 The LCD1602 is a very classic and widely used character LCD display module. Its core purpose is to provide a simple, low-cost interactive interface for various electronic projects, used to display letters, numbers, or custom dot matrix graphics. In this experiment, we will learn how to drive the LCD1602 LCD screen using Arduino.1. Experiment Materials 1. Arduino development board ×1 2. LCD1602 module ×1
3. 10kΩ potentiometer x1
4. Breadboard ×1
5. Dupont wires (male to male) × several
6. USB data cable ×1
2. Experiment Principle2.1 LCDLCD Screen
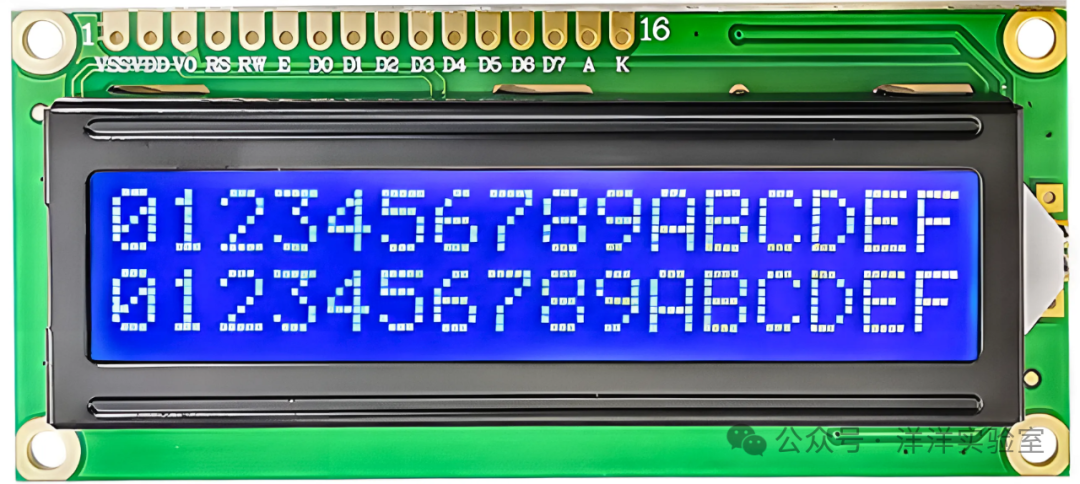
The LCD1602 is an industrial character LCD that can display16×2 (i.e.,32) characters simultaneously. The principle of the LCD1602 display is to utilize the physical properties of liquid crystals, controlling the display area through voltage to show letters, numbers, symbols, and otherdot matrix graphics.
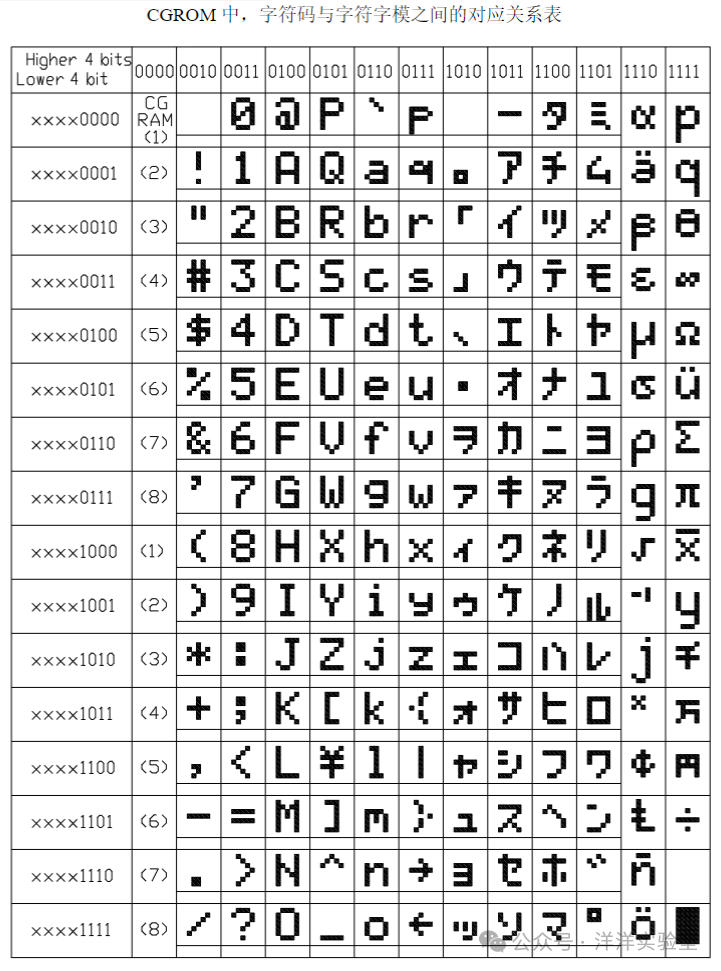
The LCD1602 LCD module containscharacter generatormemory(CGROM), which stores 160 differentdot matrix character graphics, such as Arabic numerals, uppercase and lowercase English letters, commonly used symbols, etc. Each character has a fixed code, and by writing the character code, the corresponding character is displayed.
3. Experiment Content
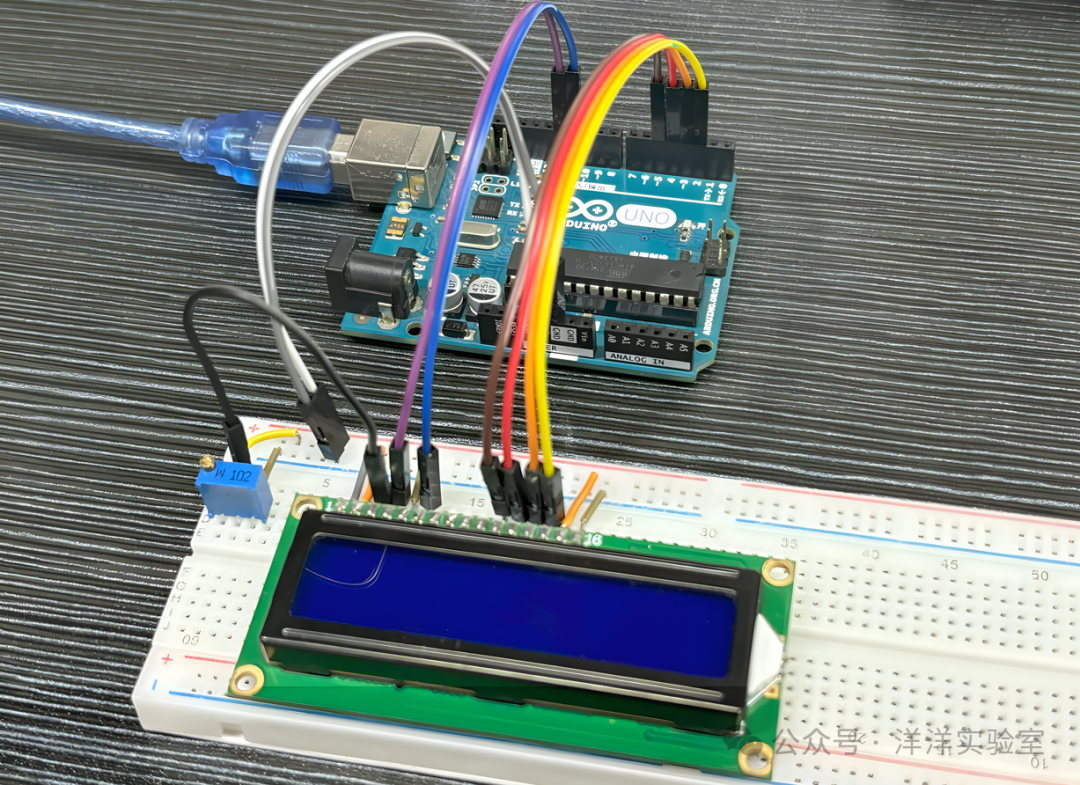
First, place the LCD1602 LCD screen and the 10kΩ potentiometer on the breadboard in suitable positions, and then connect them using Dupont wires. The two ends of the 10kΩ potentiometer should be connected to 5V and GND, and the adjustable end should connect to the VO pin of the LCD1602.
The LCD1602 is connected to the Arduino as follows:
| LCD1602 | Arduino UNO |
| VSS | GND |
| VDD | 5V |
| RS | Digital Pin 12 |
| RW | GND |
| E | Digital Pin 11 |
| D4 | Digital Pin 5 |
| D5 | Digital Pin 4 |
| D6 | Digital Pin 3 |
| D7 | Digital Pin 2 |
| A | 5V |
| K | GND |
 Then upload the Arduino example program, the program code is as follows:
#include <LiquidCrystal.h> // Initialize LiquidCrystal libraryLiquidCrystal lcd(rs, en, d4, d5, d6, d7); void setup() { // Configure LCD column and row count lcd.begin(16, 2); lcd.print("hello, world!");} void loop() { // Set cursor position lcd.setCursor(0, 1); // Display Arduino running time, in seconds lcd.print(millis() / 1000);}Adjust the 10kΩ potentiometer resistance to set the LCD1602 to the appropriate contrast, and you can observe the working condition of the LCD module.