
Exploring the World of Sensors: A Fascinating Journey of Experiments Based on Arduino
In today’s rapidly advancing technology, sensors serve as the “tentacles” that perceive the world, widely used across various fields. Are you curious about how these sensors work? Do you want to experience their wonders firsthand? Today, let us use the Arduino development board to step into the colorful world of sensor experiments!
1. Unveiling the Files of Arduino IDE
Before starting the experiments, let’s get to know the files generated after installing the Arduino IDE on a Windows system. These files serve different purposes and collectively support the operation of the Arduino IDE. For example, the locales folder is responsible for localization, allowing users of different languages to use it easily; the resources folder contains static resources such as icons and images; Arduino IDE.exe is the main program file that starts and runs the IDE. There are also many files with extensions like .dll, .pak, .bin, etc., which play important roles in graphics rendering, multimedia processing, JavaScript code acceleration, and more. Understanding these files can help us better grasp the Arduino development environment.
These files are generated after installing the Arduino IDE (Integrated Development Environment) on a Windows system. The Arduino IDE is used to write, compile, and upload code to the Arduino development board. Here is a brief introduction to these files:
1. locales (folder): Contains files related to localization, supporting user interfaces in different languages.
2. resources (folder): Contains resource files for the application, such as icons, images, and other static resources.
3. Arduino IDE.exe (application): This is the main program file for the Arduino IDE, used to start and run the IDE.
4. chrome_100_percent.pak and chrome_200_percent.pak (PAK files): These files contain graphical resources for the user interface, usually related to the Chromium engine.
5. d3dcompiler_47.dll (application extension): Direct3D compiler library used for graphics rendering, usually related to graphics hardware acceleration.
6. ffmpeg.dll (application extension): FFmpeg library used for processing multimedia data, such as audio and video.
7. iaudtl.dat (FormatPlayer (d…)): The specific purpose of this file is unclear, but it may relate to audio processing or data storage.
8. libEGL.dll and libGLESv2.dll (application extensions): These are OpenGL ES libraries used for graphics rendering, usually related to graphics processing in embedded systems.
9. LICENSE.electron.txt (text document): Contains license information for the Electron framework, on which the Arduino IDE is built.
10. LICENSES.chromium.html (Microsoft Edge …): Contains license information for the Chromium project.
11. resources.pak (PAK file): Contains resource files for the application, such as icons, images, and other static resources.
12. snapshot_blob.bin and v8_context_snapshot.bin (BIN files): These files are related to the V8 JavaScript engine, used to accelerate the execution of JavaScript code.
13. Uninstall Arduino IDE.exe (application): Program used to uninstall the Arduino IDE.
14. uninstallericon.ico (ICO file): Icon file for the uninstallation program.
15. vk_swiftshader.dll and vulkan-1.dll (application extensions): These files are related to the Vulkan graphics API, used for graphics rendering.
16. vk_swiftshader_jcd.json (JSON file): Contains configuration information related to the Vulkan graphics API.
These files collectively support the operation of the Arduino IDE, including graphics rendering, localization, resource management, and multimedia processing.
//
//
·
Click to see more
Click to see more·
2. Comprehensive Analysis of Sensor Experiments
(1) Infrared Sensor: The Little Expert in Signal Reception
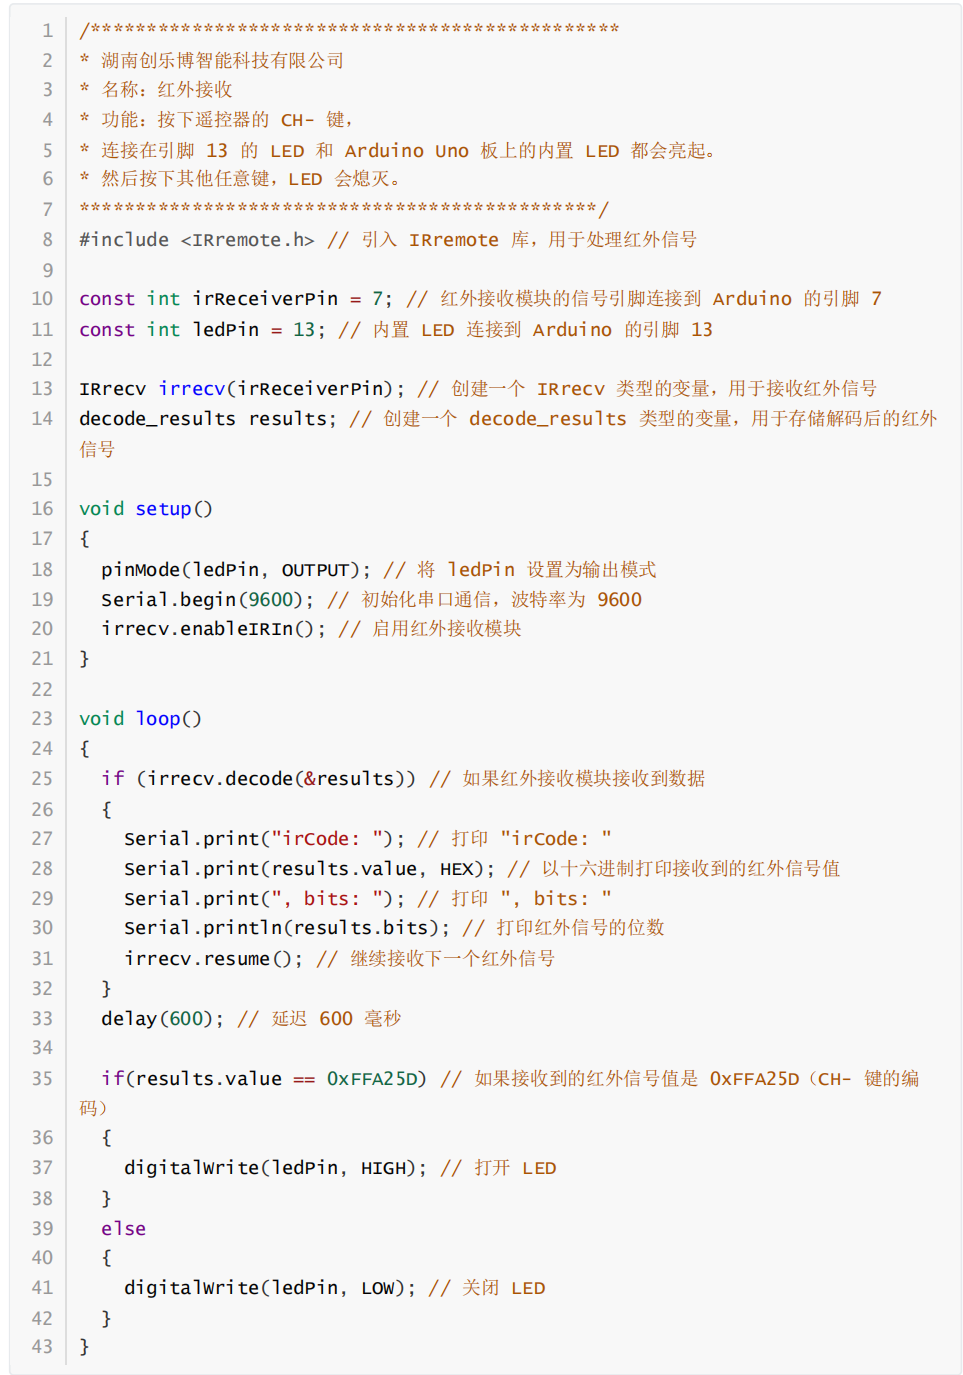
In the infrared sensor experiment, our goal is to enable the infrared receiver module to accurately receive signals from the remote control and control the LED light’s on and off. The code processes infrared signals by importing the IRremote library. When the CH- button (encoded as 0xFFA25D) on the remote control is pressed, the LED connected to pin 13 and the built-in LED on the Arduino Uno board will light up; pressing other buttons will turn them off. However, in practice, issues may arise, such as the program not keeping the red light on as expected, only flashing once. This could be due to the new infrared library being referenced or a hardware issue, so understanding the principles is crucial.
//
//
·
Click to see more
Click to see more·
(2) U-Shaped Photoelectric Sensor: A Simple Yet Powerful Detection Assistant
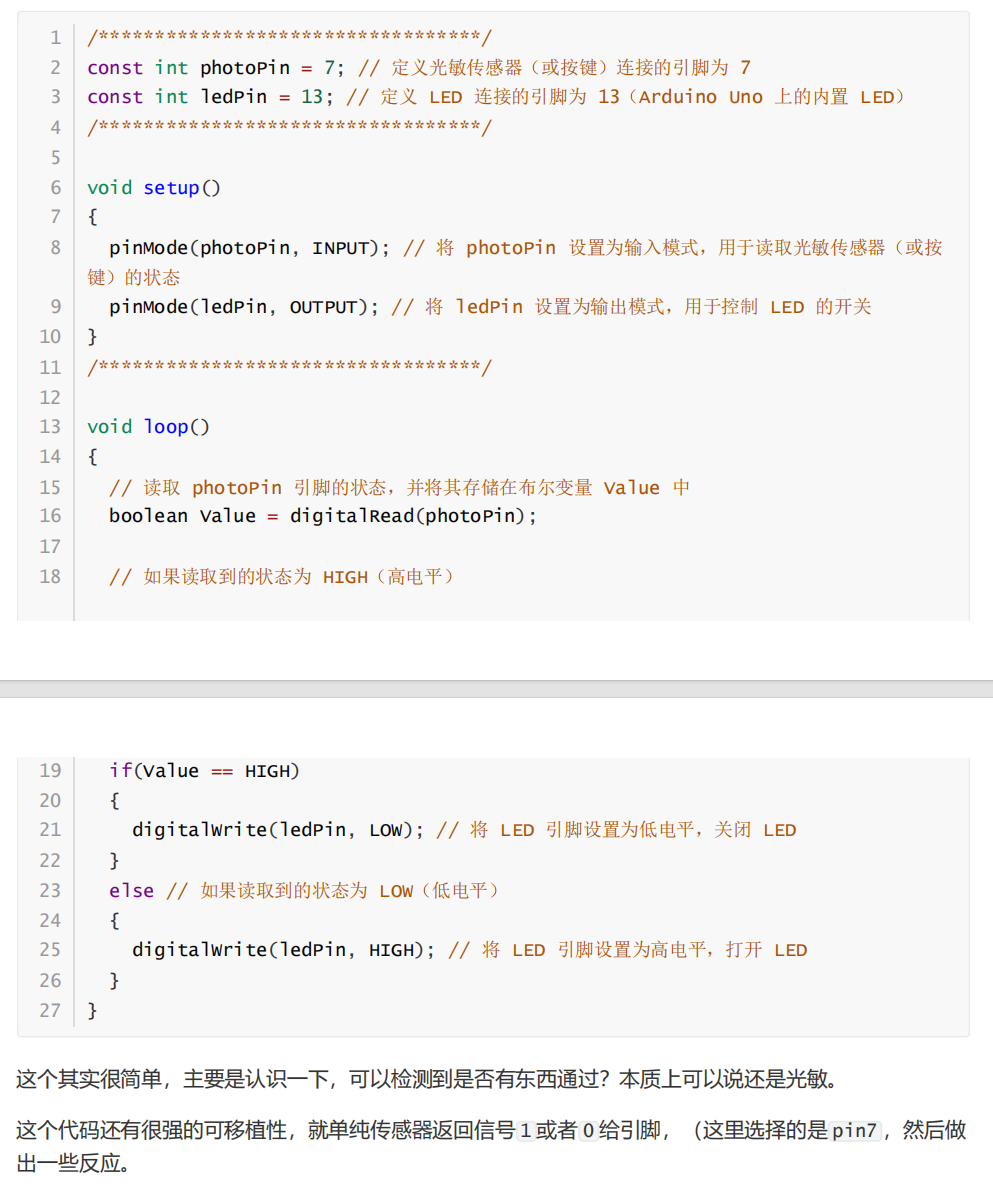
The code for the U-shaped photoelectric sensor is very concise. By defining the pin connected to the light-sensitive sensor (or button) as 7 and the pin connected to the LED as 13, we set the pin modes in the setup function, and in the loop function, we read the state of the light-sensitive sensor and control the LED’s on and off based on the state. It can detect whether something passes through, essentially utilizing its light-sensitive characteristics, and the code is highly portable, responding according to the signal returned by the sensor (1 or 0).
//
//
·
Click to see more
(3) Analog Hall Sensor: The “Observer” Closely Related to Magnetism
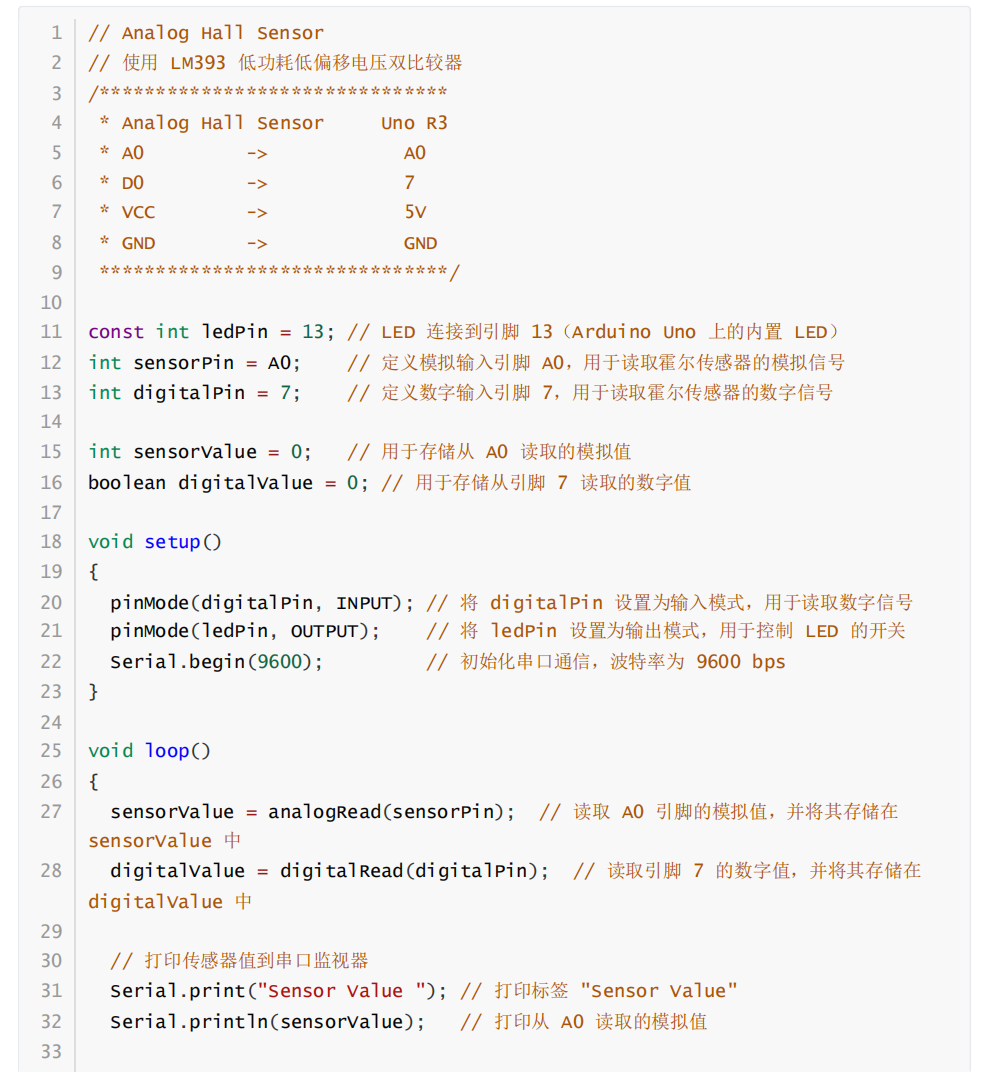
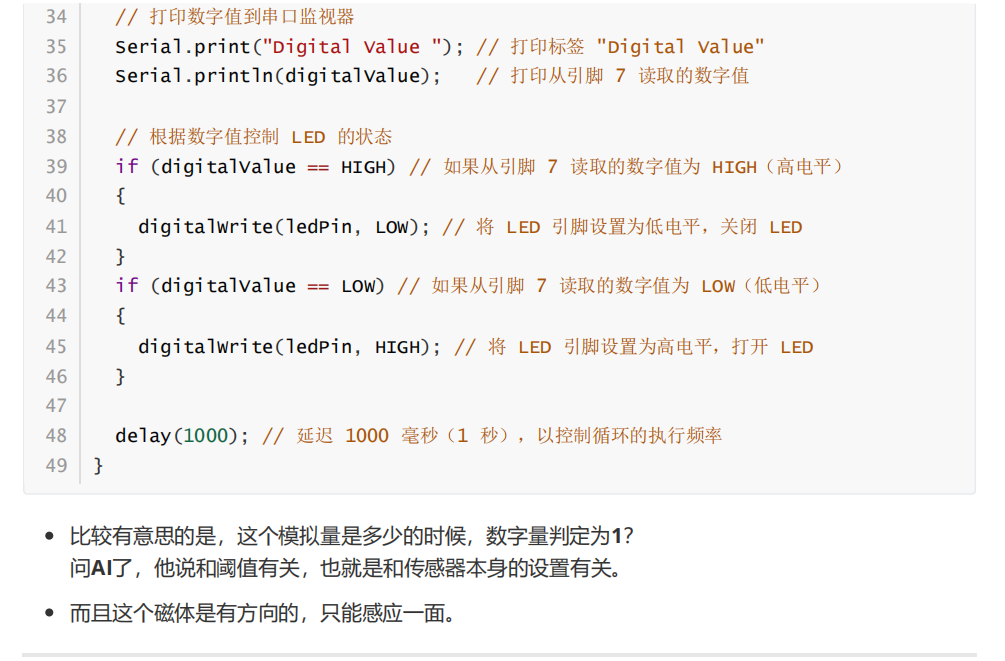
The analog Hall sensor experiment uses the LM393 low-power, low-offset voltage dual comparator. The code defines the analog input pin A0 to read the analog signal from the Hall sensor and the digital input pin 7 to read the digital signal. In the loop function, it not only reads and prints the sensor values and digital values but also controls the LED state based on the digital value. Interestingly, the digital quantity determined as 1 is related to the threshold of the analog quantity, and the magnet has a direction, only sensing one side.
//
//
·
Click to see more
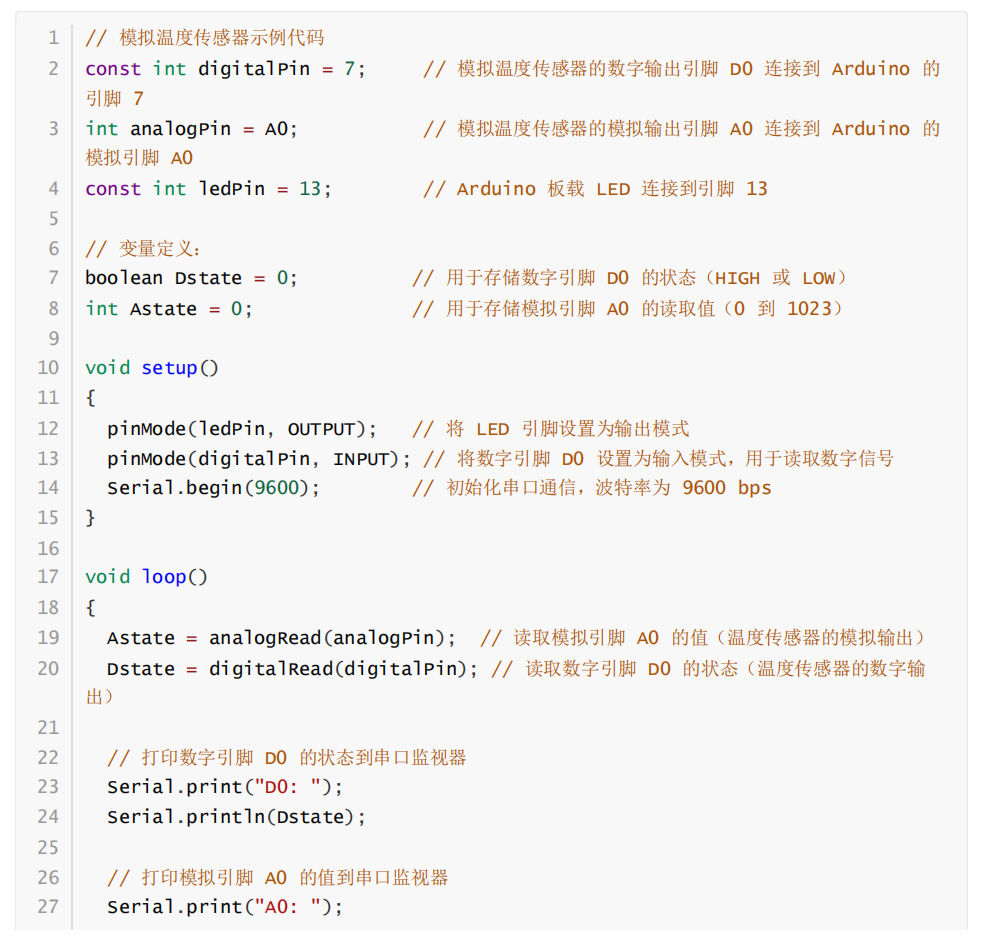
(4) Analog Temperature Sensor: The “Clever Little One” That Senses Temperature
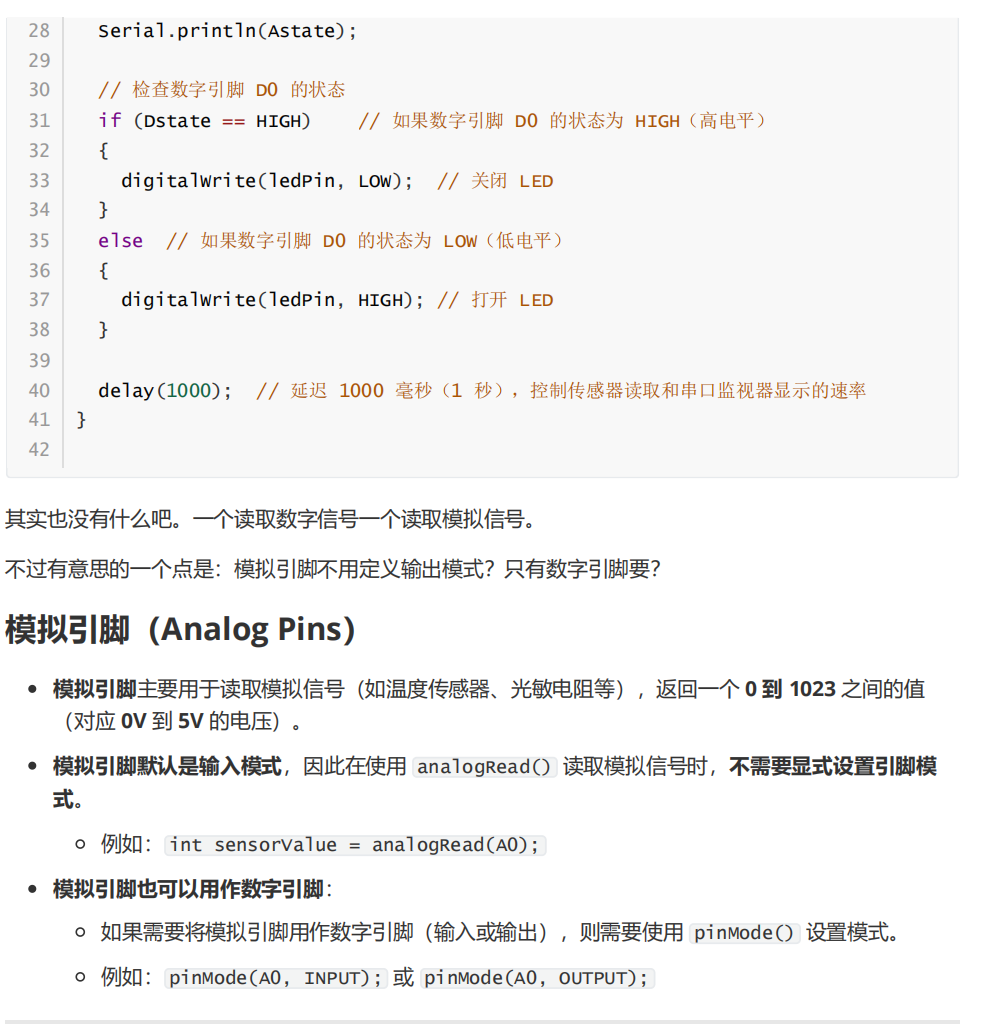
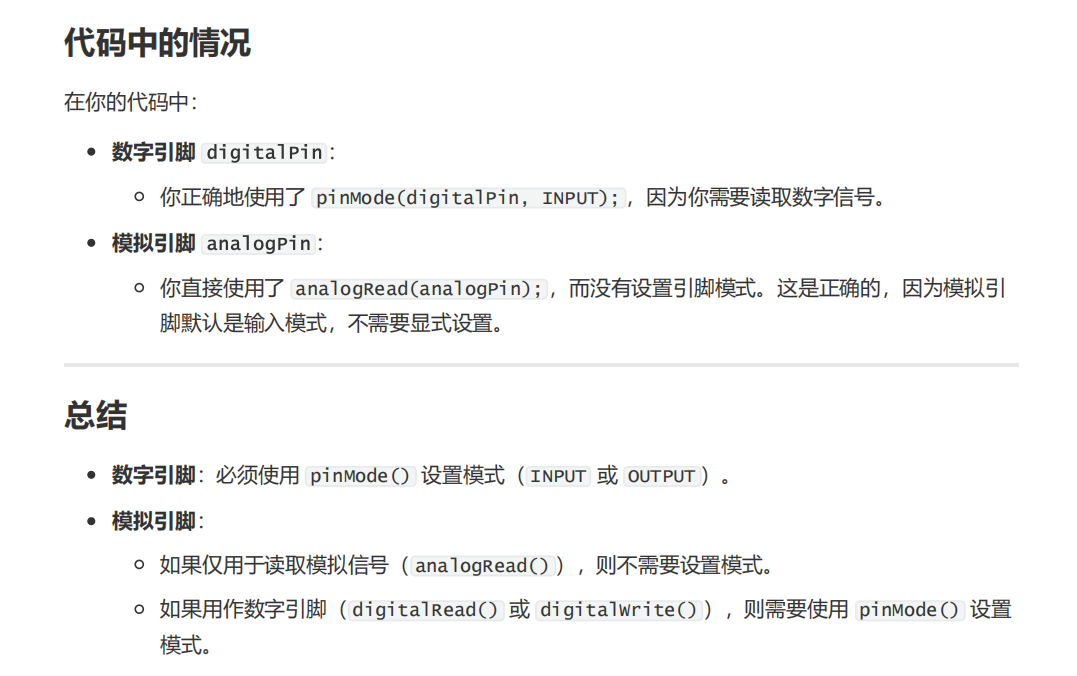
The analog temperature sensor reads the analog output and digital output of the temperature sensor through analog pin A0 and digital pin 7, respectively. In the setup function, serial communication and pin modes are initialized, and in the loop function, it reads and prints the analog value and digital state, controlling the LED’s on and off based on the state of digital pin D0. Notably, the analog pin defaults to input mode, so there is no need to explicitly set the mode when reading analog signals.
//
//
·
Click to see more
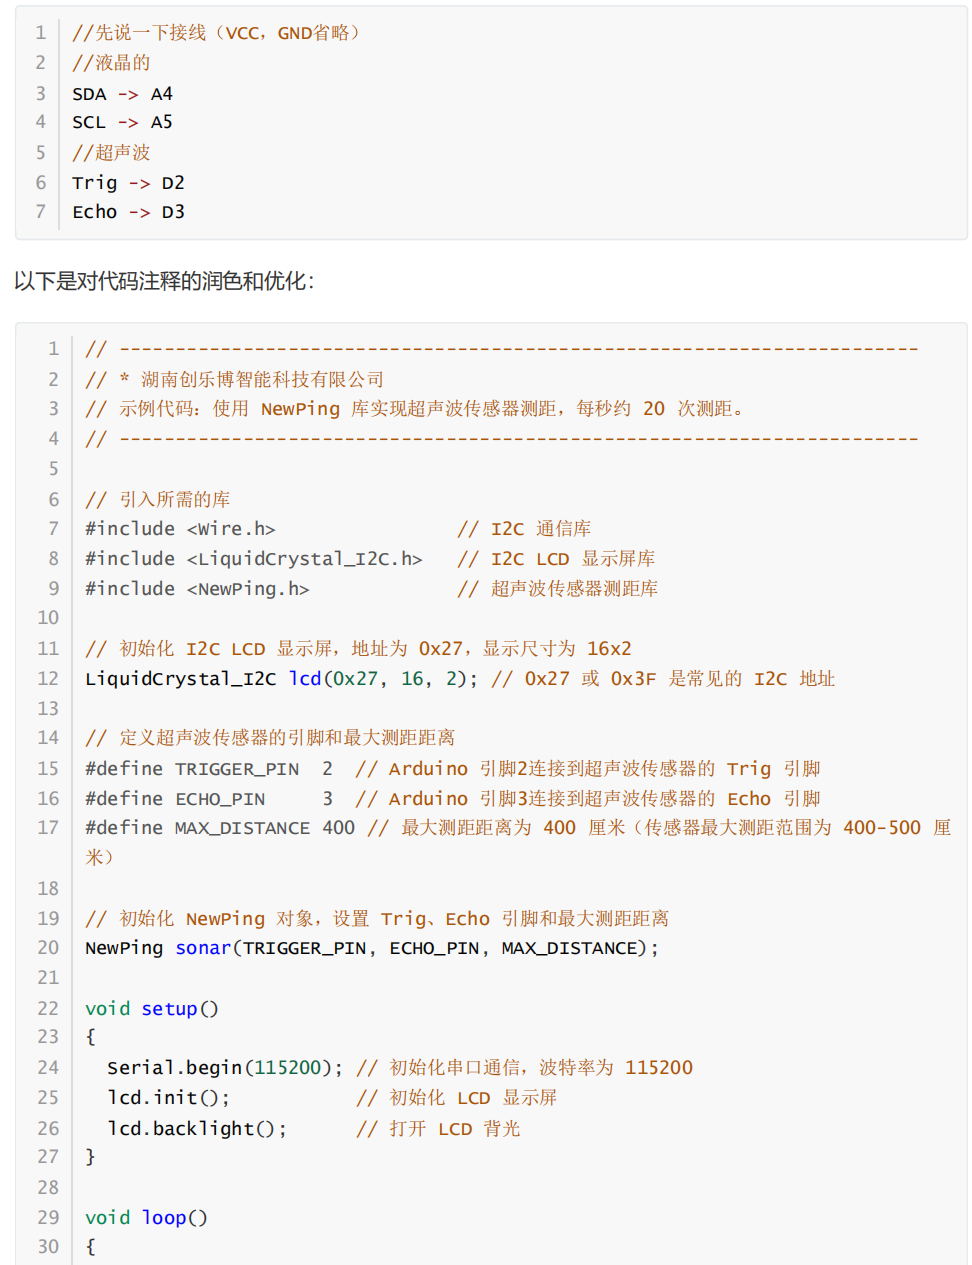
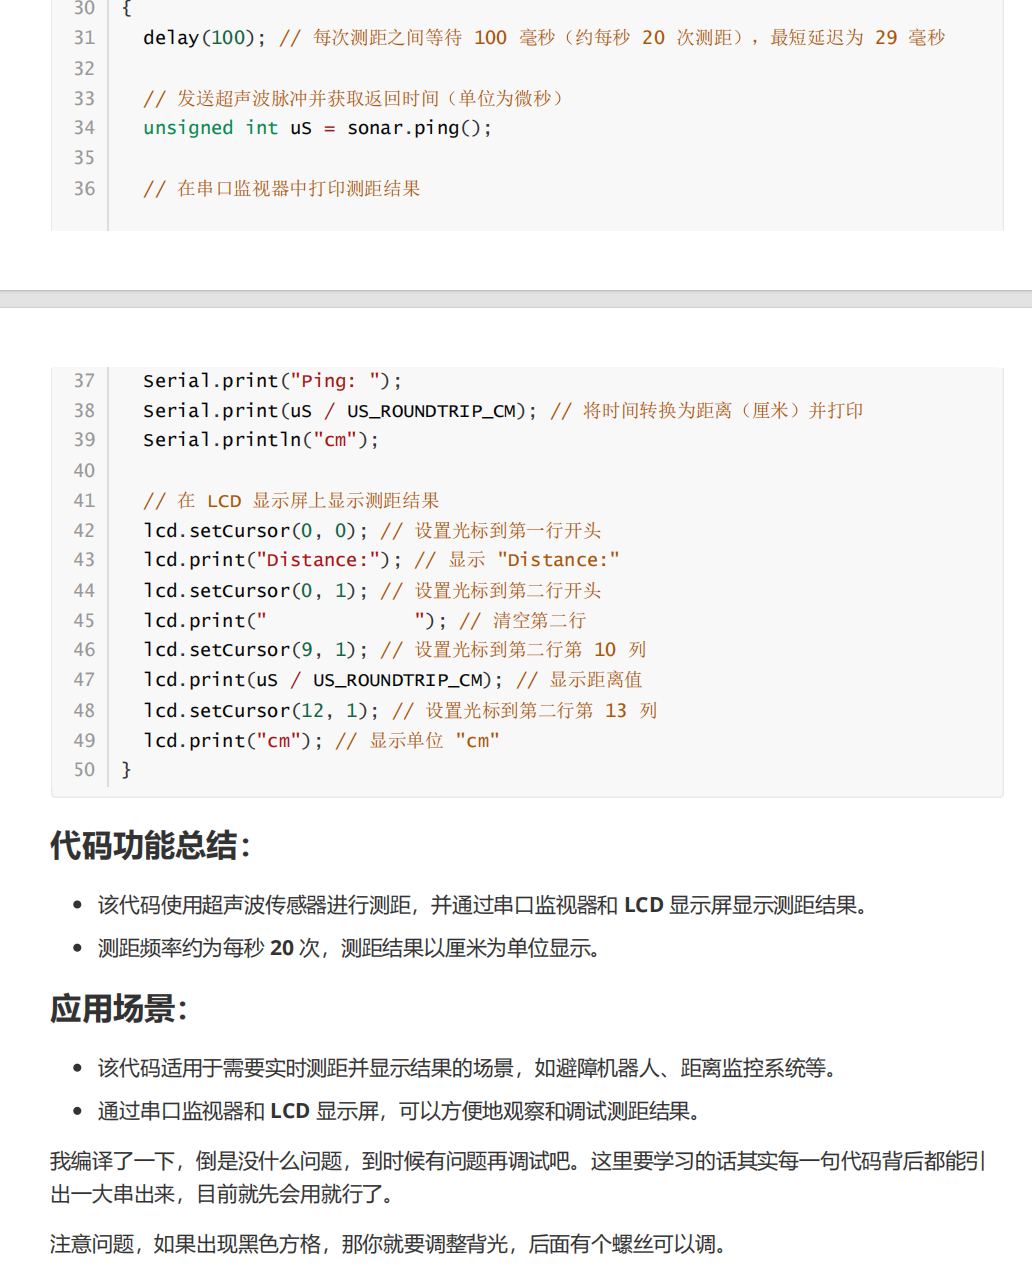
(5) Ultrasonic Sensor: The “Expert” in Precise Distance Measurement
The ultrasonic sensor experiment requires importing the Wire.h, LiquidCrystal_I2C.h, and NewPing.h libraries. By defining the pins for the ultrasonic sensor and the maximum measurement distance, we initialize the relevant objects, and in the loop function, we perform distance measurements approximately 20 times per second, displaying the results through the serial monitor and LCD screen. This experiment is suitable for obstacle-avoiding robots, distance monitoring systems, and other scenarios that require real-time distance measurement and result display.
//
//
Click to see more·
Click to see more
Editor: Pan Jinglin
Initial Review: Chen Siyu
Re-review: Lin Manshu
Final Review: Zhang Zhijian