 The running light is a common electronic display effect characterized by multiple LED lights (or other light sources) lighting up and extinguishing in sequence, creating a dynamic visual effect similar to “flowing water” or “waves.” The running light experiment is simple and intuitive, making it a classic project for learning Arduino programming.1. Experiment Materials 1. Arduino development board ×1 2. LED lights (color optional) ×8 3. 220Ω resistors ×8
4. Breadboard ×1
5. Dupont wires (male to male) × several
6. USB data cable ×1
2. Experiment Principle2.1 LED Working Principle
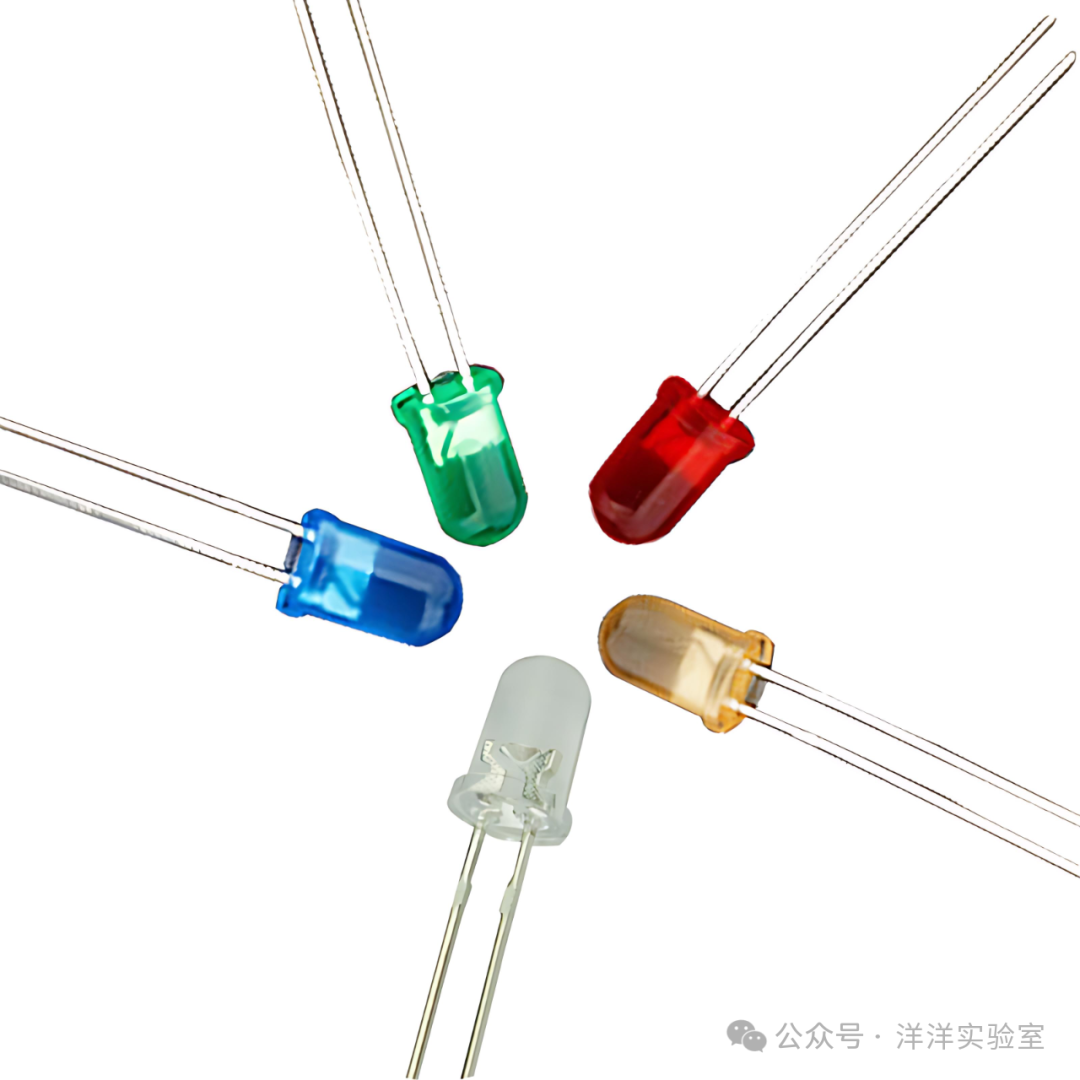
LED stands for Light Emitting Diode, which is a semiconductor device that emits light when forward-biased and is off when reverse-biased. When using LEDs, a current-limiting resistor (such as 220Ω) must be connected in series to prevent excessive current from burning them out.
 2.2 Running Light Principle The working principle of the running light is not complicated; it is essentially multiple LED lights (or other light sources) lighting up and extinguishing in sequence. In the experiment, each LED is connected to an independent digital pin on the Arduino, which controls the on and off states of multiple LEDs in sequence, using delays to create a visual persistence effect, ultimately achieving the “running” light effect.
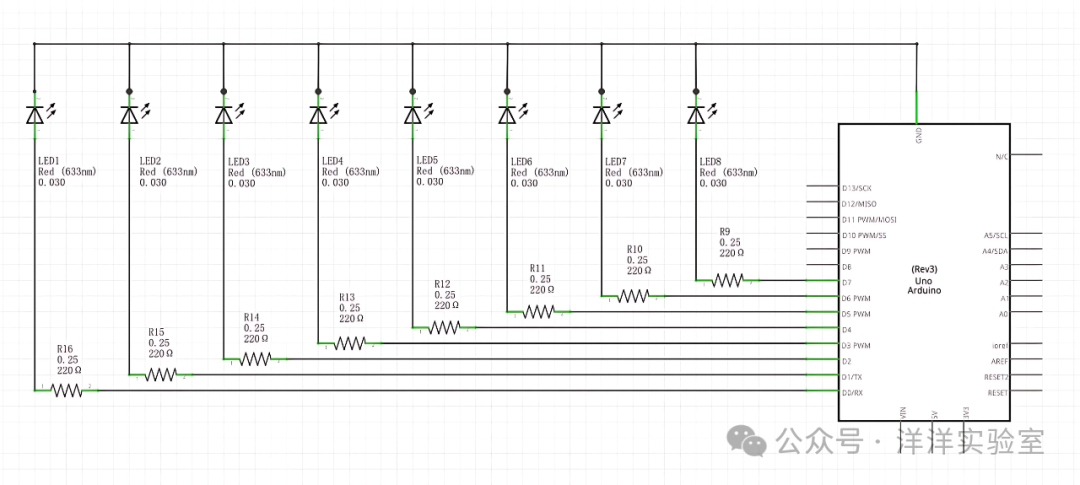 3. Experiment Content First, connect the positive terminals of the 8 LEDs through 220Ω resistors to the digital pins 0 to 7 of the Arduino, and connect all the negative terminals of the LEDs to the GND bus on the breadboard, then connect it to the Arduino’s GND pin using Dupont wires.
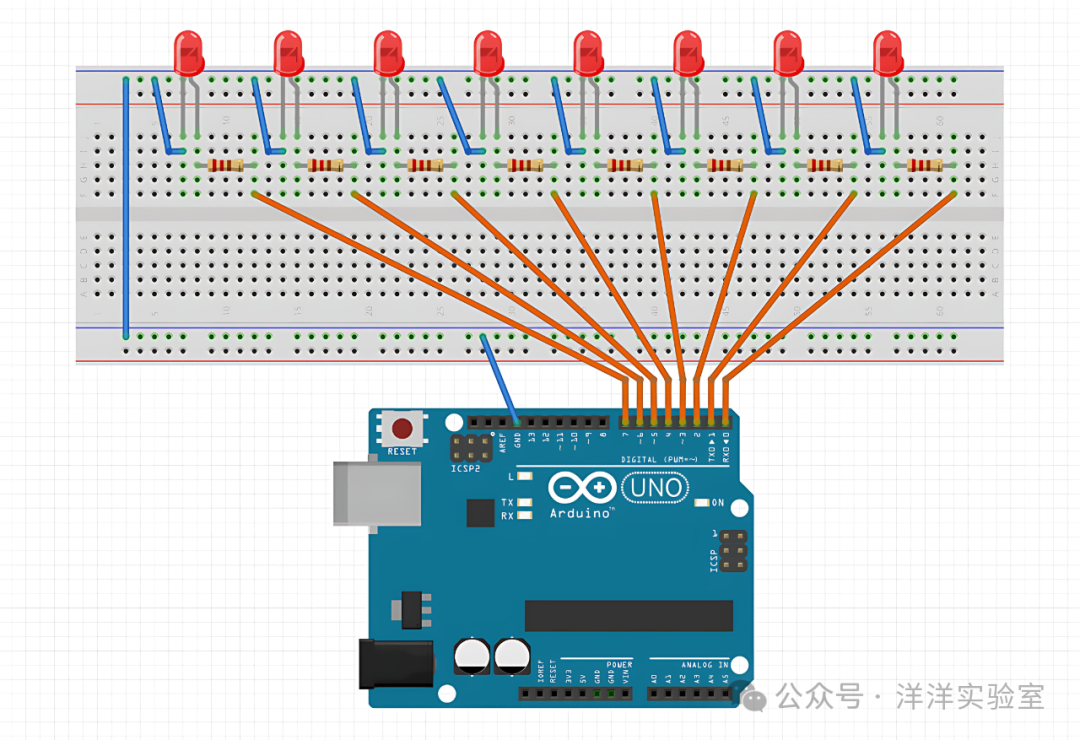 Write the code in the Arduino IDE; here are two reference codes.
// Using delay() function version
int ledPins[] = {7,6,5,4,3,2,1,0}; // Pins connected to LEDs
int numLeds = 8;                   // Number of LEDs
int delayTime = 100;               // Flow speed (in milliseconds)

void setup() {
  for(int i=0; i<numLeds; i++) {
    pinMode(ledPins[i], OUTPUT);
  }
}

void loop() {
  // Forward flow (from left to right)
  for(int i=0; i<numLeds; i++) {
    digitalWrite(ledPins[i], HIGH);
    delay(delayTime);
    digitalWrite(ledPins[i], LOW);
  }
  // Reverse flow (from right to left)
  for(int i=numLeds-1; i>=0; i--) {
    digitalWrite(ledPins[i], HIGH);
    delay(delayTime);
    digitalWrite(ledPins[i], LOW);
  }
}
// Using millis() function version
int ledPins[] = {7,6,5,4,3,2,1,0}; // Pins connected to LEDs
int numLeds = 8; // Number of LEDs
int interval = 100; // Time interval (in milliseconds)
void setup() {
for(int i=0; i<numLeds; i++) {
pinMode(ledPins[i], OUTPUT);
}
}
unsigned long previousMillis = 0; // Store the last LED update time
unsigned int ledState = 1; // Store LED state
unsigned int ledDirection = 0; // Store LED flow direction
void loop() {
// Get current time, in milliseconds
unsigned long currentMillis = millis();
if (currentMillis - previousMillis >= interval) {
// Save last LED update time
previousMillis = currentMillis;
// LED output
for (int i=0; i<numLeds; i++) {
if (ledState & (0x01 << i)) {
digitalWrite(ledPins[i], HIGH);
}
else {
digitalWrite(ledPins[i], LOW);
}
}
// Update LED state
if (ledDirection == 0) {
ledState = ledState << 1;
}
else {
ledState = ledState >> 1;
}
// Change flow direction
if ((ledState == 128) && (ledDirection == 0)) {
ledDirection = 1;
}
else if ((ledState == 1) && (ledDirection == 1)) {
ledDirection = 0;
}
}
}Connect the Arduino to the computer using a USB cable, select the correct board and port.Upload the code and observe whether the LEDs light up and extinguish in sequence, creating the flowing effect.(An LED module was used here for demonstration purposes.)