This article is reprinted from the Jishu Community
Jishu Column: STAR CPU (Star Processor)
The XR806 Harmony development board is a new high-integration wireless MCU chip from Allwinner Technology that supports WiFi and BLE, and is compatible with the Harmony L0 system. The CPU uses Arm Technology’s “Star” (STAR-MC1) processor. I am fortunate to have received the XR806 Harmony development board gifted by Allwinner Technology, and this is my first experience with the Harmony system development, so I am making a record of it.
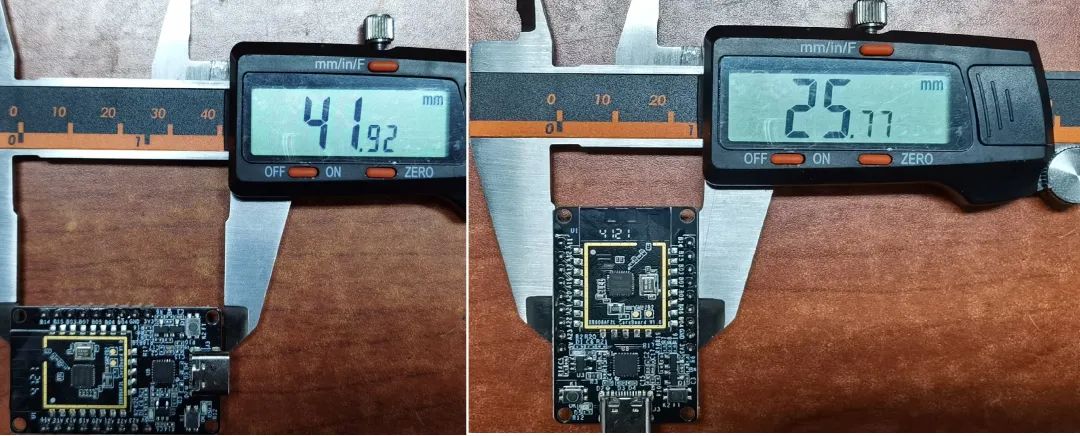
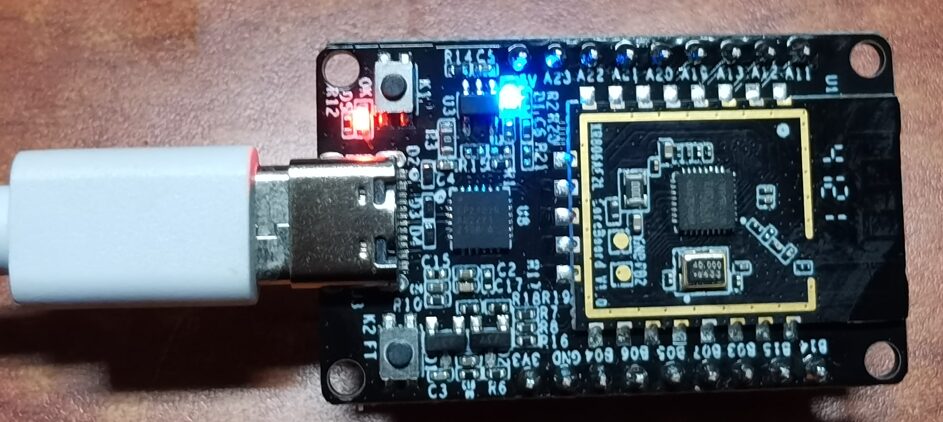
Development Board Physical
1. The XR806 development board is indeed compact, with the entire board measuring only 25.8mm * 42mm.
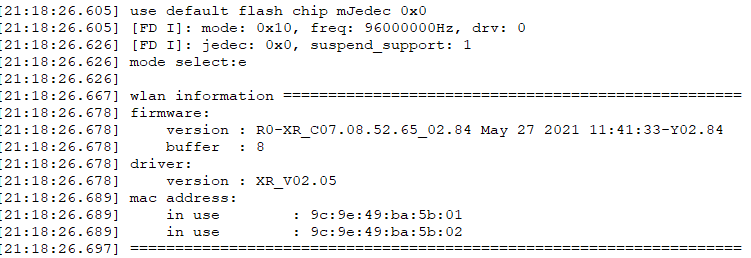
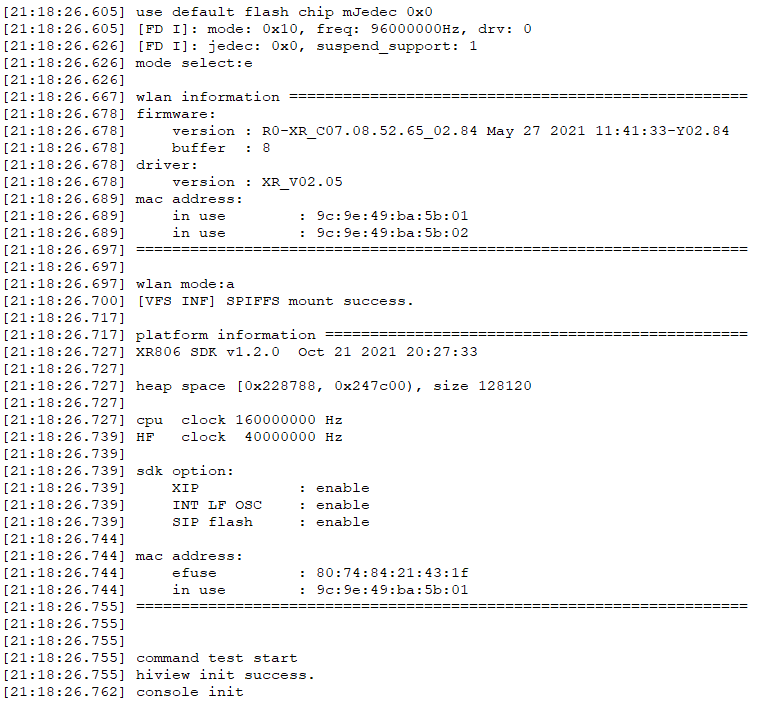
2. The development board provides power supply capabilities, UART communication, and firmware burning capabilities through a type-C interface. Connect the USB cable to the PC, and it can automatically recognize the COM port (based on the CP2120 chip). Set the baud rate to 115200, and you can see the printed information in the serial debugging assistant.
The XR806 is a high-integration wireless MCU chip that supports WiFi and BLE. Once the module is operational, input the relevant commands to experience the WiFi functionality.
-
Enable WiFi: hm net sta enable
-
Scan for hotspots: hm net sta scan
-
Get scan results: hm net sta scan_result n=30
-
Connect to a specified hotspot after a successful scan: hm net sta connect < ssid > < psk >
-
Disconnect WiFi: hm net sta disconnect
-
Disable WiFi: hm net sta disable
Setting Up the XR806 Development Environment
1. Download System Source Code Using Repo Tool
Python3 Dependency
The execution of the repo init command depends on the Python3 environment. Please ensure that the Python called by the system is Python3, and it is recommended that the Python3 version is greater than 3.8.
Download the Latest Version of the Repo File
The repo tool is used to obtain the source code for XR806.
The author uses Ubuntu 18.04, and the repo file already exists in the /usr/bin path.
If the repo tool is not available, it can be obtained using the following git command.
git clone https://gerrit-googlesource.lug.ustc.edu.cn/git-repo
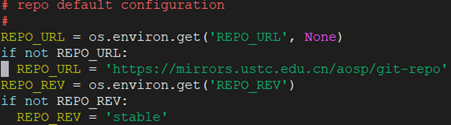
Modify Repo Mirror Address
When executing repo init directly, the system may prompt a connection timeout.
This is because the default URL that Repo init accesses, https://gerrit.googlesource.com/git-repo, often fails.
Therefore, we need to replace it with a domestic address: https://mirrors.ustc.edu.cn/a…
Modify the REPO_URL address in the repo file downloaded from git-repo, as shown in the image below.
Finally, directly replace the /usr/bin/repo with the downloaded git-repo/repo file. Then execute the repo command to run it properly.
Obtain System Source Code
Obtain the Harmony system branch source code from the Gitee repository.
repo init -u https://gitee.com/openharmony/manifest.git -b OpenHarmony_1.0.1_release --no-repo-verify
repo forall -c ‘git lfs pull’
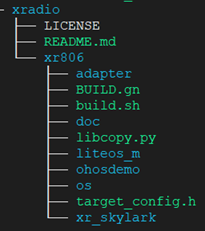
2. Download XR806 Source Code
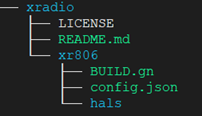
Place the two downloaded folders in the system source code path, ensuring the file path results are as shown in the image.
1. Download the device repository content from https://gitee.com/openharmony-sig/devboard_device_allwinner_xr806 and place it in the device path.
git clone https://gitee.com/openharmony-sig/devboard_device_allwinner_xr806.git
2. Download the vendor repository content from https://gitee.com/openharmony-sig/devboard_vendor_allwinner_xr806 and place it in the vendor path.
git clone https://gitee.com/openharmony-sig/devboard_vendor_allwinner_xr806.git
3. Download Cross-Compilation Tools
Note, do not choose the latest version, as I have tested that subsequent compilations will fail. A successful version is as shown in the link:
https://armkeil.blob.core.windows.net/developer/Files/downloads/gnu-rm/10-2020q4/gcc-arm-none-eabi-10-2020-q4-major-x86_64-linux.tar.bz2
Unzip and place it in the specified path.
1. Modify the board_toolchain_prefix in device/xradio/xr806/liteos_m/config.gni to the actual gcc path in your environment.
2. Modify device/xradio/xr806/xr_skylark/gcc.mk.
4. Install Harmony System Development Environment
This step requires the installation of the Harmony-related open-source environment. For specifics, please refer to the official Harmony guidance tutorial.
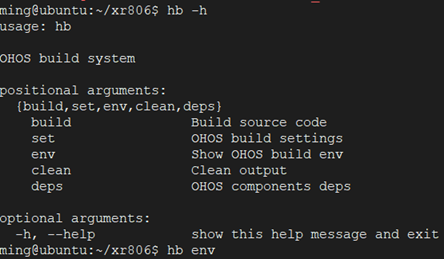
After successfully installing the environment, you can execute the hb command to compile and generate the image file.
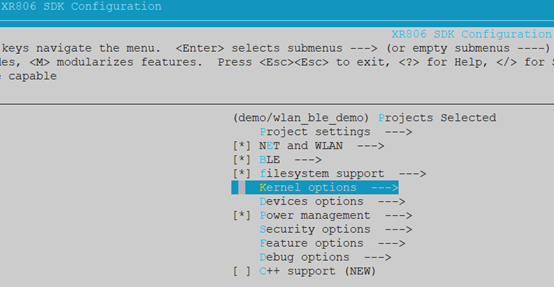
5. SDK Configuration
After modifying the cross-compilation tool path, execute the following in the xr_skylark directory:
1. Copy the configuration file
cp project/demo/wlan_ble_demo/gcc/defconfig .config
2. You can use a graphical interface to confirm the configuration
 3. Clear the process files
4. Generate static libraries and automatically generate header files
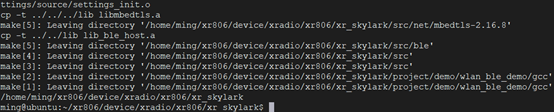
make lib -j Successful result as shown in the image
3. Clear the process files
4. Generate static libraries and automatically generate header files
make lib -j Successful result as shown in the image
6. Compile System Source Code
Return to the XR806 system source code directory
The generated image file is xr_system.img
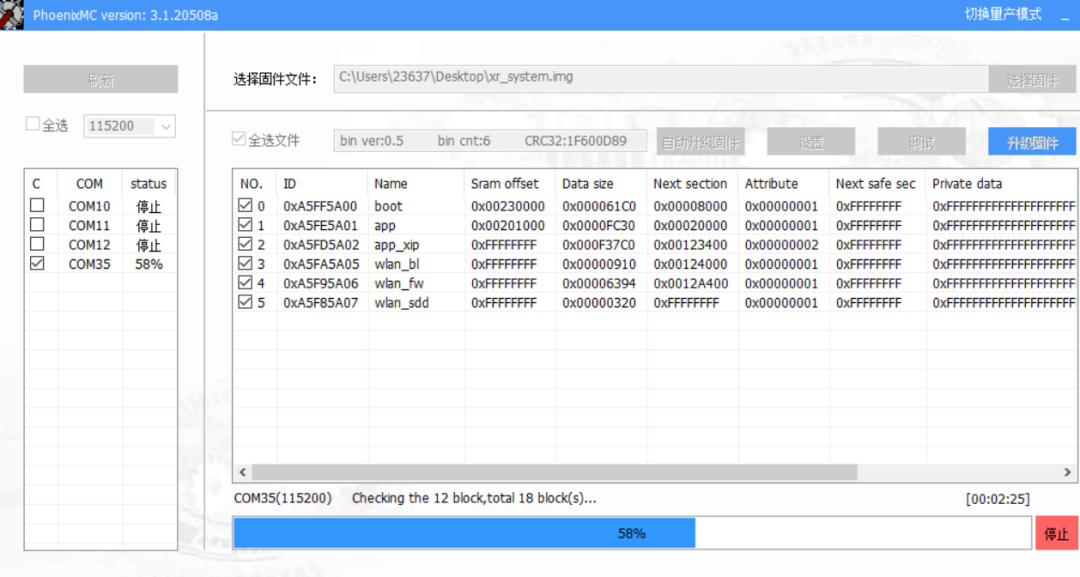
7. Burning Tool
The generated image is located at device/xradio/xr806/xr_skylark/out;
The burning tool is named phoenixMC, located at device\xradio\xr806\xr_skylark\tools.
On Windows, open this tool and write the image via serial port.
After burning is complete, restart the development board
Running Development Board
References
-
Allwinner Community Forum
-
https://gitee.com/openharmony-sig/devboard_device_allwinner_xr806/tree/master
-
https://gitee.com/openharmony-sig/devboard_vendor_allwinner_xr806
END


关于安芯教育


安芯教育是聚焦AIoT(人工智能+物联网)的创新教育平台,提供从中小学到高等院校的贯通式AIoT教育解决方案。
安芯教育依托Arm技术,开发了ASC(Arm智能互联)课程及人才培养体系。已广泛应用于高等院校产学研合作及中小学STEM教育,致力于为学校和企业培养适应时代需求的智能互联领域人才。