
Source: LPWAN Technology
IoT Think Tank Organized and Published
Please indicate the source when reprinting
—— [Introduction] ——
The author’s remarks: The following narrative is solely personal opinion, devoid of any emotional color.
Background
The core development technologies of NB-IoT are held by a few major companies, such as Huawei HiSilicon, Qualcomm, and Intel. Of course, module manufacturers include companies like Quectel and u-blox. The documentation and technology for chips are not open-source like LoRa, so small companies can only use the modules, and we cannot touch the technical implementations inside. Therefore, we will take Huawei HiSilicon’s chip (Quectel module) for a brief discussion.
1. Debugging Steps for Unicom
The company first submits the project plan and product usage scenarios to Huawei. After review, Huawei and you will sign a cooperation agreement, the specific content of which is not detailed. At this stage, some materials will be provided, mostly the integration methods for the software platform and some development AT command sets for the hardware modules. At this point, the company will evaluate the development progress and timeline based on the materials received.
The integration is divided into north-south interfaces, one being: terminal —-> Huawei platform, and the other being: Huawei platform —> to your private application platform.
1. Software Platform Integration
This part provides two integration methods.
The first method: use Huawei’s platform, embed our own parsing layer code, and use profile files to specify in advance, etc.
Parsing layer code: should be developed according to the codec library development documentation provided by Huawei.
Profile file: means that it should be filled in according to the JSON format specified by Huawei; any minor error in filling out may cause the first debugging to fail. The profile mainly addresses questions such as: what is your terminal? Which company does it belong to? What data will be transmitted to the platform?
Only after filling in these items completely and submitting them to Huawei for review, if no errors occur, can you proceed to the hardware and software joint debugging.
However, we did not have such smooth sailing and had to revise it no less than five times, and this was after studying a lot of materials to write the profile, perhaps due to my own limited knowledge and clumsiness. In the end, we succeeded.
If you have reached this step, the remaining task is hardware preparation.
After development is completed, joint debugging will take place. To be honest, from hardware development to launch, the total debugging is divided into three phases. Reaching this point means the first step of the first phase of joint debugging has just begun. This is because it involves the deployment issues of the operator’s network (after all, upgrading the base station to deploy the NB network takes time, which everyone understands; it’s just a matter of speed).
Huawei cleverly provided a software called softradio, so you do not need to use the base station’s network for debugging. After all, when this base station will be fully deployed is still uncertain, and even after deployment, the signal quality cannot be guaranteed, so it is better to eliminate this uncertain factor. Kudos to Huawei for this move.
The softradio software mentioned above simulates the NB module you are using, meaning you can debug and establish connectivity with the platform without relying on the physical NB module.
After installing this software, the login address is: localhost:8090, but to use this software, you need to obtain a key from Huawei, and only after adding it can you use it.

The operations here are related to the profile device description you wrote; once you understand the profile clearly, you will naturally know what to fill in here later.
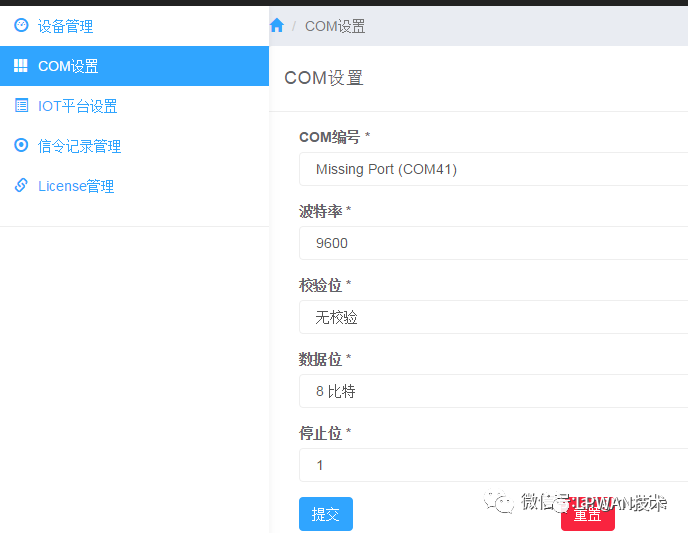
In this software, there is a COM port setting; what is this for? This is the interface between your NB module and the MCU, simulating the serial port of the physical NB module. Here you can use a serial debugging tool or a real MCU to control data transmission and reception. After connecting, if you send an AT command that the NB module can recognize, it will respond accordingly, provided that your network is functional and your softradio is communicating with the platform correctly; otherwise, softradio can only reply with an error. The specific reasons for errors can vary widely; only through personal testing can one know.
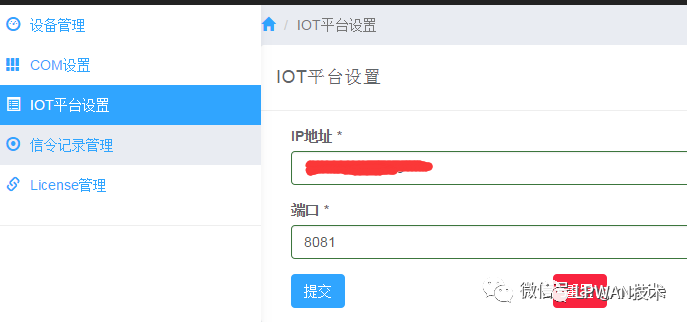
This represents a series of wired and wireless connections between the simulated NB physical module and the platform. In this software, you only need to write the platform’s IP address and port, which means that the connection of the actual physical model (NB module—> base station—> public network—> platform side) is simplified; a single IP port represents everything. This eliminates the issues related to the operator’s base station deployment.
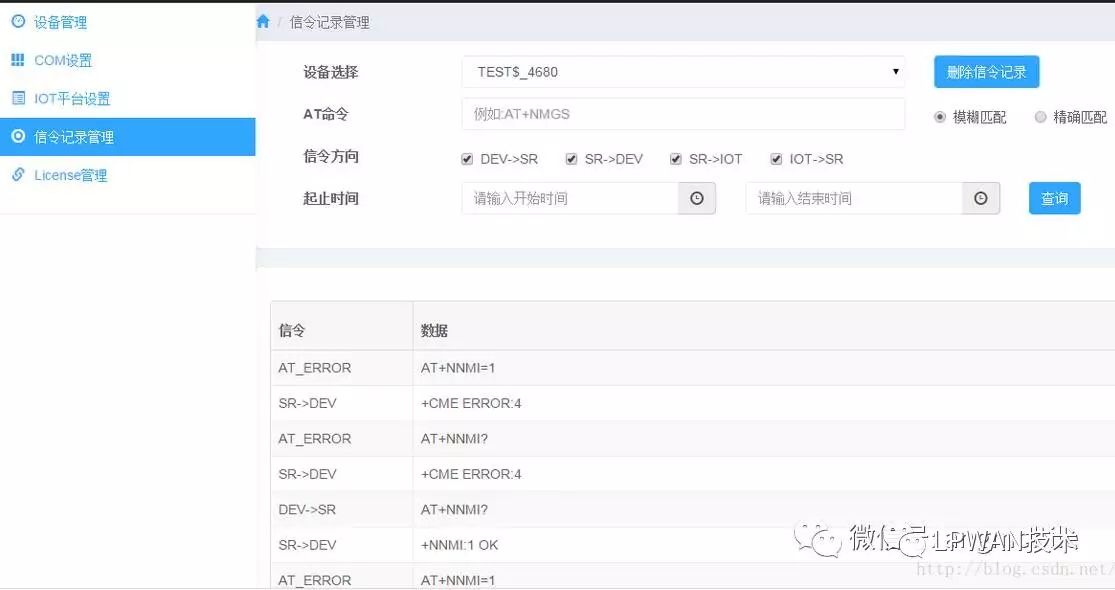
This is used for tracking and verifying the commands you interact with the platform during debugging. Your reported and received data will be displayed here, and you can query it here later. Of course, the precondition is that your previous steps must be configured correctly.
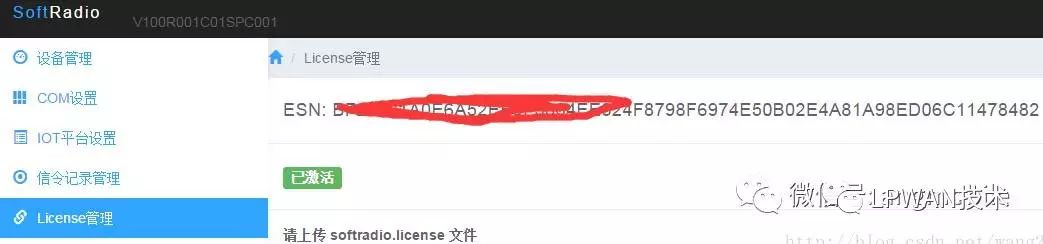
The keys mentioned above are generated based on your ESN; you need to submit this ESN value to Huawei, and after they generate the key, you can proceed to import the key value, and then the software can be used.
Thus, some software debugging tools have been introduced. Oh, by the way, this debugging is based on the CoAP protocol. If you are using UDP, then sorry, it cannot be debugged; I do not know if that has changed now.
CoAP is also a data transmission protocol, and the data transmission volume is relatively small.
Hexadecimal ===== CoAP/2 <<<<<<<< HTTP
CoAP converts the high and low 8 bits of hexadecimal separately into characters for transmission. For example, to transmit the hexadecimal: 0xAB
CoAP transmission: character A character B ====》 converted to ASCII characters ===》0x41 0x42 both become visible characters.
HTTP transmission: JSON (0xAB) has a larger data volume.
UDP ——–> encapsulation ——— CoAP (similar format, does not require a reply)
TCP ——–> encapsulation ——— HTTP (similar format, requires a reply)
Because Huawei currently supports CoAP and UDP for NB, all terminal and server data parsing must comply with the CoAP protocol.
The second method: the integration form is to use the nature of UDP; your terminal only needs to be registered on Huawei’s platform, that is, the IMEI number is registered. During UDP transmission, you can write your company’s IP; all previous integrations are unnecessary. For example, profile and codec libraries do not need to be developed; you can directly send data to your data parsing service. However, there is a problem: if your network situation is good, it is fine, as debugging is not much needed; seeing the data come up is enough. If the data is sent, but your server does not receive it, you will be in trouble; you cannot determine whether the AT command written by your hardware development is incorrect, or if the network is down, or if there are other issues. After all, you have nothing to verify. In the previous case, there was the softradio software available for you to verify.
2. Laboratory Debugging
When the above situation is normal and data connectivity is established, it is time to go to Huawei’s laboratory for debugging. This debugging is generally very simple, just set the APN of the hardware module to the network deployed by Huawei’s laboratory, change the IP address, change the port, and then send and receive data.
If there are no major issues with Huawei’s laboratory network, and your terminal remains unchanged, this connection is usually quick. However, the original operator’s SIM card must be replaced with one provided specifically by Huawei; otherwise, you will not be able to access the internet.
However, there are significant changes in Huawei’s laboratory, and the updates seem to be inconsistent with the versions released by Quectel. Sometimes the laboratory version is updated, but the old module does not support it, and you must ask Quectel for a new version for the upgrade.
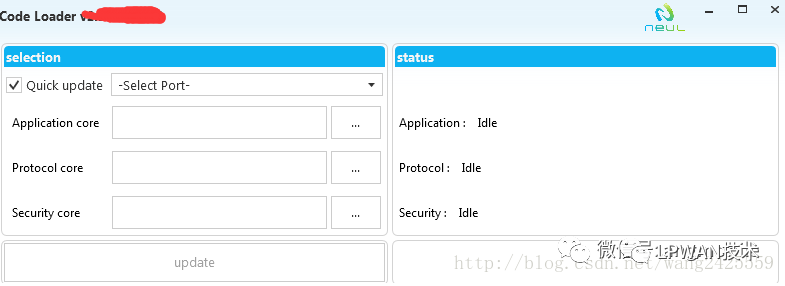
Speaking of this upgrade, I am quite frustrated. Two upgrade tools were provided: one is a straightforward UI interface operation, and the other requires modifying batch files in DOS. However, I prefer the straightforward operation. Using either seems similar to downloading programs for 51 microcontrollers, except that three firmware need to be downloaded, following the instructions above to add the three firmware for download. After powering back on, the download begins, but this upgrade was not successful; some versions simply could not be upgraded using this method, and the specific reasons are unclear. If there are no special instructions on the differences between these two tools or under what scenarios each should be used.
Then the question arises: why does the straightforward upgrade tool not work? Everyone is a developer; we all understand the situation. I won’t elaborate further here, but I hope it was just my operational error. However, I feel that I am not that clumsy to make a mistake after just four mouse clicks. Also, note that the tools used are always bundled with the firmware.
After multiple unsuccessful attempts, I switched to the other tool and succeeded in one go. The ordinary (straightforward) download tool is as follows:
3. Online Debugging with the Operator
Finally, after the joint debugging in Huawei’s laboratory is completed, debugging with the operator is next. You will debug with the SIM card from the operator you are using. Of course, the previous APN must be reset to the operator’s; otherwise, you will not be able to connect to the public network. This debugging is simpler; basically, just modifying the APN and ensuring data transmission and reception is normal is sufficient. The remaining work will be proven over time, which is your testing phase. You will see if the network situation is suitable.
4. Another Data Transmission Form
The last form of communication with the platform that neither Huawei nor the operator will provide, apart from the above two forms, is something we have only attempted but not truly utilized. After all, the absence of support from these two giants must have its reasons; I will not elaborate further on this. After all, they will not be able to control it.
5. NB-IoT User Experience
After several months of testing and verification, I feel skeptical about the claims of battery life lasting 7/8 years. The peak current detected at startup does not seem to be much lower than that of ordinary 2G modules. It indeed drops significantly during transmission and reception. However, the current value still appears relatively high compared to local area network setups (LoRa), as the usage scenarios are different, and I won’t comment further. For devices claiming to last 7/8 years, I want to know what your reporting cycle is; if it is very frequent, it is simply impossible. Some even boast of standby for 10 years; I find that amusing. Besides, regarding the battery, battery life is affected not only by the device’s own consumption but also by self-discharge. A battery that lasts for 10 years is quite impressive. I sincerely hope that the final development turns out to be as impressive as advertised; then I will truly admire NB-IoT.

Previous Hot Articles (Click the article title to read directly):
-
“How Difficult Is It to Make Smart Locks on Shared Bicycles?”
-
“Cognitive Computing, Blockchain IoT, IoT Security… Those Who Understand Will Control the Future”
-
“KUKA, ABB, Fanuc, Yaskawa, Four Industrial Robot Giants Have Long Been Stationed in the IoT Field”
-
“[Heavyweight] IoT Industry Panorama Report, First to Open Domestic IoT Industry Two-Dimensional Perspective Panorama”
-
“A Cartoon Explains: Besides WiFi and Bluetooth, What Can the Recently Popular NB-IoT Do?”
-
“A Cartoon Explains: What Is LoRa, Which Is Also Frequently Mentioned Alongside NB-IoT?”