3D Printed Arduino Color Picker
MAKER:alojz / Translated by:Fun Endless
Arduino Mini × 1TCS34725 RGB Color Sensor × 1I2C 16×2 LCD Display × 1Toggle Switch × 1RGB
MAKER:alojz / Translated by:Fun Endless
Arduino Mini × 1TCS34725 RGB Color Sensor × 1I2C 16×2 LCD Display × 1Toggle Switch × 1RGB
Part 1: Introduction
In the field of electronics and education, the Arduino development board is popular due to its simplicity and powerful functionality. This project aims to use the Arduino Uno control board and a passive buzzer to create a control device that can emit sounds of different frequencies. Through this project, you will learn how to implement hardware control and sound generation using the Arduino platform, adding more interactivity and alert functions to various electronic devices.
Part 2: Hardware and Software
The Maker movement is sweeping the globe, and more and more development boards catering to various needs are emerging. This is certainly good news for Makers, as it not only provides more options but also makes prices more affordable. However, with so many development boards available, from the well-known Arduino and Raspberry Pi to the newly emerged Intel Edison and MediaTek Linkit One, or even the Taiwan-developed BananaPi, selecting the right platform can be a significant challenge for novice Makers.
Among
1. Introduction to Arduino UNO R3
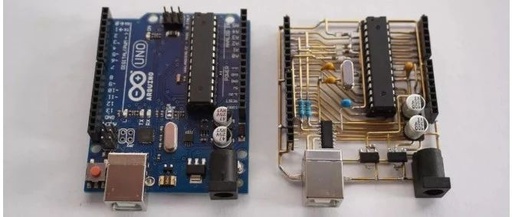
Arduino UNO R3 is an open-source microcontroller development board launched by Arduino. It is the most suitable and fully functional development board for beginners among Arduino products. It is equipped with the ATmega328P microcontroller, which has a maximum operating frequency of 20MHz and a performance of up to 20MIPS. It has very powerful functions and a wide range of applications. It has 14 digital input/output pins (6 of
Today, Teacher Cheng from the Mark Pen Design Study Abroad continues to bring knowledge about Arduino. In previous articles, many common sensors have been introduced, such as ultrasonic sensors, human infrared sensors, and photoresistors.This time we will talk about a slightly more complex module - the SD card module.
Actually, when it comes to music playback, many students should have used the buzzer module. A buzzer is an electronic sound-emitting component that can emit a "beep" sound. It uses DC voltage
This article mainly introduces how to use the fingerprint sensor module FPM10A on the Arduino development board. We will show you how to register a new fingerprint ID and how to find a matching fingerprint.
Introduction to Fingerprint Sensor Module
By using the fingerprint sensor module shown in the figure below, fingerprint recognition can be made easier to implement and easy to add to your project. This means that fingerprint acquisition, registration, comparison, and search are very easy to achieve.
A timer is a type of clock that is usually used to measure time intervals. There are two types of timers: one counts up from zero to measure elapsed time, known as a stopwatch, while the second type counts down from a specified duration provided by the user, commonly referred to as a countdown timer.
In this tutorial, we will show you how to create a countdown timer using the Arduino development board. In this article, we do not use any
Start your university journey with Arduino
Download Courseware
http://pan.baidu.com/s/1cDsX5c
Beijing University of Posts and Telecommunications Spark Space
http://www.ourspark.space/
Arduino Examples
http://www.ourspark.space/wiki/index.php/%E5%9F%BA%E4%BA%8EArduino%E7%9A%84%E5%AE%9E%E9%AA%8C
High energy ahead!
!!!
I purchased the Arduino UNO R3 development board for 23 yuan. Since it is relatively expensive, the board type and chip are
Since the end of July this year, Tinkercad has introduced the Circuits feature, and users who love electronic circuits have eagerly started creating many interesting circuit designs and checking the Simulation effects in Tinkercad.
However, many friends have @us, expressing that they are not satisfied with just viewing the simulation effects and want to turn their designs into reality. This article will teach you
DIY Simple Mechanical Arm with Arduino
Introduction
The mechanical arm consists of Arduino, servos, and MeArm hardware. The Arduino controls the servos through programming, enabling the functionality of the mechanical arm. There are two types of servos: analog servos and