NVIDIA GPUs provide powerful graphics processing and computing capabilities for enterprises and developers. However, to fully leverage the potential of the GPU, proper display port configuration is crucial.NVIDIA Display Mode Selector Tool was created for this purpose, helping you easily enable/disable physical display ports, optimize GPU graphics processing, computing performance, and virtual GPU deployment, ensuring the system operates at its best.
Next, we will delve into how to use this tool to unlock more potential from your GPU!
Three Display Modes
Using the NVIDIA Display Mode Selector Tool, the GPU can be switched to the following modes:
-
256MB BAR1 mode with physical display output enabled, preferred for standard workstation deployments.
-
8GB BAR1 mode with physical display output enabled, suitable for broadcasting, virtual production, and other scenarios.
-
64GB BAR1 mode with physical display output disabled, suitable for running vGPU and computing tasks.
Supported GPUs
Some NVIDIA server and workstation GPUs support changing physical display configurations:
-
NVIDIA RTX™ A5000 / NVIDIA RTX™ A5500 / NVIDIA RTX™ 5000 Ada Generation / NVIDIA RTX™ 5880 Ada Generation and other workstation graphics cards, factory default physical display output enabled (based on 256MB BAR1 mode).
-
NVIDIA A40 / NVIDIA L20 and other data center GPUs, factory default physical display output disabled (based on 64GB BAR1 mode).
* Only a portion of GPUs are listed, for a complete list, please refer to the NVIDIA Display Mode Selector Tool user guide documentation.
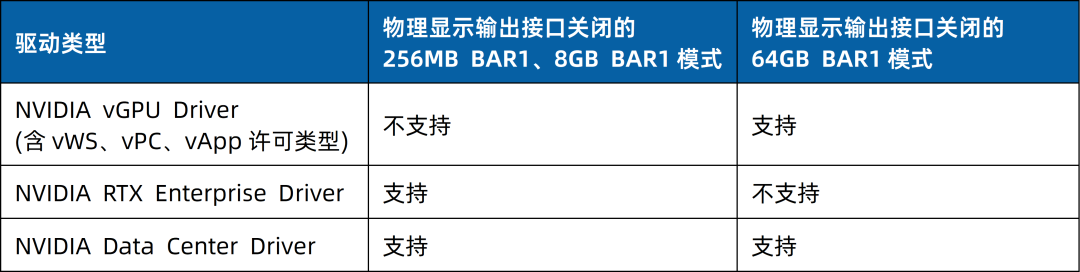
Driver and System Requirements
Different modes support different types of drivers:
©2025 Leadtek (Shanghai) Information Technology Co., Ltd.
This chart is produced by Leadtek Technology. If you have any questions or need to use it,
please contact Leadtek Technology (same below)
System Requirements:
-
64-bit Windows 10 RS5 or higher
-
64-bit Linux
-
KVM hypervisor running on RHEL 8
-
Citrix hypervisor
Note the following two points:
-
To run the NVIDIA Display Mode Selector Tool on any supported operating system, administrator privileges are required.
-
This tool can only be used on NVIDIA vGPU certified systems. Using it on non-certified systems may lead to GPU and system errors and inoperability. For a list of NVIDIA vGPU certified systems, please visit the official website:
https://www.nvidia.com/en-us/data-center/resources/vgpu-certified-servers
(Copy the link to your browser to open, same below)
NVIDIA Display Mode Selector Tool
Download
1. Log in to the NVIDIA Display Mode Selector Tool official webpage to view software introductions, FAQs, and more, to understand the tool’s functions and applicable scenarios:
https://developer.nvidia.com/displaymodeselector
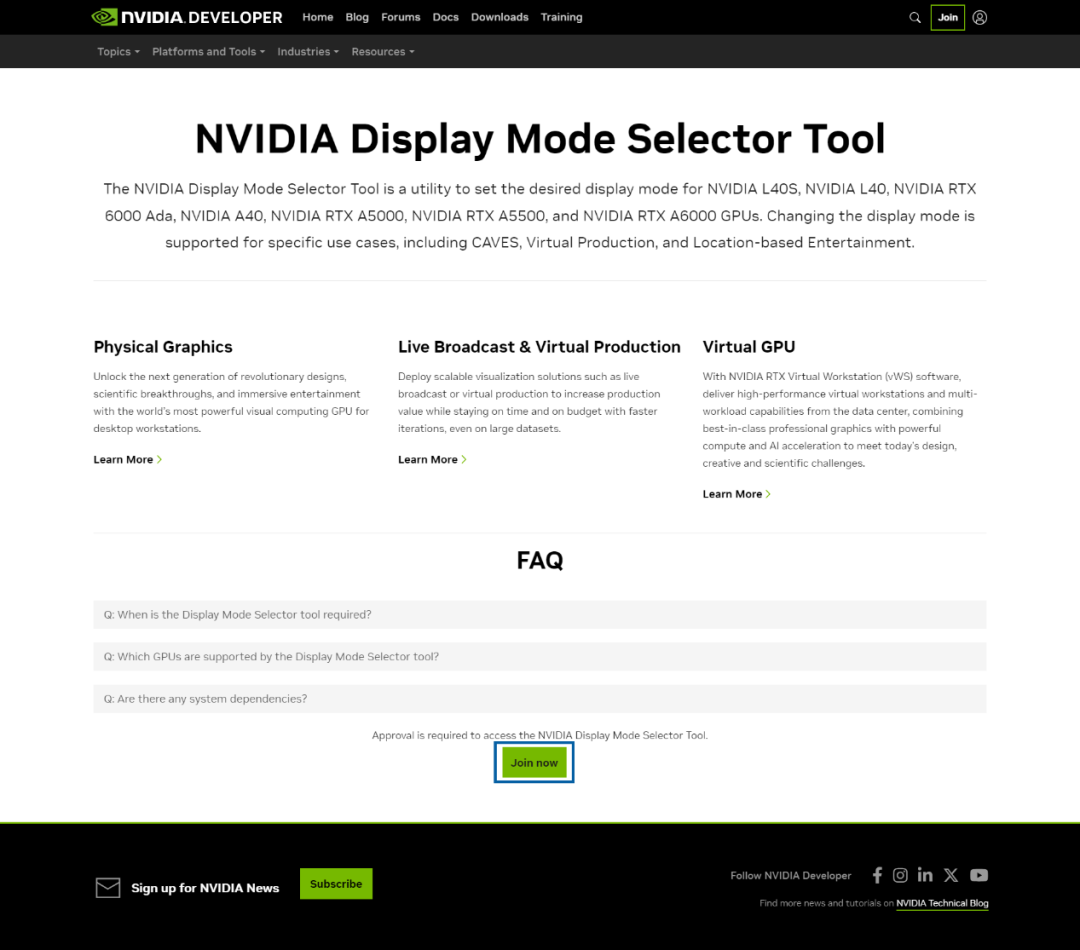
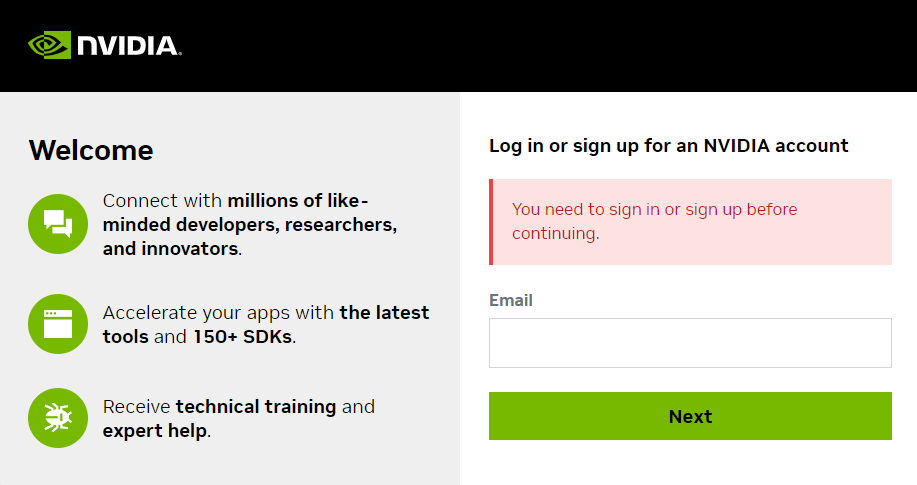
2. Click the “Join Now” button at the bottom of the page to log in.
If you do not have an NVIDIA account, you can register by filling in your email and setting a password, following the prompts to complete account verification.
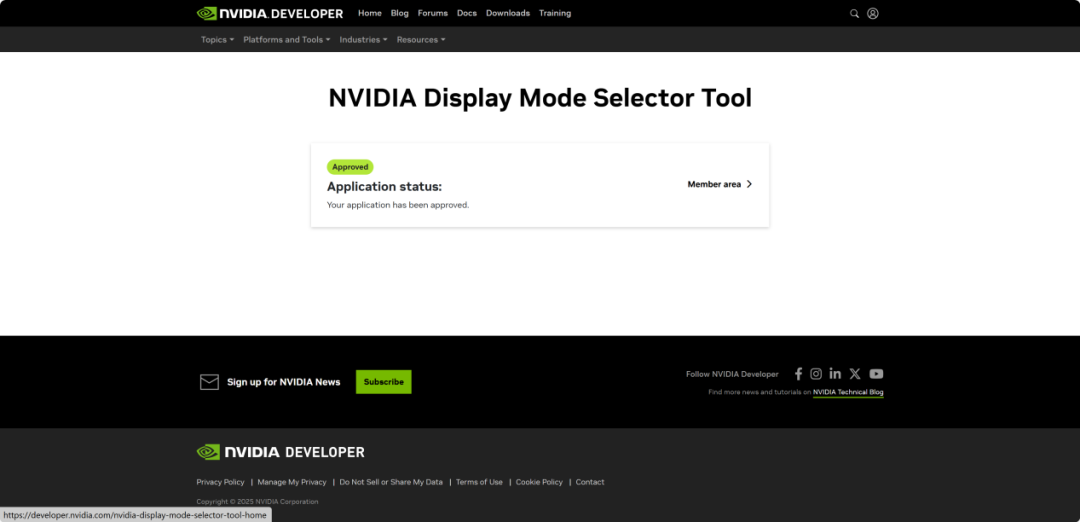
3. After successful login, you will be redirected to the download page. Here, check the system compatibility requirements and read the license agreement:
https://developer.nvidia.com/display-mode-selector-tool-home
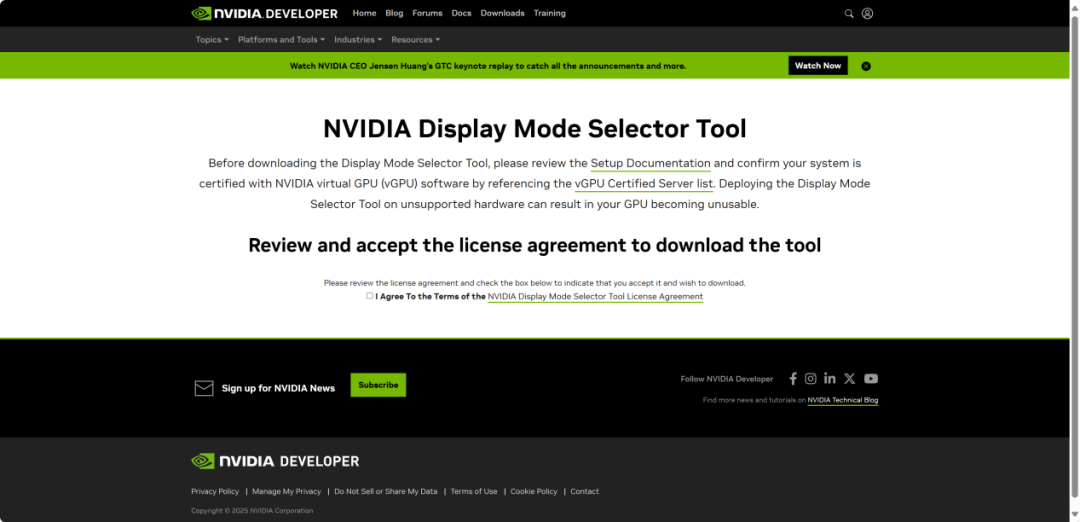
4. After confirming system compatibility and license agreement, check the terms, and click “Download” to download the software.
The downloaded software package is named:
NVIDIA_Display_Mode_Selector_Tool-1.67.0.zip

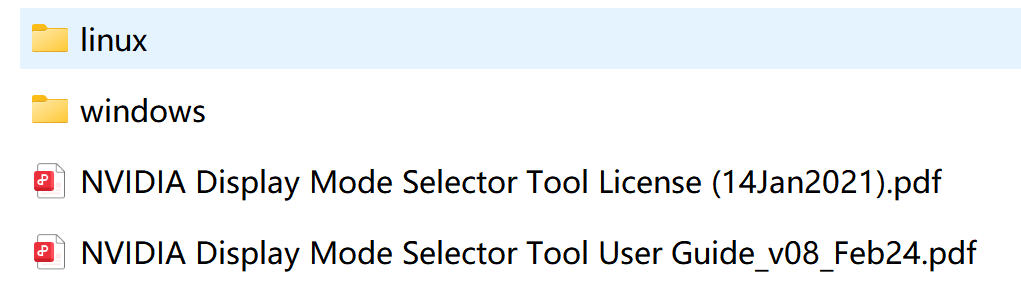
5. Unzip the software package. The folder contains programs for both Windows and Linux systems, suitable for both x64 and x86 architectures, user guides, and license agreements.
NVIDIA Display Mode Selector Tool
Switching GPU Modes
The NVIDIA Display Mode Selector Tool can set display modes for a single GPU or multiple GPUs. The command to enable or disable physical display interfaces is:
displaymodeselector --gpumode <mode_name> [-i num]
mode_name: physical_display_enabled_256MB_bar1physical_display_enabled_8GB_bar1physical_display_disabled
num: (Optional) GPU index
* Note: When running the program, the system environment must not have NVIDIA GPU drivers.
Steps to Run on Windows
1. Run the following command:
.\displaymodeselector.exe –gpumode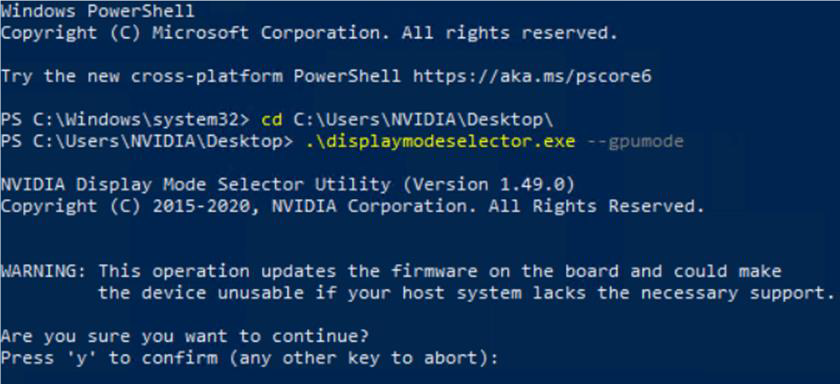
2. Press the “Y” key on the keyboard, and a list of display modes will appear.

3. Enter the number corresponding to the display mode you want to set, and press “Enter” to confirm.
4. If you want to apply the display mode to all GPUs, press the “Y” key; if you want to apply the display mode to a single GPU, press the “N” key and enter the corresponding GPU number.
5. Restart the system, and upon startup, the physical display will be enabled or disabled for each corresponding GPU based on the selected display mode.
TCC / WDDM Windows Driver Mode Switching
Next, we will introduce switching between the default driver mode WDDM Mode (Graphics On) and TCC Mode (Compute Only/Graphics Off) in Windows.
The table below lists the default Windows driver modes for different GPUs:

After enabling physical display for the GPU on Windows, the next step is to ensure the Windows driver is set to WDDM mode. To change from TCC to WDDM mode, use the nvidia-smi.exe program and execute the following:
1. Open a command window (e.g., Windows PowerShell) with administrative privileges.
2. Ensure the command window’s path directory points to the folder containing the nvidia-smi.exe file.
-
When installing non-DCH drivers, it is usually“C:\Program Files\NVIDIA Corporation\NVSMI” folder.
-
When installing DCH drivers, it is usually“C:\Windows\System32” folder.
3. Run the following command to set to WDDM mode:
.
vidia-smi.exe -fdm 0
To change the Windows driver mode from WDDM to TCC, run the following command:
.
vidia-smi.exe -fdm 1
4. Restart the system. After rebooting, the GPU with the physical display interface enabled will be displayed separately on the Windows desktop.
* Note: After disabling the GPU with a physical display interface, it is usually unnecessary to set the driver mode to TCC, as the display functionality of both NVIDIA vGPU drivers and NVIDIA data center drivers has been disabled.
Steps to Run on Linux
Next, we will explore the operating tutorial on Linux, taking Ubuntu 22.04 as an example, using two NVIDIA RTX 5880 Ada GPUs.
1. First, we will copy the program from the “\NVIDIA_Display_Mode_Selector_Tool-1.67.0\NVIDIA Display Mode Selector Tool – 1.67.0\linux\x64” folder to the current directory and grant it permissions.

2. Execute the command below to view the available commands of the program.
sudo ./displaymodeselector –help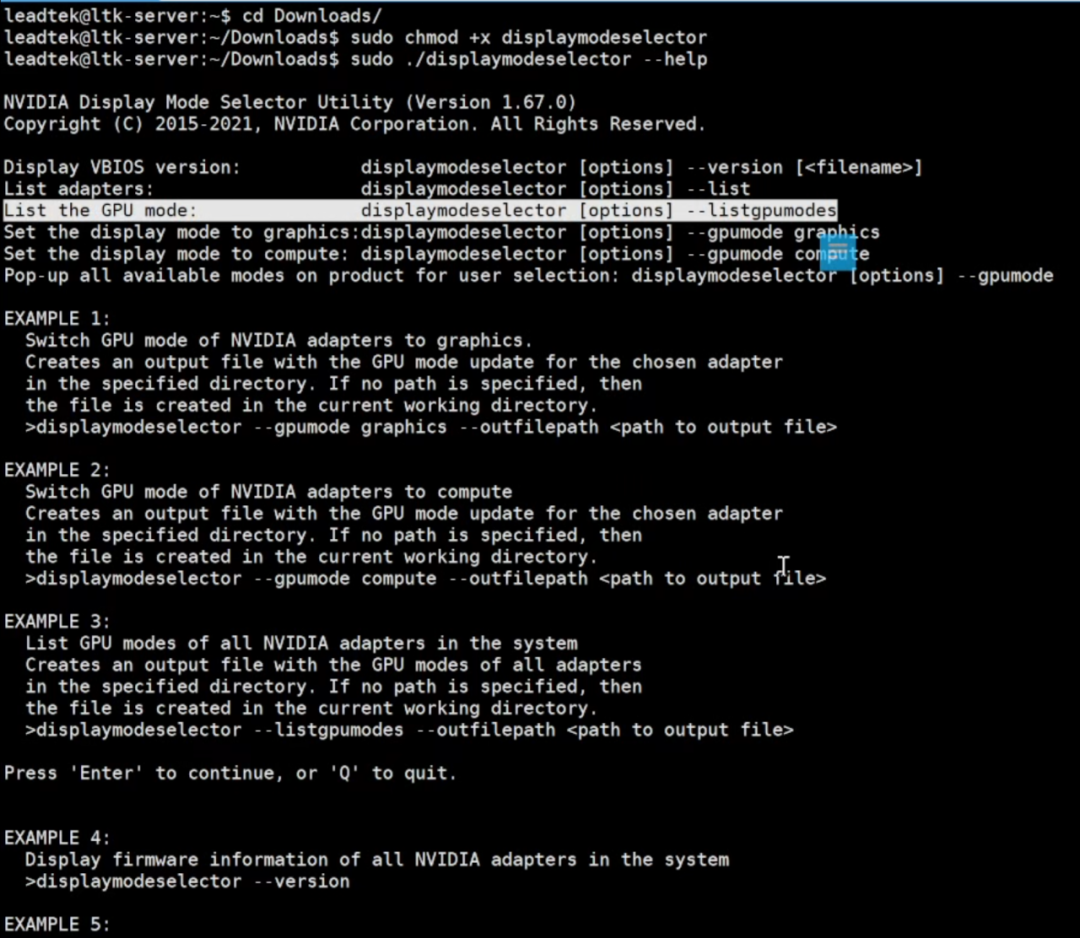
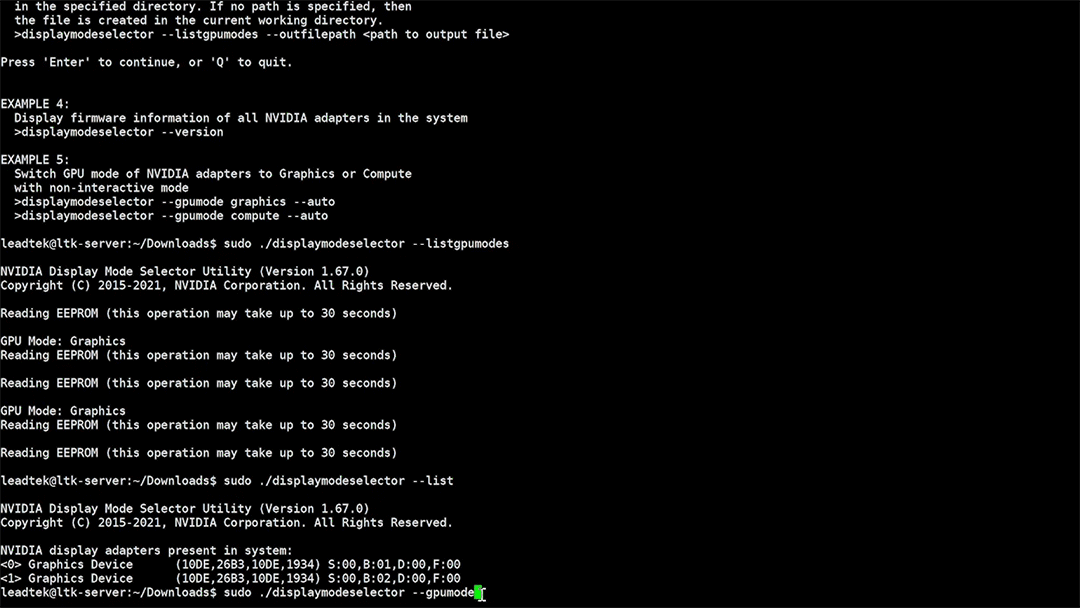
3. Run the command below to check the current GPU mode.
sudo ./displaymodeselector –listgpumodes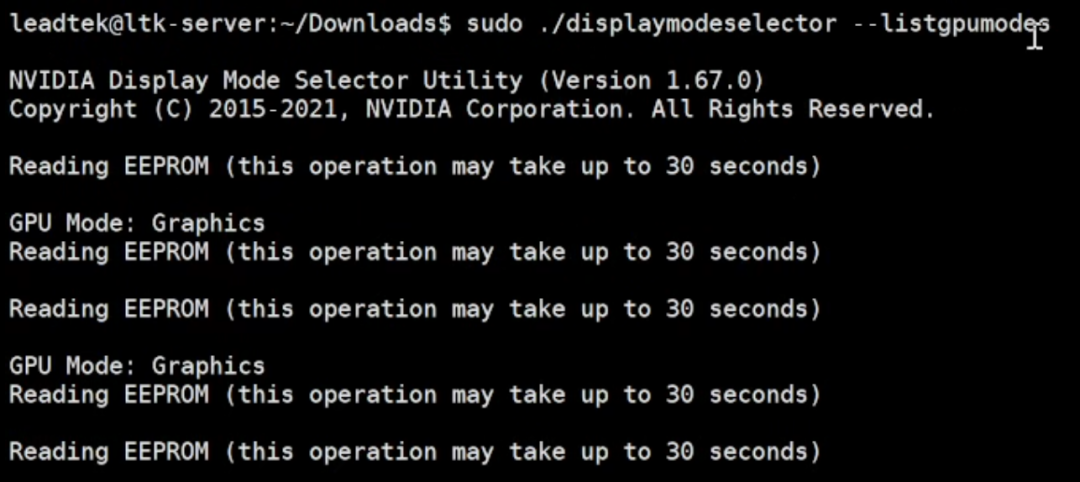
4. Run the command below to check the current GPUs in the system.
sudo ./displaymodeselector –list
5. The formal command for mode switching is:
sudo ./displaymodeselector –gpumodeAfter running the program, it will first ask for confirmation to continue. Press the “Y” key, and you will see three selectable modes. Enter the number and press the enter key to select the corresponding mode. Since the RTX 5880 Ada is factory defaulted to the physical display output interface enabled 256MB BAR1 mode, we can choose to switch it to the physical display output interface disabled 64GB BAR1 mode, so press the number “1” and confirm to switch successfully.
Next, it will prompt whether to switch modes for all GPUs:
-
Press the “Y” key, and the program will switch both RTX 5880 Ada GPUs to the physical display output interface disabled mode.
-
Press the “N” key, and you can enter the corresponding number for the specified GPU to switch.
-
Wait for the progress bar to complete and prompt “Successfully”, then restart the system as required to complete the GPU mode switch.
Finally, a reminder: changing physical display modes carries risks and should only be executed in specific application scenarios and when absolutely necessary. Improper changes or use on incompatible systems may render the GPU and the entire system inoperable.
For inquiries and information regarding purchasing and subscribing to NVIDIA vGPU product solutions, please contactLeadtek Technology:
400-138-8886
* All images or videos related to NVIDIA products (in whole or in part) are copyrighted by NVIDIA Corporation.
END