0 Preface
The previous article introduced how to use STM32CubeIDE to create a new project and its features. This article will continue to explain how to configure the project, which is also a very important step.
1 Introduction to the Configuration Interface (STM32CubeMX Interface)
The project configuration is mainly operated through the original STM32CubeMX tool. The previous article has already discussed this. STM32CubeMX uses a graphical interface to configure STM32 projects, automatically generating configuration code, which is much more reliable than manually writing code to configure the project when using the standard library.
First, double-click the xdqrshi.ioc file (project name.ioc) in the left file structure, and the configuration interface will appear on the right. As shown in the figure.
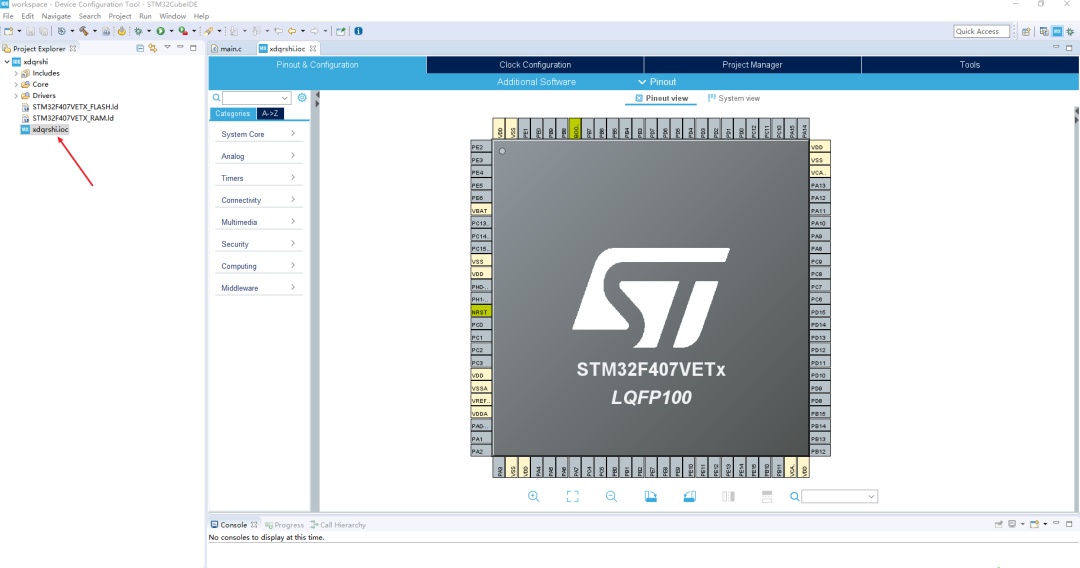
There are four tabs at the top of the interface.
-
Pinout & Configuration: This option is for configuring pin functions.
-
Clock Configuration: This option is for configuring the chip’s clock tree.
-
Project Manager: This option is for configuring the project, such as the library version, code generation method, etc.
-
Tools: This option is for chip performance testing tools, such as completing power consumption tests.
All four tabs have many important functions, so they need to be introduced separately in detail.
2 Pinout & Configuration Tab
After selecting the Pinout & Configuration tab, the largest part of the configuration interface shows the STM32 chip used in the project, displaying the chip model, package, and all pin names. The system uses different colors to distinguish between general IO ports, power supply, and reset pins. The pin functions can be configured by left-clicking on the pins, and usually, not every pin needs to be manually configured. It is more convenient to use the classification options on the left to let the system configure automatically. If the pins assigned by the system do not meet design requirements, they can be adjusted manually.
The functional categories on the left side of the interface include:
-
System Core: This item mainly completes the configuration of the chip’s DMA, GPIO, IWDG, NVIC, RCC, SYS, WWDG functions.
-
Analog: This item mainly completes the configuration of ADC and DAC.
-
Timers: This item mainly completes the configuration of RTC clock and TIM timers.
-
Connectivity: This item mainly completes the configuration of the chip’s communication interfaces, mainly CAN, ETH, FSMC, I2C, SDIO, SPI, UART, USB, etc.
-
Multimedia: This item is the configuration interface for multimedia functions, with DCMI and I2S interfaces.
-
Security: This item is for security configuration, mainly for setting the random number RNG.
-
Computing: This item is for configuring CRC checks.
-
Middleware: This item is for middleware configuration, mainly including FATFS file system, freeRTOS real-time operating system, LIBJPEG, LWIP, MBEDTLS, PDM2PCM, USB_DEVICE, USB_HOST configurations.
This tab has many functions, and only a brief introduction is provided here. Future articles will detail each part.
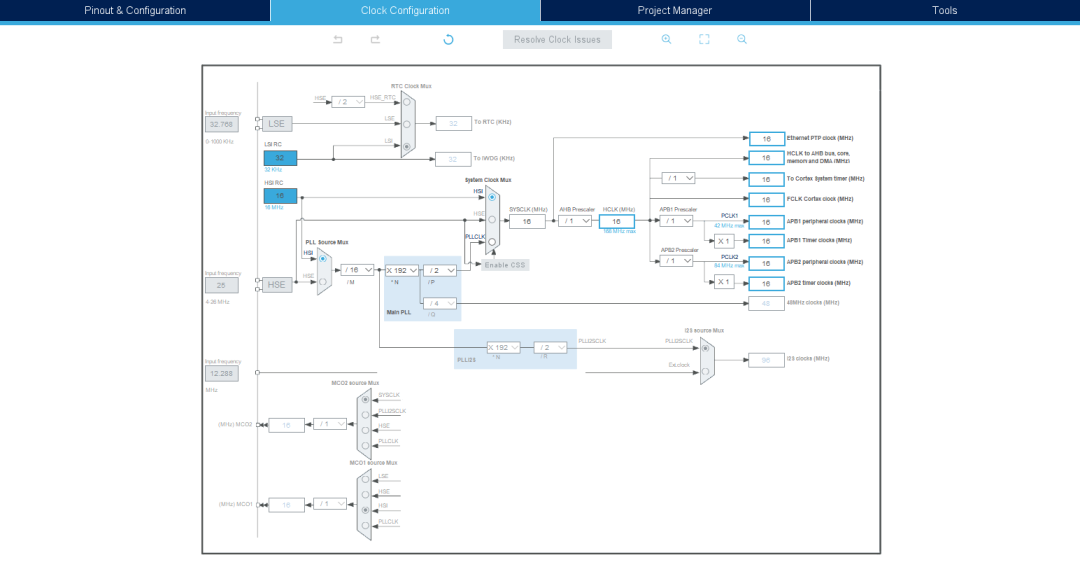
3 Clock Configuration
This tab mainly completes the configuration of the STM32 clock tree. When configuring, you only need to set the clock source and the required clock frequency, and the system will automatically calculate parameters to generate the required frequency. There is no need to manually calculate as before, which improves the efficiency of configuration to some extent.
4 Project Manager
This tab mainly manages the project, and usually, the defaults are sufficient. Other points to note are the project storage location under Project Location, as well as Minimum Heap Size and Minimum Stack Size, as these sizes can affect whether the program encounters issues.

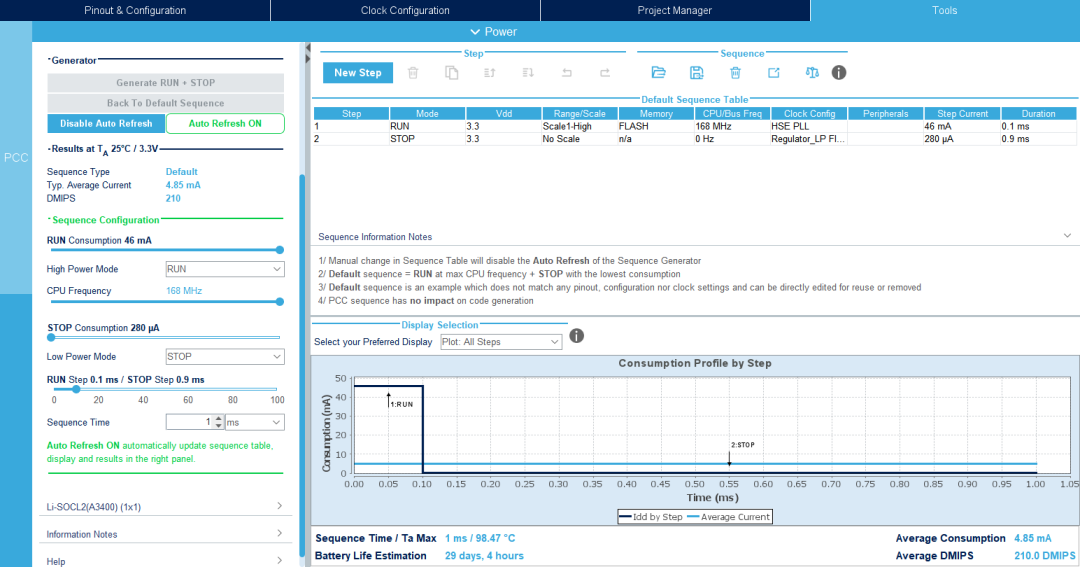
5 Tools
This tab mainly estimates the power consumption of the chip during operation. This is usually needed when designing a product. Since this tutorial is only for functional teaching and does not involve performance, it will not be introduced in detail. If needed, future articles will explain it in detail.
6 Conclusion
This article mainly introduced the basic functions needed for project configuration using STM32CubeIDE. There are many knowledge points involved in this part, and only a brief introduction is provided here. Future articles will continue to detail each part, so please stay tuned.