
The “APM32 Core” series summarizes user experiences with APM32 series products, all of which are reprinted from the 21ic forum’s Extreme Sea Semiconductor area. The full text has not been modified in any way and is prohibited from being reprinted without the original author’s authorization.
Introduction
Recently, I have been working with the APM32F407IG board and found that the official provided two RTOS demos, FreeRTOS and RT-thread. I thought, given the rich resources of APM32F4, could it also run ThreadX RTOS? So I decided to give it a try, and this article documents the process of porting ThreadX RTOS on APM32F4 for your reference.
1 Introduction to ThreadX
When it comes to RTOS, many may think of FreeRTOS and our domestic RT-Thread, both of which are well-known due to their commercial-free nature and rich components. However, ThreadX RTOS might be relatively lesser-known, yet in some industries, it is quite renowned because it has been used in space applications. Below is a brief introduction to ThreadX.
ThreadX, officially known as Azure RTOS ThreadX (here is its official website: https://learn.microsoft.com/en-us/azure/rtos/threadx/). It is specifically designed for deeply embedded real-time IoT applications. Azure RTOS ThreadX offers advanced scheduling, communication, synchronization, timers, memory management, and interrupt management capabilities. Additionally, Azure RTOS ThreadX includes many advanced features, such as a picokernel™ architecture, preemption-threshold™ scheduling, event-chaining™, execution analysis, performance metrics, and system event tracing. Azure RTOS ThreadX is very easy to use and is suitable for extremely demanding embedded applications. It has been deployed billions of times across various products, including consumer devices, medical electronics, and industrial control devices. (Excerpted from its official website)
So why is it considered powerful? The above content is just an introduction to its applications; the real strength of this RTOS lies in its various safety certifications. Below are the safety certifications it has passed:
1. Medical – FDA510(k), IEC-62304 Class C, IEC-60601, ISO-14971
2. Industrial – UL-1998, IEC-61508 SIL 4
3. Transport/Railway – EN50128 SIL 4, BS50128, 49CFR236, IEC-61508
4. Aerospace – DO-178B, ED-12B, DO-278
5. Automotive – IEC-61508 ASIL D
6. Nuclear applications – IEC-61508
7. Home appliances – UL/IEC 60730/60335
In fact, it was previously a paid closed-source software. After being acquired by Microsoft, it was made open-source, and for educational assessment purposes, we are not restricted. The strength of this RTOS can be verified on their official website; I won’t elaborate further here.
2 Obtaining the Source Code
Before porting, we need to prepare some source code:
1. The project template for APM32F407, which can be obtained from their official website: https://geehy.com/support/apm32?id=311
2. ThreadX source code, which can be obtained from their open-source repository: https://github.com/azure-rtos/threadx
It should be noted that since we are using the MDK environment, we need to use MDK version 5.30 or above.
3 File Movement and Copying
After preparing the two source codes, we need to perform some file movement and copying to complete the preliminary preparation for our project creation.
1. Copy the ThreadX source code to the APM32F4xx_SDK\Middlewares folder for subsequent project file usage.

2. Then create a copy of the \Examples\SysTick example and rename it to “ThreadX_Template”. This will serve as our base template, and we will build the APM32F4 ThreadX demo on this template.
3. Copy the “\ports\cortex_m4\ac5\example_build\tx_initialize_low_level.s” file from the ThreadX source code to our example source directory “ThreadX_Template\ThreadX_Template\Source” and rename it to “tx_initialize_low_level_ac5.s” because we will modify this file later. Here, we create a copy for subsequent modifications.

4 Adding Source Code
Here, we choose to add the corresponding source files to the MDK project of the ThreadX_Template we just copied. Open the MDK project, and under the existing directory, add the “ThreadX/ports” and “ThreadX/common” structures, and we add the corresponding source files.

4.1 ThreadX/port Structure
In this structure, we add the .s files used by the AC5 compiler.
1. All .s files under “threadx-6.2.0_rel\ports\cortex_m4\ac5\src”.
2. Add the “tx_initialize_low_level_ac5.s” file we just copied.
The final added files are as follows:

4.2 ThreadX/common Structure
In this structure, we add the core files of ThreadX, i.e., the .c files under “threadx-6.2.0_rel\common\src”.
4.3 Application Structure
In the original Application structure, we add the thread file we will create shortly: tx_application_entry.c. We will modify this file’s content later.

5 Tab Settings
5.1 Compiler Settings
Since we are using the AC5 related support files, we choose to use the AC5 compiler and check “Use MicroLIB” to use printf.

5.2 C/C++ Tab
In the settings under the “C/C++” tab, add the header file paths in the header file settings.
1. “..\..\..\..\..\Middlewares\threadx-6.2.0_rel\ports\cortex_m4\ac5\inc”
2. “..\..\..\..\..\Middlewares\threadx-6.2.0_rel\common\inc”

5.3 Assembly Header File Inclusion
In the settings under the “Asm” tab, the following settings need to be completed:
1. Add the header file path in the header file settings: “..\..\..\..\..\Middlewares\threadx-6.2.0_rel\ports\cortex_m4\ac5\inc”.
2. Fill in “–cpreproc” in the Misc Controls column to resolve compilation errors for the .s files.

6 Modify Source Files
Since ThreadX needs to take over some interrupts, and we need to create some threads using ThreadX, we need to edit the source code in our project.
6.1 tx_initialize_low_level_ac5.s
This file is used by ThreadX RTOS to complete the low-level initialization of the processor, including:
1. Setting the interrupt vector table
2. Setting the locator (Systick) for generating clock ticks
3. Saving the system stack pointer for use by the interrupt program
4. Finding the first available address in RAM to pass to the tx_application_define function, which is the value of the first_unused_memory pointer
5. Since version 6 of ThreadX and later, this file takes over the original processor startup file.
For my case, I still want to use the original processor startup file “startup_apm32f40x.s”, so I need to make some modifications to the “tx_initialize_low_level_ac5.s” file.
1. Comment out the unused labels and manually add the _Vectors and __initial_sp labels, which correspond to the interrupt vector table and stack pointer initial value exported from the APM32F4 startup file:

2. Set the clock frequency (168Mhz) and clock tick (1ms), which will be used to initialize the Systick timer:

3. Comment out the stack setting code (the stack environment has already been set in the APM32 startup file):

4. Comment out the interrupt vector table defined by ThreadX (use the vector table defined in the APM32F4 startup file):

5. Comment out the reset handler defined by ThreadX (use the reset handler in the APM32F4 startup file):

6. Modify the ThreadX low-level initialization function:

7. Comment out the unused functions:

After completing the above operations, we have modified the tx_initialize_low_level_ac5.s file.
6.2 apm32f4xx_int.c
Since ThreadX takes over some interrupts, some interrupts in apm32f4xx_int.c must be masked (or deleted) to avoid duplicate definition errors from the compiler.
Specifically, mask the PendSV_Handler and SysTick_Handler functions.

6.3 tx_application_entry.c
In this file, we create two threads and run them, which requires knowledge of ThreadX. I won’t elaborate further; here is the source code directly.
————————————————————
#include <stdio.h>
#include “Board.h”
#include “tx_api.h”
#include “main.h”
#define TX_APPLICATION1_PRIO 3
#define TX_APPLICATION1_STACK_SIZE 1024
static TX_THREAD tx_application1;
uint8_t tx_application1_stack[TX_APPLICATION1_STACK_SIZE];
#define TX_APPLICATION2_PRIO 2
#define TX_APPLICATION2_STACK_SIZE 1024
static TX_THREAD tx_application2;
uint8_t tx_application2_stack[TX_APPLICATION2_STACK_SIZE];
void my_tx_application1_entry(ULONG thread_input)
{
/* Enter into a forever loop. */
while(1)
{
printf(“ThreadX 1 application running…\r\n”);
APM_MINI_LEDToggle(LED2);
/* Sleep for 1500 ticks. */
tx_thread_sleep(1500);
}
}
void my_tx_application2_entry(ULONG thread_input)
{
/* Enter into a forever loop. */
while(1)
{
printf(“ThreadX 2 application running…\r\n”);
APM_MINI_LEDToggle(LED3);
/* Sleep for 1000 ticks. */
tx_thread_sleep(1000);
}
}
void tx_application_define(void *first_unused_memory)
{
/* Create thread */
tx_thread_create(&tx_application1, “thread 1”, my_tx_application1_entry, 0, &tx_application1_stack[0], TX_APPLICATION1_STACK_SIZE, TX_APPLICATION1_PRIO, TX_APPLICATION1_PRIO, TX_NO_TIME_SLICE, TX_AUTO_START);
tx_thread_create(&tx_application2, “thread 2”, my_tx_application2_entry, 0, &tx_application2_stack[0], TX_APPLICATION2_STACK_SIZE, TX_APPLICATION2_PRIO, TX_APPLICATION2_PRIO, TX_NO_TIME_SLICE, TX_AUTO_START);
}
————————————————————
6.4 main.cWe need to initialize the corresponding peripherals (LED, USART) in the main function before starting ThreadX. Since printf is used in tx_application_entry.c, we also need to redirect printf. Additionally, we will remove some operations from the previous SysTick project; I won’t elaborate further; here is the source code directly.
————————————————————
/* Includes */
#include “main.h”
#include “Board.h”
#include <stdio.h>
#include “tx_api.h”
/** @addtogroup Examples
@{
*/
/** @addtogroup SysTick_TimeBase
@{
*/
/** @addtogroup SysTick_TimeBase_Macros Macros
@{
*/
/** printf using USART1 */
#define DEBUG_USART USART1
/**@} end of group SysTick_TimeBase_Macros*/
/** @defgroup SysTick_TimeBase_Functions Functions
@{
*/
/*!
* [url=home.php?mod=space&uid=247401]@brief[/url] Main program
*
* @param None
*
* @retval None
*/
int main(void)
{
USART_Config_T usartConfigStruct;
usartConfigStruct.baudRate = 115200;
usartConfigStruct.hardwareFlow = USART_HARDWARE_FLOW_NONE;
usartConfigStruct.mode = USART_MODE_TX;
usartConfigStruct.parity = USART_PARITY_NONE;
usartConfigStruct.stopBits = USART_STOP_BIT_1;
usartConfigStruct.wordLength = USART_WORD_LEN_8B;
APM_MINI_COMInit(COM1, &usartConfigStruct);
APM_MINI_LEDInit(LED2);
APM_MINI_LEDInit(LED3);
printf(“ThreadX RTOS on APM32F407 IG MINI Board\r\n”);
tx_kernel_enter();
while (1)
{
}
}
/*!
* [url=home.php?mod=space&uid=247401]@brief[/url] Redirect C Library function printf to serial port.
* After Redirection, you can use printf function.
*
* @param ch: The characters that need to be sent.
*
* @param *f: pointer to a FILE that can record all information
* needed to control a stream
*
* @retval The characters that need to be sent.
*/
int fputc(int ch, FILE *f)
{
/** send a byte of data to the serial port */
USART_TxData(DEBUG_USART,(uint8_t)ch);
/** wait for the data to be sent */
while (USART_ReadStatusFlag(DEBUG_USART, USART_FLAG_TXBE) == RESET);
return (ch);
}
————————————————————
7 Compilation and Download
Finally, we compile the project, and the compilation results are as follows.

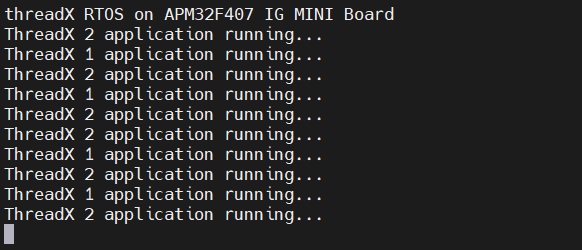
Then, after downloading the program to the board, LED2 and LED3 blink, and if connected to the serial port, the following information can be seen:
Note: The article’s author has provided the project files in the original post; please visit the original 21ic forum to download if needed.
Original link: https://bbs.21ic.com/icview-3271244-1-1.html
Or click below to read the original article

 0756 6299999


www.geehy.com

Guangdong Province, Zhuhai City, Xiangzhou District, Guangwan Street No. 83, Building 01