This article mainly introduces the problems encountered when using .Net nanoFramework to drive the WS2812B LED on the ESP32-S3-Zero board, as well as how to design a light control class to conveniently use the status indicator light to display the working status of the device.
1. Introduction
When using the .Net nanoFramework to drive the WS2812B LED on the ESP32-S3-Zero board, you may encounter some challenges, such as the reverse color problem of the LED. This article will explore in detail how to solve these problems and how to effectively utilize the status indicator light to display the working status of the device. We will use the Iot.Device.Ws28xx.Esp32 library, which is specifically designed for the ESP32 board to drive the WS28xx series LEDs.

2. Using the Onboard LED
Hardware development is different from pure software because the specific characteristics of the hardware we use often lead to different behaviors of the same code on different hardware. Therefore, we need to have a certain understanding of the characteristics of the hardware during development to better utilize it.
Generally, we can easily drive our LED through the Iot.Device.Ws28xx.Esp32 library. According to the board’s documentation, we can find that the ESP32-S3-Zero board has an onboard WS2812B LED, and the pin for this LED is GPIO 21. We can drive this LED with the following code:
int WS2812_Count = 1;int WS2812_Pin = 21;var leddev = new Ws2812b(WS2812_Pin, WS2812_Count);BitmapImage img = leddev.Image;img.SetPixel(0, 0, Color.Red);leddev.Update();Thread.Sleep(1000);img.SetPixel(0, 0, Color.Green);leddev.Update();Thread.Sleep(1000);img.SetPixel(0, 0, Color.Blue);leddev.Update();In this way, we can display different colors through this LED. However, in practice, the light color appears strange and tends towards white. When we replace Ws2812b with Ws2812c, it can drive the correct colors, but the colors are reversed.
3. Solving the Reverse Color Problem
By examining the source code[1] from the official repository, we can see that the constructor of the Ws2812b class uses the BitmapImageNeo3 class to initialize the Image property, while the Ws2812c class uses the BitmapImageWs2808Grb. According to the technical data sheet for the XL-0807RGBC-WS2812B used by the board, its color data uses the RGB order, which makes the problem easy to identify.
To address this situation, we can inherit from the Ws28xx class and modify it ourselves to solve this problem. Previously, classes like BitmapImageWs2808Grb and BitmapImageWs2808 were internal and could not be inherited. The latest version has made these classes public, allowing us to inherit these classes directly and modify the Image object to use BitmapImageWs2808 to resolve the issue.
public class XlWs2812b : Ws28xx{ public XlWs2812b(int gpioPin, int width, int height = 1) : base(gpioPin, new BitmapImageWs2808(width, height)) { ClockDivider = 2; OnePulse = new RmtCommand(32, true, 18, false); ZeroPulse = new RmtCommand(16, true, 34, false); ResetCommand = new RmtCommand(2000, false, 2000, false); }}After adding this class, we can use the XlWs2812b class to drive our LED.
4. Applications of Status Indicator Lights
To better understand the working status of the device, we can use the status indicator light to display the device’s status. This way, we can understand the working status of the device through the color of the light.
4.1 Designing the Status Indicator Light
First, we define an enumeration to represent the working status of the device:
/// <summary>/// Defines device status/// </summary>public enum RunStatus{ /// <summary> /// Starting, blue light always on /// </summary> Start, /// <summary> /// Requesting identification, blue light flashing fast /// </summary> OnIdentify, /// <summary> /// Verification successful, green light always on /// <summary> AuthSuccess, /// <summary> /// Connecting to Wi-Fi, orange light flashing /// </summary> Connecting, /// <summary> /// Wi-Fi configuration issue, red light flashing /// </summary> ConfigFailed, /// <summary> /// Wi-Fi connection failed, red light always on /// <summary> ConnectFailed, /// <summary> /// Normal operation, green breathing light /// <summary> Working, /// <summary> /// Turn off the light /// </summary> Close}Then we define a BoardLedControl class to control the light display. In the constructor of this class, we can set the light’s pin and the check interval for the light. This class uses a thread to check the light’s status, allowing us to control the light’s display by modifying its status from other threads.
/// <summary>/// Control for the working light/// </summary>/// <param name="pin">Gpio Pin</param>/// <param name="checkDelay">Control check interval</param>public BoardLedControl(int pin = 21,int checkDelay = 500){ WS2812_Pin = pin; leddev = new XlWs2812b(WS2812_Pin, 1, 1); image = leddev.Image; statusThread = new Thread(() => { while (true) { if (autoUpdate) { UpdateLedStatus(); } } }); statusThread.Start();}4.2 Several Light Modes
In the BoardLedControl class, we define several light modes, such as always on, flashing, breathing light, etc.
/// <summary>/// Light effect - flashing/// </summary>/// <param name="color">Color</param>/// <param name="delay">Delay</param>public void LedBlink(Color color,int delay = 500){ image.SetPixel(0, 0, color); leddev.Update(); Thread.Sleep(delay); image.SetPixel(0, 0, Color.Black); leddev.Update(); Thread.Sleep(delay);}/// <summary>/// Set light color/// </summary>/// <param name="color">Color</param>/// <param name="sleepDuration">Wait</param>public void LedSet(Color color, int sleepDuration = 0){ image.SetPixel(0, 0, color); leddev.Update(); if (sleepDuration > 0) { Thread.Sleep(sleepDuration); }}/// <summary>/// Light effect - breathing/// </summary>/// <param name="color">Color</param>/// <param name="duration">Duration</param>/// <param name="steps">Steps</param>public void LedBreath(Color color, int duration = 3900, int steps = 20){ // Limit parameter range steps = steps < 10 ? 10 : steps; duration = duration < 1000 ? 1000 : duration; // Calculate the pause duration for each step (in milliseconds) int sleepDuration = duration / (2 * steps); for (int i = 1; i <= steps; i++) { // Calculate current brightness float brightness = (float)i / steps; // Set color Color currentColor = Color.FromArgb( (int)(color.R * brightness), (int)(color.G * brightness), (int)(color.B * brightness)); LedSet(currentColor, sleepDuration); } for (int i = steps; i > 0; i--) { float brightness = (float)i / steps; Color currentColor = Color.FromArgb( (int)(color.R * brightness), (int)(color.G * brightness), (int)(color.B * brightness)); LedSet(currentColor, sleepDuration); }}4.3 Checking Light Status
In the BoardLedControl class, we define an UpdateLedStatus method to check the light status and control the light display based on the status.
/// <summary>/// Update light/// </summary>public void UpdateLedStatus(){ // Update light based on device status switch (DeviceStatus) { case RunStatus.Start: LedSet(Color.Blue); break; case RunStatus.OnIdentify: LedBlink(Color.Blue, 200); break; case RunStatus.AuthSuccess: LedSet(Color.Green); break; case RunStatus.Connecting: LedBlink(Color.Orange, 200); break; case RunStatus.ConfigFailed: LedBlink(Color.Red); break; case RunStatus.ConnectFailed: LedSet(Color.Red); break; case RunStatus.Working: LedBreath(Color.Green); break; default: LedSet(Color.Black); break; }}4.4 Using the Status Indicator Light
When using the status indicator light, we can use the following code:
// Initialize light controlvar _led = new BoardLedControl();// Turn on the working light, blue engine starting!_led.StartAutoUpdate();// ....// Change status_led.DeviceStatus = RunStatus.OnIdentify;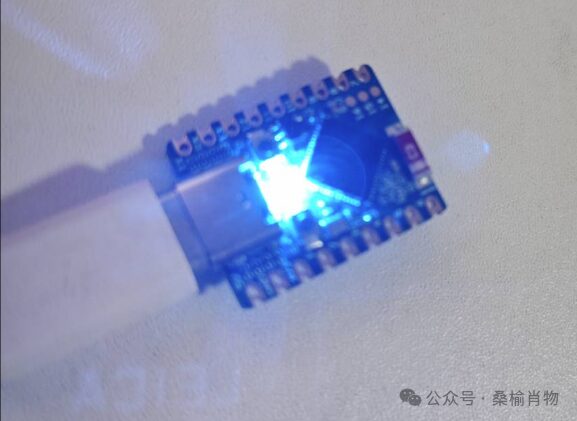
In use, we can control the light display by modifying the DeviceStatus property, allowing us to understand the working status of the device through the color of the light. Of course, we can also choose not to enable the automatic update using StartAutoUpdate() or use the StopAutoUpdate method to close automatic updates at the right time, and then directly call methods like LedSet, LedBlink, LedBreath to control the light display.
5. Conclusion
Although using the onboard WS2812B LED of the ESP32 may encounter some problems, once you understand the causes of these issues, you can find solutions. At the same time, the status indicator light is a very effective tool to help you better understand the working status of the device. We hope this article can assist you in using the ESP32 to drive the WS2812B LED. The code in this article has been uploaded to the Github ESP32_S3_Samples[2] project, and everyone is welcome to download and use it.
References
[1] Source code: https://github.com/nanoframework/nanoFramework.IoT.Device/blob/develop/devices/Ws28xx.Esp32/Ws2812B.cs?wt.mc_id=DT-MVP-5005195[2] ESP32_S3_Samples: https://github.com/sangyuxiaowu/ESP32_S3_Samples?wt.mc_id=DT-MVP-5005195