I bought an ESP32S board from Taobao, and as soon as it arrived, I couldn’t wait to get started. I planned to work on the NanoFramework, which is an embedded system for .Net, supporting embedded development in C#. Of course, it also supports other languages like C, C++, Lua, JavaScript, AT commands, etc. There are many language options, but I’m particularly happy that it supports C#, as I’m familiar with it.
Based on this, I’ll write a simple example of using the ESP32 NanoFramework. In the future, to modify the underlying system, I will use the official examples as a reference. For those looking for a simpler solution, you can refer to the relevant examples in VsCode. I will also release one later.
Regarding buying the board, it’s actually all based on a model. Just choose the right model. The model I have is ESP32S, but other models are also acceptable, as long as they start with ESP32. Otherwise, you will have to worry more about the board model issues.
Introduction to ESP32 Chip
The ESP32 SoC chip supports the following features:
-
1. 2.4 GHz Wi-Fi
-
2. Bluetooth
-
3. High-performance Xtensa® 32-bit LX6 dual-core processor
-
4. Ultra-low power co-processor
-
5. Various peripherals
The ESP32 is manufactured using a 40 nm process, offering optimal power performance, RF performance, stability, versatility, and reliability, suitable for various application scenarios and different power requirements.
Espressif provides users with complete software and hardware resources for the development of ESP32 hardware devices. The software development environment ESP-IDF is designed to assist users in quickly developing IoT applications, meeting user requirements for Wi-Fi, Bluetooth, low power consumption, and more.
Setting Up the ESP-IDF Environment
You can refer to this article:
https://docs.espressif.com/projects/esp-idf/en/latest/esp32/get-started/index.html
Of course, I also referenced this article.
This document aims to guide users in setting up the software environment for ESP32 hardware development, demonstrating how to use the ESP-IDF (Espressif IoT Development Framework) configuration menu, compile, and download firmware to the ESP32 development board, among other steps.
Preparation
-
1. An ESP32 development board (I have the ESP32S)
-
2. USB data cable (A to Micro-B)
-
3. A computer (Windows, Linux, or macOS) (I have Windows; others can refer to the official documentation)
Connecting the Development Board to the Computer USB
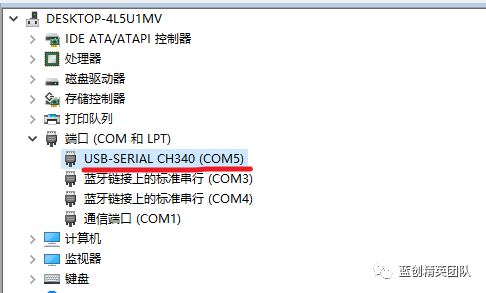
It should display COM5 (it doesn’t necessarily have to be 5; it could be another number) for it to be normal. If it’s not normal, you need to download the driver. The driver required for my board can be downloaded from:
https://www.silabs.com/developers/usb-to-uart-bridge-vcp-drivers
Download the CP210x Universal Windows Driver, double-click the 64.exe file, and it should be fine. Then, unplug and plug the development board back in.
Installing ESP-IDF
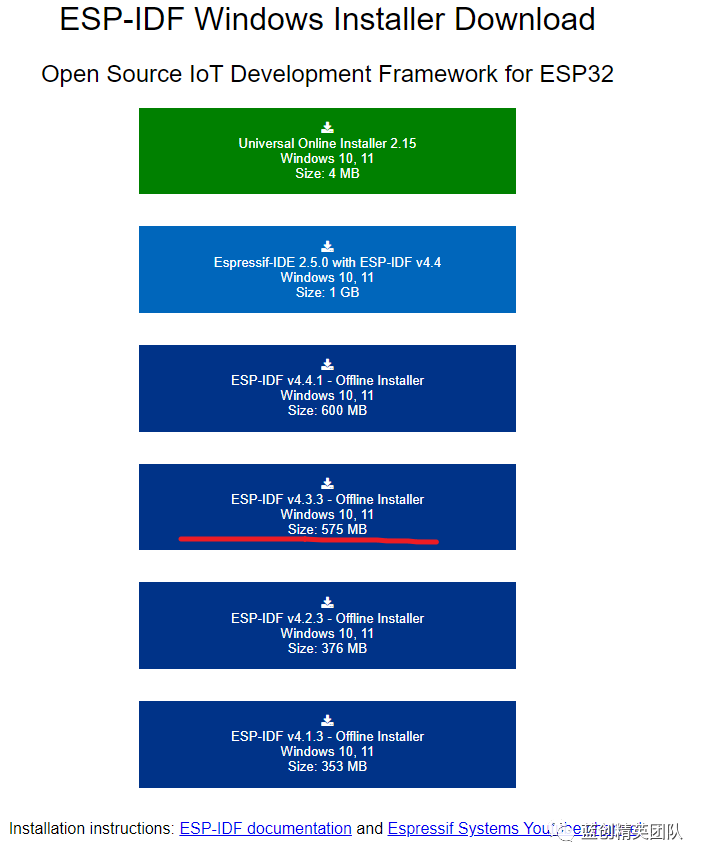
Step 1: Download ESP-IDF
Address:
https://dl.espressif.com/dl/esp-idf/?idf=4.4
I downloaded this one; it seems relatively smaller (the download speed isn’t very fast).
After Downloading
It’s simple. Just double-click to run it.
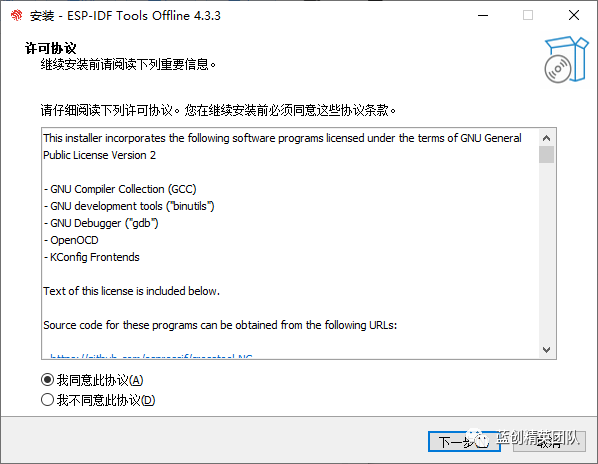
Just click next; this part requires an environment variable, which is important, and it will also activate Windows’ defense mechanism, which I later disabled because it consumes too much performance.
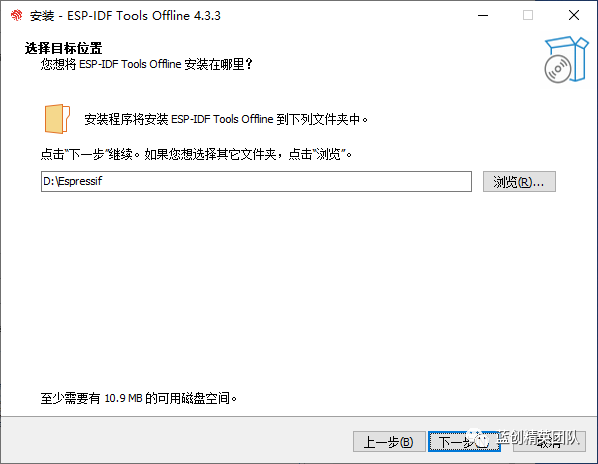
I usually choose D drive; if C drive is large, I just go with C drive.
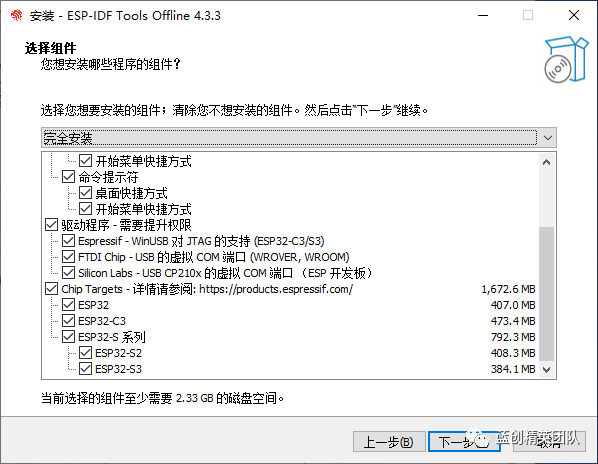
Select all and just click next.
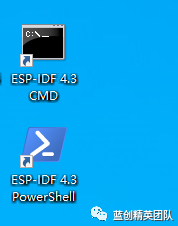
Finally, it generates what we need on the desktop.

Thus, the installation is complete.
Step 2: Install Other Tools
-
1. Python (3.7+)
-
2. Git
These two must be installed first.
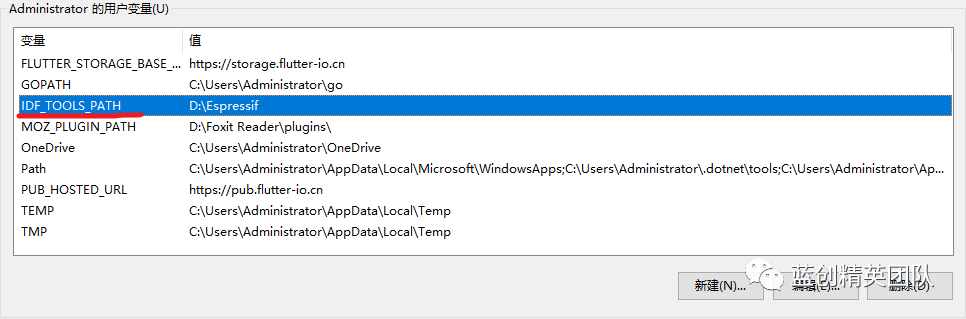
Step 3: Set Environment Variables
First, set the environment variables for the newly installed tools.

Set the environment variables for ESP-IDF
In the directory D:\Espressif\frameworks\esp-idf-v4.3.3 (or the corresponding directory), execute:
export.ps1Then execute:
install.ps1 allAfter execution, the user’s environment variables will have data.
Build System
Build Commands
The idf.py command includes the following functionalities:
-
1. CMake, to configure the project to be built
-
2. Command-line build tools (Ninja or GNU Make)
-
3. esptool.py, to flash the target hardware device
When building, the commands we use are:
-
1. Set the target platform for the build; my platform here is esp32.
idf.py set-target esp32-
2. Set the corresponding parameter information for the hardware platform.
idf.py menuconfigThis will display as shown in the following image:
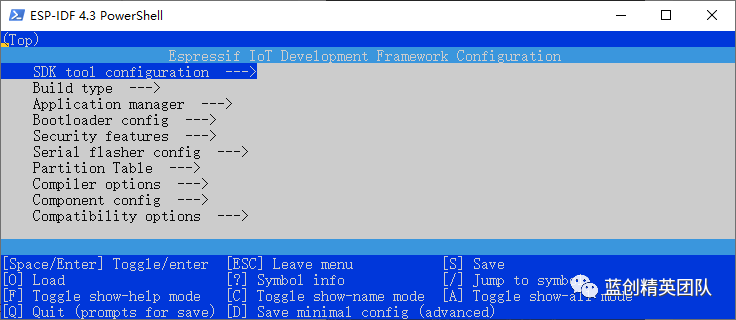
You can set specific variables for the project through this menu, including Wi-Fi network name, password, and processor speed, etc. The hello_world example project will run with the default configuration, so you can skip this menuconfig step for project configuration.
-
3. Build command
idf.py build-
4. Download to ESP32
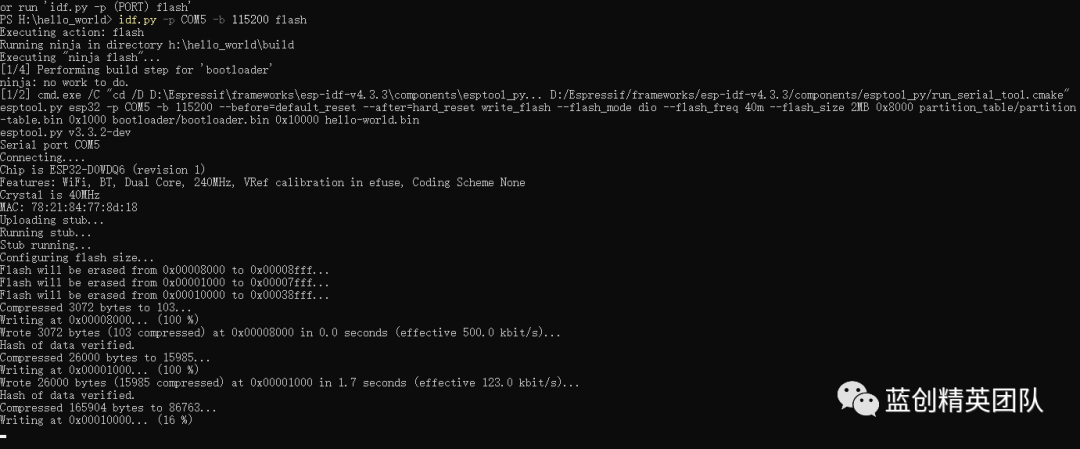
idf.py -p COM5 -b 115200 flashThe command is simple; com5 is the serial port name on my end, which you can change to yours.
115200 is the baud rate I set for the serial port; you can set it to the same or any other rate.
-
5. Clean or full clean
idf.py clean
idf.py fullclean
I tried both commands, and they can both serve the purpose of recompiling the project.
Build Example
Copy
D:\Espressif\frameworks\esp-idf-v4.3.3\examples\get-started\hello_world
Project to
H:\hello_world
This is how my directory looks; you can do it however you want.
Start Command Line
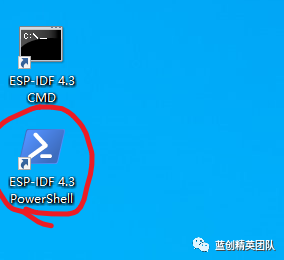
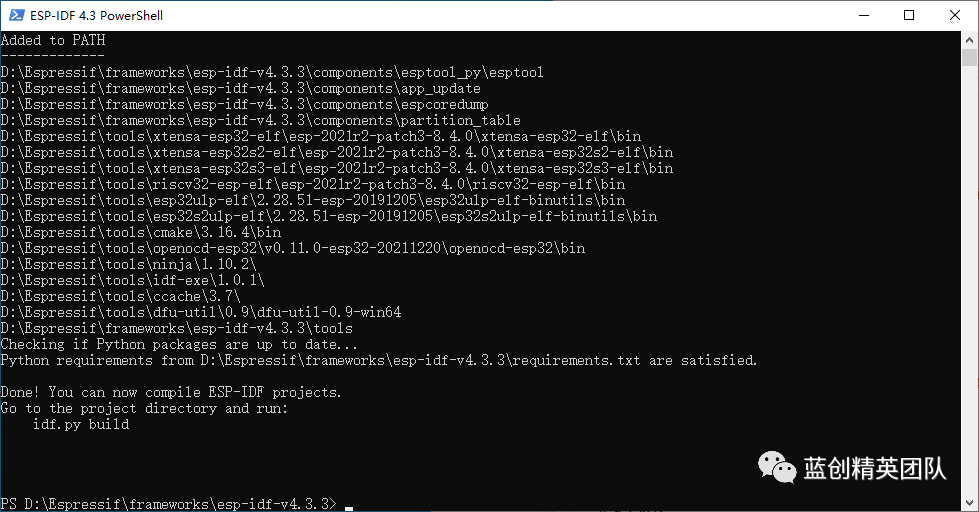
Start any of them; I started PowerShell.
It will automatically output a bunch of information; don’t worry about it.
Directly navigate to the copied project directory:
PS D:\Espressif\frameworks\esp-idf-v4.3.3> cd H:\hello_world
PS H:\hello_world>
Then, execute the command
PS H:\hello_world> idf.py buildIt will output a lot of information, including the compilation process and linking process.

Just wait for it to compile completely.

Once compiled, it outputs the above message.
D:\Espressif\python_env\idf4.3_py3.8_env\Scripts\python.exe D:\Espressif\frameworks\esp-idf-v4.3.3\components\esptool_py\esptool\esptool.py -p (PORT) -b 460800 --before default_reset --after hard_reset --chip esp32  write_flash --flash_mode dio --flash_size detect --flash_freq 40m 0x1000 build\bootloader\bootloader.bin 0x8000 build\partition_table\partition-table.bin 0x10000 build\hello-world.bin
or run 'idf.py -p (PORT) flash'
This command indicates that it actually generates three bin files:
-
1. build\bootloader\bootloader.bin 0x1000
-
2. build\partition_table\partition-table.bin 0x8000
-
3. build\hello-world.bin 0x10000
These three bin files are: bootloader, partition table, and application program, which are the internal flash addresses where they are stored.
Why is there such a structure? Stay tuned for later explanations (some experts probably already know).
Of course, the system also provides a command to execute
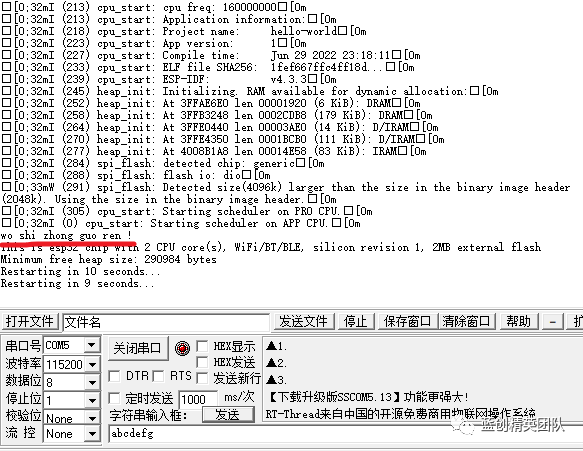
idf.py -p COM5 -b 115200 flashAfter execution, as shown in the following image:
Then, you can check with the serial assistant (be careful with serial port occupancy issues; try to ensure only one party is using it).
In the original example code, I have already modified it. Currently, it does not support Chinese serial assistants, but that’s for later.
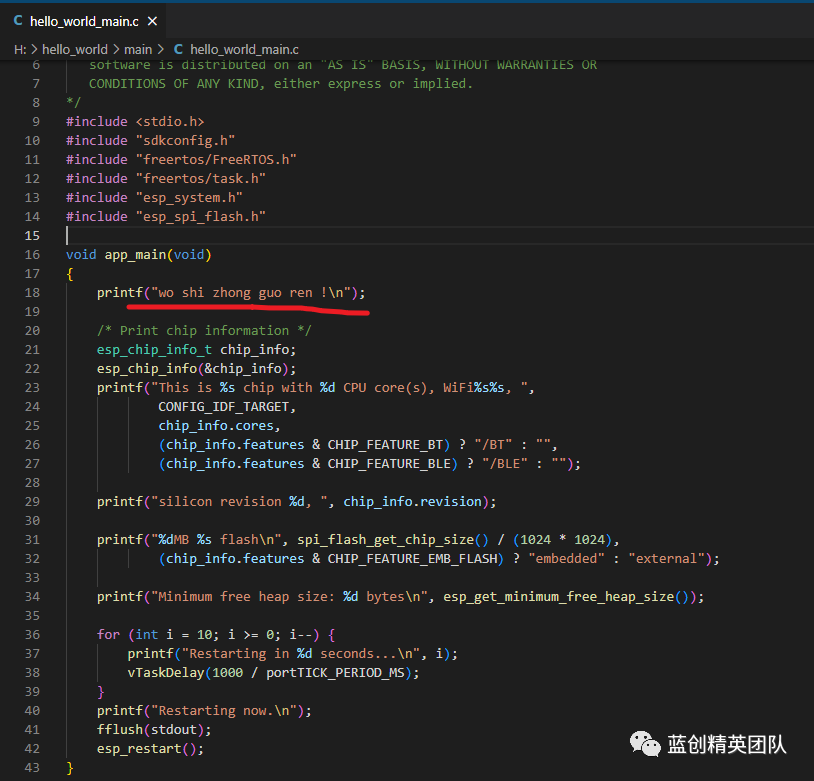
Through the serial assistant, we can see that the result is as we expected.
Summary
We have completed the logic modification, compilation, generation, and downloading of the ESP32 project based on the official ESP-IDF tool. There are many official examples, and you can try more to learn.
Next, I will burn the NanoFramework and generate it, at which point, I will be able to use C#. For now, it’s still C. One step at a time.
Reference Links
https://docs.espressif.com/projects/esp-idf/en/latest/esp32/get-started/index.html
Read
Don’t forget to support me with a like, your support is my motivation!