1 Overview
TASKING® SmartCode is a development solution for Infineon’s next-generation AURIX™ TC4x microcontroller family. SmartCode generates fast and compact code and is the only comprehensive software development platform that supports all architectures and cores of TC4x.
SmartCode compiler cores:
1)TriCore TCv1.8 core and network security real-time module (CSRM)
2)Synopsys‘ parallel processing unit (PPU)
3)Bosch’s latest GTM(IP4.1 version)
4)SCR (XC800)
Next, we will start with the software installation to fully understand SmartCode.
2 Software Installation
The installation process for SmartCode is generally the same for both the floating and standalone versions, with some differences in certain steps. This article primarily describes the installation process for the floating version, highlighting the different parts for the standalone version.
2.1 Floating Version Software Installation
Unzip the downloaded package, run “setup.exe”, and the software will pop up an installation interface (Figure 1). Click the “Install” button to continue the installation process.
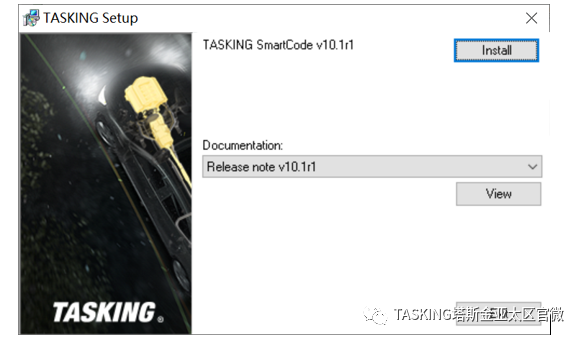
Figure 1: Installation Interface
The “Software Installation Wizard” interface will appear (Figure 2). Click the “Next” button to proceed.
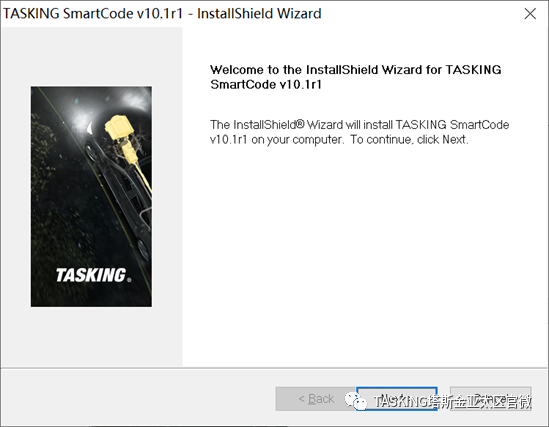
Figure 2 Software Installation Wizard
The “License Agreement” interface will appear (Figure 3), select “I accept……”, and click the “Next” button to proceed.
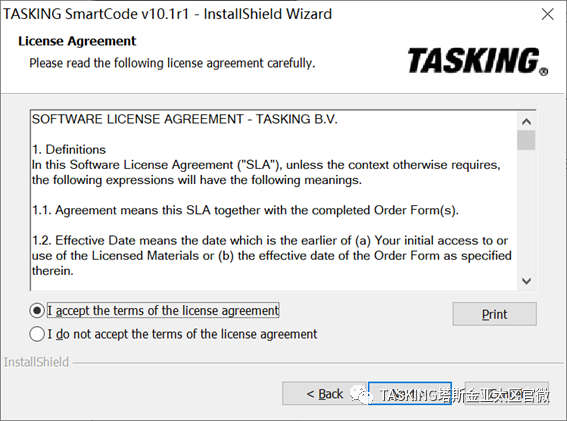
Figure 3: License Agreement
Switch to the “License Key Input” interface (Figure 4), enter the 16-digit license key from the license email into the input field, and click the “Next” button to proceed.
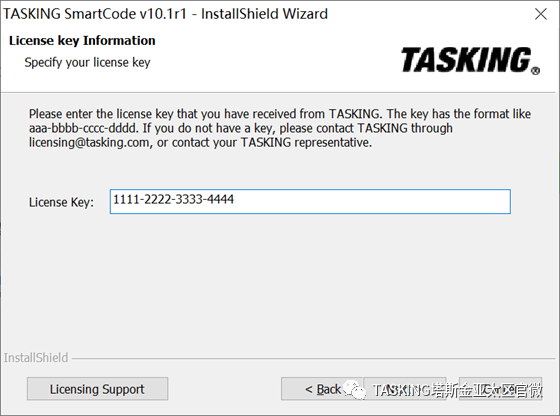
Figure 4: License Key Input
Switch to the “License Type Selection” interface (Figure 5). If online, the software will automatically recognize the license type. If offline, manually select “Floating License”.
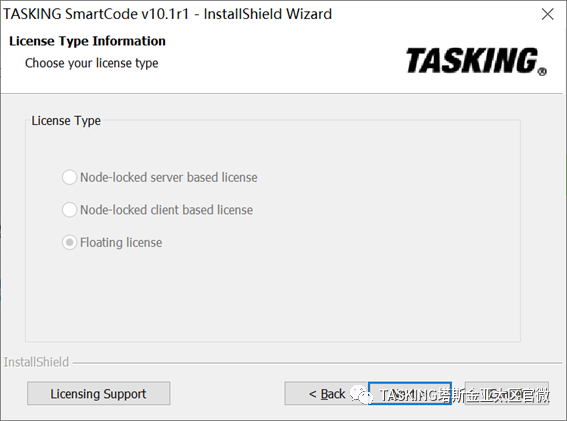
Figure 5: License Type Selection
Switch to the “Server Settings” interface (Figure 6), where the remote server is for customers with a “Global” license; for local servers, enter the server’s IP and port number, then click the “Next” button to proceed.
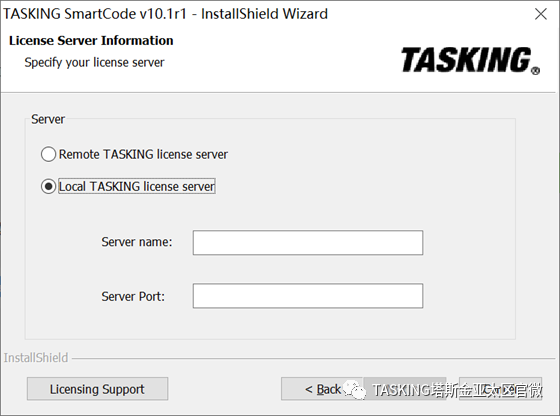
Figure 6: Server Selection and Settings
Switch to the “Program Installation Path Selection” interface (Figure 7), choose the installation path as needed; using the default installation path is generally done by clicking the “Next” button to proceed.
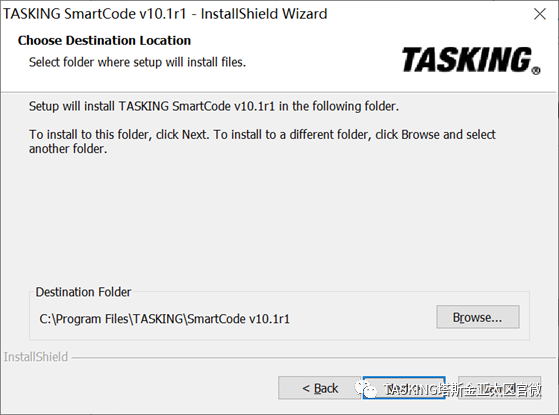
Figure 7: Installation Path Selection
Switch to the “Program Shortcut Setting” interface (Figure 8), generally click the “Next” button to proceed.
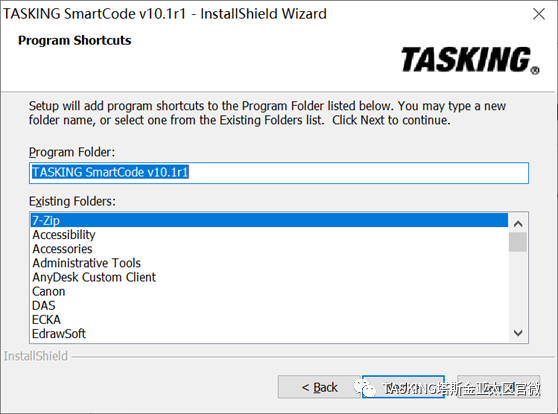
Figure 8: Program Shortcut
Next, switch to the “Program Feature Selection” interface, ensure that “Eclipse IDE” is checked, and click the “Next” button to proceed.
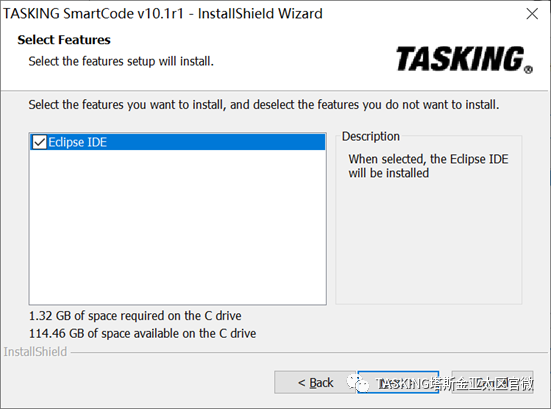
Figure 9: Program Feature Selection
SmartCode’s IDE interface is based on Eclipse, requiring Java 11 or higher to run. If the installer does not find JRE or has an incorrect version installed on the system, it is recommended to install AdoptOpenJDK. When the Figure 10 window appears, check “AdoptOpenJDK 11”, and click “NEXT” to proceed.
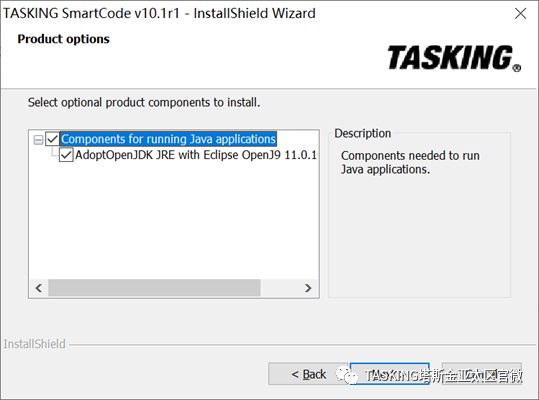
Figure 10: JDK Installation Selection
Switch to the “Review Information” interface, check if the license key, installation path, and other information are correct. If modifications are needed, click “Back” to return to the previous interface for changes. If no modifications are needed, click the “Next” button to proceed.
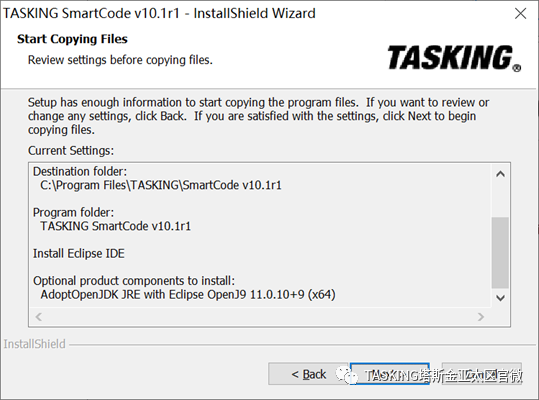
Figure 11: Review Information Window
Next, the software installation status will be displayed, with a progress bar indicating the degree of installation (Figure 12).
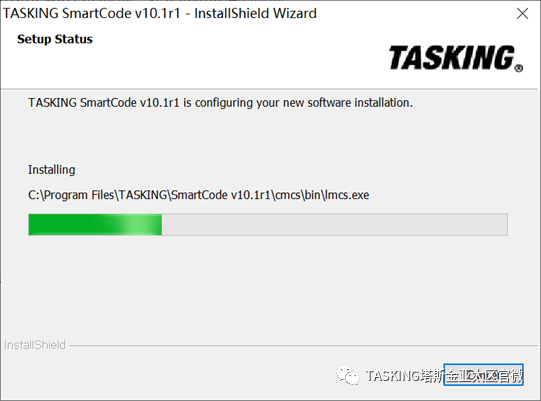
Figure 12: Software Installation Progress
After the software installation is complete, it will switch to the window shown in Figure 13. Click “Finish” to complete the entire process.
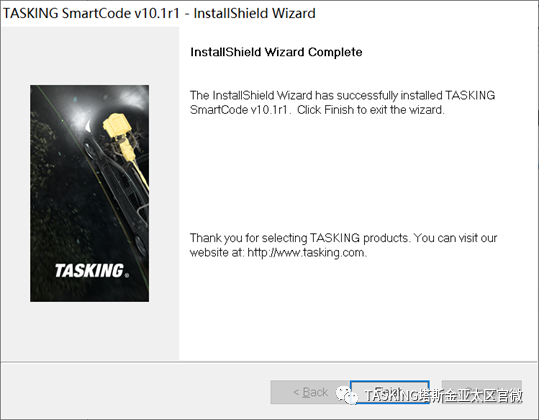
Figure 13: Installation Complete Window
2.2 Standalone Version Software Installation
The installation process for the standalone version is generally the same as the floating version, with slight differences in the License section. Only the different parts are mentioned here. In an online state, the license type can be automatically recognized (as shown in Figure 14), click the “Next” button to proceed.
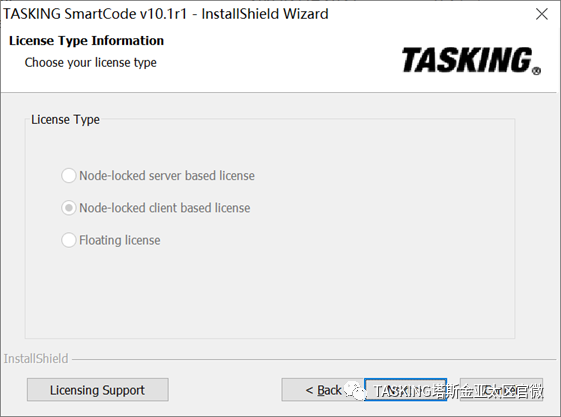
Figure 14: Standalone Version License Type Selection
Automatically load the license description information. As shown in Figure 15.
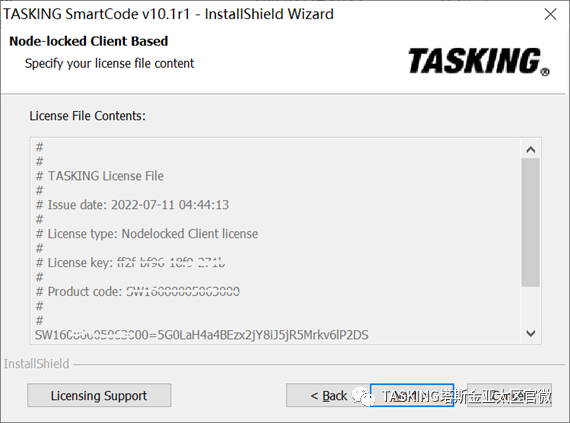
Figure 15: License Description Information
If offline, manually select “Node-Locked client based license”, click the “Next” button to proceed. A window will appear Figure 16, copy the license content from the email, which starts with SW and ends with ==, into the box. Click the “Next” button to proceed.
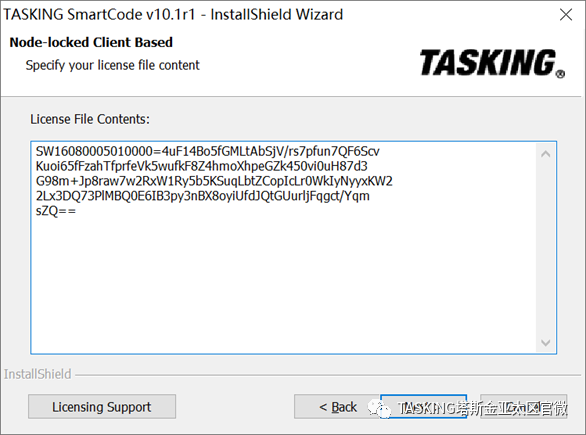
Figure 16: License Description Information Input
The remaining steps are the same for both standalone and floating versions, and will not be elaborated here. Readers can refer to the previous section.
3 Eclipse Parameter and System Environment Variable Settings
After installing SmartCode, you need to configure the parameters of the eclipse.ini file.
First, use the -vm option to specify OpenJDK as the virtual machine, as shown below (needs to be on line 2):
-vm
C:\Program Files\AdoptOpenJDK\jre-11.0.10.9-openj9\bin\javaw (JDK installation path).
Next, you need to set the memory.
-XX:MaxPermSize: Maximum allowed non-heap memory allocation. The value can be set larger; if issues arise, please adjust it first.
-Xms: Minimum memory occupied by the virtual machine (unit M), initial allocation, can be set relatively larger. For example, -Xms1024m-Xmx: Maximum memory occupied by the virtual machine (unit M), allocated as needed. It can be set larger, for example, -Xmx 4096M, -Xmx 6128M.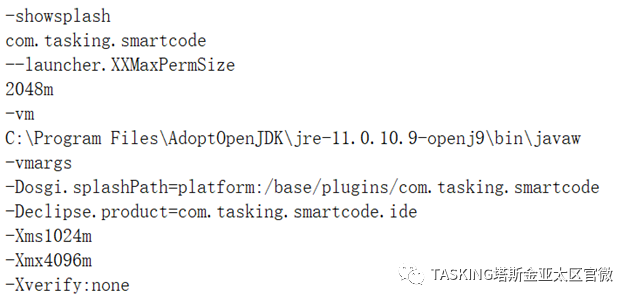
Figure 17: Modified eclipse.ini File Example
Next, check the system environment variables. Open the system environment variable interface, find “Path” in the system variables, select it and click “Edit”. After popping up the edit environment variable window, check the path for AdoptOpenJDK “C:\Program Files\AdoptOpenJDK\jre-11.0.10.9-openj9\bin\javaw”. If the path does not exist, you need to manually add it. It is recommended to move it down the order, not to the top, so as not to affect other programs.
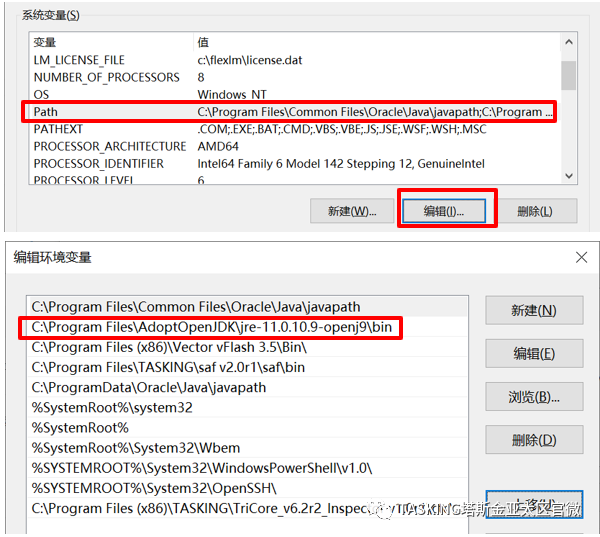
Figure 18: System Environment Variable Settings
4 Installation Common Issues
After installing SmartCode, some common issues you may encounter include: 1) SmartCode cannot run; 2) Previous versions of TASKING cannot run.
4.1 SmartCode Cannot Run
4.1.1 Uninstalled JDK/JRE
The SmartCode IDE is based on Eclipse, and requires JRE 11 or higher to run. If no JDK or JRE is installed on the computer, the SmartCode IDE interface cannot run, and a pop-up like Figure 19 will appear. The solution is to check the option to install “AdoptOpenJDK” during software installation (see Figure 10), or download the latest version of JDK/JRE for installation.
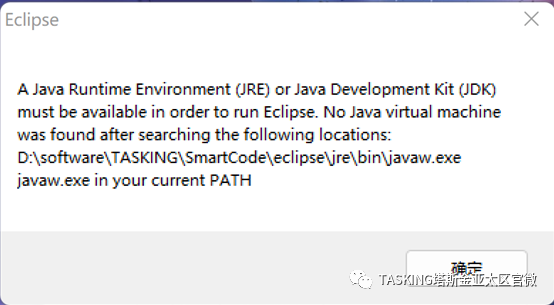
Figure 19: Pop-up for Uninstalled JRE or JDK
4.1.2 System Environment Variable Setting Issues
If SmartCode is installed, and JDK is properly installed, but the software still cannot open and a pop-up like Figure 20 appears, it means the system environment variable Path option is set incorrectly. Eclipse cannot find the path.
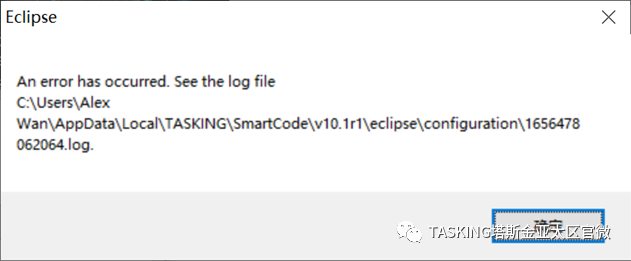
Figure 20: Pop-up Caused by Path Setting Issues
The solution to this problem is to adjust the order of the Path in the system environment variables; moving it to the top will resolve the issue. It is still recommended to add the virtual machine path in Eclipse.ini (see Chapter 3); merely adjusting the order of Path may affect other software’s operation.
4.2 TASKING Other Versions of Software Cannot Run
After installing SmartCode, it can run normally. If other versions of TASKING software, such as 6.3r1, are installed on the computer, a pop-up may appear during execution (as shown in Figure 21).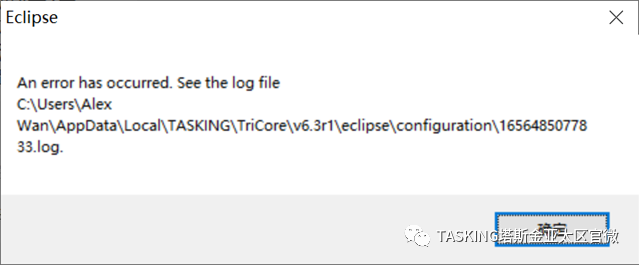
Figure21 TASKINGVX–toolset 6.3r1 Software Cannot Run Pop-up
This is because, during the installation of SmartCode, the option to install AdoptOpenJDK was selected, which changes the system environment variable Path, preventing the old version of “Eclipse IDE” from starting. This issue can be resolved by adjusting the order in the Path of the system environment variable. However, this may cause SmartCode to not run. A more permanent solution is to update the eclipse.ini file of the old TASKING product: use the -vm option to specify the virtual machine as shown below (needs to be on line 2).
-vm
C:\Program Files\Common Files\Oracle\Java\javapath.
The old TASKING product’s Eclipse IDE can correctly find the JDK path upon startup, allowing it to be used as before with Oracle Java.
5 Contact Us
If you have technical issues, please contact TASKING China for the most professional and timely technical support. Email: [email protected] Official Website: www.tasking.com Trial Application: https://www.tasking.com/trial Please follow the official subscription account for the latest TASKING information and technical documents.