RTC: Real Time Clock.
In previous projects, an external clock chip was often used. With the growth of demand and technological advancements, many MCUs now integrate the RTC (Real Time Clock) module internally.This article describes the usage of the RTC module in conjunction with the e2 studio development environment and the RA8D1 microcontroller.
Preparation
1
Download and install the e2 studio tool
Download link, recommended from Renesas official GitHub:
GitHub
https://github.com/renesas/fsp/releases
 We will take the Renesas RA8D1 microcontroller as an example (of course, the RA series microcontrollers are similar):
Configuring the RTC Module in e2 studio
This article is based on the e2 studio development environment and the RA8D1 microcontroller to implement date and time functionality.
1
Create a Project
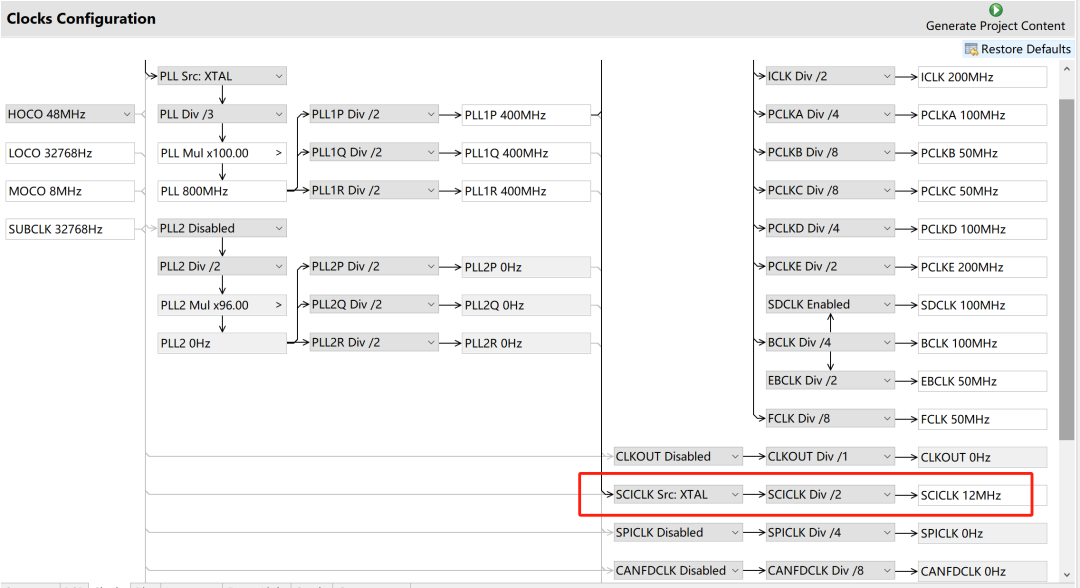
We will use serial output for debugging, expanding on the previously shared UART serial project. Here are a few important points: first, the UART clock needs to select the SCICLK clock:
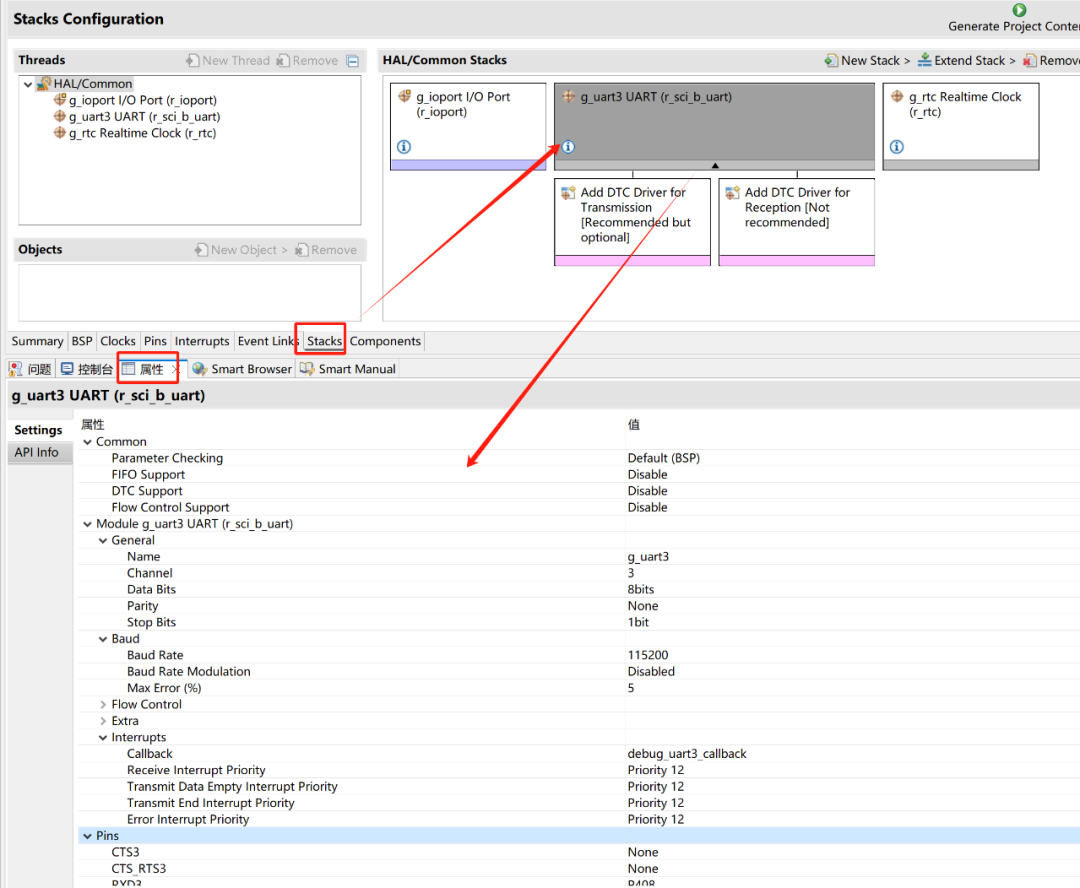
 Next, configure the UART settings:
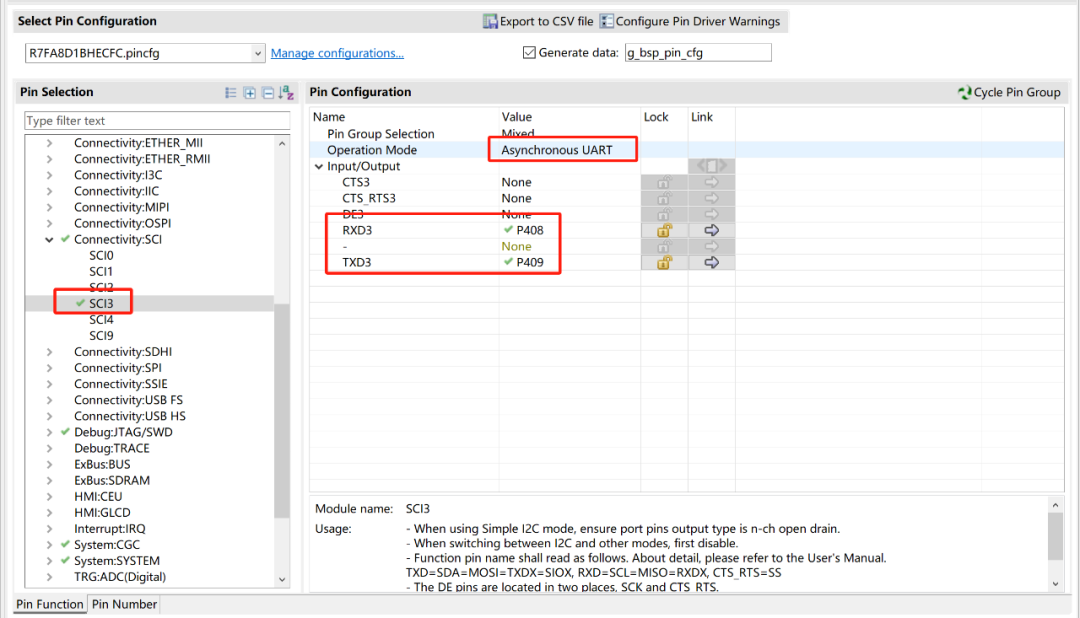
 Also, set the menu: Project -> C/C++ Project Settings:
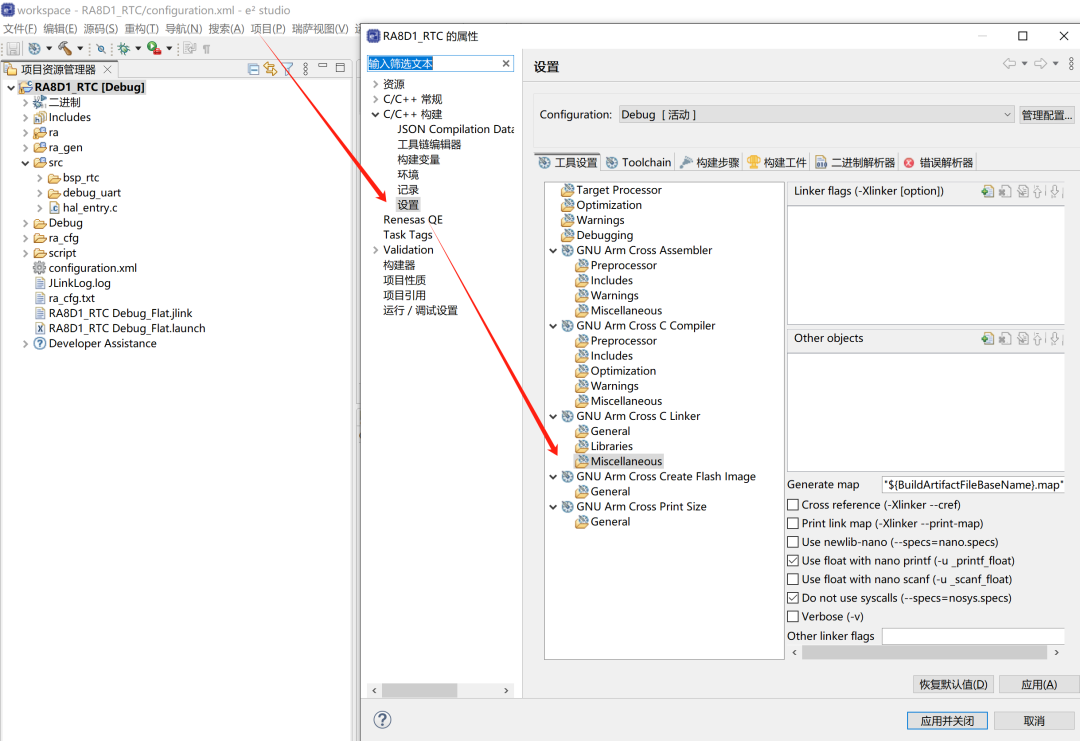
2
Configure the RTC Module
To facilitate understanding, we will first configure the RTC in the most basic way, then read the RTC every second and print the output via UART.
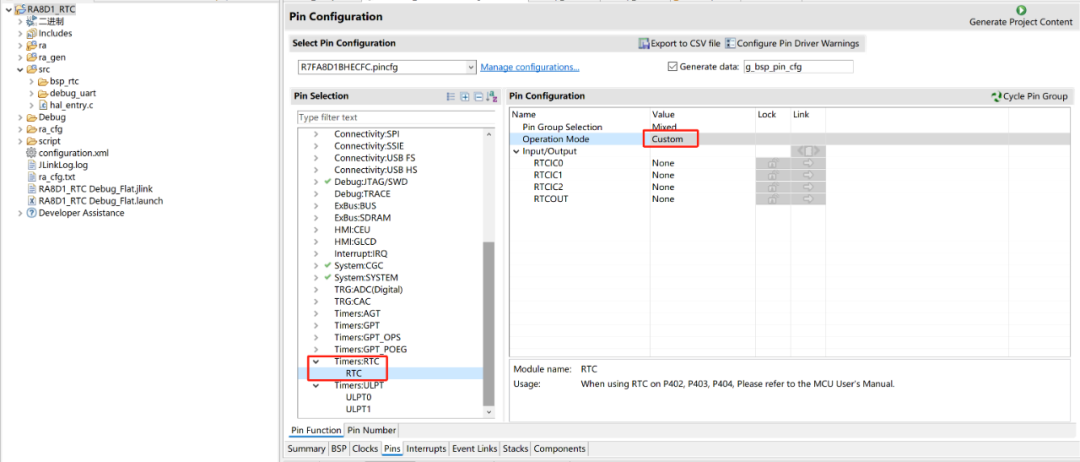
Configuring the RTC: Under the Pins option, select RTC and configure the mode.
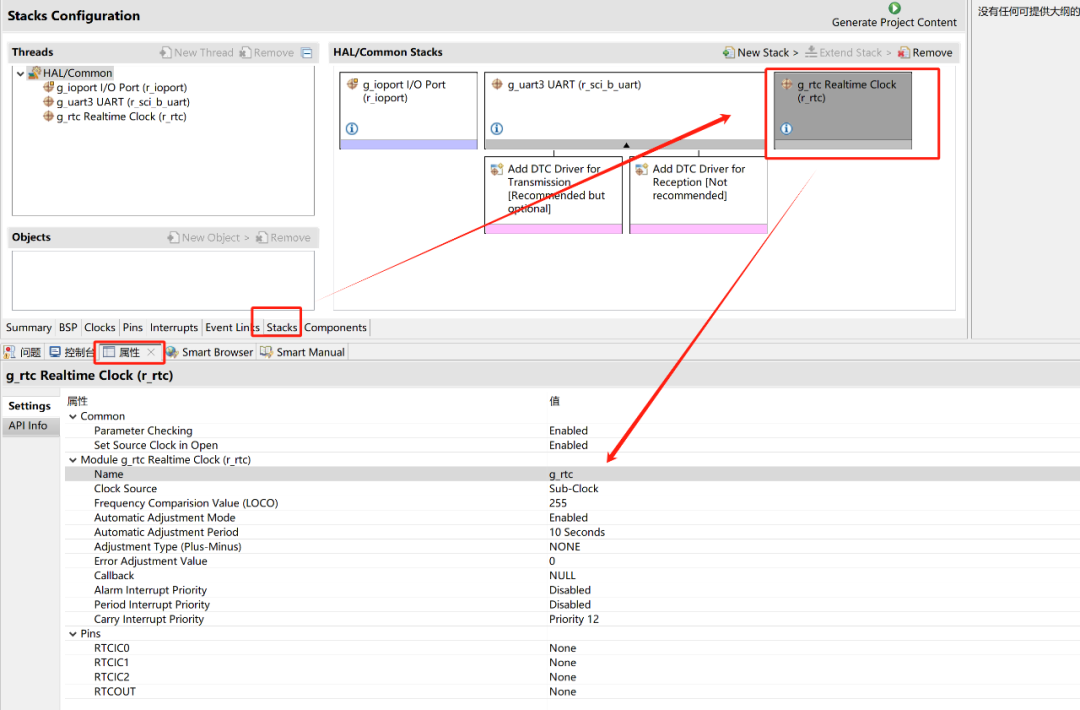
 Create a new RTC module: We add the RTC module and configure the relevant properties (the default settings are usually sufficient).
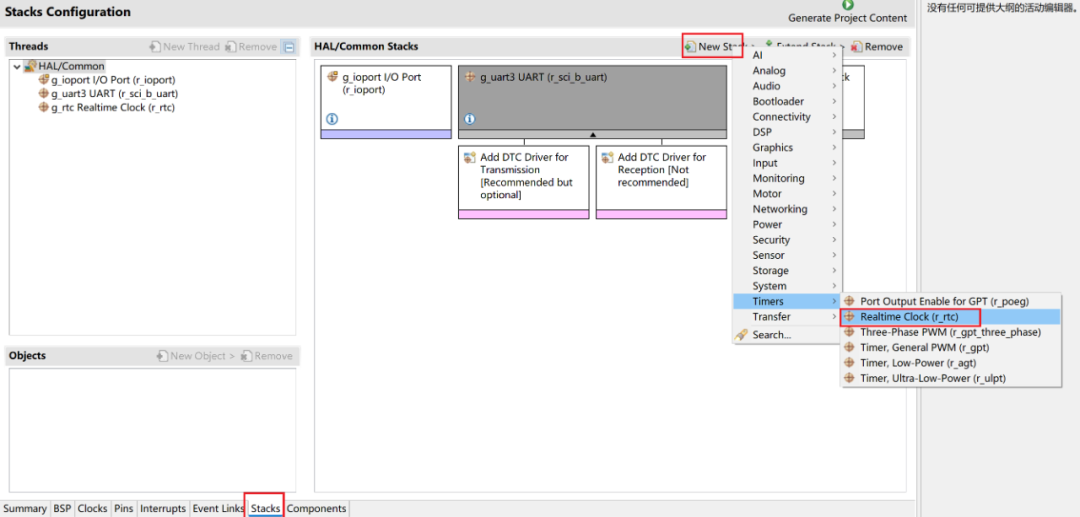
3
Add Source Code
We will simply add an RTC module (source code file), as shown:
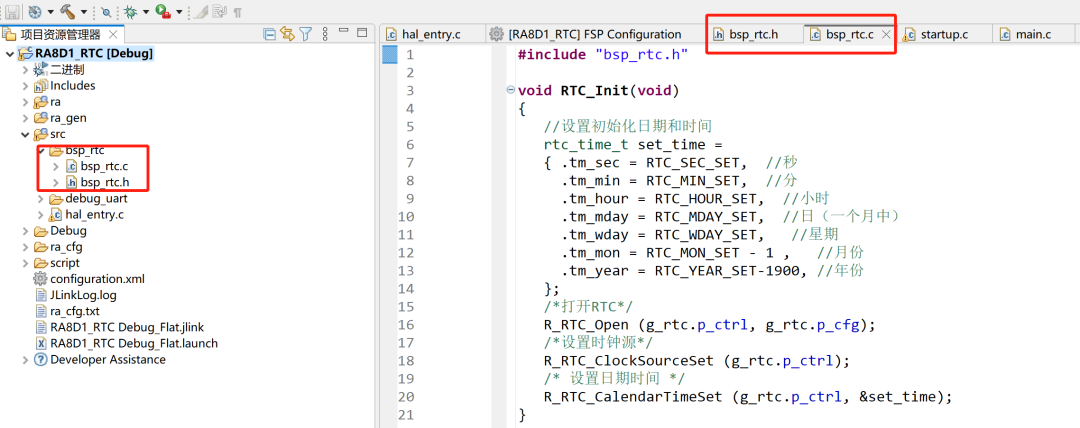 Source code for bsp_rtct.c:
#include "bsp_rtc.h"
void RTC_Init(void){   // Set initial date and time   rtc_time_t set_time =   { .tm_sec = RTC_SEC_SET,  // seconds     .tm_min = RTC_MIN_SET,  // minutes     .tm_hour = RTC_HOUR_SET,  // hours     .tm_mday = RTC_MDAY_SET,  // day of the month     .tm_wday = RTC_WDAY_SET,   // week day     .tm_mon = RTC_MON_SET - 1 ,   // month     .tm_year = RTC_YEAR_SET-1900, // year   };   /* Open RTC */   R_RTC_Open (g_rtc.p_ctrl, g_rtc.p_cfg);   /* Set clock source */   R_RTC_ClockSourceSet (g_rtc.p_ctrl);   /* Set date and time */   R_RTC_CalendarTimeSet (g_rtc.p_ctrl, &set_time);}
Source code for bsp_rtc.h:
#ifndef BSP_RTC_H
#define BSP_RTC_H
#include "hal_data.h"
/********** Date Macro Definitions **********/
#define RTC_YEAR_SET 2024       // year
#define RTC_MON_SET 10           // month
#define RTC_MDAY_SET 31          // day
/* Calculate week day */
#define RTC_WDAY_SET (RTC_YEAR_SET-2000 \
                  + ((RTC_YEAR_SET-2000)/4) \
                  - 35 + (26*(RTC_MON_SET+1))/10 \
                  + RTC_MDAY_SET -1 )%7
/********** Time Macro Definitions **********/
#define RTC_HOUR_SET 23          // hour
#define RTC_MIN_SET 59           // minutes
#define RTC_SEC_SET 50           // seconds
void RTC_Init(void);
#endif
Here we have simply configured (initialized) the date and time, and then in the application, we read and print the output every second.
void hal_entry(void){ static rtc_time_t get_time;
Debug_UART3_Init(); // SCI3 UART debug serial initialization RTC_Init(); // Initialize RTC
while(1) { R_IOPORT_PinWrite(&g_ioport_ctrl, BSP_IO_PORT_10_PIN_01, BSP_IO_LEVEL_LOW); R_BSP_SoftwareDelay(500, BSP_DELAY_UNITS_MILLISECONDS); // Delay 500ms
R_IOPORT_PinWrite(&g_ioport_ctrl, BSP_IO_PORT_10_PIN_01, BSP_IO_LEVEL_HIGH); R_BSP_SoftwareDelay(500, BSP_DELAY_UNITS_MILLISECONDS); // Delay 500ms
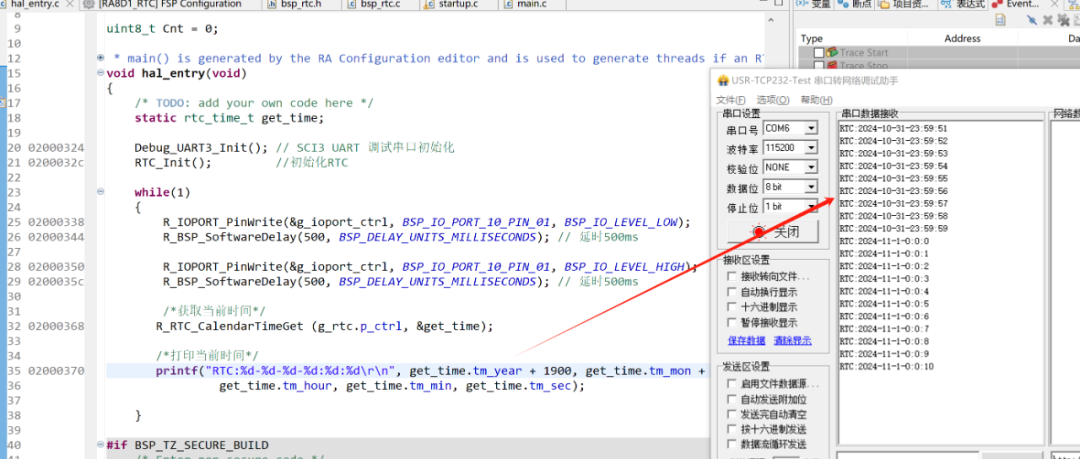
/* Get current time */ R_RTC_CalendarTimeGet (g_rtc.p_ctrl, &get_time);
/* Print current time */ printf("RTC:%d-%d-%d-%d:%d:%d\r\n", get_time.tm_year + 1900, get_time.tm_mon + 1, get_time.tm_mday, get_time.tm_hour, get_time.tm_min, get_time.tm_sec);
}}4
Demonstration Effect
Here, we actively read the RTC every second and print the output, resulting in the following effect:
 From the above configuration, you will find it quite simple. There is also a method to print output via RTC (1 second) interrupt, which eliminates the need for active reading.The method is quite simple, configure the interrupt:
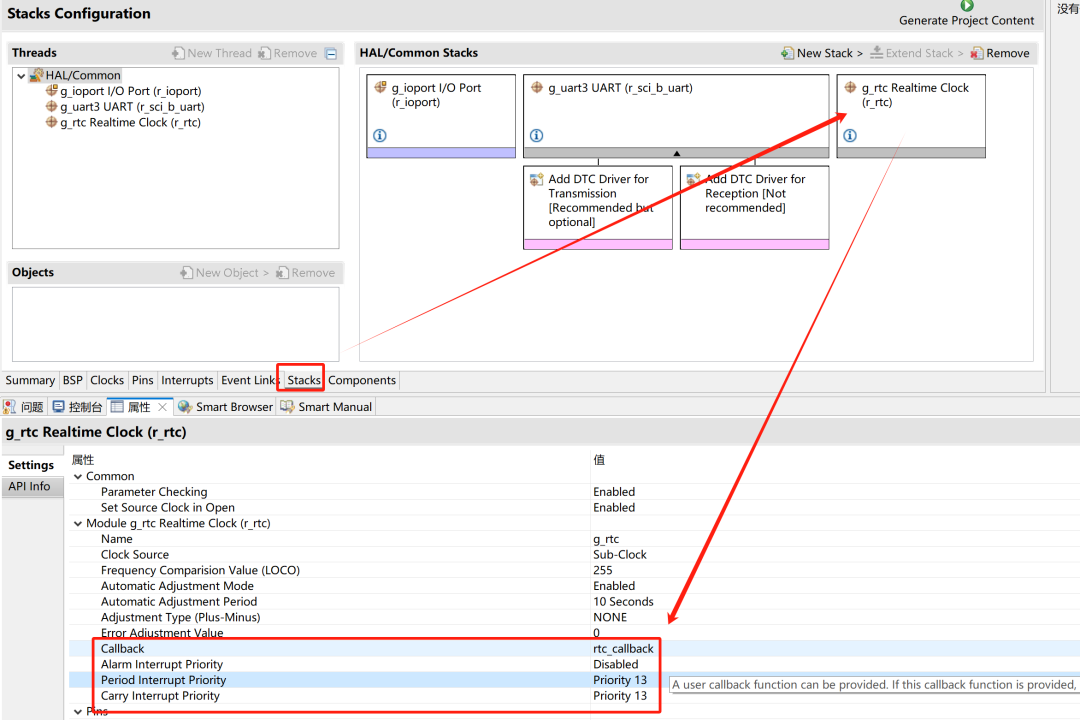 Then add the rtc_callback interrupt callback function in the code.
void rtc_callback(rtc_callback_args_t *p_args){      static rtc_time_t get_time;
      switch (p_args->event)      {         /* If it is a periodic interrupt, print date and time */         case RTC_EVENT_PERIODIC_IRQ:
            /* Get current time */            R_RTC_CalendarTimeGet (g_rtc.p_ctrl, &get_time);
            /* Print current time */            printf("RTC:%d-%d-%d-%d:%d:%d\r\n", get_time.tm_year + 1900, get_time.tm_mon + 1, get_time.tm_mday,                get_time.tm_hour, get_time.tm_min, get_time.tm_sec);            break;         default:            break;      }}
The implementation effect is the same, so there is no need for the application to actively read.This concludes the article, and I hope it is helpful to you.

Need Technical Support?
If you have any questions while using Renesas MCU/MPU products, you can scan the QR code below or copy the URL into your browser to access the Renesas Technical Forum for answers or online technical support.

https://community-ja.renesas.com/zh/forums-groups/mcu-mpu/
Recent Events Overview
See you in Shanghai on April 18! The 2025 Renesas Industrial Ethernet Technology Day concludes with a show.
—— Sign up to win great prizes by April 18
1
END
1
To be continued
Recommended Reading

Renesas RA8 Series Tutorial | How to Run RTOS on RA8 Based on e2s

Renesas RA8 Series Tutorial | Configuring IO Interrupts for Renesas RA8 Microcontroller

Renesas RA8 Series Tutorial | How to Implement PWM Output on RA8