Introduction to VS Code
VS Code (Visual Studio Code) is a free and versatile code editor developed by Microsoft, supporting almost all major programming languages and frameworks. Recently, it has added the GitHub Copilot feature, allowing users to smoothly transition into the era of AI programming, further enhancing coding efficiency. It also supports multiple operating systems, including Windows, Linux, and Mac, and can be downloaded from the 【Visual Studio Code Official Website】 (>=v1.96.0).(You can copy the link below into your browser or scan the QR code to view)
Visual Studio Code Official Website
https://code.visualstudio.com/

Renesas Electronics, as a globally recognized embedded processor manufacturer, keeps pace with technological trends and actively adapts to the VS Code development ecosystem. They have developed the Renesas VS Code Extensions for various types of Renesas MCU and MPU platforms, helping users build and debug Renesas C/C++ projects in VS Code. This includes:
-
Renesas Build Utilities for Project Building
(You can copy the link below into your browser or scan the QR code to view)
Renesas Build Utilities for Project Building
https://marketplace.visualstudio.com/items?itemName=RenesasElectronicsCorporation.renesas-build-utilities

-
Renesas Debug for Project Debugging
(You can copy the link below into your browser or scan the QR code to view)
Renesas Debug for Project Debugging
https://marketplace.visualstudio.com/items?itemName=RenesasElectronicsCorporation.renesas-debug

This article will be divided into three parts to introduce the usage steps and considerations for the RA, RX, and RL78 series MCU platforms in VS Code.
Introduction to RA MCU
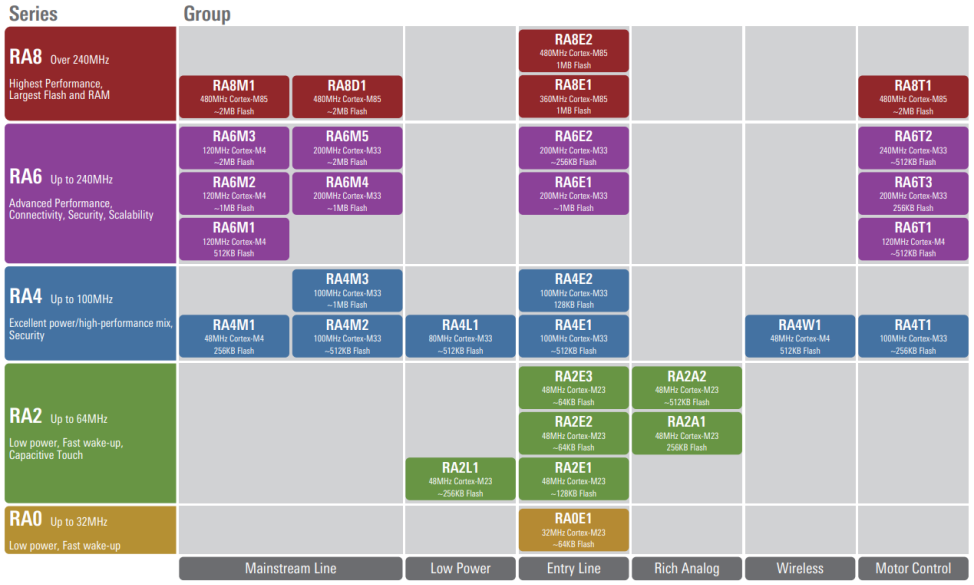
The RA family of MCUs uses Arm®Cortex®-M33, -M23, -M4, and -M85 processor cores, and is PSA certified, making it an industry-leading 32-bit MCU. Currently, it includes the RA0/RA2/RA4/RA6/RA8 series.
Specific steps are as follows:
Software Installation
1
Install Python
-
Download and install 64-bit Python 3.10.0 or above from the link below.(You can copy the link below into your browser or scan the QR code to view)
64-bit Python 3.10.0
https://www.python.org/downloads/

-
Add the path of the Python 3.10 folder to the “path” environment variable. You can refer to this blog post.(You can copy the link below into your browser or scan the QR code to view)
Installing Python Environment and Configuring Environment Variables on Windows (Detailed Tutorial) – python windows environment variables – CSDN Blog
https://blog.csdn.net/Lyh1gguyg/article/details/146276117

2
Install RA Smart Configurator (RASC)
-
Download and install from the link below.(You can copy the link below into your browser or scan the QR code to view)
RA Smart Configurator (RASC) Installation
https://github.com/renesas/fsp/releases

3
Install CMAKE and Ninja
-
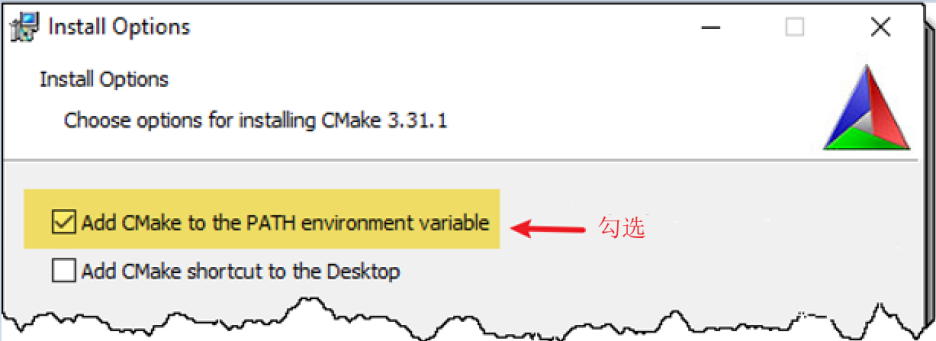
Download the CMake Windows x64 installer (.msi) from the link below and install it.(You can copy the link below into your browser or scan the QR code to view)
Note: CMAKE version greater than 3.31.1 is required.
CMake Windows x64 installer (.msi)
https://cmake.org/

-
During installation, make sure to add the CMake folder path to the “path” environment variable.
-
Download ninja-win.zip from the link below. Unzip the zip file and copy ninja.exe to the bin folder of the CMake installation path.(You can copy the link below into your browser or scan the QR code to view)
ninja-win.zip
https://github.com/ninja-build/ninja/releases/

-
Open the Windows command window. Enter
ninja --versionandcmake --versionto check if the installation was successful and if it has been added to the environment variables.

4
Install and Configure the GCC and LLVM Toolchains
-
GCC(You can copy the link below into your browser or scan the QR code to view)
GCC
https://developer.arm.com/downloads/-/arm-gnu-toolchain-downloads

-
LLVM(You can copy the link below into your browser or scan the QR code to view)
LLVM
https://github.com/ARM-software/LLVM-embedded-toolchain-for-Arm/releases

-
Note, ensure that the toolchain version you download matches the FSP version you are using.
-
Add the path of the GCC bin folder to the ARM_GCC_TOOLCHAIN_PATH environment variable, and the path of the LLVM bin folder to the ARM_LLVM_TOOLCHAIN_PATH environment variable.
Note, some users may encounter issues with the above variables not being found after adding GCC and LLVM to the environment variables. In such cases, try running VS Code with administrator privileges.

5
Install and Configure RASC
For RA projects, it is recommended to install and configure RASC (RA Smart Configurator) before starting development. Download and install RASC from the link below.(You can copy the link below into your browser or scan the QR code to view)
RASC
https://github.com/renesas/fsp/releases
6
Open VS Code
Open VS Code and ensure that the Renesas Build Utilities and Renesas Debug extensions are installed.
-
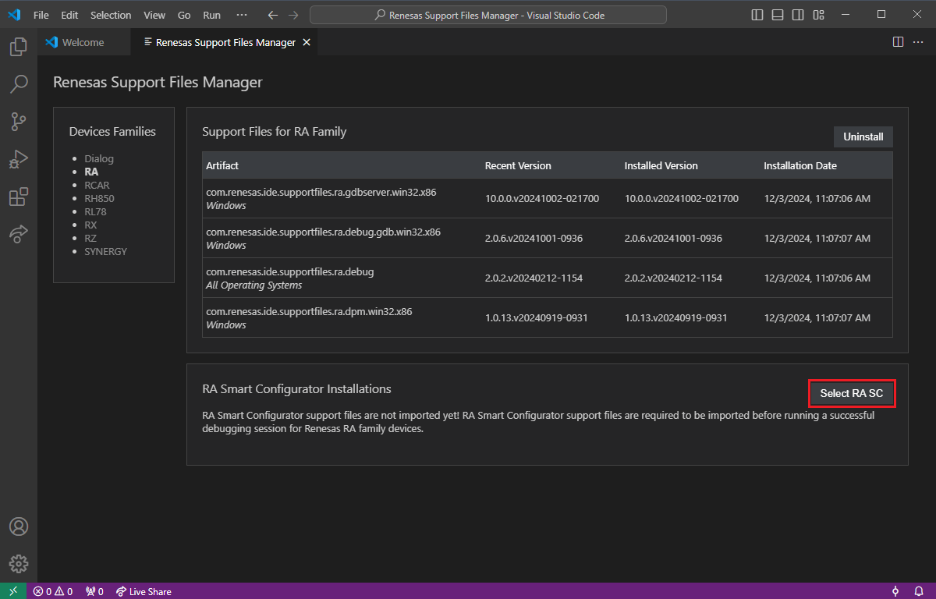
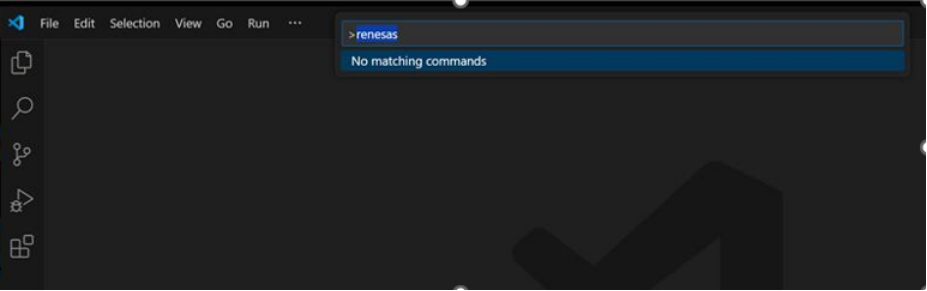
Open the Command Palette (click View => Command Palette from the menu, or use the CTRL+SHIFT+P shortcut), then click Renesas: Open Renesas Support Files Manager.

-
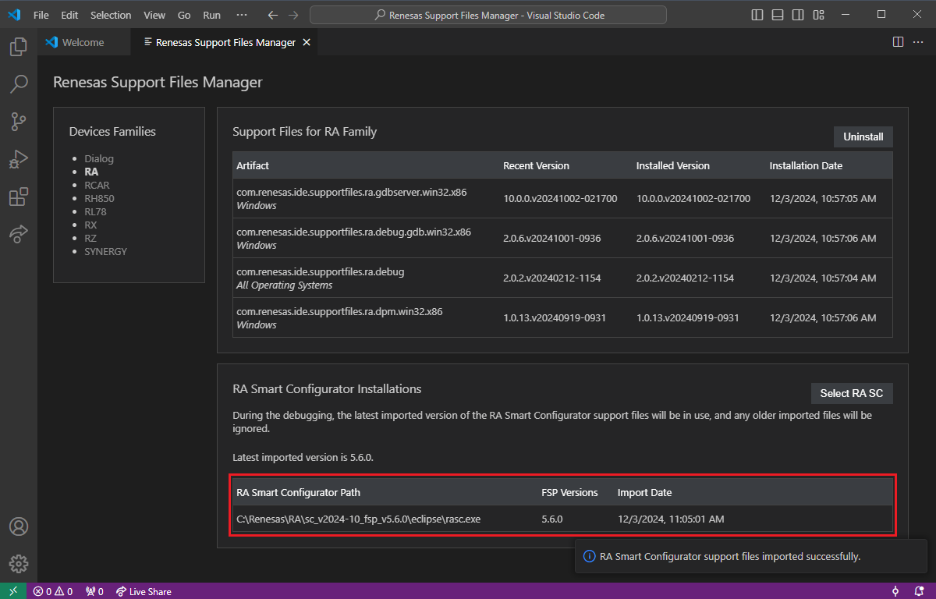
Select RA on the left, then choose Install, and wait for the installation to complete.

-
Add Smart Configurators.
-
Click the Select RA SC button.
-
Select the installed rasc.exe in the pop-up dialog.
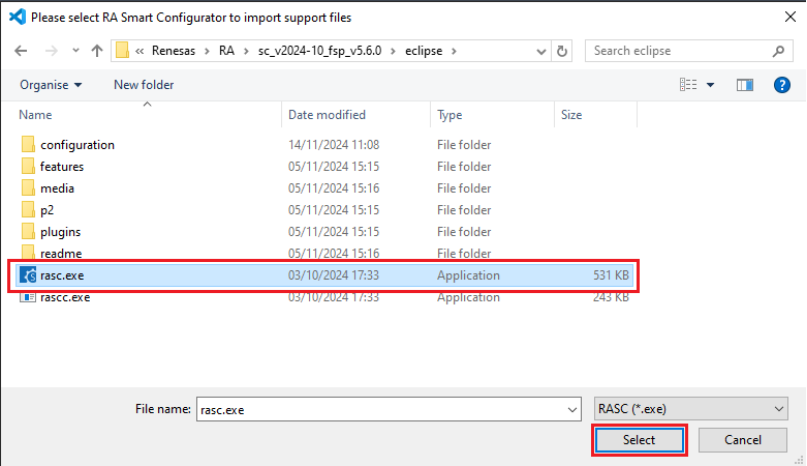
-
The Renesas Debug extension will automatically import and register RASC in VS Code.
-
This process will register the Smart Configurator for use and import the necessary device files for debugging.
7
Create a Project
-
Open VS Code, click View→Command Palette, and select Renesas: Create RA Project with Smart Configurator.

-
VS Code will display a list of installed RA Smart Configurators; select one of the Smart Configurators.

-
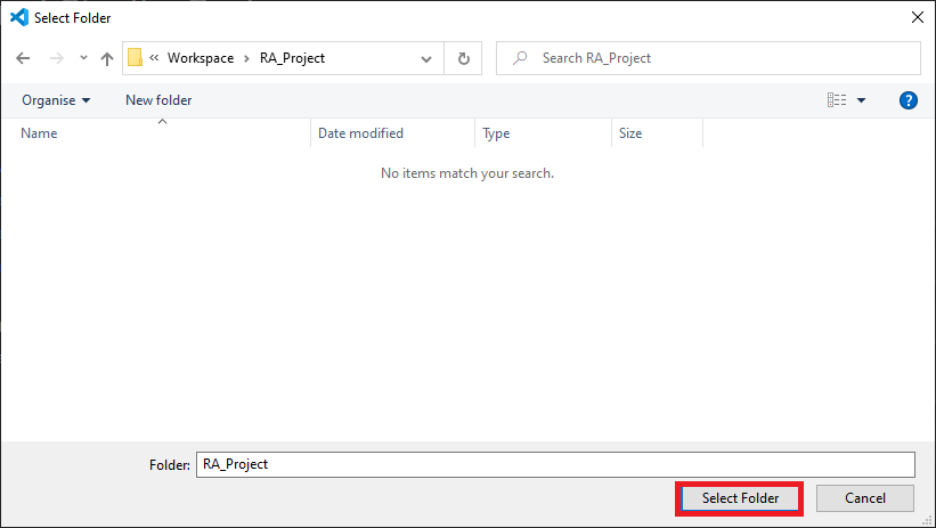
Select the folder to create the project.
-
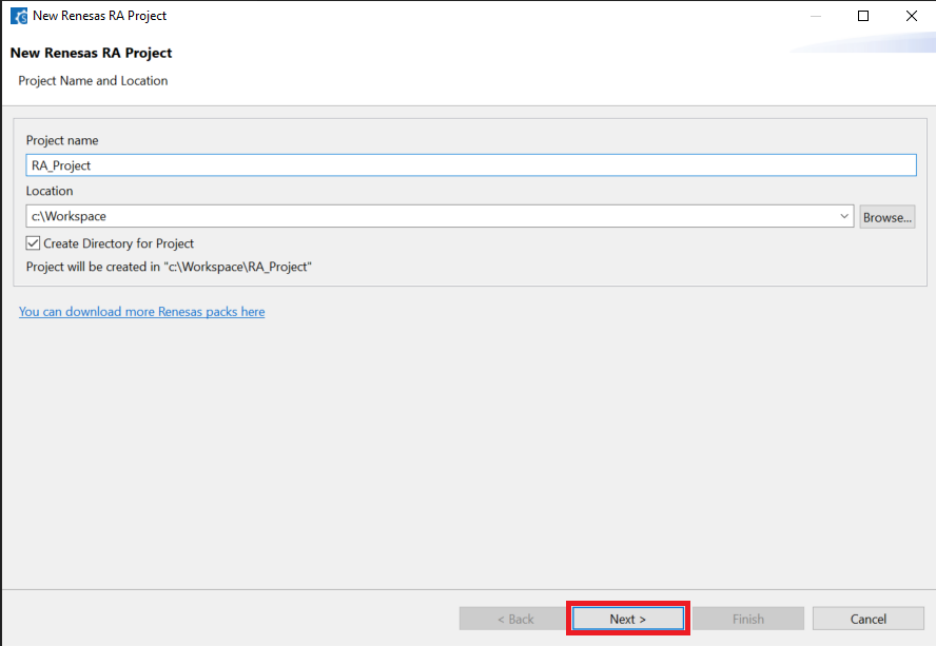
Enter the project name, then click Next.
-
Configure your board information, device type, and toolchain. Then click Next.
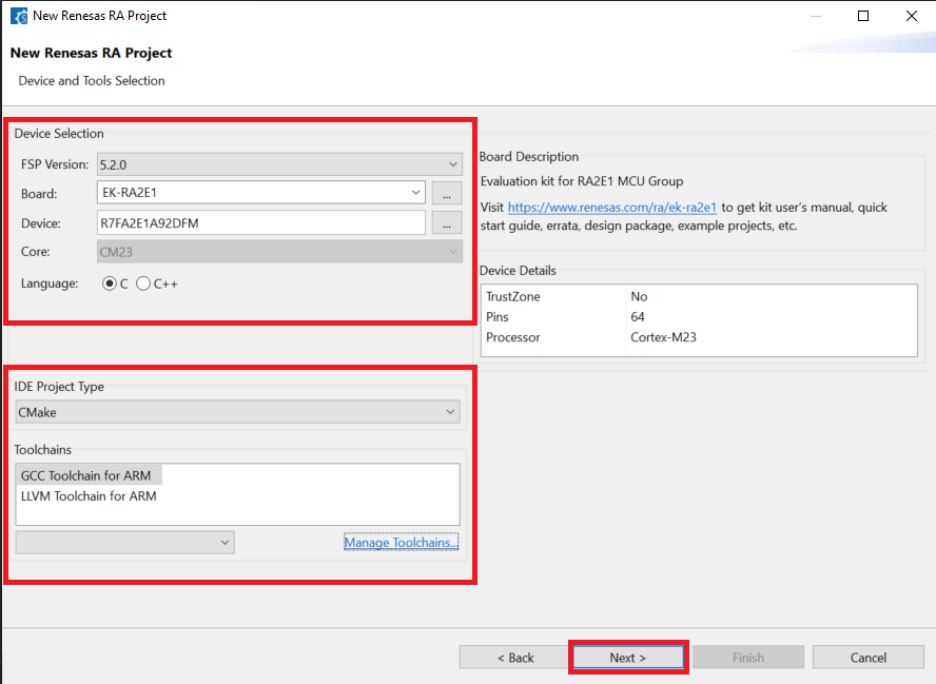
-
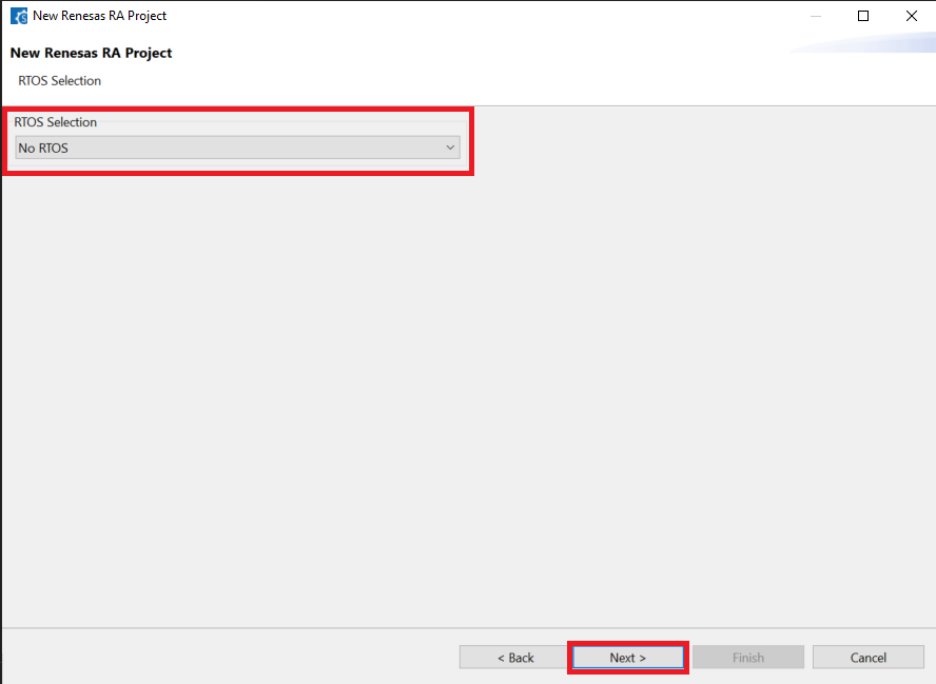
Select “No RTOS”, then click Next.
-
Select the project template shown in the image below, then click Finish to complete project creation.
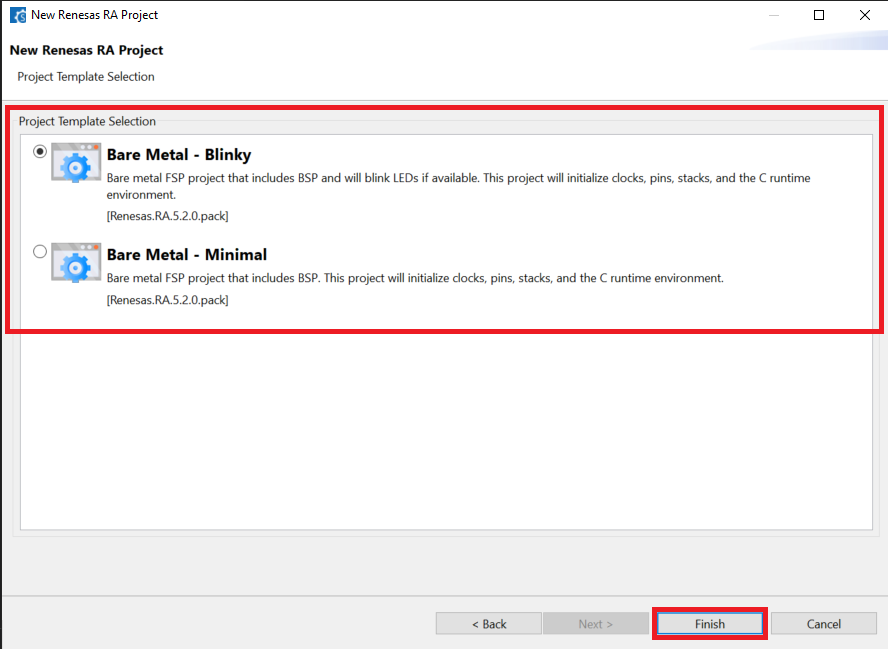
-
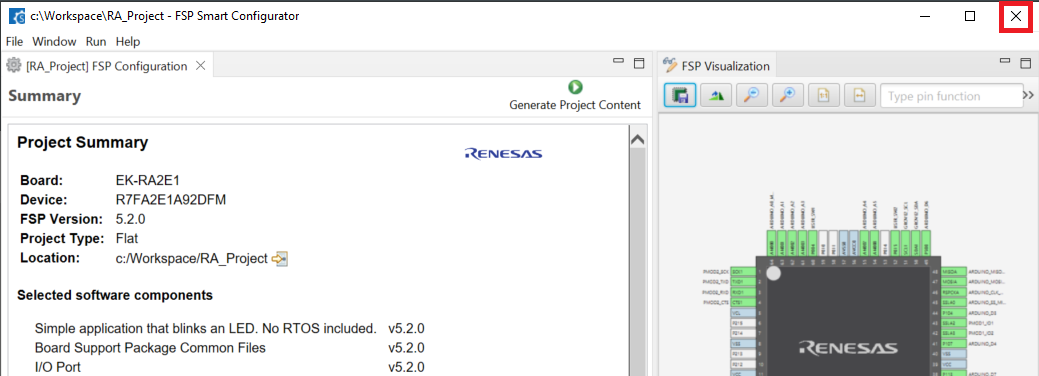
Once the project is generated, close the RA Smart Configurator.
Project Compilation
Note
The Restricted mode in VS Code may cause CMake commands to be unavailable in the Command Palette.
You need to disable Restricted mode. Click on the Restricted Mode in the lower left corner and click Trust.

-
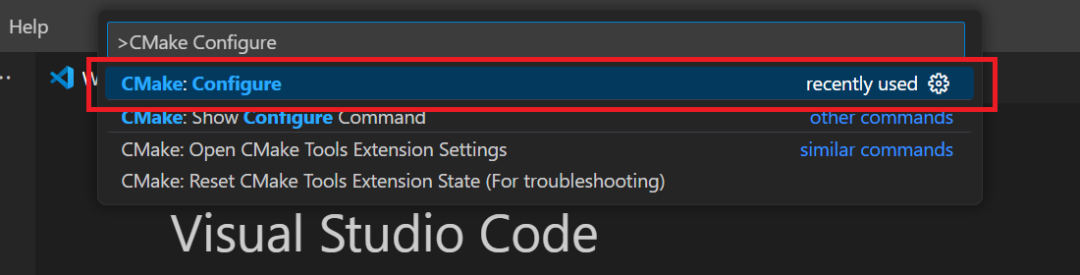
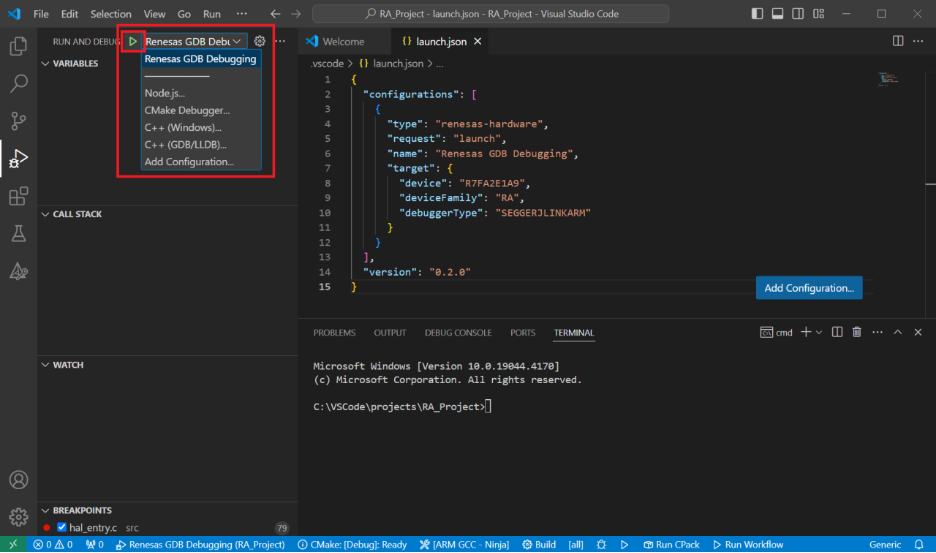
When you first open the project created in the previous steps, use the CMake configure command in the Command Palette to configure CMake and Kit selection.
-
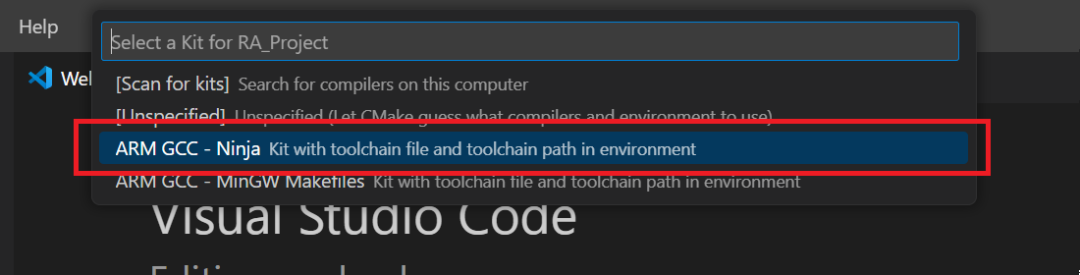
Then configure the kit, selecting “ARM GCC – Ninja”.
-
Note: Selecting the wrong CMake kit at this step will lead to compilation failure. You can reconfigure the Kit through “CMake: Select a kit” in the Command Palette.
-
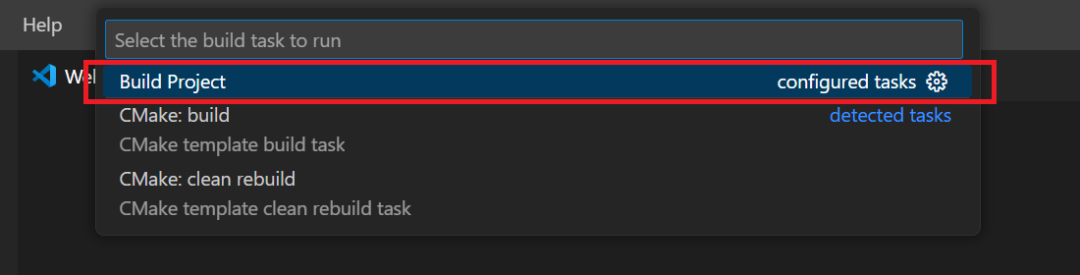
Click on the menu Terminal→Run Build Task.
-
Select Build Project.
When the project compilation is complete, by default, the .elf file will be generated in the “build//CMakeFiles/.elf.dir/” folder.
Project Debugging
-
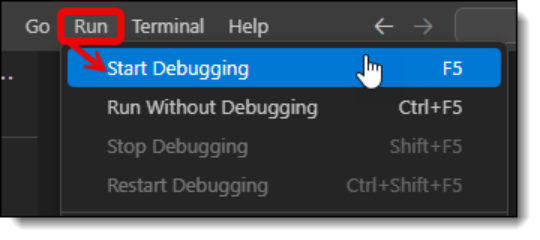
You can start debugging by clicking Run→Start Debugging or pressing the F5 key.
-
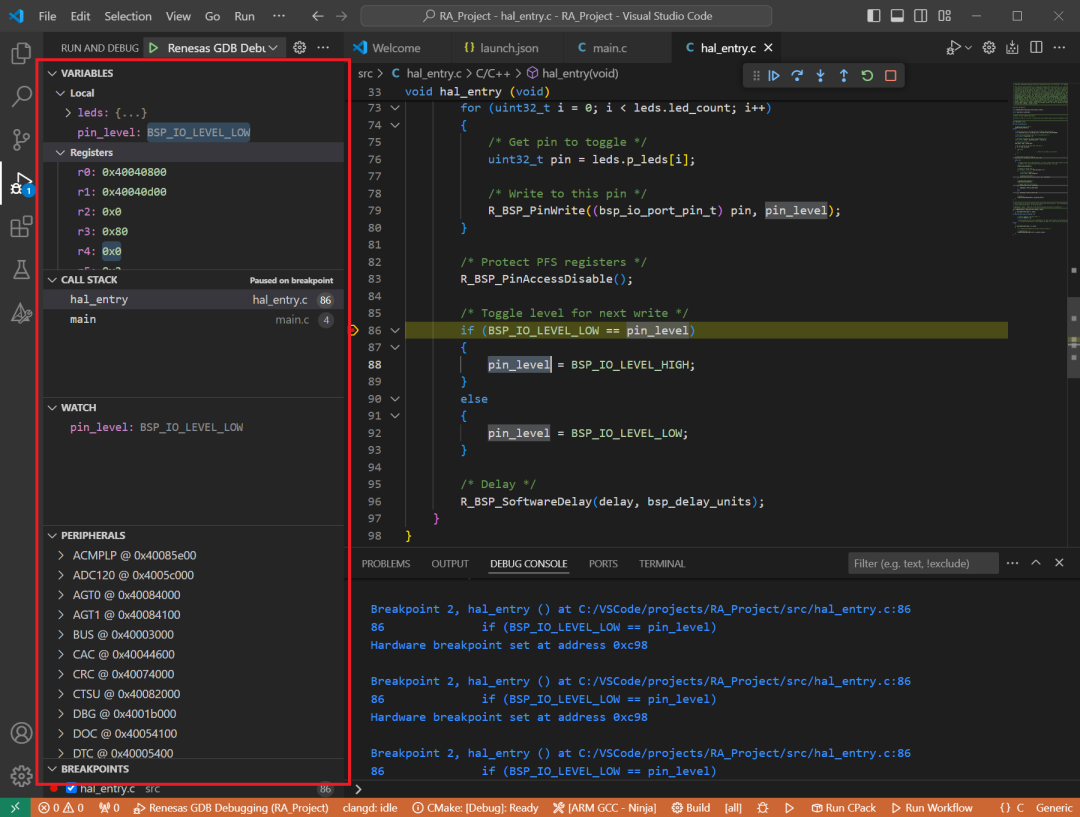
Once debugging starts, general debugging control buttons will be displayed, including options to step back, pause, step into, step over, step out, restart, and stop debugging. Useful information will be displayed in the Debug Console during the debugging process.

-
During debugging, details of local variables, device registers, call stacks, watch variables, and peripheral status will be displayed in the Run and Debug tab of the main sidebar in VS Code.
Through the above steps, users have fully experienced the process of using the Renesas RA series MCU in VS Code. The next content will introduce how to operate the Renesas RX and RL78 series MCUs in VS Code, so stay tuned!


Need Technical Support?
If you have any questions while using Renesas MCU/MPU products, you can identify the QR code below or copy the URL into your browser to enter the Renesas Technical Forum to find answers or get online technical support.

https://community-ja.renesas.com/zh/forums-groups/mcu-mpu/
Recent Events Overview
See you in Shanghai on April 18! 2025 Renesas Industrial Ethernet Technology Day wrap-up show
—— Sign up to win great prizes by April 18
1
END
1
Recommended Reading

Introduction to TrustZone and its Applications with Device Lifecycle Management (DLM) – Renesas RA Series FSP Library Development Practical Guide Series (05)

Boot Modes of RA Chips and Using Renesas Flash Programmer Software, etc. – Renesas RA Series FSP Library Development Practical Guide (06)

Setting Security Boundaries Using Renesas Flash Programmer Software – Renesas RA Series FSP Library Development Practical Guide (07)