Table of Contents
1
Generating Project Files
2
Using Smart Configuration to Generate Sample Programs
3
Debugging & Simulation
Generating Project Files
Step 1
-
Select “File” → “New” → “Renesas C/C++ Project” → “Renesas RX”.
-
The “Templates for Renesas RX Project” dialog will pop up.
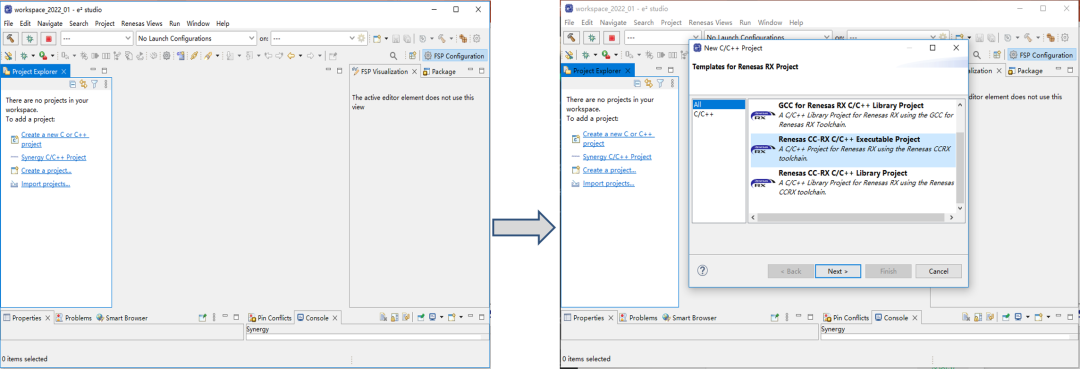
Step 2
-
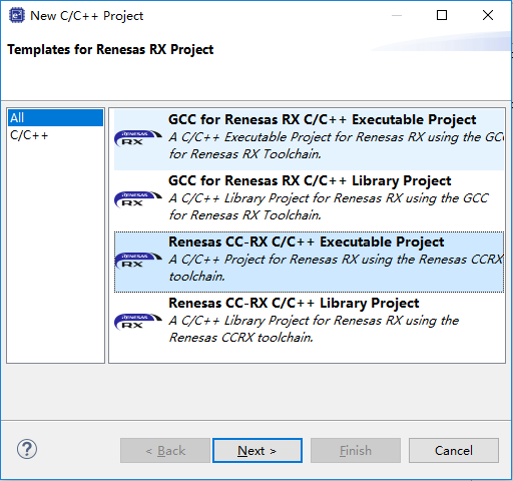
Select “Renesas CC-RX C/C++ Executable Project”.
GCC is a third-party compiler.
CC-RX is Renesas’ proprietary compiler.
-
Click 【NEXT】.
Step 3
-
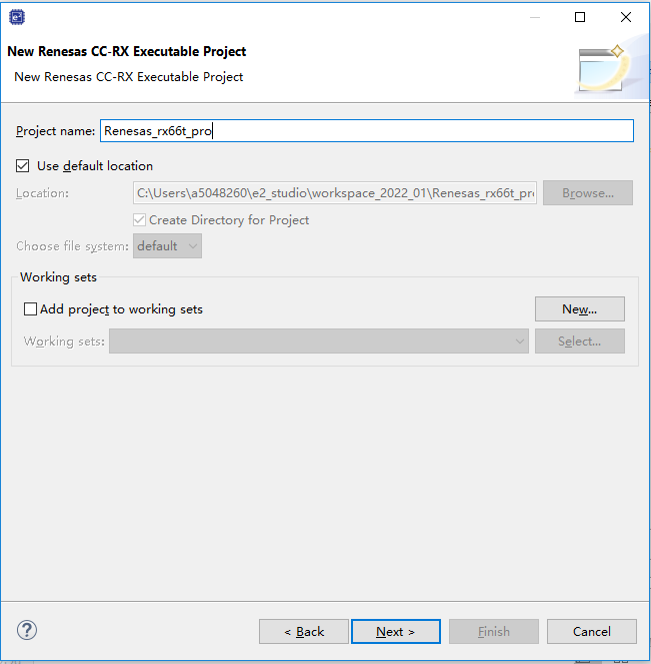
Enter the project name in the “Project name” field, currently using RX66T as an example to create the project document, enter “Renesas_rx66t_pro”.
-
If you do not want to use the default storage location, uncheck “Use default location” and select the path in the “Location” field below; it is recommended to use the default location.
-
Click 【NEXT】.
Step 4
-
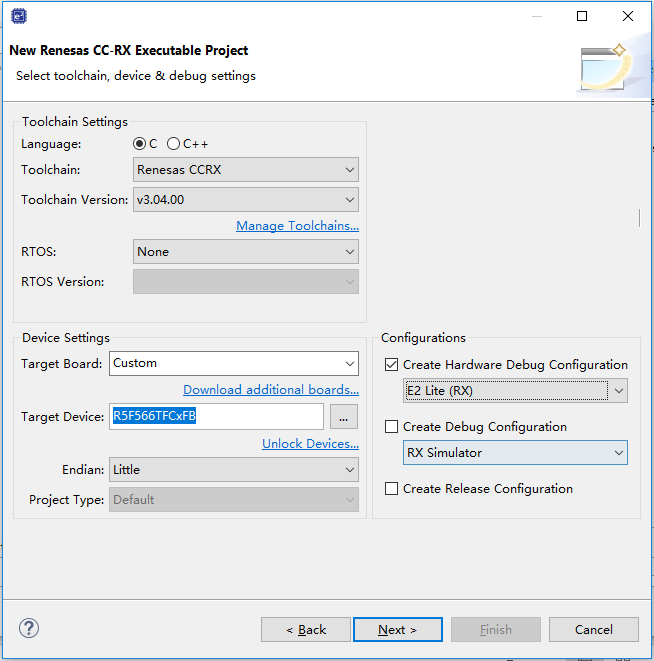
In the pop-up dialog, select according to the prompts:
1. Toolchain Setting
Toolchain → Renesas CCRX
Toolchain Version → v3.04.00 (if multiple versions are installed, select one)
RTOS → None
2. Device Setting
Target Board → Custom
Target Device → R5F566TFCxFB
Endian → Little
3. Configurations
Select E2 Lite (RX) as the emulator.
-
Click 【NEXT】.
Step 5
-
In the pop-up dialog, select “Smart Configurator”.
-
Click 【NEXT】.
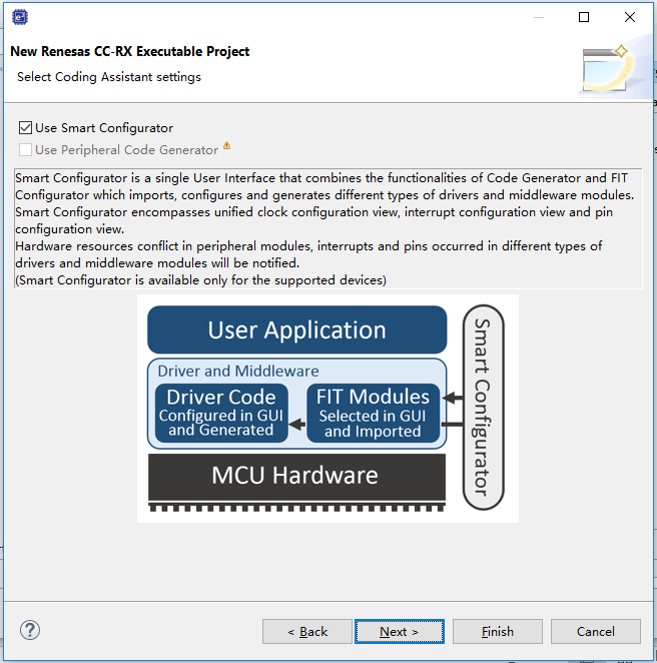
Step 6
-
In the pop-up dialog, there is no need to check “Use Renesas Debug Virtual Console”.
-
Click 【NEXT】.
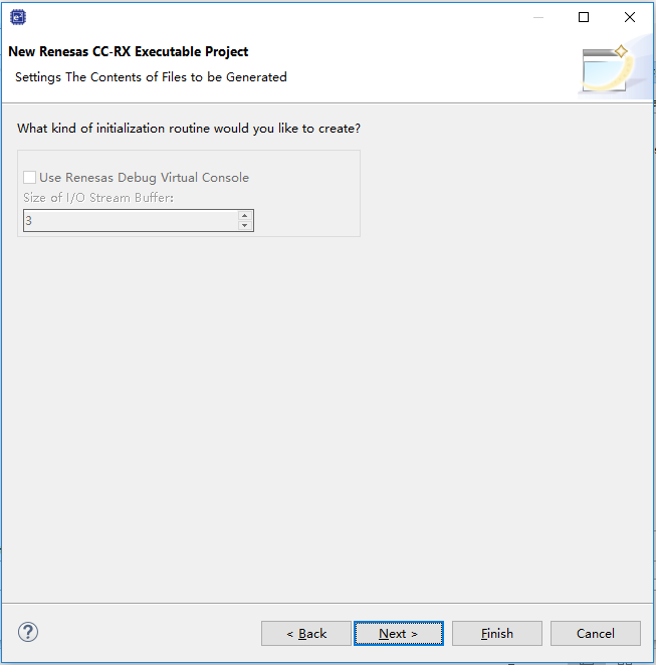
Step 7
-
In the pop-up dialog, the toolchain name and version number are displayed.
-
Click 【Finish】.
-
In the pop-up “Open Associate Perspective” dialog, select “Open Perspective”.
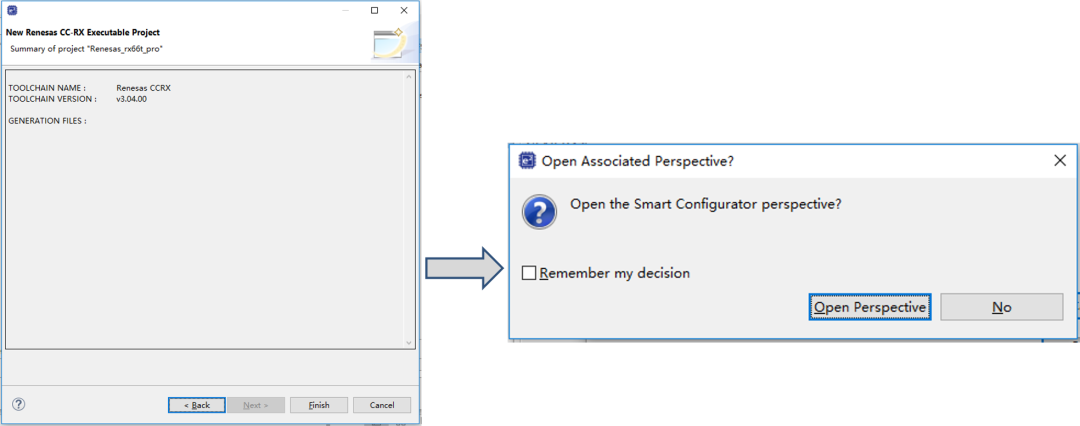
Step 8
-
At this point, an empty project file named “Renesas_rx66t_pro” has been successfully created.
-
If the complete right-side interface does not appear, open the project file in “Project Explorer” and double-click “Renesas_rx66t_pro.scfg”.
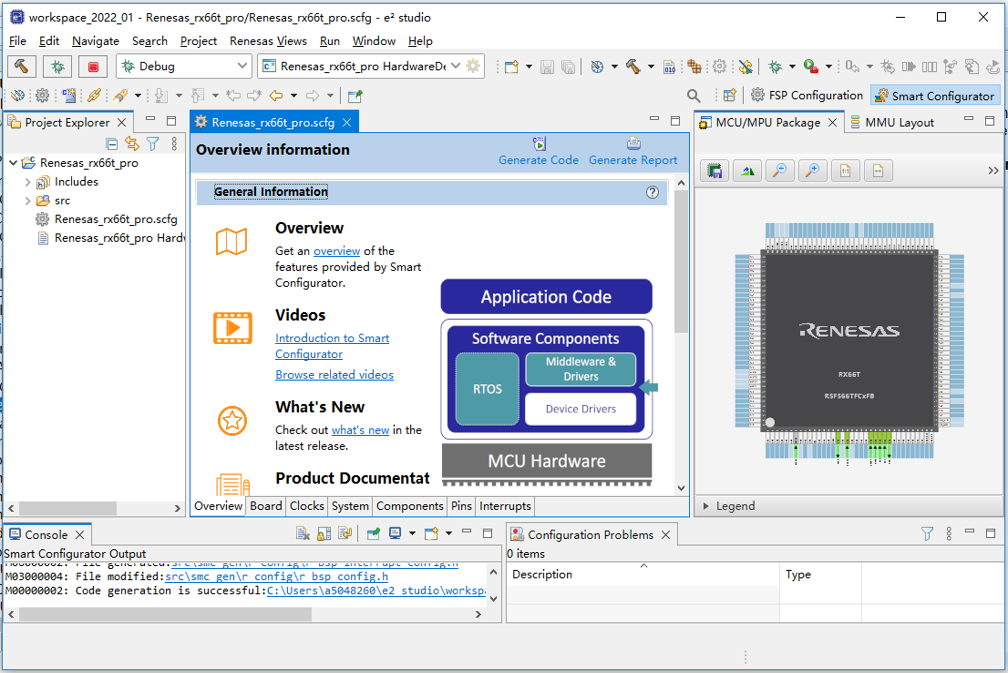
To Be Continued
Previous Recommendations
1
Add New Compilation and Debug Configuration in e² Project
2
Analysis of Dead Zone Complementary PWM Interrupt Delay Issue with RA2E1 Timer
3
e² Studio Debugging MCU Stack Settings and Viewing
Renesas Electronics Corporation (TSE: 6723)
Technology makes life easier, committed to creating a safer, smarter, and sustainable future. As a global microcontroller supplier, Renesas Electronics combines expertise in embedded processing, analog, power, and connectivity to provide complete semiconductor solutions. Successful product portfolios accelerate the time to market for automotive, industrial, infrastructure, and IoT applications, empowering billions of connected smart devices to improve people’s work and lifestyles.
For more information, please visit renesas.com