【Click the above「Blue Text」 to follow DF Maker Community, let’s become tech enthusiasts together】

1. Hardware Preparation
-
Raspberry Pi -
Breadboard -
LED -
Jumper Wires (Male to Female) -
Resistor 220 Ohm
2. Configuration Steps
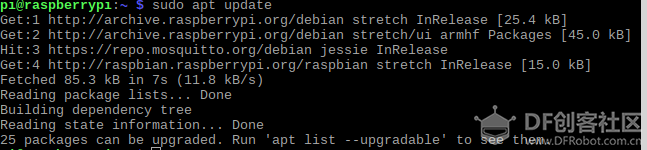
1. First, we need to use the GPIO Zero library. Access the terminal via SSH or directly using a monitor. Update the repository list.
sudo apt update
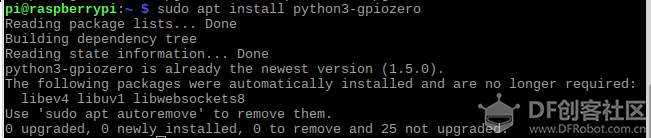
2. Install the GPIO Zero package.
sudo apt install python3-gpiozero
3. Raspberry Pi Pinout
The GPIO Zero library uses the Broadcom (BCM) pin numbering. The numbers within the circle are the physical pin numbers. In the right image, any pin labeled “GPIO” can be used with its pin number.
For example, if an LED is connected to GPIO 18, you need to specify the pin number as 18 in your code, not 12.
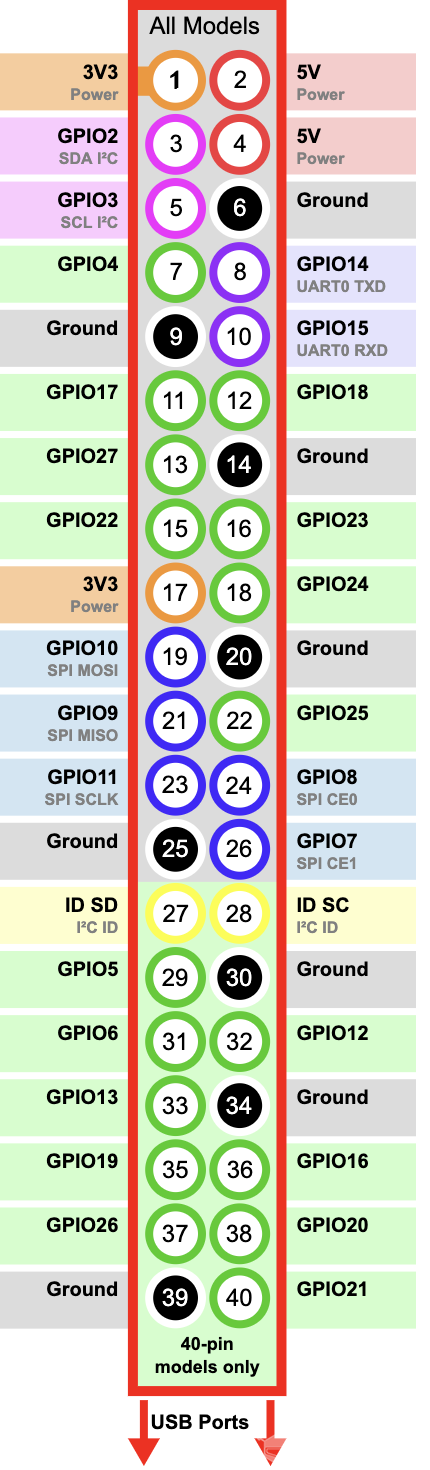
There are several ways to define the pin number:
-
led = LED(18)
-
led = LED(“GPIO18”)
-
led = LED(“BCM18”)
-
led = LED(“BOARD12”)
-
led = LED(“J8:12”)
-
led = LED(“WPI0”) //WiringPi pin number
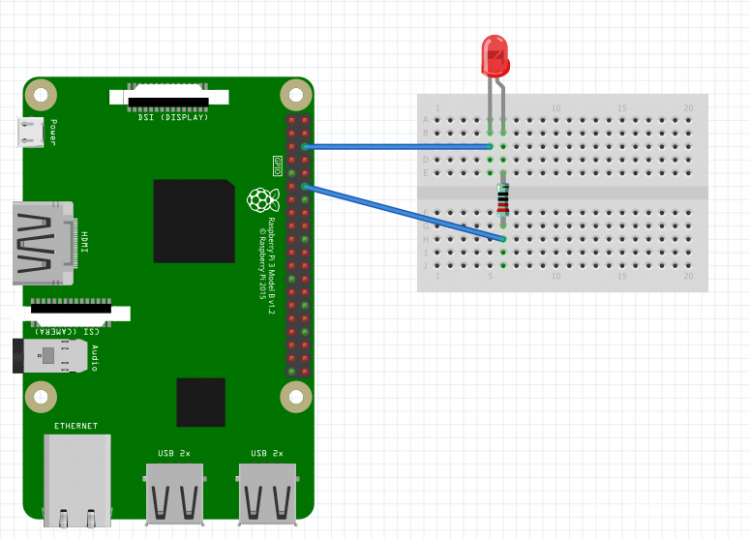
Hardware connection diagram, as shown above.
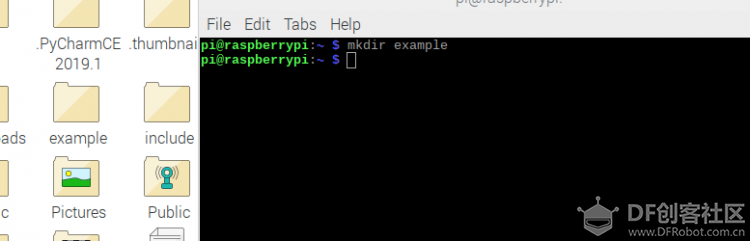
4. Create a new folder named example.
mkdir example
5. Enter the example folder.
cd example/

Create and edit a Python file named LED.py.
nano LED.py
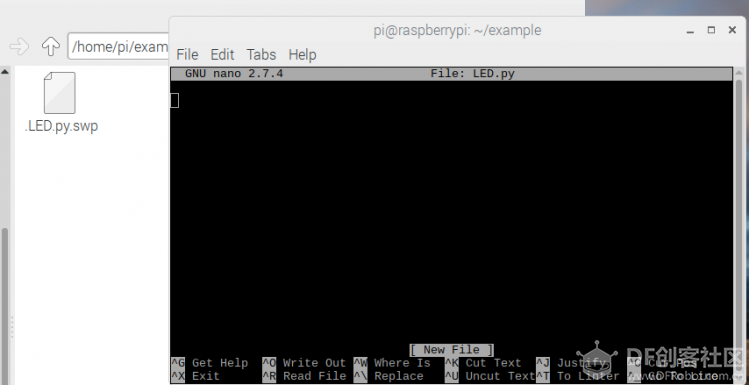
6. Enter the editing interface and input the code.
from gpiozero import LED
from time import sleep

yellow = LED(18)

while True:
    yellow.on()
    sleep(1)
    yellow.off()
    sleep(1)
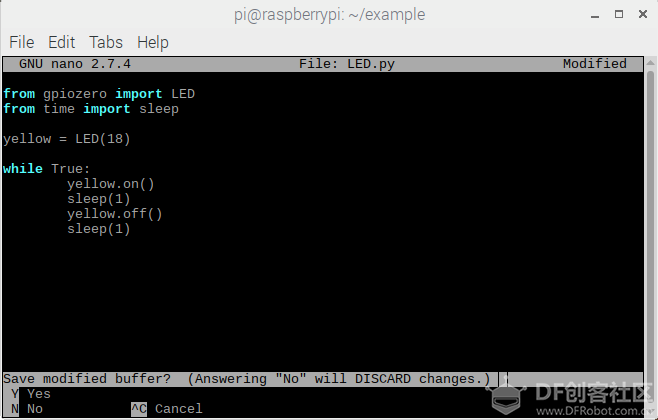
After editing, press ctrl+x to exit, then press y and hit enter to confirm.
-
Run the test
sudo python3 LED.py
If everything goes well, you should see the yellow LED blinking.
– END –
Here we conclude the routine operation of turning on the light.
Wishing everyone a happy May Day in advance, and we will continue to update when we return!
Hardware Arsenal
Raspberry Pi 4 Model B 2GB
Click to learn more👆
If you have any thoughts or corrections regarding the article, feel free toleave a message!
For those who are eager to learn more, clickRead the Original to continue learning in the community!
Previous Reviews
What is Raspberry Pi? Can you eat it?
【Raspberry Pi Basic Series Tutorial】1. Configure and Initialize Raspberry Pi
【Raspberry Pi Basic Series Tutorial】2. Remote Connection to Raspberry Pi
【Raspberry Pi Basic Series Tutorial】3. Learning Linux Commands
Click to read👆