The official version of Minecraft requires a fee and has a steep learning curve for modding. The Raspberry Pi version of Minecraft is free and easily interacts with Python, making it an excellent learning tool. Students have a unique enthusiasm for Minecraft, and combining it with Python allows them to experience the charm of coding everything. This article is a translation from the official Raspberry Pi website, so please bear with us (the translation has been criticized as robotic).
The official Raspberry Pi tutorial has a standardized format, making it a good reference for writing tutorial materials.
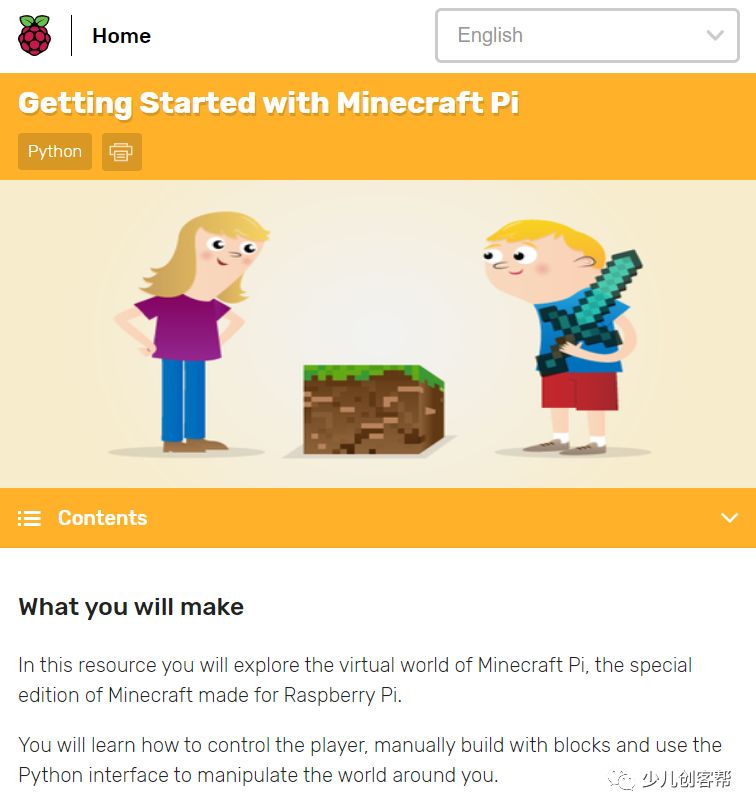
Final Results
You will explore the virtual world in the Raspberry Pi customized version of Minecraft. You will learn how to control players, manually build blocks, and control everything in the game with Python.
Learning Objectives
By using this material to learn on Raspberry Pi, you will master:
-
How to launch
Minecraft Piand create a new world -
How to connect
IDLE Pythonprogramming environment toMinecraft Pi -
How to send messages to the chat window using
Minecraft Python API, determine player coordinates, and teleport to build structures -
How to use variables to store different types of block
IDvalues -
Try using different types of blocks with special attributes
This material covers the requirements involved in the Raspberry Pi Digital Maker course:
-
Writing simple programs using basic program structures
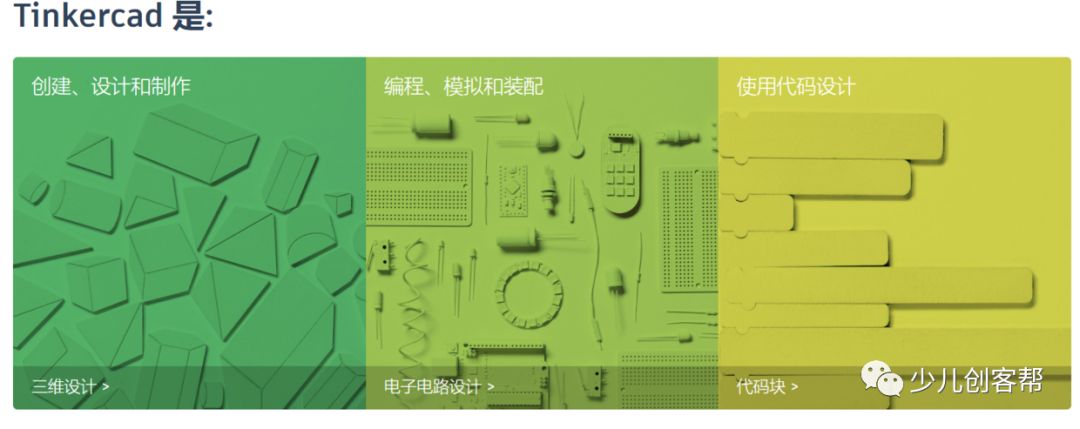
The Raspberry Pi has its own set of digital maker course standards, which share similar ideas with the CAD company’s
TinkerCAD, effectively supporting the implementation of the Raspberry Pi curriculum.
Requirements List
Software
Software Installation
Since September 2014, the Raspberry Pi system Raspbian has come with Minecraft pre-installed by default. You can start it by double-clicking the shortcut. If you are using an older version of the Raspberry Pi system, open the command line window and enter the following commands:
sudo apt-get update
sudo apt-get install minecraft-pi
Once the command execution is complete, Minecraft Pi and the related Python libraries will be successfully installed.
I remember that the Raspberry Pi system used to come with some games, like Gomoku and memory games, but my current Raspberry Pi system installed with NOOBS doesn’t have them anymore.
Testing if Minecraft is Successfully Installed
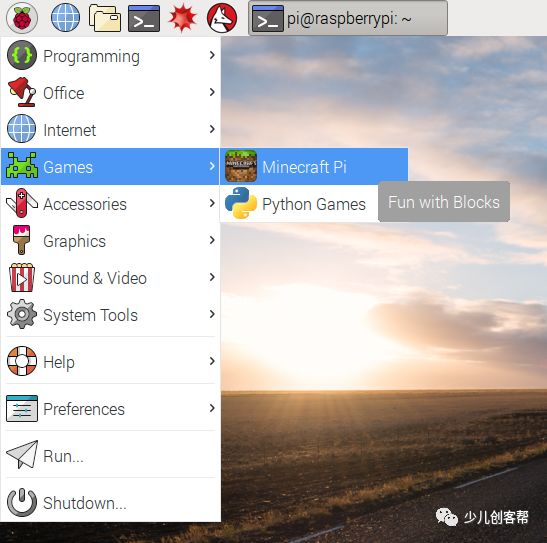
You can start Minecraft by double-clicking the Minecraft icon on the desktop or by entering minecraft-pi in the command line window.
Note
If you receive the above prompt after installing Minecraft Pi and the icon is not found in the menu or on the desktop, try entering the following command in the command line to start Minecraft:
minecraft-pi
The command line may continuously output a bunch of strange information; you can ignore it.
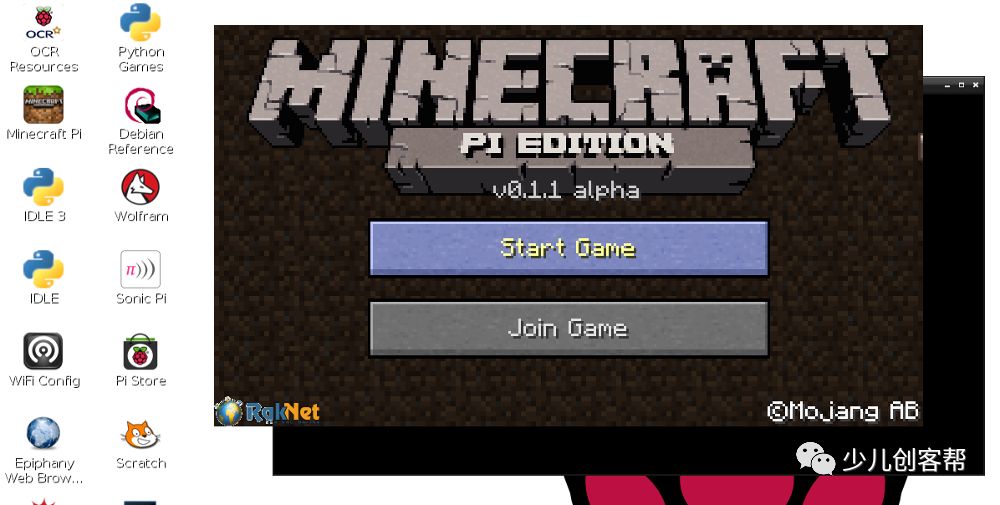
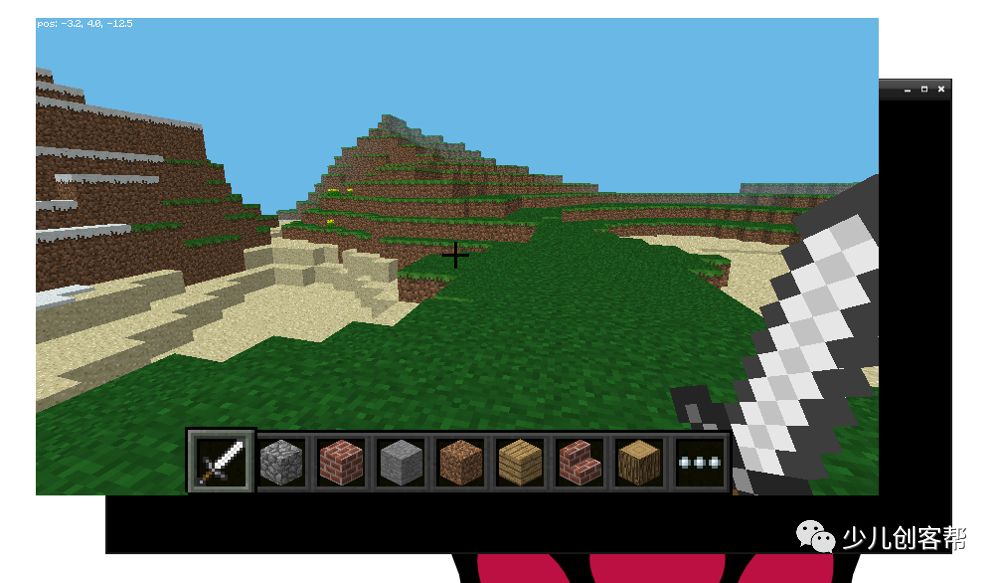
Once Minecraft is loaded, click the Start Game button to begin playing. The game window may be slightly misaligned. If you want to drag the window, you can drag the title bar behind the game window. 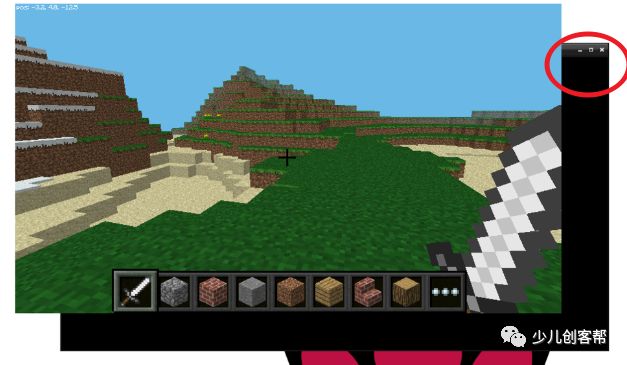
Look, you are now in the Minecraft game.
Testing Python
Start and run Raspberry Pi, create a world, press Tab to release the mouse from the game, open Python3 IDLE, click the start button, and select Python 3(IDLE) programming. Then arrange the IDLE window and Minecraft side by side.
You can also directly input commands in the Python interactive command line or create a new Python file for easier control of Minecraft later.
If you want to create a new file, click File>New wind or File>Save. You can save the Python file in the home folder or create a new folder.
First, we need to import the Minecraft library, then establish a connection between the code file and the game by sending Hello world to the game window to test the Minecraft library.
from mcpi import minecraft

mc = minecraft.Minecraft.create()

mc.postToChat("Hello world")
If you enter the above commands in the Python interactive command line, press enter after each command. If you created a new Python file, save it using Ctrl + S and run the file with F5. After running the code, you will see the message in the game’s interface. 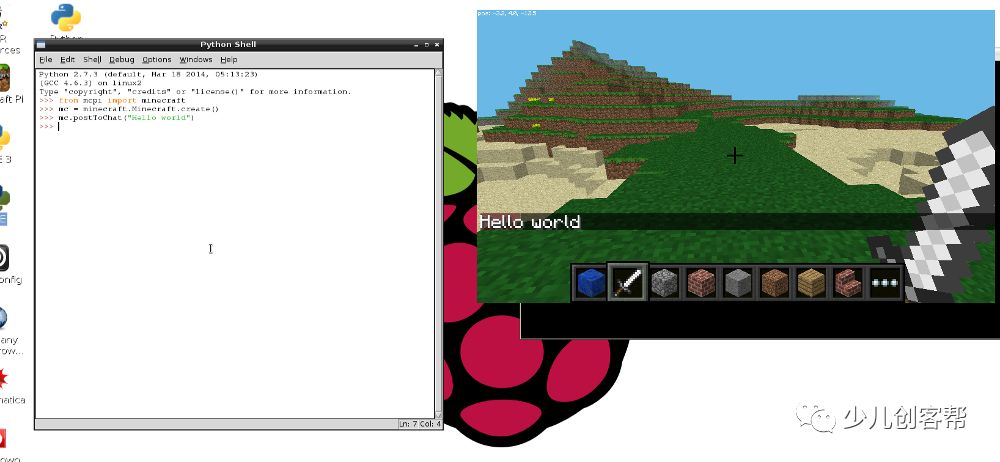
If the Minecraft interface displays Hello world, you can proceed to the next step.
Start Exploring Minecraft Pi
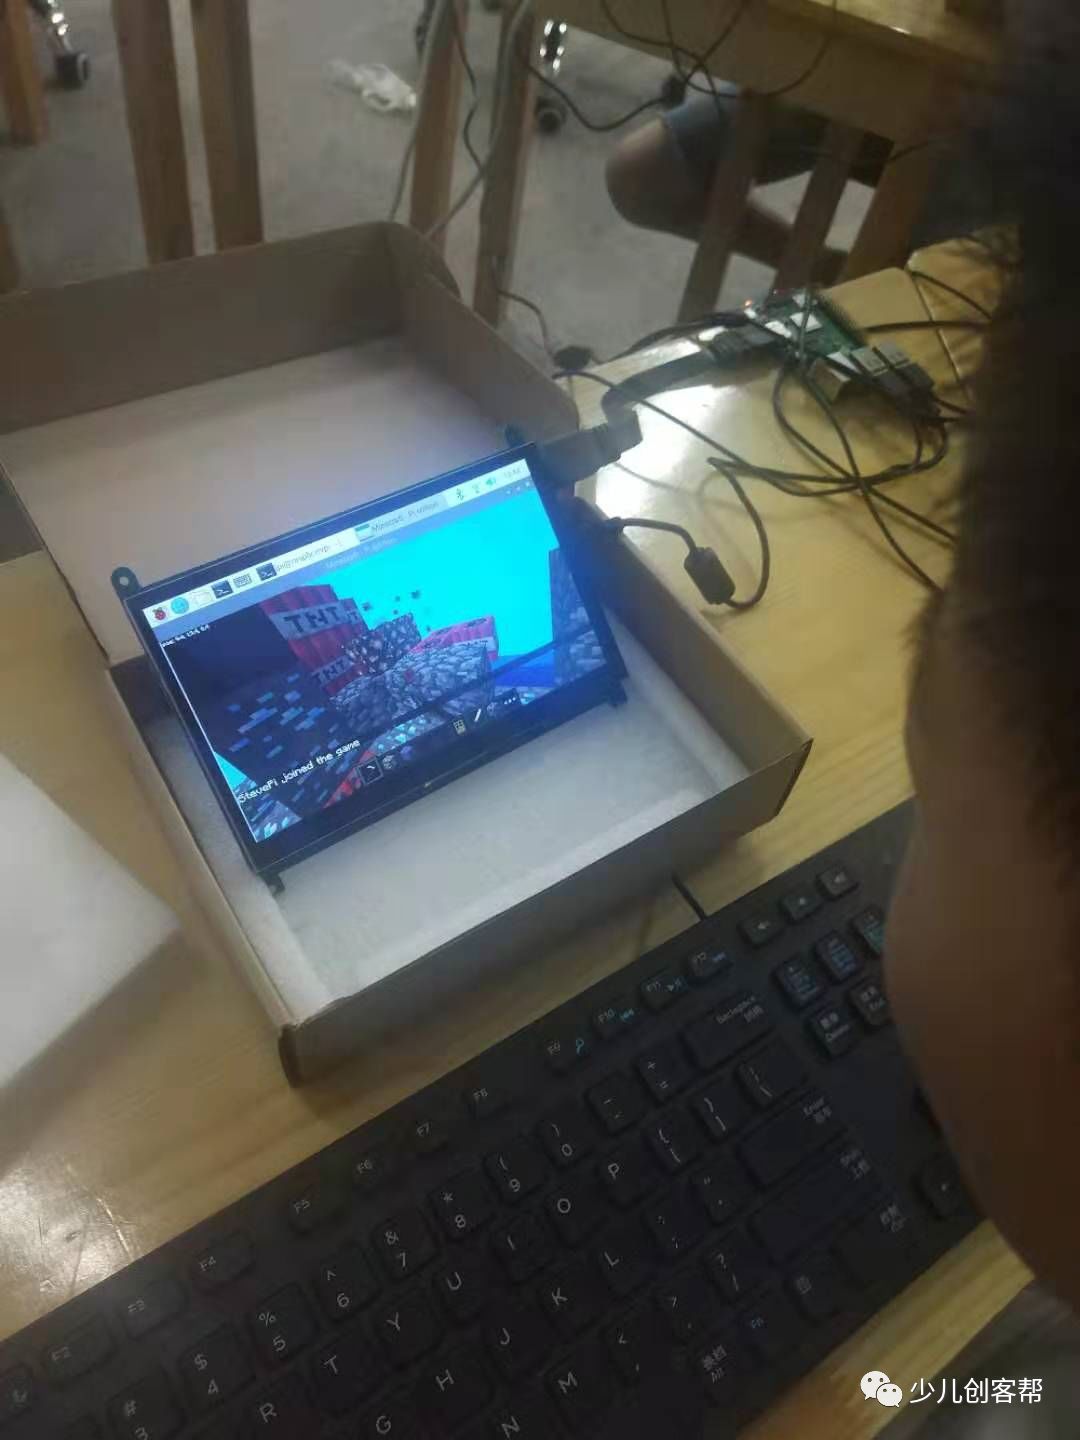
Minecraft is a very popular open-world sandbox game, and a free version has been developed for the Raspberry Pi, along with a dedicated programming interface. This means you can use Python to write commands and scripts to automatically build whatever you want in the game. This is a fantastic way to learn Python.

The Raspberry Pi version of Minecraft can be played online. Two of our kids played together, and they coordinated well, one as the architect and the other as the executor. Many students tested online without a limit on the number of players, which was a lot of fun! This is consistent with the division of labor that automatically occurs in the Scratch community for creating complex works, which is described in detail in the official Scratch paper *”Scratch: Programming for All”*.
Everyone can learn programming Scratch: Program for All
The Raspberry Pi’s Wi-Fi is unstable, so if possible, it’s best to use a wired network. If using a wireless network, avoid the 5G frequency band; using 2.4G will be much more stable and faster for searching online games.
Running Minecraft
You can start Minecraft from the desktop menu or by entering minecraft-pi in the command line.
Once Minecraft starts, click the Start Game button, then create a new world Create new. The Minecraft window may be slightly misaligned.
This part is repeated in the official material, possibly because they think testing and officially starting are two different things, so the entire process is mentioned twice.
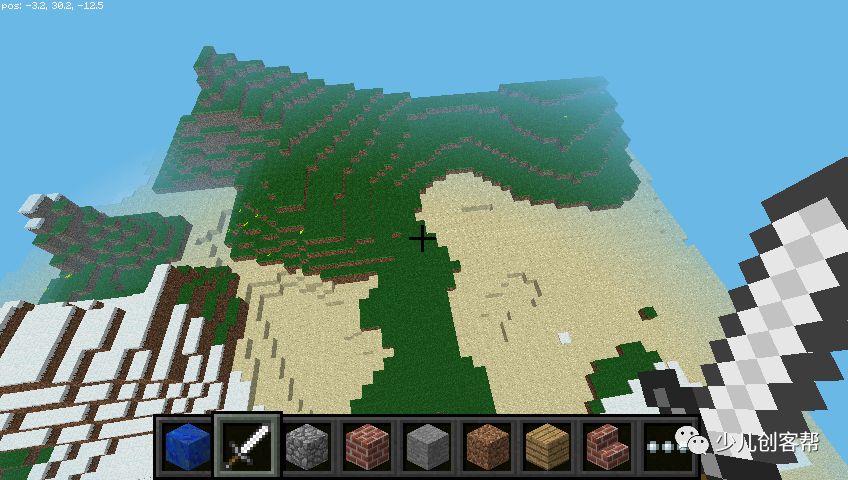
Look for highlights in the image below: 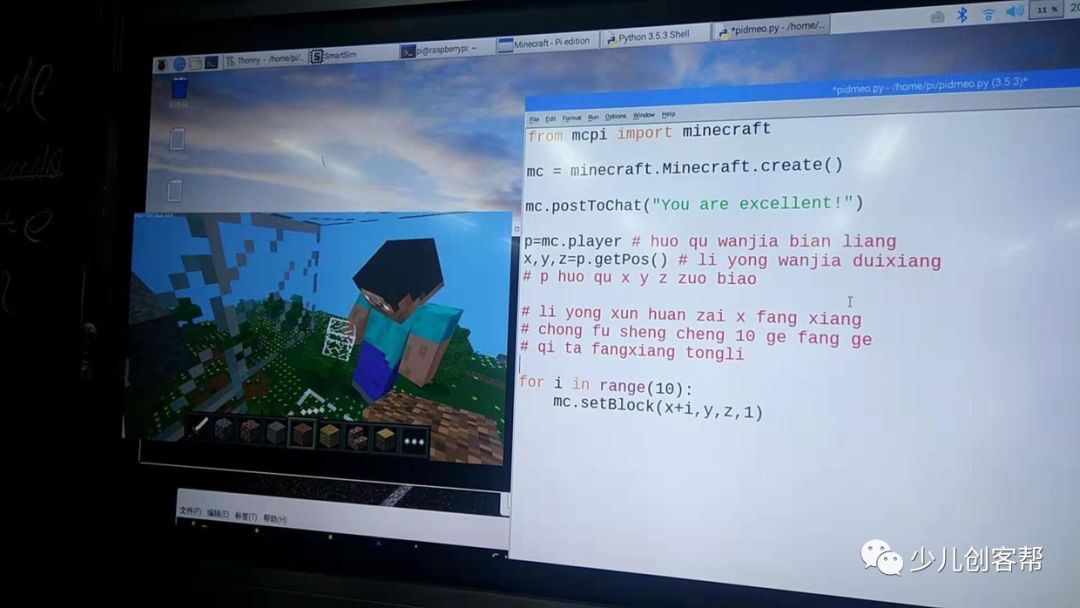
The Raspberry Pi is an excellent learning platform with a high degree of playability, suitable for ages 3 to 99. It is a fantastic platform for learning programming, open-source hardware, and maker skills. Elementary school students can use Scratch, middle school students can learn Python and open-source hardware, high school students can study AI, and university students can learn foundational knowledge. It’s impressive. Moreover, a Raspberry Pi plus a keyboard and mouse costs about 300, and a 32-inch TV is only around 700-800, so you can assemble a very good learning platform for just 1000 yuan, which is extremely cost-effective compared to buying an Apple product. Apple does not have exposed GPIO pins, haha.
In the classroom, the kids played Minecraft online, showcasing excellent cooperation and division of labor. The skill level of the children was astonishing, with great hand-eye coordination and superb operation using both hands. For example, generating a room frame with both hands was much faster than typing. Games truly are a child’s nature. 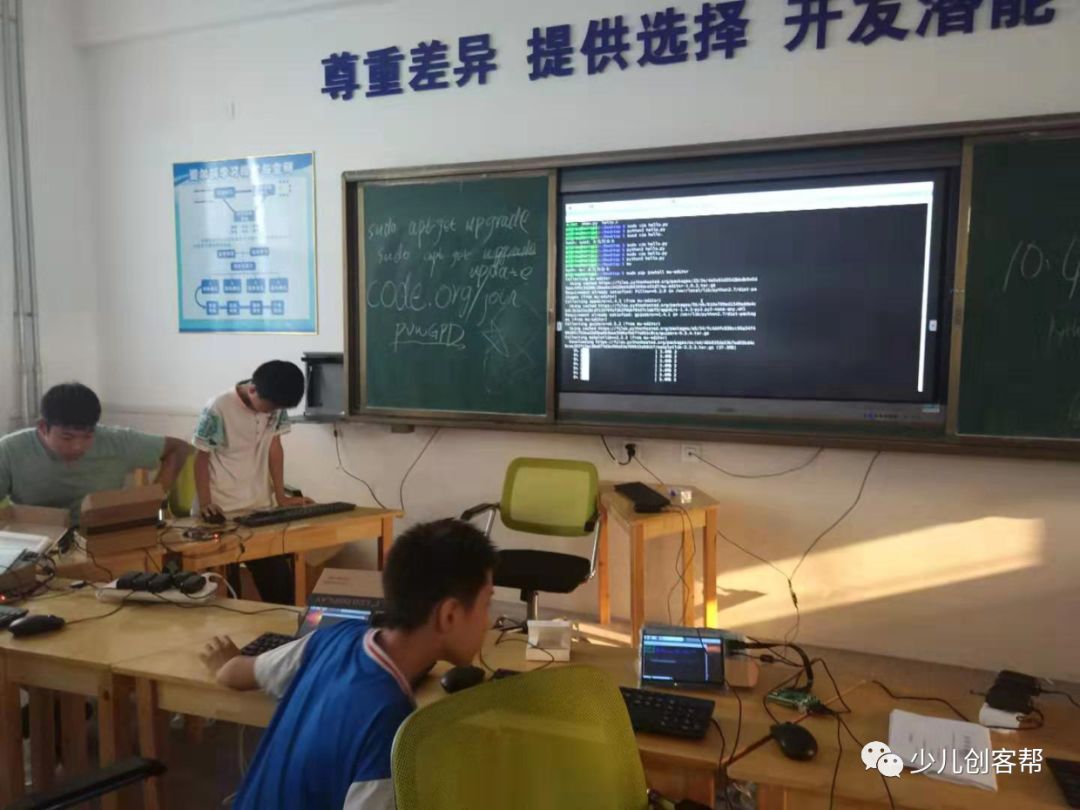
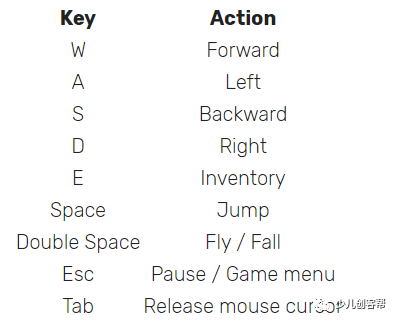
Moving the mouse can switch perspectives, and the commonly used shortcut keys are as follows:
The Raspberry Pi version can be considered the educational or stripped-down version, with limited operations. However, our students still had a great time, and the division of labor was excellent. Some students even managed to encase me in stone, haha. I went out for 20 minutes, and they managed to push me into oblivion, those little rascals.
You can use the mouse wheel to select different items from the shortcut menu, or use the keyboard shortcuts, or press the E key to choose what you want from the inventory. 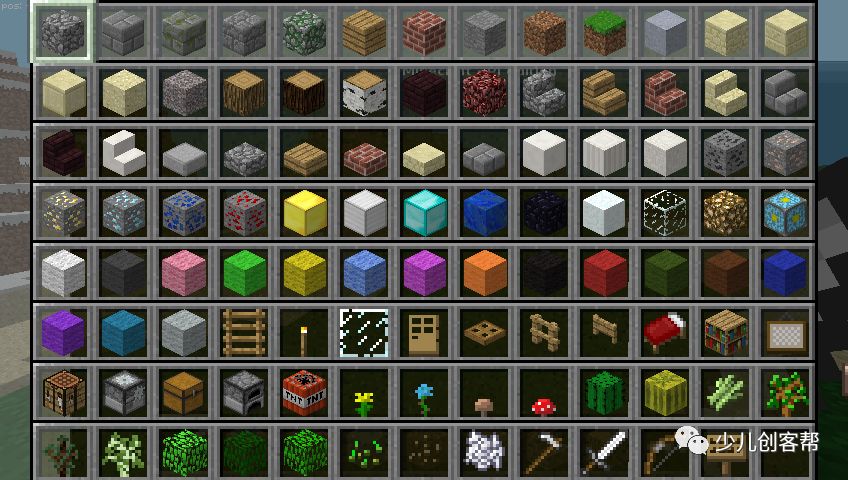
Quickly double-clicking the space key allows you to fly. Releasing the space key stops flying, allowing you to hover in the air. Double-clicking the space key again will land you back on the ground.
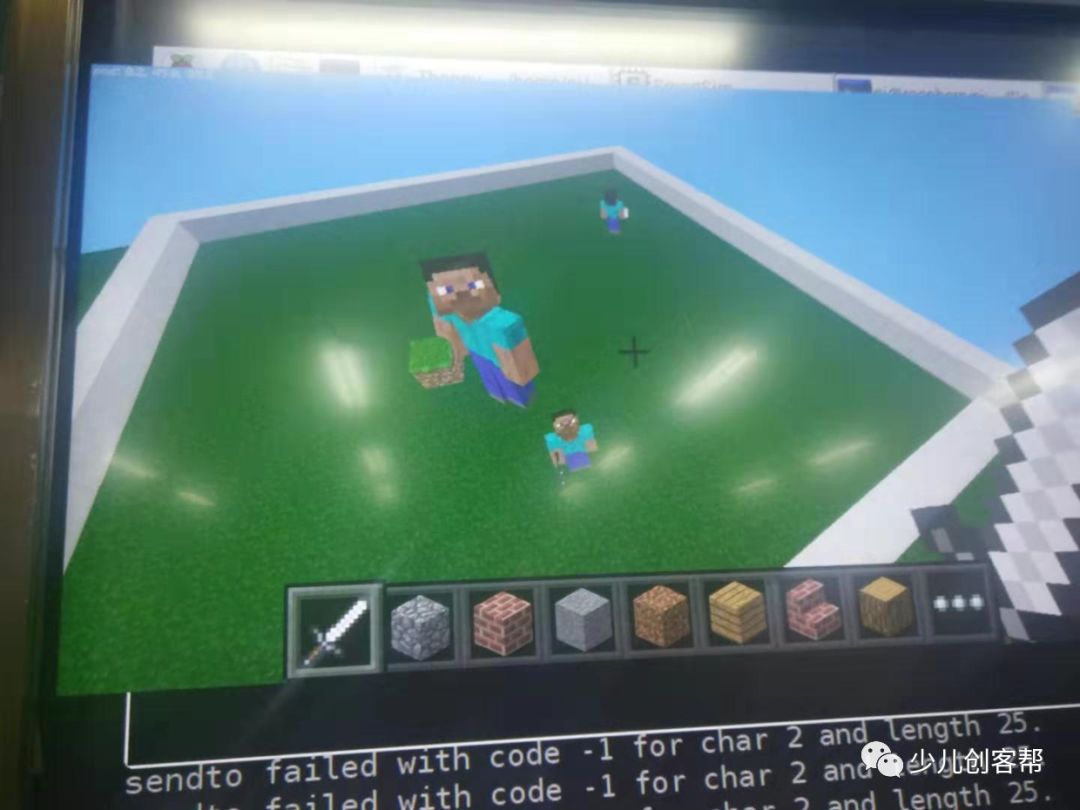
The Raspberry Pi has limited computing power, so if you build something too large, it may not render completely. The Raspberry Pi’s networking capability is very interesting; if kids play the Raspberry Pi version of Minecraft together, it will be even more fun. One downside of Minecraft Pi is that all joined players are named StevePi with no differentiation, and characters joining the same game have the same appearance without tags. It is an open-source project, so maybe one day when I have time, I will modify the code (just that I don’t have time).
With a sword in hand, you can destroy blocks in front of you or dig holes. If you have a block in hand, right-click to place a block directly in front of you, and left-click to destroy a block.
Using the Python Programming Interface
Similar to the previous tests, start Minecraft, create a world, and enter the game interface. Press the Tab key to release the mouse from the game. Open Python3 IDLE and arrange the two windows side by side.
You can write commands in the interactive command line or create a Python file for later use.
If you create a file, click File>Save and save it in a suitable location.
To start, you need to import the Minecraft library, establish a connection with the game, and test by sending Hello world! to the game interface.
from mcpi.minecraft import Minecraft

mc = Minecraft.create()

mc.postToChat("Hello world")
If you enter this in the command line, press enter after each line of code. If it’s a file, save it with Ctrl + S and run it with F5. When the code runs, you should see a message appear on the screen.
Determining Your Position
To determine your position in the game, you can enter the following code:
pos = mc.player.getPos()
Running this will save your position in the pos variable. You can access each part of your coordinates using pos.x, pos.y, and pos.z.
Minecraft is a three-dimensional game, requiring three coordinates to establish a position. You can use three orthogonal lines at the corners of a room as an example to enhance understanding.
Using Python’s unpacking syntax to save the coordinates into three variables is also a good method (though not as intuitive as above):
x, y, z = mc.player.getPos()
This way, x, y, and z variables will each hold a part of the coordinates. x and z indicate walking direction (forward, backward, left, or right), while y indicates up or down.
Note that the getPos() method returns the coordinates of the player at the time the code is run. If you move, you must call this function again to get the position information or use the already stored information.
For the PC version of Minecraft, you can view your current coordinates by pressing F3. Minecraft is very helpful in cultivating children’s creativity and spatial imagination.
Teleportation
Since you can get the current position coordinates, you can also move to specific coordinates, just like teleporting.
x, y, z = mc.player.getPos()
mc.player.setPos(x, y+100, z)
If the kids want to encase the character in blocks, I can use this command so they cannot encase me.
The code above will teleport your player 100 blocks up from the current position. You will be teleported into the air and then fall straight to the ground.
Try teleporting to other locations.
Generating Blocks
If you have a block in hand, left-click will generate a block, but you can also generate blocks using mc.setBlock(), which requires providing the new block’s coordinates and type ID.
x, y, z = mc.player.getPos()
mc.setBlock(x+1, y, z, 1)
Running the above code will create a block of stone next to where you are standing. If you don’t see the stone block, move the mouse to change the game’s perspective until you can see the gray stone in front of you.
Other types of blocks include:
* Air:         0
* Grass:    2
* Dirt:        3

Keep the stone block in your view and try generating other types of blocks:
mc.setBlock(x+1, y, z, 2)
You will see the gray stone turn into a glass block.## Block Constants
If you know the name of the block (in English), you can generate blocks using the built-in block constants (this is much easier than memorizing numbers). You need to add a new line of code to import the library.
from mcpi import block
Now you can generate new blocks:
mc.setBlock(x+3, y, z, block.STONE.id)
Block IDs are easy to guess and are all uppercase. Here are some examples to help you understand and get accustomed to block names:WOOD PLANKS
WATER STATIONARY
GOLD ORE
GOLD BLOCK
DIAMOND BLOCK
NETHER REACTOR CORE
## Using Variables to Represent Blocks

If you know the block ID clearly, you can use a variable to represent the block, which is useful. You can use the variable name of the block ID to replace the block ID.
dirt = 3
mc.setBlock(x, y, z, dirt)
ordirt = block.DIRT.id
mc.setBlock(x, y, z, dirt)
> This time, the summer camp failed because there wasn't enough textual material prepared for the students. Next time, I will prepare textual materials for the students. It will be more convenient for them to learn, but this article can also be shown to students.## Special Blocks
Some blocks have additional properties, such as wool that can have its color set. You can set these additional details using the fourth optional parameter of the setBlock function.
wool = 35
mc.setBlock(x, y, z, wool, 1)
The number <code>1sets the wool block's color to orange. If you do not set the fourth parameter, the default value is0, which is white. Other color examples are as follows:
2: Magenta
3: Light Blue
4: Yellow
Other blocks with additional information include <code>17wood blocks: oak planks, spruce planks, birch planks, etc.; tall grass31, bushes, ferns; torches50: can be set to point in the four cardinal directions. More can be read in the [https://www.stuffaboutcode.com/p/minecraft-api-reference.html](https://www.stuffaboutcode.com/p/minecraft-api-reference.html) API reference manual.
## Generating Multiple Blocks Using <code>setBlockcan generate a single block, whilesetBlockscan generate a cube composed of multiple blocks.
stone = 1
x, y, z = mc.player.getPos()
mc.setBlocks(x+1, y+1, z+1, x+11, y+11, z+11, stone)
This will generate a stone cube of 10x10x10.
Using the <code>setBlocks function can generate a larger cube, but it takes more time.Generating Blocks While Walking
Now that we know how to generate blocks, let’s implement generating blocks while walking (this is very useful when creating blocks).
The following code will generate flowers as you walk:
from mcpi.minecraft import Minecraft
from time import sleep

mc = Minecraft.create()

flower = 38

while True:
    x, y, z = mc.player.getPos()
    mc.setBlock(x, y, z, flower)
    sleep(0.1)
Now, walk a couple of steps and turn around. You will find that you are indeed leaving a trail of flowers behind you. 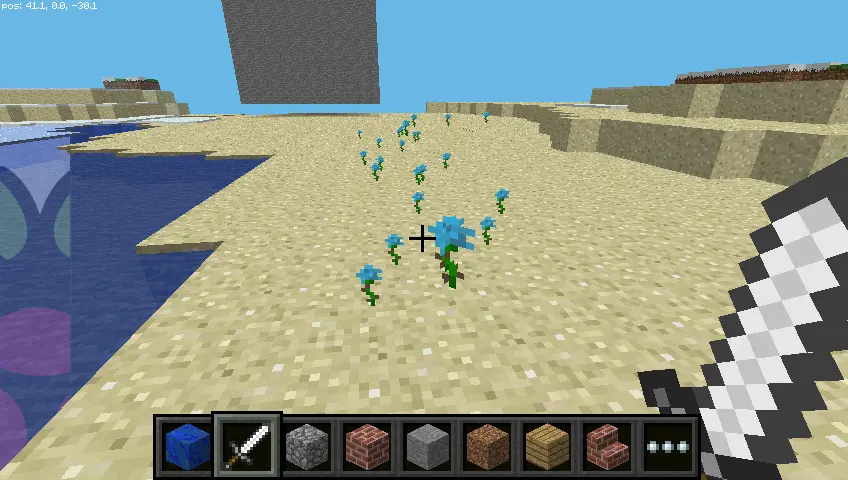
Because we are using while True, the code will keep running, and flowers will be generated as you walk. You can stop the program by pressing Ctrl + C in the Python window.
You can also try flying and see a beautiful scene of flowers blooming everywhere.
If we want to generate flowers only when the player walks on grass, we can use getBlock to get the type of block.
x, y, z = mc.player.getPos() # player position (x, y, z)
this_block = mc.getBlock(x, y, z) # block ID
print(this_block)
This code will return **the type of block you are standing on**. If it is 0, that means you are in the air. We want to know what type of block we are **standing on**, so we need to subtract 1 from the y-coordinate of the current position and use the getBlock method to return the type of block we are standing on:
x, y, z = mc.player.getPos() # player position (x, y, z)
block_beneath = mc.getBlock(x, y-1, z) # block ID
print(block_beneath)
The above code will tell us what type of block we are standing on.
We can use a loop to print the type ID of any block you are standing on:
while True:
    x, y, z = mc.player.getPos()
    block_beneath = mc.getBlock(x, y-1, z)
    print(block_beneath)
We can use an if conditional statement to decide whether to plant a flower:
grass = 2
flower = 38

while True:
    x, y, z = mc.player.getPos() # player position (x, y, z)
    block_beneath = mc.getBlock(x, y-1, z) # block ID

    if block_beneath == grass:
        mc.setBlock(x, y, z, flower)
    sleep(0.1) # Don't plant too fast, or the program may crash
The country emphasizes environmental protection, vigorously retreats farmland to protect riverbanks, and implements three-fold protective barriers. Therefore, we can transform the block we are standing on into grass blocks, realizing the retreat of farmland and returning to forests, haha.
grass = 2
flower = 38

while True:
    x, y, z = mc.player.getPos() # player position (x, y, z)
    block_beneath = mc.getBlock(x, y-1, z) # block ID

    if block_beneath == grass:
        mc.setBlock(x, y, z, flower)
    else:
        mc.setBlock(x, y-1, z, grass)
    sleep(0.1)
Now, try walking a couple of steps. If you walk on grass, you will leave a fragrant flower behind. If the next block is not a grass block, we will turn it into a grass block. When we look back, we will see a flower blooming behind us.

Playing with TNT Explosives
Another very interesting block is TNT! The regular TNT looks like this:

Of course, this ordinary TNT is too mundane and uninteresting. We can set the data attribute of TNT to 1, which means setting the fourth parameter of setBlock to 1:
tnt = 46
mc.setBlock(x, y, z, tnt, 1)
Now, when you left-click on the TNT block with your sword, it will explode after a short delay, which is equivalent to a timed explosive.
Now try building a huge cube of TNT:
tnt = 46
mc.setBlocks(x+1, y+1, z+1, x+11, y+11, z+11, tnt, 1)

Now, you will see a cube filled with TNT. Light one of the TNT blocks, run away, and observe the spectacular explosion scene. Because so many things change during the explosion, the graphical rendering may lag, which means the frame rate may drop; the Raspberry Pi’s performance is somewhat limited.
Trying the Fun of Lava
Another very interesting block is lava:
from mcpi.minecraft import Minecraft
mc = Minecraft.create()
x, y, z = mc.player.getPos()
lava = 10
mc.setBlock(x+3, y+3, z, lava)
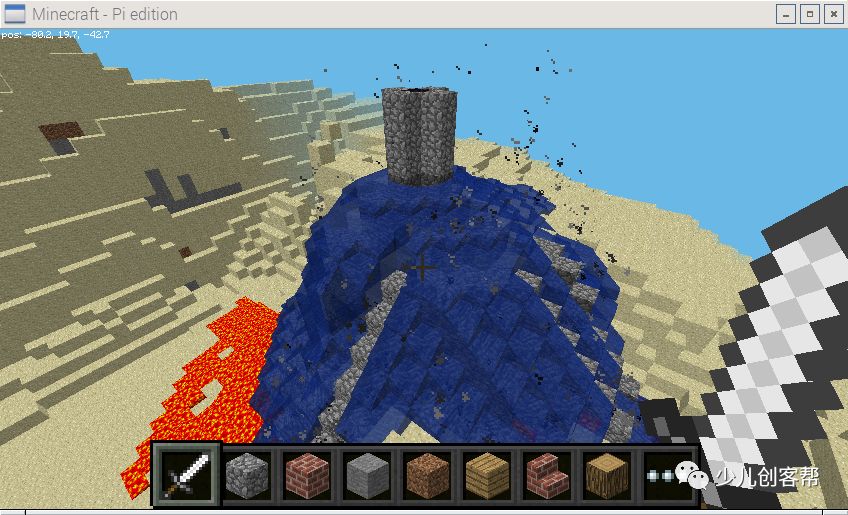
Find the code block you just placed, and you will see lava flowing to the ground.
When the lava cools, it will turn into rock, which is really cool. Change the position and try the following code:
from mcpi.minecraft import Minecraft
from time import sleep
mc = Minecraft.create()
x, y, z = mc.player.getPos()
lava = 10
water = 8
air = 0
mc.setBlock(x+3, y+3, z, lava)
sleep(20)
mc.setBlock(x+3, y+5, z, water)
sleep(4)
mc.setBlock(x+3, y+5, z, air)
Adjust the sleep parameters to change the duration of time the lava flows.
Advanced Learning
Once you understand how to control Minecraft using Python, there are countless things you can create with Python code.
Online Play
If multiple Raspberry Pis are connected to the same local area network, players can join each other’s Minecraft worlds and play together. Players can see each other in Minecraft.
API Interface
Visit the API to see a detailed list of block IDs and more detailed explanations of the API. I will also introduce more APIs and examples when I have time. 
This is a rough translation; in some places, I have interpreted it according to my understanding. Click to read the original text to access the original English material.
Related Articles
-
Everyone Can Learn Programming: Scratch: Program for All
-
The Best Tool for Installing and Configuring Raspberry Pi – NOOBS: An Introduction to Built-in Software for Raspberry Pi Zero (PiZero) from an IT Teacher
-
Raspberry Pi Physical Computing Course 1: Introduction to Physical Computing
-
Raspberry Pi Physical Computing Course 2: Controlling a Buzzer
If you like it, please give it a thumbs up. If you really like it and find it helpful, you can support it.