For more content, you can join the Linux system knowledge base package (tutorials + videos + Q&A)
Contact me on WeChat to receive a large discount coupon for the Linux comprehensive course:
1. Driver Content Learning
1.1. Foundation
Must be fully mastered.
1.1.1. Rockchip Development Environment
Necessity: The code environment must be set up before learning
Reason: Without the environment, experiments cannot be conducted
Learning Method:
① Refer to the manufacturer’s manual to complete the system SDK compilation (just run ./build.sh to compile)
② Flash the development board
③ Use a serial debugging tool to verify if the environment is normal (check the startup logs)
1.1.2. Linux Modular Programming
Necessity: Kernel module writing (<span>module_init</span>/<span>exit</span>), Makefile, symbol export.
Reason: The writing form of all Linux drivers is the first program in driver development.
Learning Method:
① Minimal case: Start by writing a kernel module that prints “Hello Module” to master<span>module_init</span>/<span>exit</span> and <span>Makefile</span> basic syntax (such as <span>obj-m</span>). ② Symbol export experiment: Create two modules and share functions through <span>EXPORT_SYMBOL</span> to understand inter-module communication.
1.1.3. Interrupts and Exceptions
Necessity: Interrupt registration (<span>request_irq</span>), top half/bottom half (tasklet, work queue).
Reason: The core mechanism for handling real-time hardware events (such as buttons, sensors).
Learning Method:
① Tasklet experiment ② Interrupt threading experiment
1.1.4. Kernel Mutex Techniques
Necessity: Spinlocks, semaphores, mutexes, RCU.
Reason: Ensuring driver safety in multi-core/multi-threaded environments, a must-ask in interviews.
Learning Method:
① Experiment with protecting resources using spinlocks (<span>spin_lock</span>) and mutexes (<span>mutex</span>)
1.1.5. Character Device Driver Model
Necessity:<span>file_operations</span> structure, device number allocation (<span>register_chrdev</span>).
Reason: 90% of simple peripherals (such as LEDs, buttons) are based on this model.
Learning Method:
① Simplified framework: Implement a virtual character device that only supports<span>read</span>/<span>write</span> operations (like an echo driver: whatever you write, you read back). ② Automatically create device nodes: Combine <span>udev</span> rules to automatically generate device files in <span>/dev</span> when the driver loads.
1.1.6. Linux Device Model
Necessity:<span>sysfs</span>, <span>kobject</span>, <span>kset</span>, <span>udev</span> rules.
Reason: Understanding how Linux uniformly manages devices is the foundation for subsequent subsystems.
Learning Method:
① Manually create a <span>kobject</span>: Create a custom directory under <span>/sys</span> and add attribute files (implement read/write callbacks through <span>kobj_attribute</span>). ② Observe existing devices: Analyze existing devices under <span>/sys/bus</span> and <span>/sys/class</span> (such as the hierarchy of the <span>input</span> subsystem).
1.2. Advanced Learning
Must be fully mastered.
1.2.1. Device Tree
Necessity:<span>.dts</span> syntax, device tree compilation, kernel parsing mechanism.
Reason: Modern embedded development has completely replaced hard coding, must be mastered.
Learning Method:
① Decompile and compare: Modify <span>.dts</span>, compile it into <span>.dtb</span>, then use the <span>fdtdump</span> tool to decompile and observe the syntax correspondence. ② Dynamic modification: Use <span>/proc/device-tree</span> to view the device tree nodes parsed by the kernel in real-time.
1.2.2. Platform Virtual Bus Driver
Necessity:<span>platform_driver</span>, <span>platform_device</span> separation design.
Reason: The core design philosophy of the Linux driver framework, a high-frequency interview question.
Learning Method:
① Separation design practice: Transform the character device driver into a separated structure of <span>platform_driver</span> and <span>platform_device</span> (the device tree describes hardware resources). ② Matching mechanism experiment: Intentionally modify the compatible string in <span>of_match_table</span> to observe the driver loading failure phenomenon.
1.2.3. GPIO Subsystem
Necessity:<span>gpiod_get</span>, direction setting, interrupt binding.
Reason: The foundation for controlling all pins (such as LEDs, relays).
Learning Method:
① LED blinking practice: Control the LED pin level through <span>gpiod_direction_output()</span> and combine with a timer to achieve a breathing light effect. ② Interrupt button: Use <span>gpiod_to_irq()</span> to map the button GPIO to an interrupt number and test debounce handling.
1.2.4. Pinctrl Subsystem
Necessity: Pin multiplexing configuration (when UART and GPIO conflict).
Reason: Solve complex SoC pin function conflict issues.
Learning Method:
① Pin multiplexing conflict: Configure the same pin in the device tree to serve both UART and GPIO, and observe the error messages during kernel startup. ② Oscilloscope verification: After modifying the <span>pinctrl</span> configuration, use an oscilloscope to measure the actual pin level changes.
1.2.5. LED Subsystem
Necessity:<span>led_classdev</span>, triggers.
Reason: Standardized LED control, rapid development without reinventing the wheel.
Learning Method:
① Trigger application: Use the built-in <span>heartbeat</span> trigger to make the LED blink with the system heartbeat without writing a driver.
1.2.6. Input Subsystem
Necessity: Input event reporting (<span>input_event</span>).
Reason: Standardized driver framework for input devices such as buttons and touch screens.
Learning Method:
① Input device: Create a button driver that reports events through <span>input_event()</span>. ② Read real devices: Parse the raw data in <span>/dev/input/eventX</span> (using the <span>evtest</span> tool for assistance).
1.2.7. IIC Section
Necessity: I2C is used to connect low-speed peripherals (such as sensors, EEPROMs, touch screens, etc.)
Reason:
Learning Method:
① User-mode simulation: First use <span>i2c-tools</span> (such as <span>i2cset</span>/<span>i2cget</span>) to manually operate the sensor, then compare with the kernel driver implementation. ② Protocol analysis: Use a logic analyzer to capture I2C waveforms and analyze the timing diagrams for <span>START</span>/<span>STOP</span>/<span>ACK</span> signals.
1.2.8. SPI Section
① Full-duplex test: Implement SPI loopback test (MOSI connected to MISO) to verify data transmission consistency. ② Performance optimization: Compare the throughput differences between <span>spi_sync()</span> and <span>spi_async()</span> (such as the time taken to transmit 1MB of data).
1.2.9. UART Section
① Loopback test: Short-circuit the TX/RX pins of the development board, send data using the <span>echo</span> command and receive verification. ② Custom protocol: Implement a simple serial protocol based on <span>tty_struct</span> (such as frame header + data + CRC check).
1.3. Advanced Learning
Choose based on personal direction.
1.3.1. SDIO
Necessity: Communication interface for SD cards and Wi-Fi modules.
Reason: Embedded devices commonly use the SDIO interface to connect high-speed peripherals (such as the Wi-Fi chip RTL8723DS), need to master SDIO protocol, block device read/write, and power management.
1.3.2. Ethernet
Necessity: Wired network communication (TCP/IP protocol stack, PHY chip driver).
Reason: Essential for industrial devices (such as PLCs) and gateway development, need to be familiar with PHY drivers, <span>net_device</span> structure, and DMA transmission optimization.
1.3.3. USB
Necessity: Host/device mode (USB Host/Gadget driver).
Reason: Peripheral expansion such as USB drives, cameras, and 4G modules, need to learn URB requests, descriptor configuration, and OTG dual-role switching.
1.3.4. PCIe
Necessity: High-speed data transmission (NVMe SSD, GPU acceleration card).
Reason: Edge computing and server scenarios (such as AI inference), need to master BAR space mapping, MSI interrupts, and DMA engine configuration.
2. Learning Sequence for Advertising Machine Project
2.1. Resume Template
① Project Function Description:
-
Multimedia playback function
-
Supports local advertisement video/audio playback
-
Supports advertisement image display (supports JPG/PNG/BMP formats)
-
Automatically loops multimedia content
-
Running data statistics
-
Automatically records device running time
-
Statistics on advertisement playback times
-
Elevator environment monitoring
-
Real-time monitoring of temperature and humidity data inside the elevator
-
Abnormal environment state warning function
-
Historical environment data recording and analysis
② Technical Implementation and Responsibilities:
-
Storage system development
-
Implement SD card auto-mount/unmount functionality
-
Automatic indexing of multimedia files
-
4G communication module
-
EC20 4G module driver development
-
Signal strength monitoring and network status management
-
Hardware driver development
-
Servo control PWM signal generation
-
Motor driver
-
LVGL Project
-
GUI system porting
-
Porting and optimizing LVGL V8 graphics library
-
Display current floor
-
Display running times
-
Display weather
-
Display time
-
Low memory usage optimization
-
Environment monitoring system
-
Temperature and humidity sensor DHT11
-
Smoke anomaly threshold detection, buzzer alarm
2.2. Resume Template 2
Project: Smart Building Advertising Machine Terminal
1. Project Description: Developed based on the Rockchip RK3568 platform, using the LVGL UI framework for display, the building advertising machine terminal interface is divided into seven sections, supporting real-time display of network time, real-time collection and display of elevator temperature, recording of elevator operation times, polling playback of advertisement images, and real-time display of elevator Wi-Fi QR codes, etc.
2. Responsibilities in the Project:
Application Part:
-
Porting of LVGL project
-
Control of UI layout for building advertising machine interface
-
NTP real-time network time acquisition
-
Loading of LVGL image and Chinese character libraries
Driver Part:
-
Porting of DHT11 temperature sensor low-level driver
-
Porting of RTL8822CE wireless Wi-Fi driver
-
Porting of MPU6050 accelerometer driver and implementation of acceleration direction business code
-
Porting of smoke sensor driver and implementation of real-time monitoring business code.
-
Customization and trimming of Linux system.
-
Control of servo using PWM driver subsystem.
-
Porting of RGMII interface Ethernet driver.
-
Enabling and using HDMI display output driver content.
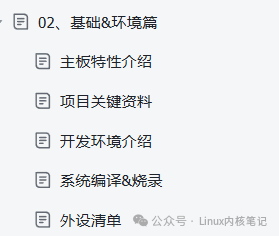
2.3. Learning Step ①: Basic Environment Preparation
Learning Content:
-
Set up the development board environment (flashing, compiling)
-
Understand the schematic diagram
Refer to the knowledge base space for learning as follows:
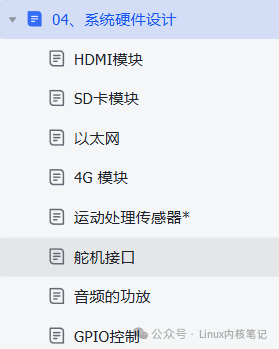
2.3. Learning Step ②: Understand Involved Hardware
Learning Content:
Understand the involved hardware, including pin connections, etc.
-
Understand the usage of hardware pin resources
-
Summarize the chip manuals of all peripheral devices used in the hardware and understand their operating principles
Refer to the knowledge base space for learning as follows:
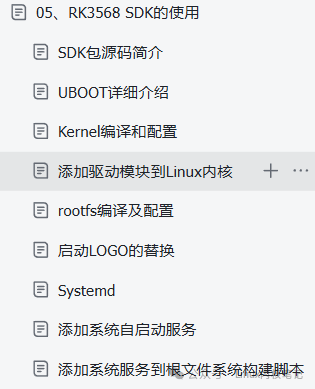
2.4. Learning Step ③: Using Software SDK
Learning Content:
-
Understand the directories of the SDK code project
-
Customize the kernel, mastering how to add peripheral modules
-
Master how to add auto-start application services
-
Understand the syntax of systemd
Refer to the knowledge base space for learning as follows:
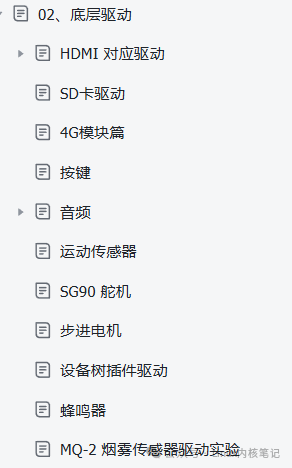
2.5. Learning Step ④: System Software Design Lower Layer
Learning Content:
-
HDMI device tree configuration
-
Adaptation of 4G module PID/VID options driver
-
Register buttons as input devices, apply to listen to /dev/event0
-
Audio playback
-
Motion sensor
-
SG90 servo simulating the closing of the elevator door
-
Master how to add auto-start application services
-
Buzzer
-
Usage of LED subsystem
-
Driver for MQ-2 smoke sensor
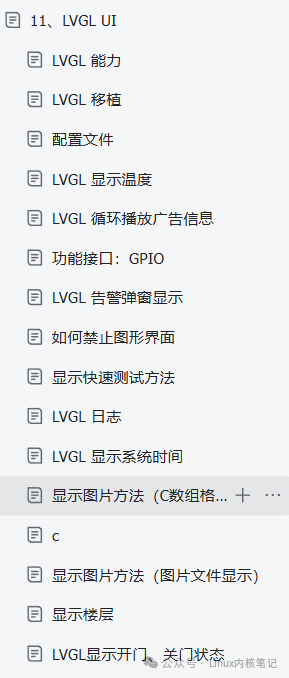
2.6. Learning Step ⑤: System Software Design Application (LVGL) Part
Learning Content:
-
Understanding the LVGL V8 SDK project code directory
-
LVGL configuration files
-
LVGL displaying the current environmental temperature
-
LVGL alarm pop-up
-
LVGL displaying system time
-
NTP synchronizing network time
-
LVGL displaying door opening and closing in conjunction with the servo