Thank you all for your continued support!

 !This article follows the “Python Data Science Handbook” and is for those interested in Python web development. You can follow the author’s “steps” as we learn everything step by step. Before we begin, I would like to thank everyone for their support again!

 !Unfortunately, this book does not have an open-source code website, so we can only follow the author’s steps slowly. However, I know everyone will work hard, so without further ado, let’s start a new chapter!1. What is the Web?
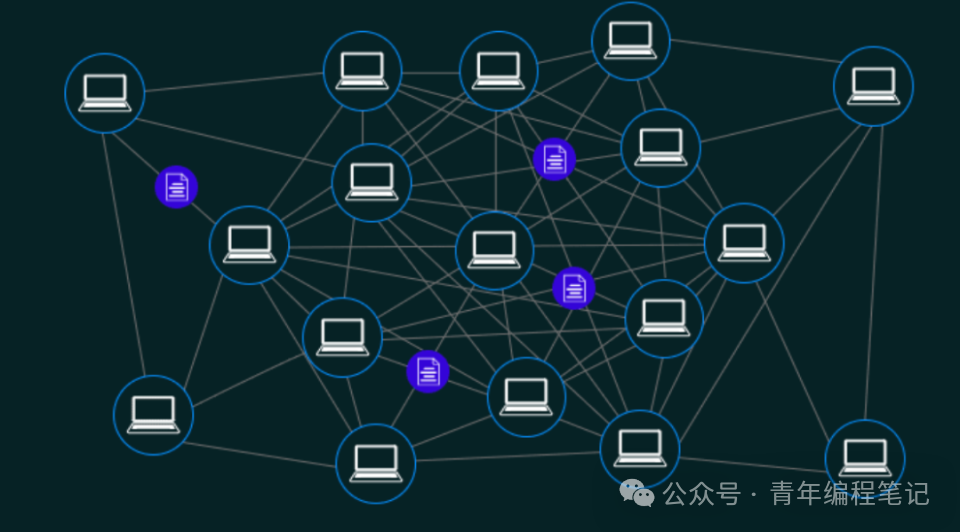
The Web (World Wide Web) is an information space based on the Internet. It integrates multimedia content such as text, images, audio, and video in the form of web pages, interconnected through hyperlinks, making it easy for users to browse and access information.
 2. Basics of HTML2.1 Introduction to HTML
HTML (Hypertext Markup Language) is the standard markup language used to create the structure and content of web pages. It defines the layout and display of elements such as text, images, and links through various tags.
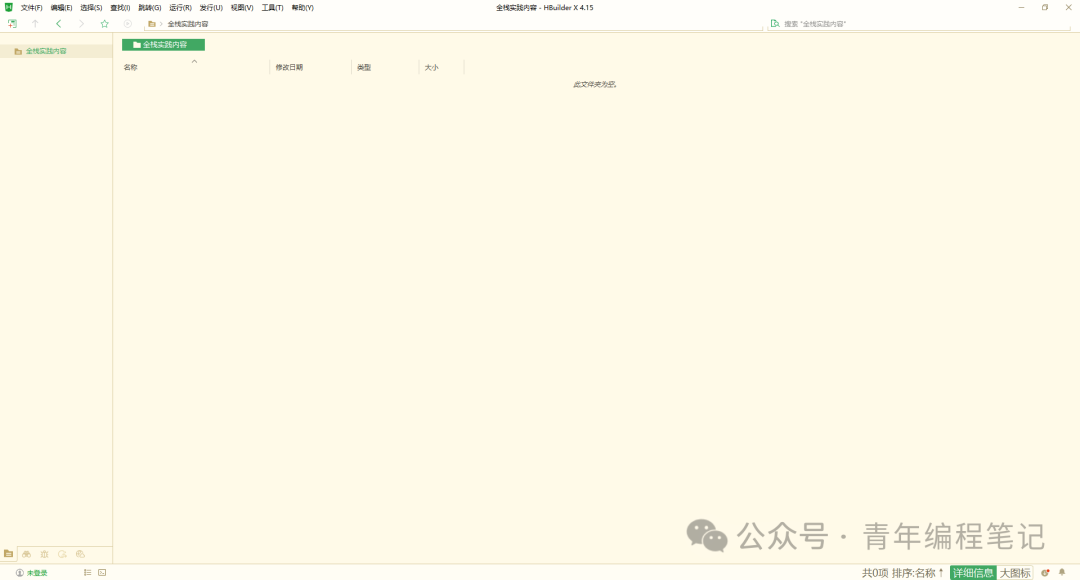
To create your first web page, you must use our HBuilder software, and the article for downloading the software is here:HBuilderX Installation Guide: Build Your Development EnvironmentAfter installing HBuilder, the interface looks like this: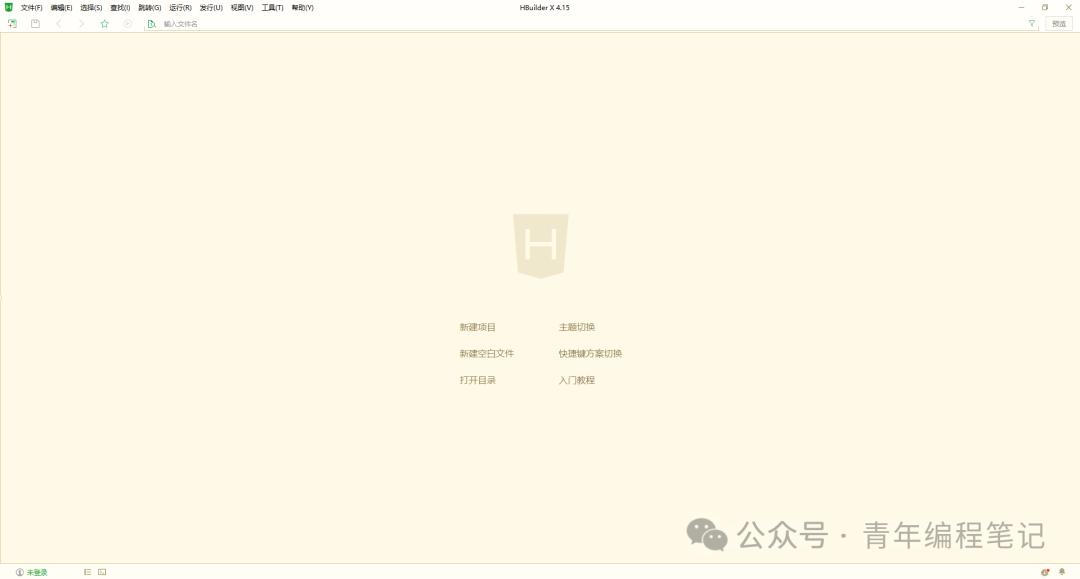 With this interface, we can create our first folder:
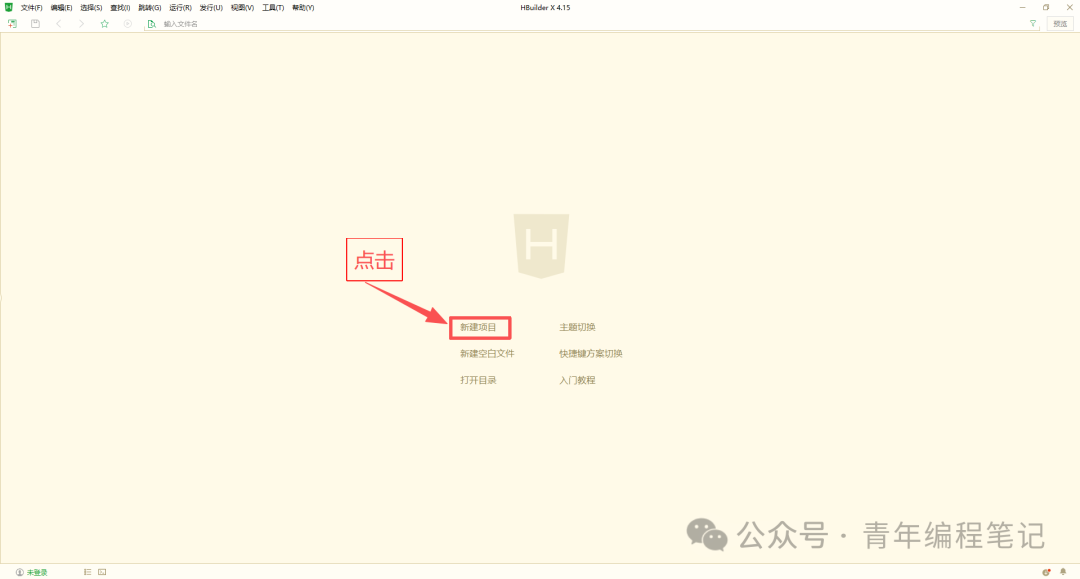 After clicking, the interface looks like this:
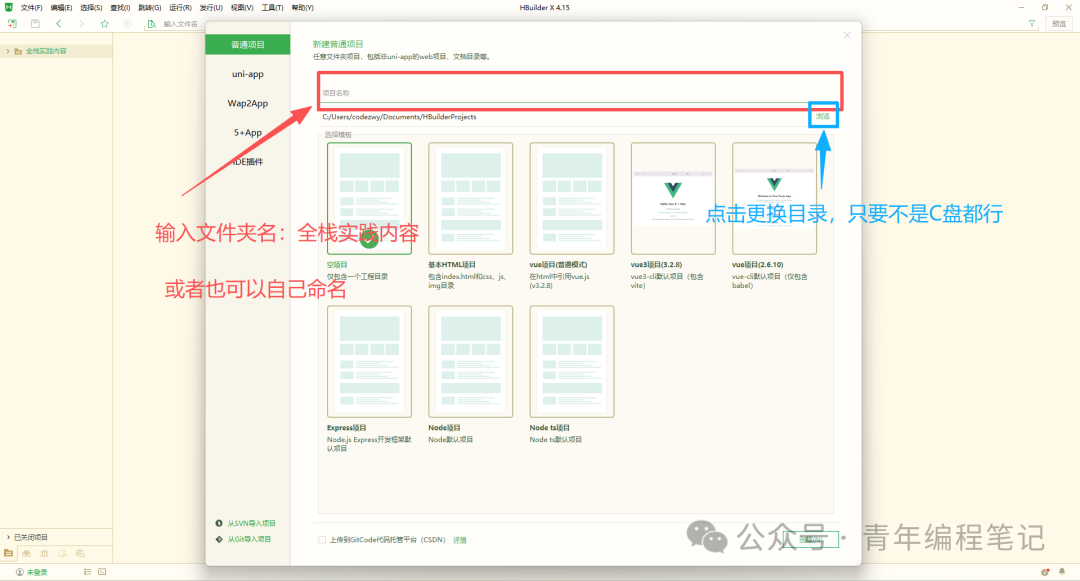 Once created, we have our first full-stack folder:
 Next, we need to create our first HTML file. Right-click on the folder as shown:
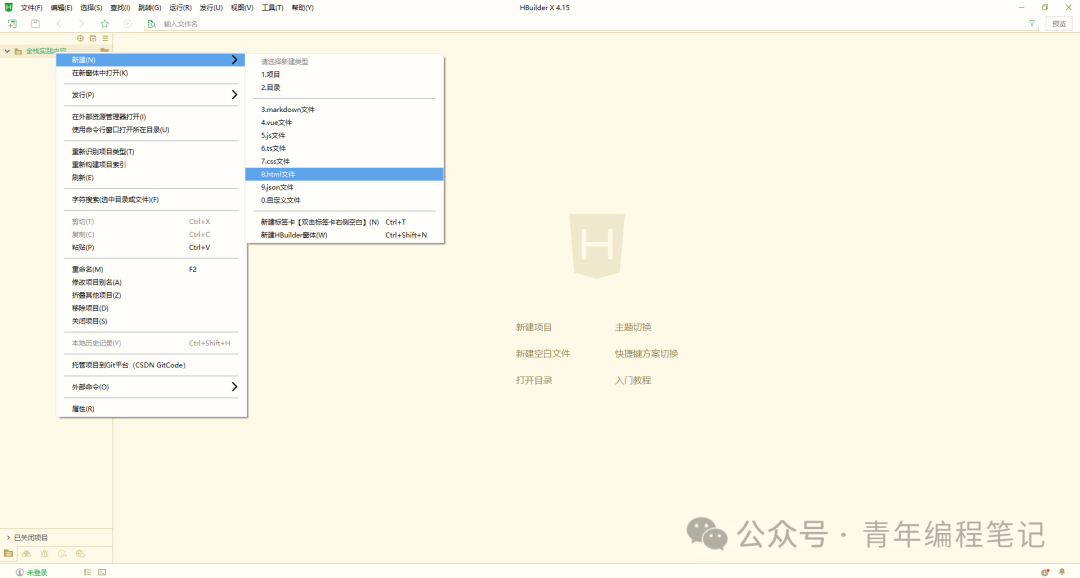 Popup window:
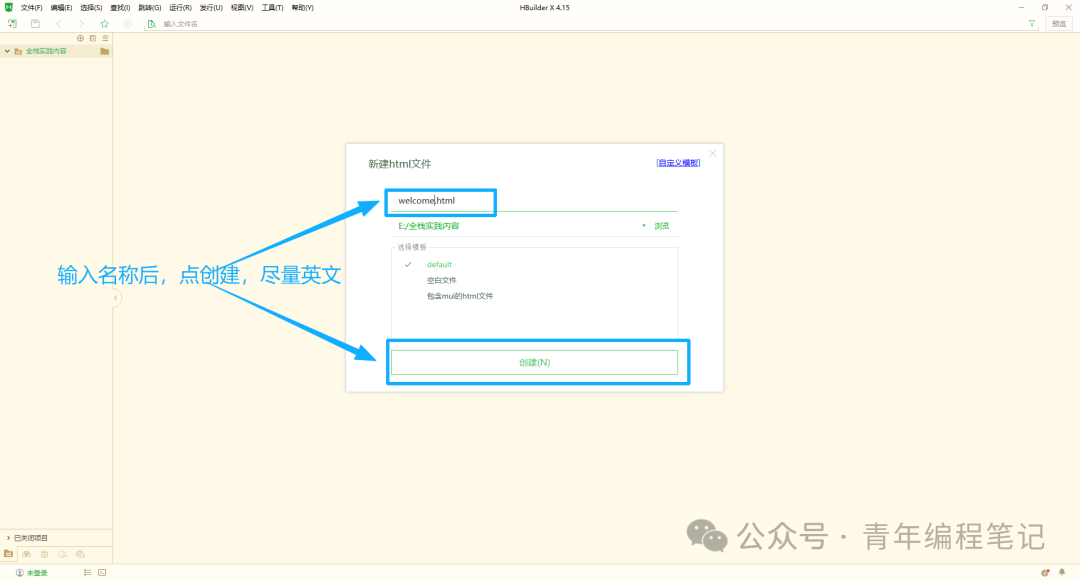 Final file:
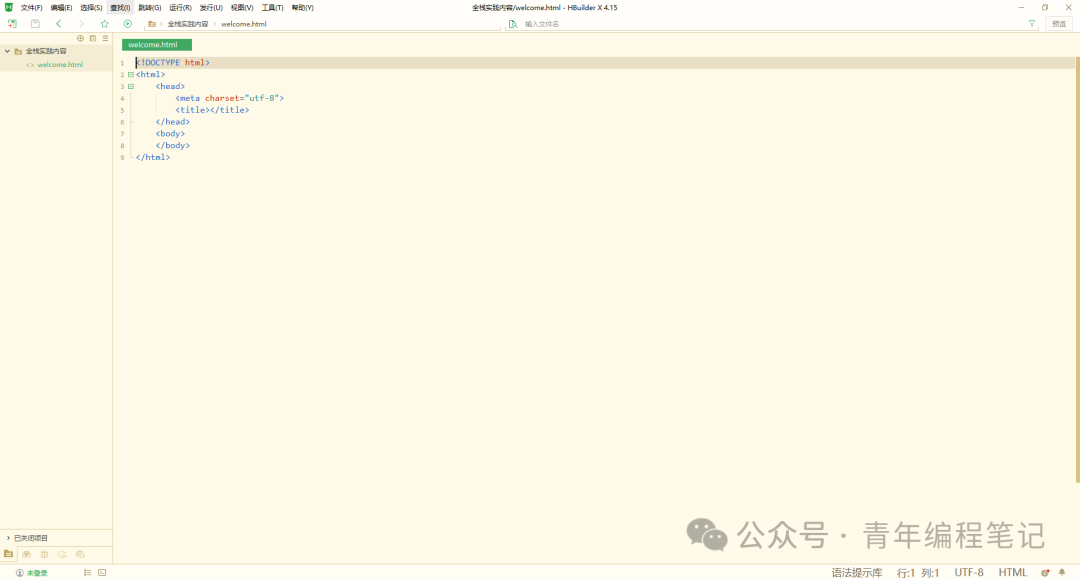 Now we have our own .html file. Let’s write our first HTML page:
<!DOCTYPE html><html><head><meta charset="utf-8"><title></title></head><body><h1>Welcome to the World of HTML</h1><p>Hey, friends! Welcome to the world of HTML, where creativity and surprises abound. Imagine that your HTML code is like a box of magical colored pens, each line of code can sketch unique colors and shapes on the canvas of the web page. You can use it to build a vibrant personal blog to showcase your life, or create a cool game page to have fun with friends. Here, you are the wizard in control, using simple tags and commands to create your own digital kingdom. Don't worry, even if you are a beginner, there are countless resources and friendly communities waiting for you to explore this wonderful world of HTML!</p></body></html>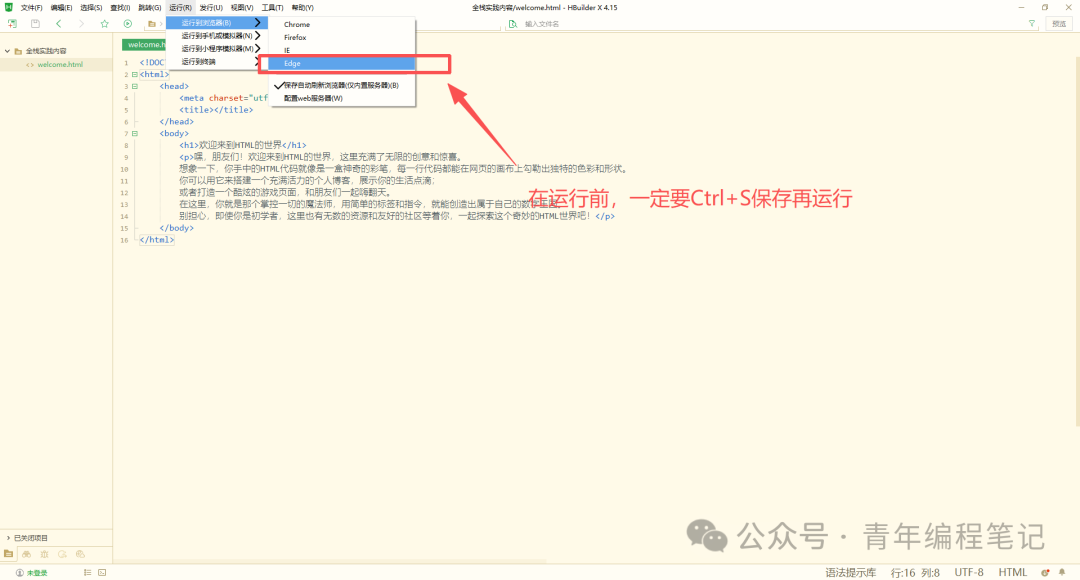
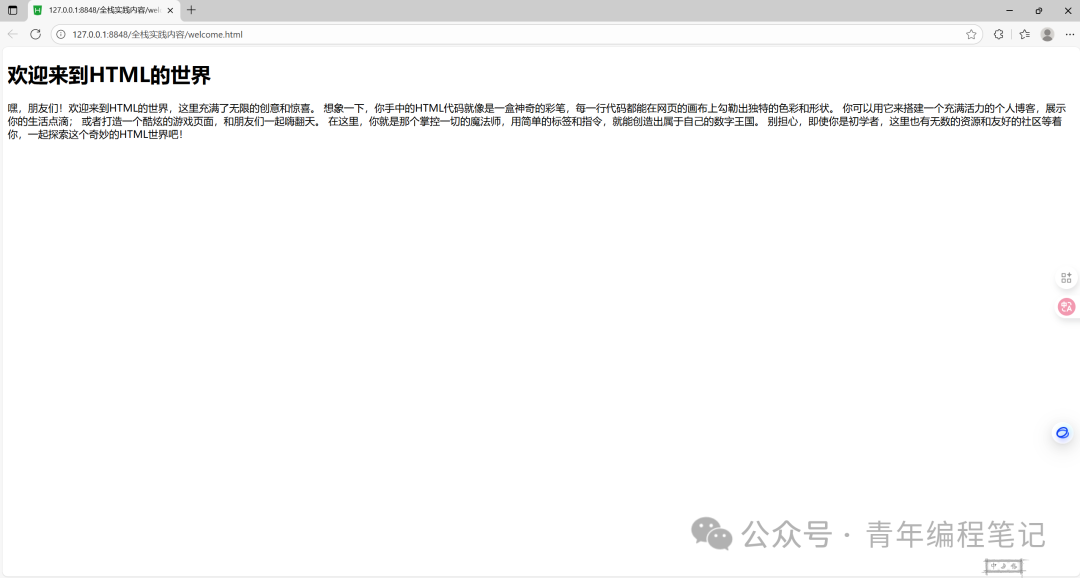 Now, everyone’s first HTML page is up and running.2.2 HTML Tags and Their UsageThe format of HTML tags is as follows:
<tag>content</tag>Common HTML tags are as follows:
| Tag | Meaning |
| <!–…–> | Comment |
| <!DOCTYPE> | Document Type |
| <a> | Hypertext Link |
| <b> | Bold Text |
| <body> | Document Body Content |
| <br> | Line Break |
| <p> | Paragraph |
| <title> | Title |
| <h1-h6> | HTML Headings Level 1 to 6 |
Here are 10 common tags. If needed, I will emphasize their usage later. You can also search for “Common HTML Tags” for more information.2.3 Using HTML TablesHere, I will demonstrate for convenience:
<!DOCTYPE html><html><head><meta charset="utf-8"><title>Welcome to the World of HTML</title></head><body><!-- Design an H3 title for "Daily Internship Schedule for College Students" --><h3 style="text-align: center;">Daily Internship Schedule for College Students</h3><!-- table is the tag for creating table data --><table border="3" cellpadding="8" width="100%"><!-- tr creates rows in the table, td creates columns, th creates table headers --><tr><th>Time</th><th>Monday</th><th>Tuesday</th><th>Wednesday</th><th>Thursday</th><th>Friday</th><th>Saturday</th><th>Sunday</th><tr style="text-align: center;"><td>7:20-7:30</td><td colspan="5">Wake Up</td><td rowspan="4" colspan="2">Sleep</td></tr><tr style="text-align: center;"><td>7:30-8:30</td><td colspan="5">Wash Up, Have Breakfast</td></tr><tr style="text-align: center;"><td>8:30-9:00</td><td colspan="5">On the Way to the Company</td></tr><tr style="text-align: center;"><td>9:00-12:00</td><td colspan="5">Work</td></tr><tr style="text-align: center;"><td>12:00-14:00</td><td colspan="5">Lunch Break</td><td colspan="2">Wake Up</td></tr><tr style="text-align: center;"><td>14:00-18:00</td><td colspan="5">Work</td><td colspan="2">Play on Phone</td></tr><tr style="text-align: center;"><td>18:00-18:30</td><td colspan="5">On the Way Home</td><td colspan="2">Go to the Supermarket to Buy Groceries</td></tr><tr style="text-align: center;"><td>18:30-19:00</td><td colspan="7">Dinner and Washing Dishes</td></tr><tr style="text-align: center;"><td>19:00-22:00</td><td colspan="5">Leisure Time</td><td colspan="2" rowspan="2">Play on Phone</td></tr><tr style="text-align: center;"><td>22:00-2:00</td><td colspan="5" rowspan="2">Sleep</td></tr><tr style="text-align: center;"><td>2:00-7:20</td><td colspan="7">Sleep</td></tr></table></body></html>Note that colspan and rowspan represent the number of columns and rows respectively!Of course, the format is not written this way; it is just for convenience. Now and in the future, the code will be written this way. If you find it not elegant, you can indent it yourself: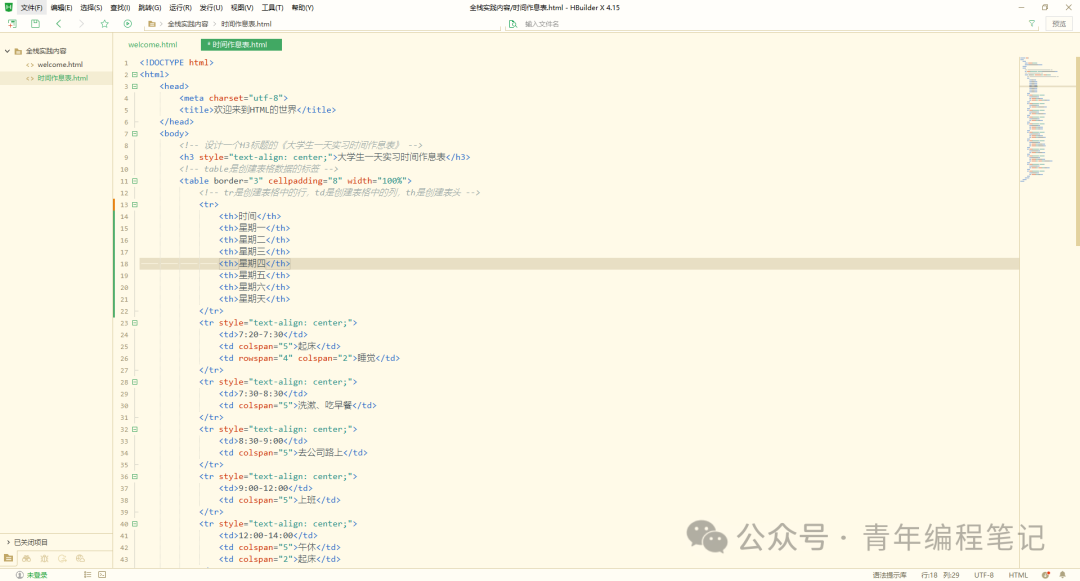
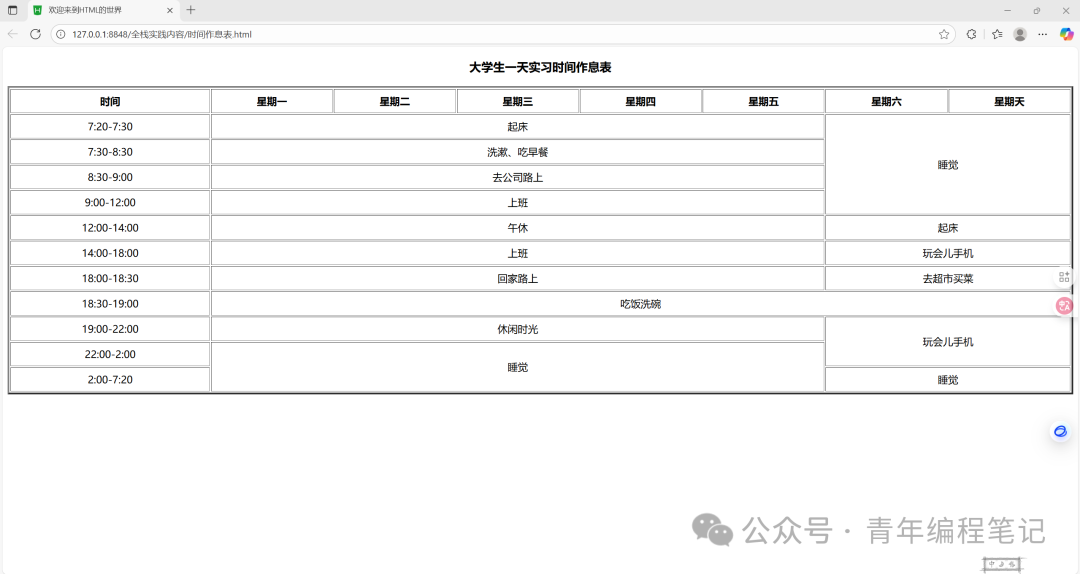 2.4 Using HTML ListsAfter understanding how to use HTML tables, we can create some commonly used items in life using unordered and ordered lists, such as toothpaste, washbasin, towel, etc:
<!DOCTYPE html><html><head><meta charset="utf-8"><title>Common Items for College Students</title></head><body><!-- Have you encountered something like this on a shopping page? --><h1>Ordered List</h1><h2>Daily Necessities</h2><ol><li>Toothpaste</li><li>Washbasin</li><li>Towel</li><li>Cup</li><li>Shelf</li></ol><h2>Study Supplies</h2><ol><li>Pencil</li><li>Brush Pen</li><li>Fountain Pen</li></ol><h2>Fruits and Vegetables</h2><ol><li>Apple</li><li>Banana</li></ol><h1>Unordered List</h1><h2>Items Bought After Work</h2><ul><li>Pork</li><li>Chicken</li><li>Lamb</li></ul><h2>Dishes Made for Dinner</h2><ul><li>Boiled Meat</li><li>Spicy Chicken</li><li>Stir-fried Lamb</li></ul></body></html>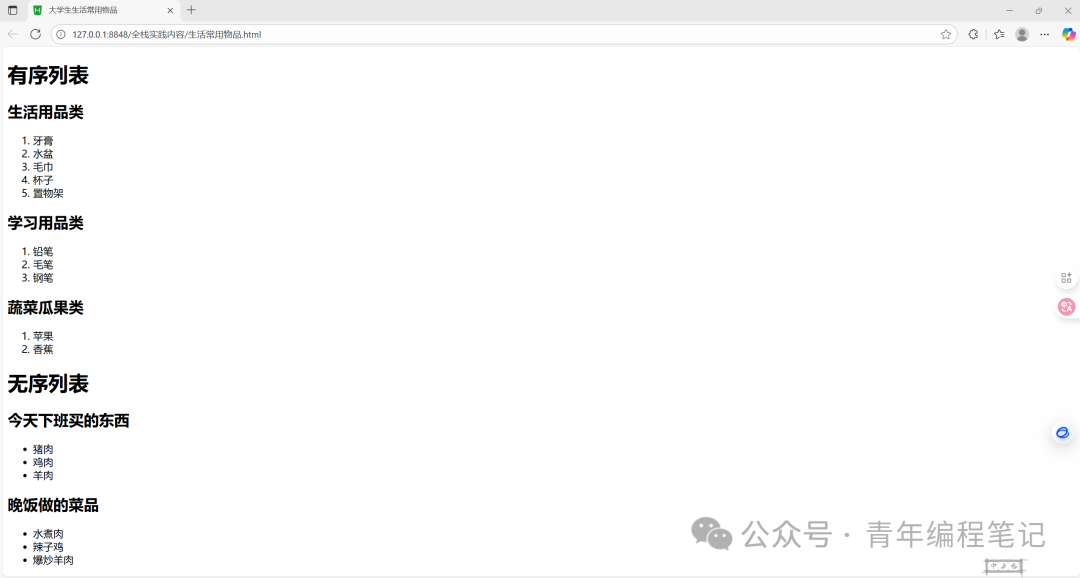 Just like when you shop on certain platforms, we don’t have CSS and JavaScript rendering backgrounds and images yet, but I will introduce them later.3. HTML Blocks and Forms3.1 HTML BlocksIn HTML, most content is defined as block-level elements or inline elements.
- Common block-level elements: <h1>, <p>, <ul>, <table>, etc.
- Common inline elements: <b>, <span>, <a>, <img>, etc.
Block-level elements are like “bricks” that occupy a whole line and support the structure, used to build the skeleton of a web page; inline elements are like “paint” that flows along and wraps text, used to embellish content.3.2 HTML Forms
HTML forms are used to collect various user information on web pages and are submitted to the server; this data is received and processed by a Python program on the server, and the results are sent back to the browser, completing an interaction. User registration, login, personal center settings, etc., are all application scenarios of HTML.
In the form element, <input> has many attribute values:
| Value | Explanation |
| text | Text Box |
| password | Password Box |
| file | File Box |
| image | Image Box |
| radio | Radio Button |
| checkbox | Checkbox |
| submit | Submit Button |
| reset | Reset Button |
| button | Normal Button |
Of course, <input> has more than these ten attributes, but most of the usable ones are just these ten.Form elements are not just <input>, but also <select>, <option>, etc.Now let’s create a user registration form to familiarize ourselves with many form elements:
<!DOCTYPE html><html><head><meta charset="utf-8"><title>User Profile</title></head><body><!-- The elements in the following form are meant to package content for processing in the browser, the method is post --><!-- post and get are submission methods in the form, the former is secure but slow, the latter is insecure but fast --><form action="server.php" method="post" enctype="multipart/form-data"> <h2>Create Personal Profile</h2> <!-- Account Information --> <fieldset><!-- We use the official tag <fieldset>, of course, you can also use <div> --> <legend>Account Information</legend> <label for="username">Username</label><!-- The placeholder here means to gray out "Please enter username", required is a mandatory field --> <input type="text" id="username" name="username" placeholder="Please enter username" required> <label for="password">Password</label> <input type="password" id="password" name="password" placeholder="Please enter password" required minlength="8"> </fieldset> <!-- Gender --> <fieldset> <legend>Gender</legend> <div> <label><input type="radio" name="gender" value="male" required> Male</label> <label><input type="radio" name="gender" value="female" required> Female</label> <label><input type="radio" name="gender" value="other"> Secret</label> </div> </fieldset> <!-- Birthday --> <fieldset> <legend>Birthday</legend> <label for="birth">Please select a date</label> <input type="date" id="birth" name="birth" max="9999-12-31"> </fieldset> <!-- Avatar --> <fieldset> <legend>Avatar</legend> <div><!-- img is for importing images --> <img id="preview" src="./default_avatar.png" style="width: 512px; height: 512px;" alt="Preview"> </div> <label for="avatar" class="upload-btn">Select Image</label> <input type="file" id="avatar" name="avatar" accept="image/*"> </fieldset> <!-- Self-introduction --> <fieldset> <legend>Self-introduction</legend> <label for="intro">Briefly introduce yourself (optional)</label> <textarea id="intro" name="intro" maxlength="300" placeholder="Introduce yourself in a few sentences~"></textarea> </fieldset> <!-- Buttons --> <div class="btn-group"> <button type="submit">Submit</button> <button type="reset">Reset</button> </div></form></body></html>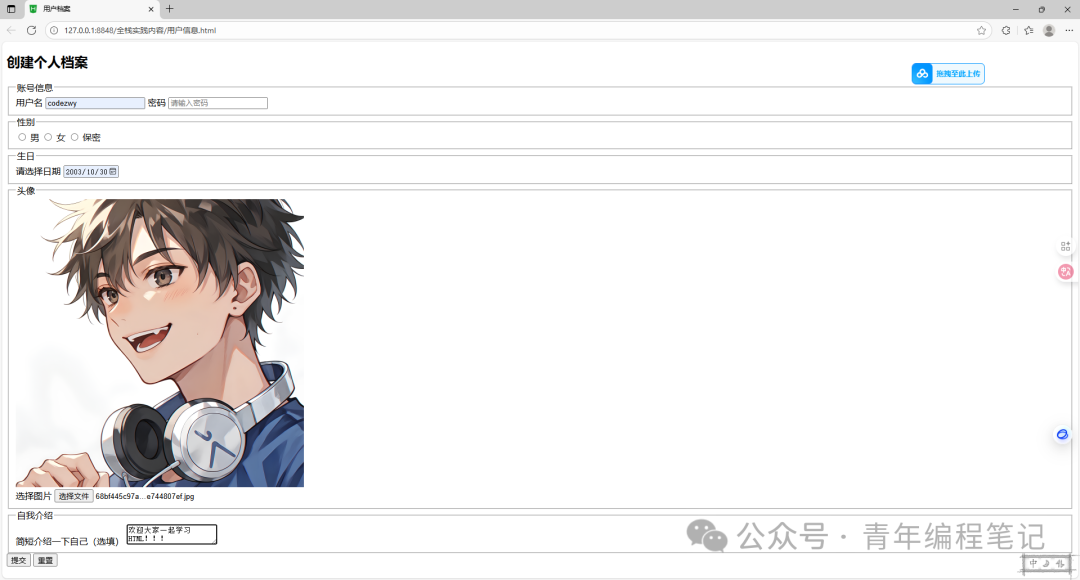 Alright, to not take up too much of your time, today we learned how to create HTML, common HTML tags, tables, lists, and forms. More content will be provided later, so stay tuned!