1. Installing Nginx
Installing Nginx on the Raspberry Pi is also quite simple. You can install it directly using the apt command. First, update the repository.
sudo apt updateInstall updates
sudo apt upgradeAfter the update is complete, install the Nginx package.
sudo apt install nginxStart Nginx
sudo /etc/init.d/nginx startAfter starting, we can enter the Raspberry Pi’s local IP address:80 in an external browser to access Nginx.
2. Installing Cpolar
Use the one-click installation script for Cpolar:
curl -L https://www.cpolar.com/static/downloads/install-release-cpolar.sh | sudo bashAdd the service to the system
sudo systemctl enable cpolarStart the Cpolar service
sudo systemctl start cpolarCheck the service status
sudo systemctl status cpolarRestart the Cpolar command (use when necessary)
sudo systemctl restart cpolarThen in an external browser, use the Raspberry Pi’s local IP address+:9200 to access the Cpolar management interface.
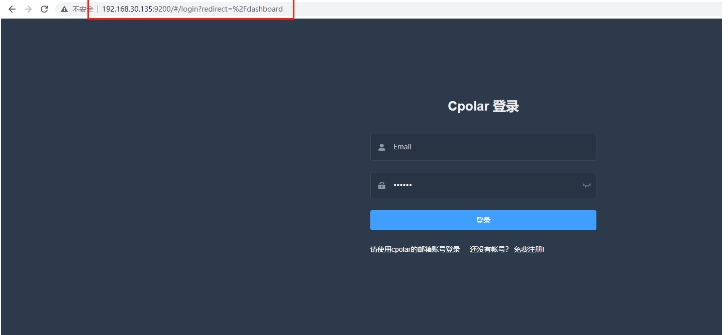
Log in with the account registered on the official website to operate on the tunnel.
3. Configuring Domain Name Access to Nginx
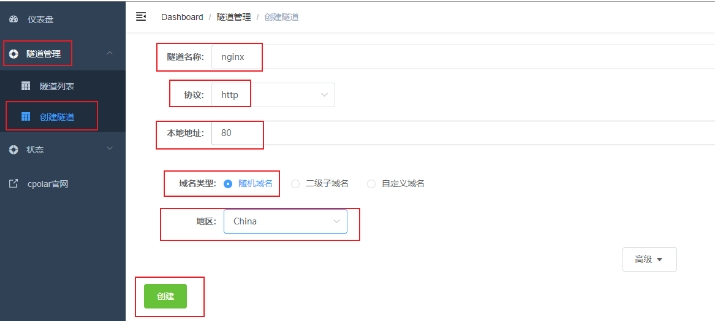
We create a random tunnel on the Cpolar management interface for port 80:
Tunnel Name: Customizable, ensure it's unique Protocol: http Local Address: 80 Port Type: Random Domain Region: ChinaClick to create
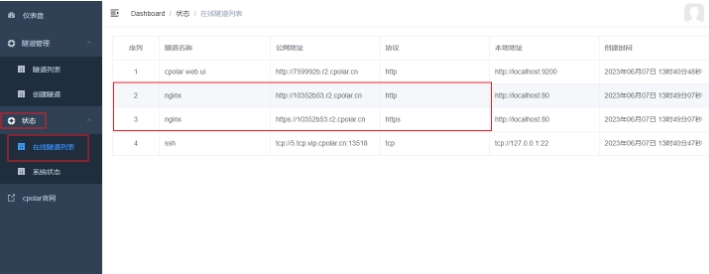
Then open the online tunnel list to view the public address of the created tunnel. There are two access methods by default: one is http and the other is https. Copy the http address.
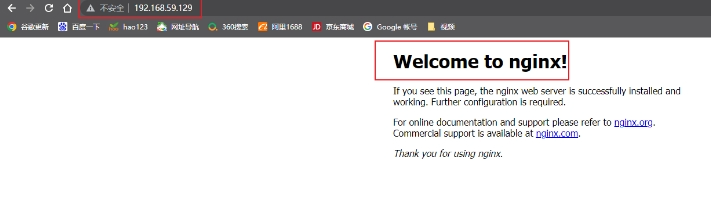
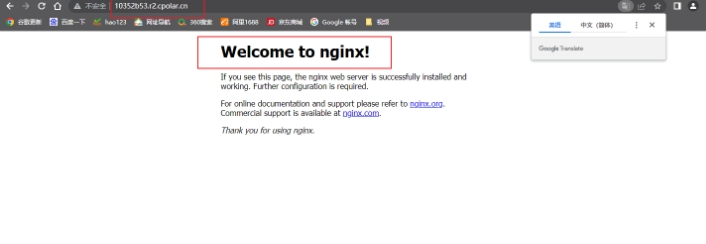
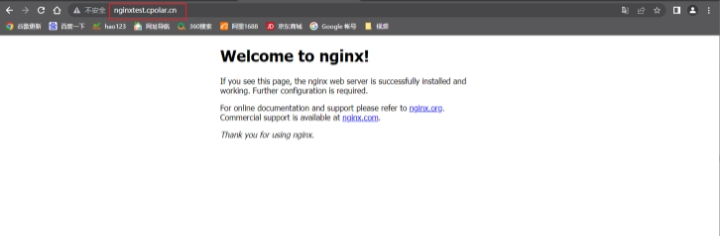
Open the browser and use the above http public address to access; you will see the Nginx welcome interface, thus remote access is set up.
4. Configuring a Fixed Domain Name Access
It should be noted that the above steps use a random temporary address, which will change randomly within 24 hours. Next, we will configure a fixed address that will not change, so you won’t need to modify the address daily.
You must upgrade to the basic package or higher to support the configuration of a fixed domain name.
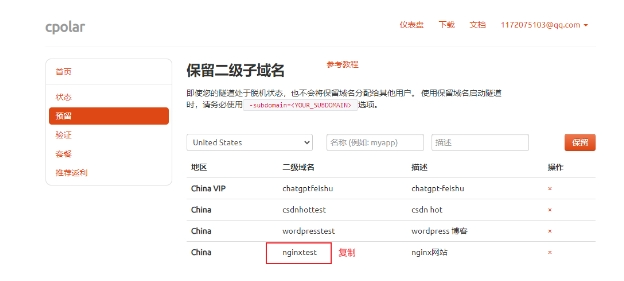
Log in to the Cpolar official website backend, click on the reserved section on the left dashboard, and find the option to reserve a secondary subdomain for the http tunnel.
Region: Select server region Name: Fill in the secondary subdomain you want to reserve (customizable) Description: Notes, can be filled in as desired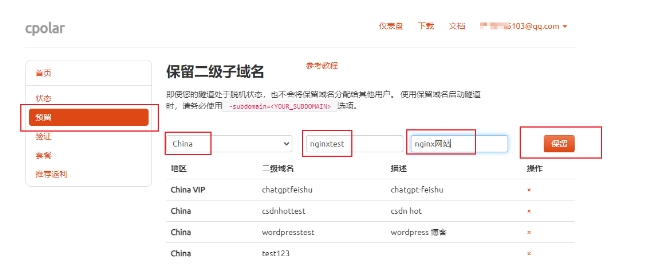
This example reserves a secondary subdomain named nginxtest. After successfully reserving the subdomain, we will copy it and then bind it to the tunnel.
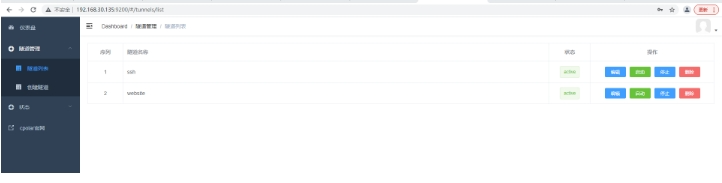
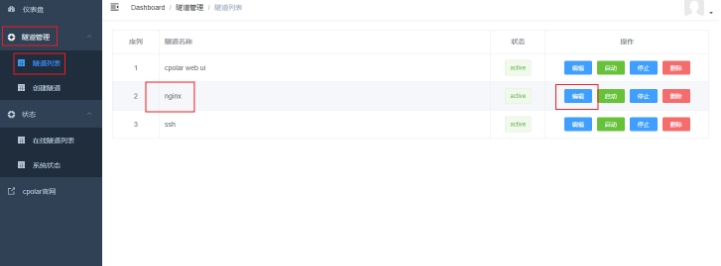
Log in to the Cpolar web UI management interface. Click on the left dashboard, Tunnel Management -> Tunnel List, find the tunnel that needs to configure the secondary subdomain, and click edit on the right.
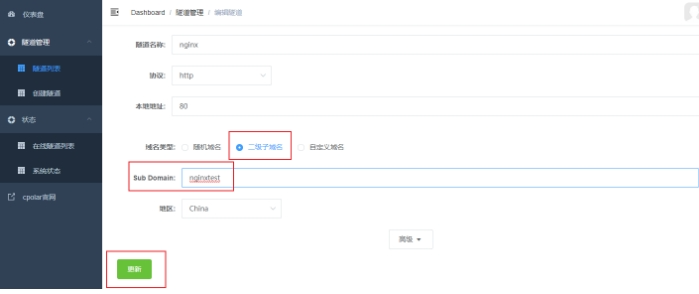
Modify the tunnel information to configure the secondary subdomain:
Domain Type: Change to select secondary subdomain
Sub Domain: Fill in the secondary subdomain we just reserved (in this case, nginxtest)
After modification, click update
After successfully updating the tunnel, click on the left dashboard, Status -> Online Tunnel List, and you can see that the public address of the Nginx tunnel has been updated to the secondary subdomain. Copy the public address.
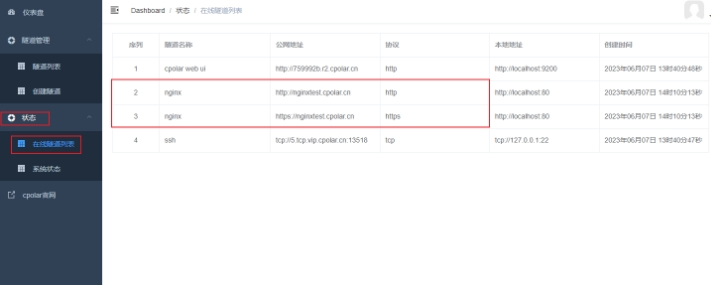
Open the browser, let’s test accessing the configured secondary subdomain. If the Nginx welcome page appears, it indicates success, and you can access it normally. Now, we have created a unique private secondary subdomain.
5. Configuring a Static Site
Enter the Nginx resource directory; this is the directory where Nginx looks for resources by default.
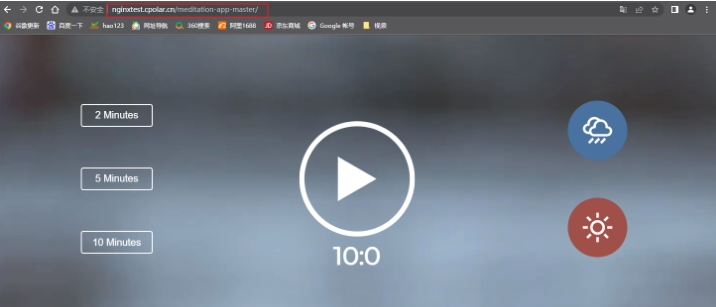
cd /var/www/htmlTo make the content of the site more meaningful, we will download and deploy a simple static demo site – a meditation relaxation site.
sudo wget https://www.cpolar.com/static/downloads/meditation-app-master.tar.gzUnzip
sudo tar xzf meditation-app-master.tar.gzThen open the browser and enter our configured public address plus the resource path: /meditation-app-master, and you will see our configured site. Remote access is also available.