
Check out this tutorial to see how easy it is to set up hardware flows using Node-RED’s drag-and-drop interface.
Node-RED is a programming tool that allows you to quickly connect hardware devices using a browser-based editor. It has a large number of nodes that can be used to build flows through drag-and-drop, significantly reducing development time. Node-RED is installed with the Raspbian Jessie on Raspberry Pi, but you can also download it independently.
To show you how it works, we will build a simple tool with Node-RED to communicate with a cellular modem connected to the Raspberry Pi. With the cellular modem, you can send/receive data from your Raspberry Pi over the cellular network. You can use a 3G/4G USB dongle typically provided by cellular network providers or connect the development board to a 3G or 4G wireless modem.
Whether you are connecting a USB dongle or a development board, the Raspberry Pi’s connection interface is through USB ports. In this tutorial, I will connect a SIM900 development board to the Raspberry Pi via a USB-to-serial cable.
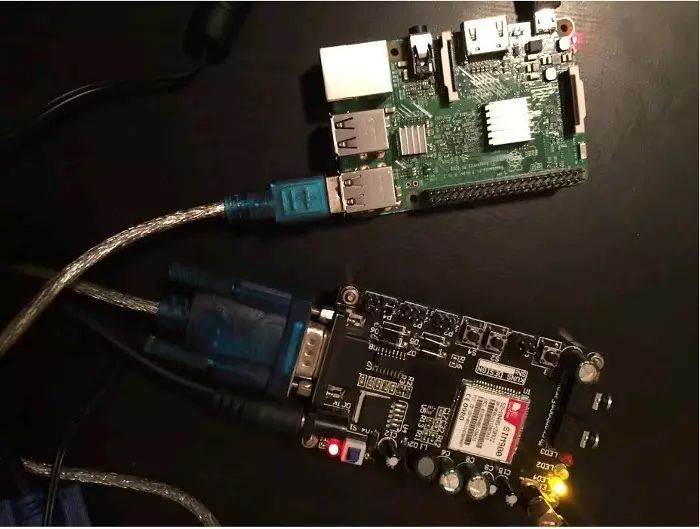
The first step is to check if the SIM900 development board is connected to the Raspberry Pi.

Checking that the SIM900 development board is connected
The USB-to-serial adapter is shown here as one of the USB devices connected to the Raspberry Pi.
Next, check the USB port number for the SIM900 connection.
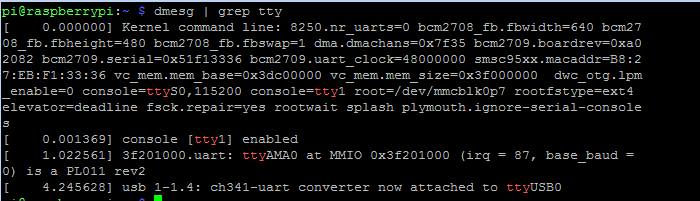
Checking the SIM900 board’s USB port number
In the last line, you can see that the SIM900 board (connected via USB-to-serial converter) is connected to ttyUSB0 on the Raspberry Pi. Now we are ready to start using Node-RED.
Start Node-RED on the Raspberry Pi.
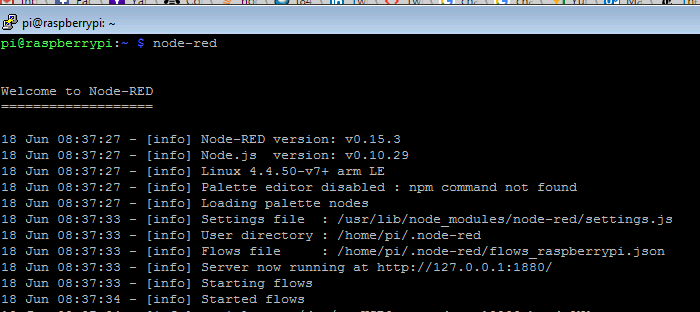
Launching Node-RED in Raspberry Pi
Download the example flow and import it into Node-RED. Note that the flow file is a JSON representation of the graphical UI.
In Node-RED, the imported flow should look like this:
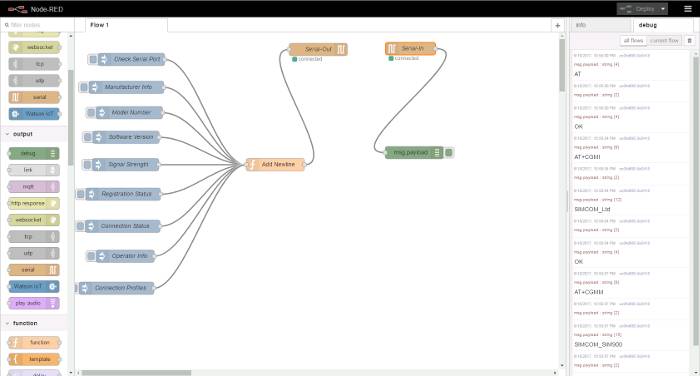
The imported flow in Node-RED
The inject node sets AT commands needed to query the modem. The Add New Line function node will append
to the AT commands passed from the inject node. The output of Add New Line is then connected to the Serial Output node, which writes data to the serial port. The response from the modem to the AT commands is read by the Serial Input node, which outputs the response to the Debug window. Confirm the serial port number and port speed in the configuration of the Serial Input and Serial Output nodes.
Node-RED is an easy-to-use programming tool that allows for quick integration and testing of hardware devices. As shown in this tutorial, using Node-RED to connect and test cellular mode with Raspberry Pi does not require coding.
For more information about Node-RED and other ways to use it, visit the project website.
(Header image: Thomas Hawk‘s Flickr. CC BY-NC 2.0. Opensource.com modified)
Author Bio:
Surya G – My interest is software development for IoT projects, especially those using cellular modems.
via: https://opensource.com/article/17/7/nodered-raspberrypi-hardware
Author: Surya G Translator: geekpi Proofreader: wxy
This article is originally compiled by LCTT and honorably presented by Linux China.

Recommended Articles
< Swipe left and right to view related articles >


Click on the image, enter the article ID, or scan the QR code to go directly