-
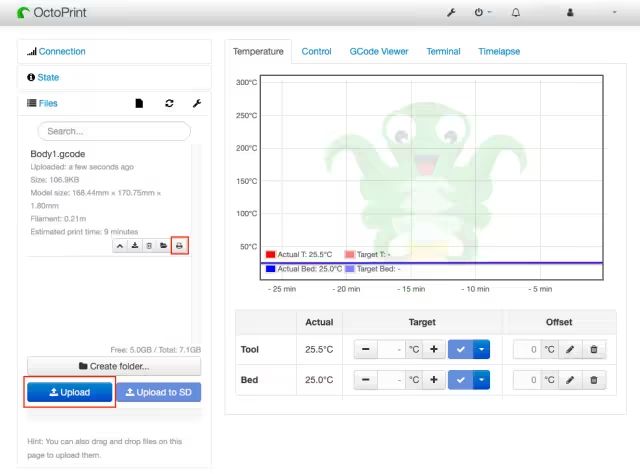
Remote Control and Monitoring: Control and monitor every detail of your 3D printer and print jobs through any web browser.
-
Webcam Integration: View the printing process in real-time with HD video streaming (requires a compatible webcam).
-
G-code Viewer: Visualize the G-code being executed during the print process in real-time for analysis and adjustment.
-
Temperature Control: Adjust the temperatures of the hotend, print bed, and print chamber in real-time to ensure print stability.
-
Print Job Management: Upload, start, pause, resume, and cancel print jobs remotely, easily managing multiple print tasks.
-
Custom Controls: Create custom buttons to perform specific printer operations (like homing axes, extruding filament, etc.) to improve operational efficiency.
-
Plugin System: Expand OctoPrint’s functionalities through a rich library of plugins to meet specific application needs.
OctoPrint Setup: How to Install OctoPi on Raspberry Pi
-
Raspberry Pi: OctoPrint strongly recommends using Raspberry Pi 3B, 3B+, 4B, or Zero 2 W models. Raspberry Pi 1 and 2 versions are compatible with OctoPrint but are not officially supported, while Pi Zero and Zero W are “not explicitly recommended.” As of the writing of this article, Raspberry Pi 5 is also not supported. Unsupported motherboards may experience performance issues, potentially negatively impacting the 3D printing process, so use them at your own risk. This tutorial will only cover installations on the recommended motherboards. -
Power Adapter for Pi: This item is often overlooked but is crucial for ensuring the motherboard receives enough power. According to the official documentation, all models require a 5.1V power supply, but power connections vary by model (3B/3B+ and Zero 2W use Micro-USB, while 4B uses USB Type-C). The current also depends on the motherboard model (3B/3B+ and Zero 2W require 2.5A, while 4B requires 3.0A). Low voltage during printing may also lead to performance issues.Warning: Cheap phone chargers may not provide sufficient current for the Raspberry Pi. Therefore, it is best to use a high-quality power adapter rated for at least 3 amps. The official power adapter would be a good choice. Additionally, high-quality USB cables should be used to ensure proper power supply. -
Micro or Full-Size SD Card: You need a card suitable for your Pi (possibly MicroSD), and if your computer only accepts full-size SD cards, you will also need an SD adapter or USB card reader. Unless you plan to queue print a lot of content through OctoPrint, an 8GB card should be sufficient. For users planning to regularly make time-lapse videos, a 16GB or 32GB card may be more appropriate. -
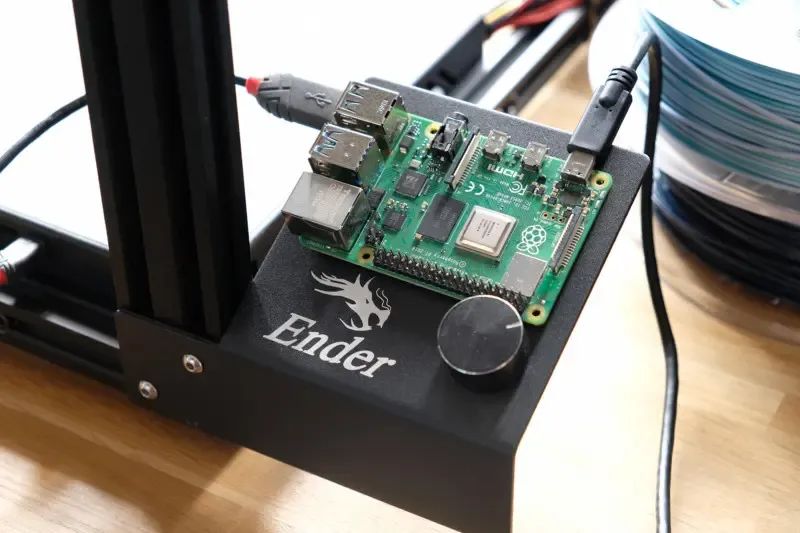
USB Cable: Used to connect the Raspberry Pi to the 3D printer. Please note what type of connection your 3D printer has—USB Type-A, Type-B, Mini, or Micro. The Pi end is USB Type-A. We also recommend taping over the 5V pin of the USB cable to prevent your Raspberry Pi from inadvertently attempting to power the printer’s controller board. Many printers (like the Ender 3 Pro with an 8-bit board) are known to cause many issues (such as low voltage warnings, unstable Wi-Fi). So this will help you avoid potential problems later on.
Flashing the OctoPi Image
-
Download and install the Raspberry Pi Imager from the Raspberry Pi Foundation. -
Insert the SD card into your computer or connect it using an adapter. There is no need to format the SD card beforehand. -
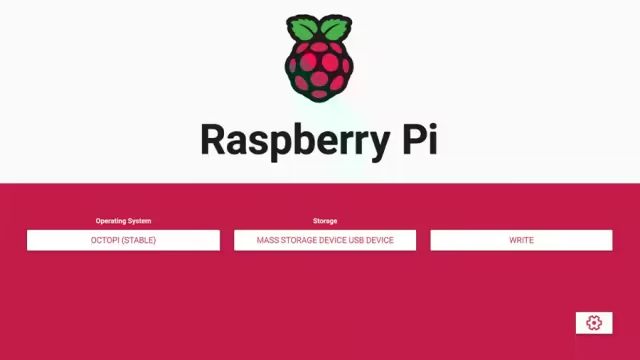
Open the Raspberry Pi Imager, click on “Choose OS” under “Operating System.” -
Then go to “Other Specific OS > 3D Printing > OctoPi.” The latest version should be there. -
Click the gear button in the bottom right corner to open “Advanced Options.” -
Under “Set Username and Password,” add a system password. Make sure to keep the username as “pi,” as this username and password are only used for SSH connections, not for logging into OctoPrint. -
Next, you can add Wi-Fi settings for the Raspberry Pi. Check the “Configure Wi-Fi” checkbox and enter your network SSID and password. -
Select your country code from the “Wi-Fi Country” dropdown menu. Click “Save.” -
Return to the main window, click “Choose Storage,” and select the SD card.
-
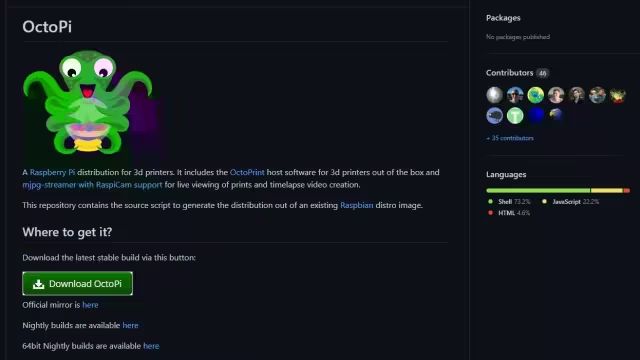
Download the latest version of OctoPi from the GitHub repository. -
Extract the downloaded image file. You should get an image file ending with “.img.” -
Insert the SD card into your computer. Again, there is no need to format the card beforehand. -
Open Etcher, select your SD card, choose the OctoPi image, and click “Flash.”
Setting Up Wi-Fi
-
If the SD card was ejected after flashing with Raspberry Pi Imager or Etcher, make sure to reinsert it into the computer.
-
Open your SD card directory (usually named “boot”). It should be located where external drives typically show up.
-
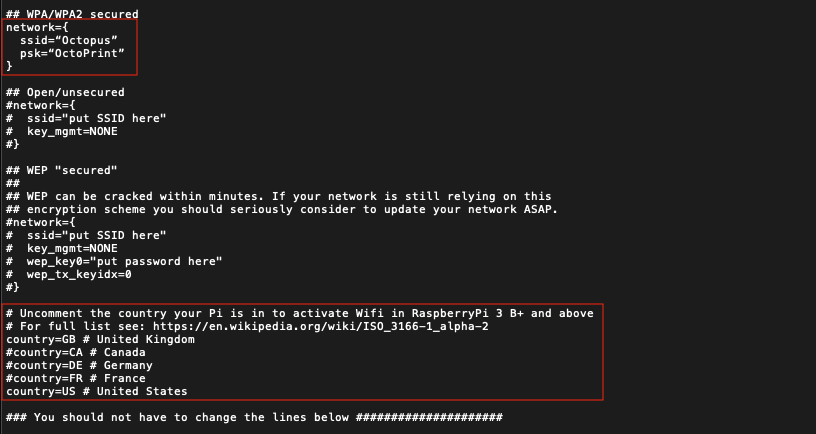
There are many files here, but don’t be afraid. We are looking for the “octopi-wpa-supplicant.txt” file.
-
We need to edit that file, but do not use Windows Notepad or MacOS TextEdit to open it, as this may introduce problems. We recommend using Notepad++ for Windows users and Atom or Visual Studio Code for MacOS users.
Ensure Secure Communication
-
Insert the SD card into the Pi’s slot. If you need to use a Wi-Fi adapter, make sure it is connected to the Pi’s USB port.
-
Power the Pi by plugging in the power cable.
-
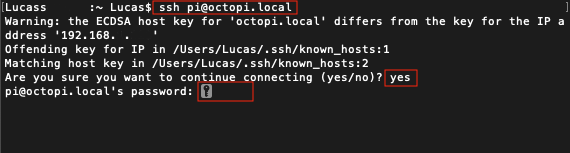
Open CMD (Windows) or Terminal (macOS), and run ssh [email protected] (or replace “octopi.local” with the IP address assigned to the Raspberry Pi by your router).
-
If it returns “Are you sure you want to continue connecting? (yes/no)?” type yes and press Enter.
-
Enter the Pi’s default password: raspberry. Press Enter.
-
Run sudo raspi-config. It will ask you to enter the default password again.
-
The first option should be “Change User Password.” Press Enter.
-
Enter the new password twice.
-
If you set up Wi-Fi and password using Raspberry Pi Imager, insert the SD card into the Pi’s slot. If you manually changed the Pi’s password, disconnect the power from the motherboard.
-
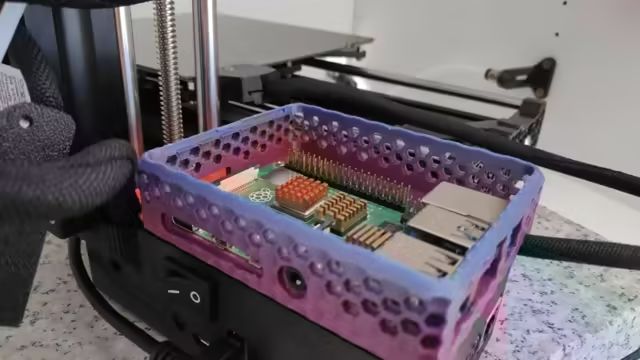
Connect the Pi to your 3D printer using the USB cable.
-
Power the Pi and your 3D printer.
Setting the Interface
Once the Pi starts, you should be able to access OctoPrint via the local network
-
In any browser, enter “http://octopi.local” (or the IP address assigned to the Pi by your router). Ensure your computer is connected to the same network as the Pi.
-
You should be able to see the OctoPrint interface and a setup wizard pop up. Follow the prompts and ensure to set a username and password for OctoPrint. Note that this is different from the username and password you set for the Raspberry Pi.
-
Connect to the printer by opening the “Connection” panel on the left. Set the options to “AUTO,” then click “Connect.” If this does not work, try manually setting the serial port and baud rate until successfully connected.
Finding the Raspberry Pi’s IP Address
-
Turn on the Raspberry Pi and connect a keyboard and mouse to it. Ensure it is successfully connected to the Wi-Fi network.
-
Open the terminal on the Raspberry Pi (usually defaults to open on OctoPi).
-
Type “hostname -I” in the terminal and press Enter.
-
The first part of the output will contain your Pi’s IP address, separated by dots. For example: 192.xx.x.x (where “x” is a number).
PING Method
-
Ensure the Raspberry Pi is powered on and connected to your Wi-Fi network.
-
Connect another computer (which can be running Windows, MacOS, or Linux) to the same Wi-Fi network.
-
Open the terminal (MacOS, Linux) or command prompt (Windows), and type “ping octopi.local.” If you changed the hostname during installation or afterward, make sure to replace “octopi.local” with the actual hostname. If you don’t remember changing anything, it is likely the default “octopi.local.”
-
After sending the command, you should start seeing the Raspberry Pi’s IP address in the output. For example, 192.14.1.2.
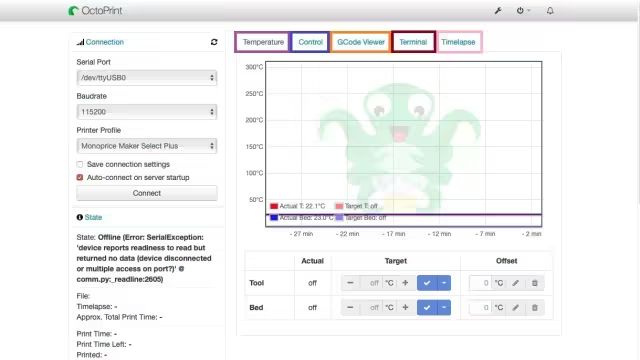
Familiarizing with the Operation
-
Temperature (Purple): Here, you can view the current temperature of the extruder and print bed on the graph. You can also set the corresponding target temperatures.
-
Control (Blue): If your Raspberry Pi is connected to a webcam, you can view the live video stream here. You can also send control-related commands to the printer, such as moving the X, Y, Z axes, extruding and retracting filament, turning off motors, turning fans on or off, setting flow rates, etc.
-
G-code Viewer (Orange): As the name suggests, this feature displays the current layer being printed. You can also jump forward or backward in the visualizer to see the printing process of the entire model.
-
Terminal (Brown): Here, you can manually enter G-code commands and send them directly to the printer. For example, entering M115 will display the current firmware version of the printer in the terminal.
-
Time-lapse (Pink): You can start or adjust the configurations for time-lapse photography.
If you’re looking for Raspberry Pi standard products and industrial products, feel free to contact us~


We will update regularly~
Follow Raspberry Pi developers~
Learn more about Raspberry Pi related content~