
Parents have been looking for ways to protect their children online, from preventing malware, banner ads, pop-ups, tracking scripts, and other issues, to stopping them from playing games and watching YouTube when they should be doing homework. Many businesses use tools to regulate employee internet security and activities, but how can this be achieved at home?
The short answer is a small, inexpensive Raspberry Pi computer that allows you to set up parental controls for your children and yourself at home. This article will guide you through how easy it is to build your own home network with parental controls enabled using a Raspberry Pi.

Installing Hardware and Software
For this project, you need a Raspberry Pi and a home network router. If you spend 5 minutes browsing online shopping sites, you will find many options. The Raspberry Pi 4 and TP-Link router are good choices for beginners.
Once you have the network devices and Raspberry Pi, you need to install Pi-hole in a Linux container or a supported operating system. There are several installation methods, but a simple way is to run the following command on your Raspberry Pi:
curl -sSL https://install.pi-hole.net | bash

Configuring Pi-hole as Your DNS Server
Next, you need to configure the DHCP settings in both the router and Pi-hole:
Each device is different, so I can’t tell you exactly what to click to adjust the settings. Generally, you can access your home router via a browser. The address of your router is sometimes printed on the bottom and starts with 192.168 or 10.
In your browser, open your router’s address and log in with your credentials. It’s usually something simple like admin and a numeric password (sometimes this password is also printed on the router). If you don’t know the login name, call your provider and ask for details.
In the graphical interface, look for the section about DHCP in your local area network and disable the DHCP server. Your router interface will almost certainly be different from mine, but here’s an example of what I set up. Uncheck DHCP Server:
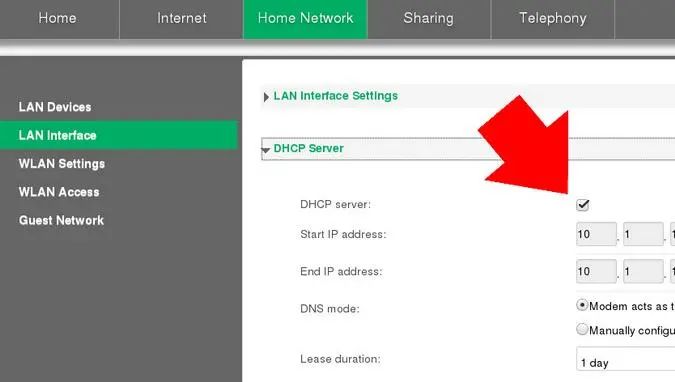
Disable DHCP
Next, you must activate the DHCP server on Pi-hole. If you don’t do this, your devices will not be able to access the internet unless you manually assign IP addresses!

Making Your Network Family-Friendly
The setup is complete. Now, your network devices (like smartphones, tablets, laptops, etc.) will automatically find the DHCP server on the Raspberry Pi. Each device will then be assigned a dynamic IP address to access the internet.
Note: If your router device supports setting a DNS server, you can also configure the DNS client in the router. The client will use Pi-hole as your DNS server.
To set rules for which websites and activities your children can access, open a browser and go to the Pi-hole admin page at http://pi.hole/admin/. On the dashboard, click “Whitelist” to add websites your children can access. You can also add websites that are not allowed for children (like games, adult content, ads, shopping, etc.) to the “Blocklist.”
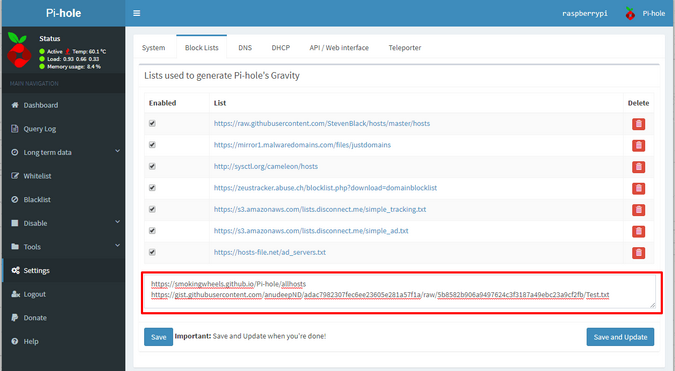
Pi-hole admin dashboard

What’s Next?
Now that you have set up parental controls on the Raspberry Pi, you can allow your children to browse the internet more safely while giving them access to approved entertainment options. This can also reduce your household streaming and lower your home network usage. For more advanced usage, visit the Pi-hole documentation and blog.
via: https://opensource.com/article/21/3/raspberry-pi-parental-control
Author: Daniel Oh Topic: lujun9972 Translator: geekpi Proofreader: wxy
This article is a LCTT original translation, proudly presented by Linux China
