Hello everyone, I am Xiao Chen! Today, let’s talk about a particularly useful skill in smart home projects—how to drive an OLED display using a microcontroller via the I2C protocol.Whether it’s a homemade temperature and humidity monitor, a smart door lock, or a household gas detector, a clear display interface can greatly enhance user experience. Now, let’s see how to accomplish this seemingly complex function in 7 steps!
1. What is the I2C Protocol?
The I2C protocol is like a “walkie-talkie” between devices, but it only uses two wires—SCL (clock line) and SDA (data line). Imagine: SCL is like a conductor’s baton, controlling the rhythm of communication; while SDA is the “mouth” that actually transmits data.
Why choose I2C to drive OLED?
- Only two wires are needed, saving interfaces and space.
- A single bus can connect multiple devices, like stringing beads.
- Stable communication, suitable for short-distance data transmission.
Note: The I2C bus requires external pull-up resistors (usually 2.2K~10K), otherwise the signal will be weak and unstable like a flashlight with no batteries. Many OLED modules already have these resistors onboard, but don’t forget to add them when designing your own circuit!
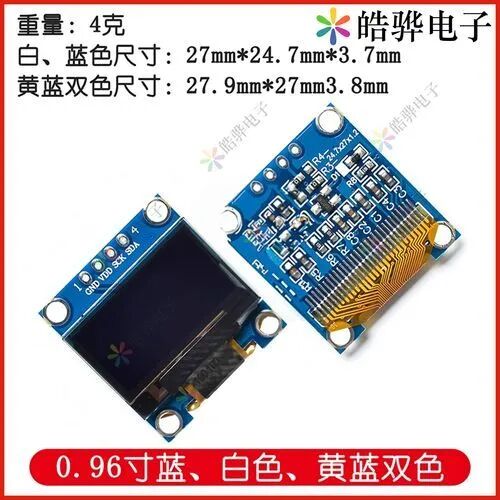
2. Choose the Right OLED Screen
The common OLED screens on the market mainly have driver chips like SSD1306 and SH1106, with sizes ranging from 0.49 inches to 2.42 inches. Beginners are advised to start with the 0.96-inch 128×64 pixel SSD1306:
- Low cost (about 10-15 yuan).
- Rich resources, with plenty of tutorials available online.
- Low power consumption, can be driven by 3.3V or 5V.
- Wide viewing angle and high contrast.
Hardware Preparation:
- An OLED screen with I2C interface (SSD1306).
- A microcontroller (Arduino/STM32/ESP32, etc.).
- 4 Dupont wires.
- Breadboard (optional).
3. Hardware Connection Diagram
The connection is simple to the point of being ridiculous, just four wires:
Microcontroller --- OLED Screen
VCC ---- VCC (3.3V or 5V, depending on module support)
GND ---- GND
SCL ---- SCL (I2C clock line, Arduino UNO is pin A5)
SDA ---- SDA (I2C data line, Arduino UNO is pin A4)
![Hardware Connection Diagram]
Pitfall Reminder: Once, while helping a student debug a project, the display just wouldn’t light up. After a long struggle, I found out that I had bought an SPI interface OLED but connected it using I2C wiring. Always confirm the communication interface type when purchasing modules!
4. Configure I2C Communication
Taking Arduino as an example, configuring I2C communication only requires a few lines of code:
#include <Wire.h>

void setup() {
  Wire.begin();  // Initialize I2C communication as a master device
  // If you need to specify pins (ESP8266/ESP32), you can use:
  // Wire.begin(SDA_PIN, SCL_PIN);

  Wire.setClock(400000);  // Set I2C communication speed to 400kHz
}
Note: Different microcontroller platforms have different I2C pins, so be sure to confirm before use:
- Arduino UNO: SDA-A4, SCL-A5.
- ESP8266: Default SDA-GPIO4(D2), SCL-GPIO5(D1).
- STM32: Depends on the I2C peripheral used, commonly PB7(SDA), PB6(SCL).
5. Install OLED Driver Library
The driver library acts like a translator, helping the microcontroller “speak” the language that the OLED can understand. It is recommended to use the Adafruit_SSD1306 library, which encapsulates a lot of useful functions:
// Install via Library Manager in Arduino IDE:
// Adafruit SSD1306
// Adafruit GFX Library
// Adafruit BusIO

#include <Adafruit_GFX.h>
#include <Adafruit_SSD1306.h>

#define SCREEN_WIDTH 128  // OLED display width, in pixels
#define SCREEN_HEIGHT 64  // OLED display height, in pixels
#define OLED_RESET    -1  // Reset pin (-1 means share Arduino's reset pin)

// Declare display object, 0x3C is the I2C address (most OLED modules use this address)
Adafruit_SSD1306 display(SCREEN_WIDTH, SCREEN_HEIGHT, &Wire, OLED_RESET);

void setup() {
  Wire.begin();

  // Initialize OLED, if failed, output error message to serial
  if(!display.begin(SSD1306_SWITCHCAPVCC, 0x3C)) {
    Serial.println(F("SSD1306 initialization failed"));
    for(;;); // Infinite loop
  }

  // Clear display buffer
  display.clearDisplay();
}
Pitfall Reminder: If initialization fails, first check if the I2C address is correct. Different modules may use 0x3C or 0x3D, and you can confirm the correct address using an I2C scanning tool.
6. 7 Key Drawing Steps
Here are the core steps to drive the OLED screen. Remember this process; it applies to any display content:
- Clear the buffer
display.clearDisplay();
- Set text color (OLED only has black and white, 1 for on, 0 for off)
display.setTextColor(WHITE); // SSD1306_WHITE can also be used- Set text size
display.setTextSize(1); // 1 is standard size, 2 is double size, and so on- Set cursor position (the top left corner is the origin (0,0))
display.setCursor(0, 0); // Set to the top left corner- Write content
display.println("Smart Home Temperature");
display.print("Current Temperature: ");
display.print(temperature);
display.println("°C");- Draw graphics (besides text, you can also draw lines, rectangles, circles, etc.)
// Draw a border
display.drawRect(0, 0, 128, 64, WHITE);
// Draw a filled rectangle as a progress bar
int barWidth = map(temperature, 0, 40, 0, 100);
display.fillRect(14, 40, barWidth, 10, WHITE);- Refresh display (this step is extremely important; without it, the previous content will not be displayed)
display.display();Core Principle: The OLED drive uses a buffer mechanism, where all drawing operations are first performed in memory, and only when the display() function is called will they actually be sent to the screen for display. This design avoids screen flickering and improves refresh efficiency.
7. Smart Home Example: Temperature and Humidity Monitoring Station
Here is a complete example of a smart home temperature and humidity monitoring station, using a DHT11 sensor and OLED display:
#include <Wire.h>
#include <Adafruit_GFX.h>
#include <Adafruit_SSD1306.h>
#include <DHT.h>

#define SCREEN_WIDTH 128
#define SCREEN_HEIGHT 64
#define OLED_RESET -1
#define DHTPIN 2       // DHT11 connected to D2
#define DHTTYPE DHT11  // Using DHT11 sensor

// Initialize objects
Adafruit_SSD1306 display(SCREEN_WIDTH, SCREEN_HEIGHT, &Wire, OLED_RESET);
DHT dht(DHTPIN, DHTTYPE);

void setup() {
  Serial.begin(9600);
dht.begin();

  // Initialize OLED
  if(!display.begin(SSD1306_SWITCHCAPVCC, 0x3C)) {
    Serial.println(F("SSD1306 initialization failed"));
    for(;;);
  }

  // Display startup screen
  display.clearDisplay();
display.setTextSize(2);
display.setTextColor(WHITE);
display.setCursor(5, 10);
display.println("Smart Home");
display.setTextSize(1);
display.setCursor(25, 40);
display.println("Temperature Monitor");
display.setCursor(35, 55);
display.println("By XiaoChen");
display.display();
delay(2000);
}

void loop() {
  // Read DHT11 data
  float h = dht.readHumidity();
  float t = dht.readTemperature();

  // Check if reading was successful
  if (isnan(h) || isnan(t)) {
    Serial.println("DHT11 read failed!");
    return;
  }

  // Clear display buffer
  display.clearDisplay();

  // Draw border and title
display.drawRect(0, 0, 128, 64, WHITE);
display.setTextSize(1);
display.setTextColor(WHITE);
display.setCursor(25, 4);
display.println("Home Environment");

  // Display temperature
display.setCursor(10, 18);
display.print("Temperature: ");
display.print(t);
display.println(" C");

  // Temperature progress bar
display.drawRect(10, 28, 108, 8, WHITE);
  int tempBar = map(t, 0, 50, 0, 108);
display.fillRect(10, 28, tempBar, 8, WHITE);

  // Display humidity
display.setCursor(10, 40);
display.print("Humidity: ");
display.print(h);
display.println(" %");

  // Humidity progress bar
display.drawRect(10, 50, 108, 8, WHITE);
  int humBar = map(h, 0, 100, 0, 108);
display.fillRect(10, 50, humBar, 8, WHITE);

  // Update display
display.display();

  // Update every 2 seconds
delay(2000);
}
8. Common Problems and Solutions
-
Screen does not display content
- Check if the wiring is correct.
- Confirm the I2C address (use an I2C scanning program).
- Check if
display.display()has been called to refresh the screen.
Display is garbled or only partially shows
- Confirm that the screen resolution is set correctly.
- It may be due to a mismatch in driver chip types; SSD1306 and SH1106 are not fully compatible.
I2C communication failure
- Check if the pull-up resistors are connected.
- Try lowering the I2C clock frequency:
<span>Wire.setClock(100000);</span> - Confirm that the cable length does not exceed 50cm.
Screen flickers
- Increase the refresh interval.
- Avoid frequent full-screen refreshes; only update the changed parts.
Experience Sharing: While working on an environmental monitoring project, I found that the OLED screen occasionally reset or displayed garbled characters. After troubleshooting, I discovered it was due to unstable power supply, especially when the sensors were working simultaneously. The solution was to connect a 10μF capacitor in parallel with the OLED power interface, providing instantaneous current demand, and the problem was immediately resolved.
9. Optimization and Expansion
-
Display Optimization
- Use custom fonts and icons.
- Add animation effects (like smooth transitions when values change).
- Design a multi-page interface with button switching.
Function Expansion
- Connect to WiFi to display network information or weather data.
- Add a buzzer to alert when environmental parameters are abnormal.
- Combine with an RTC module to display time and date.
Performance Optimization
- Partial refresh instead of full-screen refresh.
- Use bitmaps instead of text to reduce drawing time.
- Simplify unnecessary code and calculations.
Practical Exercise Suggestions
After mastering these 7 key steps, try the following exercises to solidify your skills:
- Create a digital clock that displays time and date.
- Design a simple game, like Snake or Breakout.
- Make a system monitor that displays CPU, memory, or network status.
- Connect multiple sensors and display different parameters in turn.
- Challenge yourself to create a complete user interface on a 64×128 small screen.
Finally, a reminder: Although OLED screens are beautiful, they have a limited lifespan, and areas that are constantly lit can easily suffer from burn-in. In practical applications, you can set a screensaver or turn off the display at intervals to extend its lifespan.
That’s all the core knowledge about driving an OLED screen using the I2C protocol. I hope this tutorial helps everyone add an elegant display interface to their smart home projects!