It’s called an adventure.
Some friends asked what the little red car has experienced?
The name was chosen
because the chassis at hand happens to be red.
Plus, I was deeply impressed by Zheng Yuanjie’s
“Red Car Adventure”
from childhood,
so it’s a tribute to my childhood 
With a theme I set myself,
I must create some “adventure” 
In this lesson,
we will let the red car brave the maze.
Regarding materials,
based on the previous two lessons,
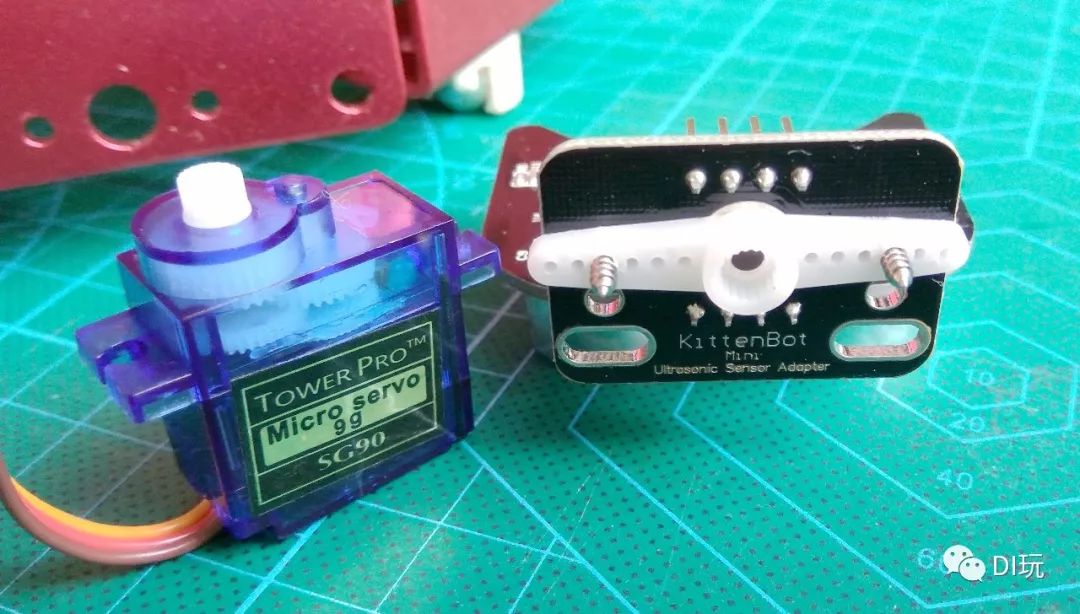
we need an ultrasonic module
and an SG90 servo.
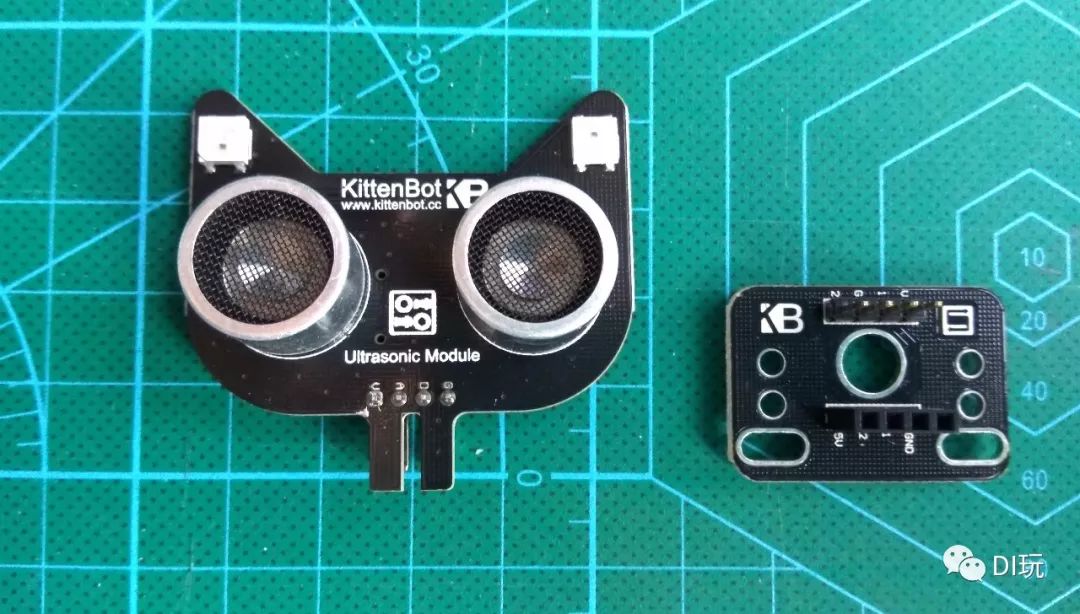
This is the KittenBot’s cat-head ultrasonic module.
With a cute appearance,
it comes with two RGB LEDs.
The circuit board on the right
is the matching adapter base.
After the adapter, it can be flexibly used in various installation positions.
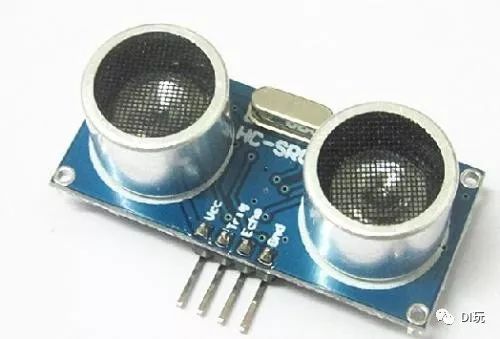
The cat-head ultrasonic module
is similar to the common SR04 ultrasonic module.
It has two “eyes”;
one is responsible for emitting
and the other for receiving.
The working principle is a matter of distance:
Distance = Speed of Sound × Time of Travel / 2.
The reason for dividing by 2
is that the received sound wave
is reflected back after hitting an obstacle.
The sound wave has a “round-trip ticket” 
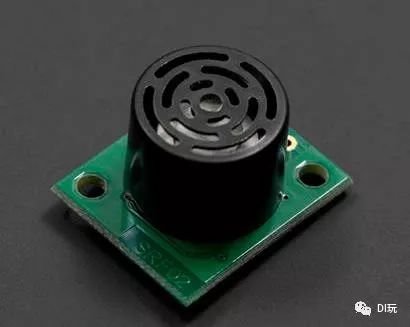
There are also ultrasonic modules that integrate sending and receiving,
which are more expensive.
This is probably because there is no angle between the sending and receiving components,
allowing sound waves to travel in a straight line,
thus improving measurement range and accuracy.
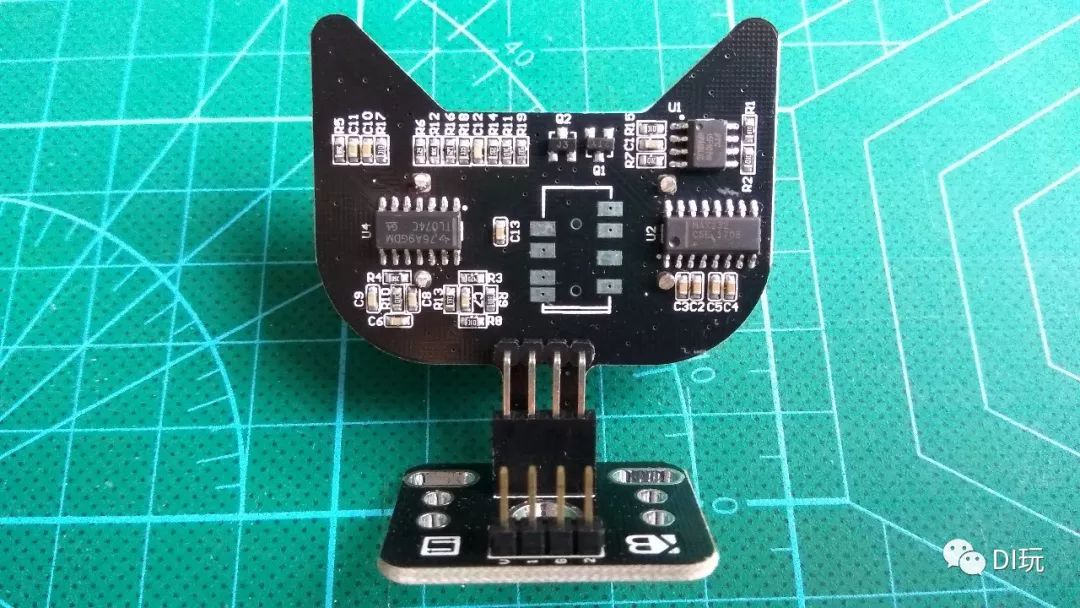
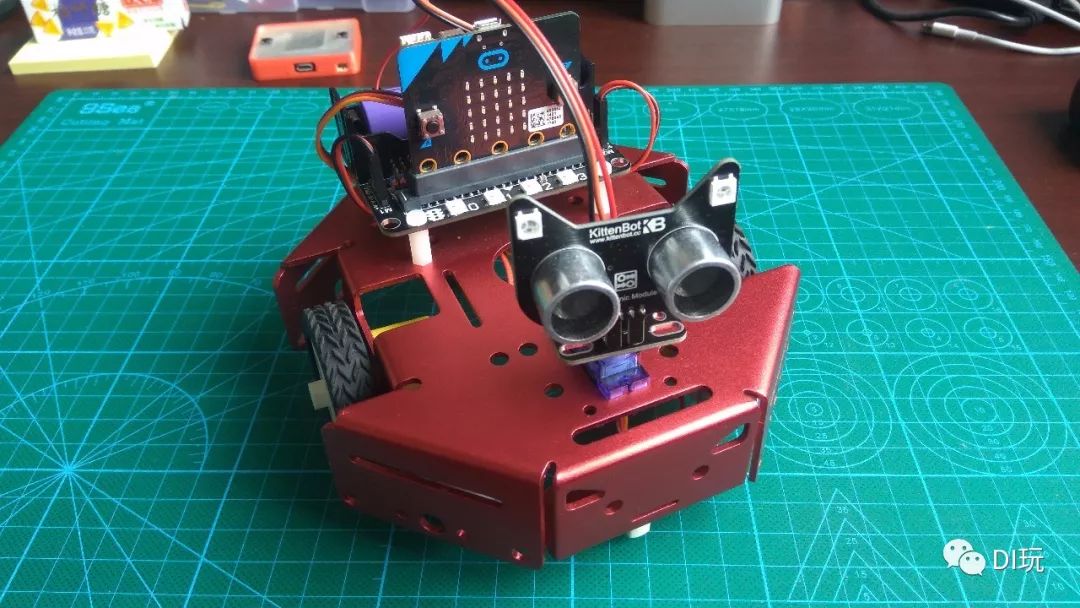
From the animated GIF above,
you should understand how to install the ultrasonic module.
Unlike the usual fixed installation of ultrasonic sensors on small cars,
we will mount it on a servo
to change the sensor’s orientation,
thus achieving a larger detection range.
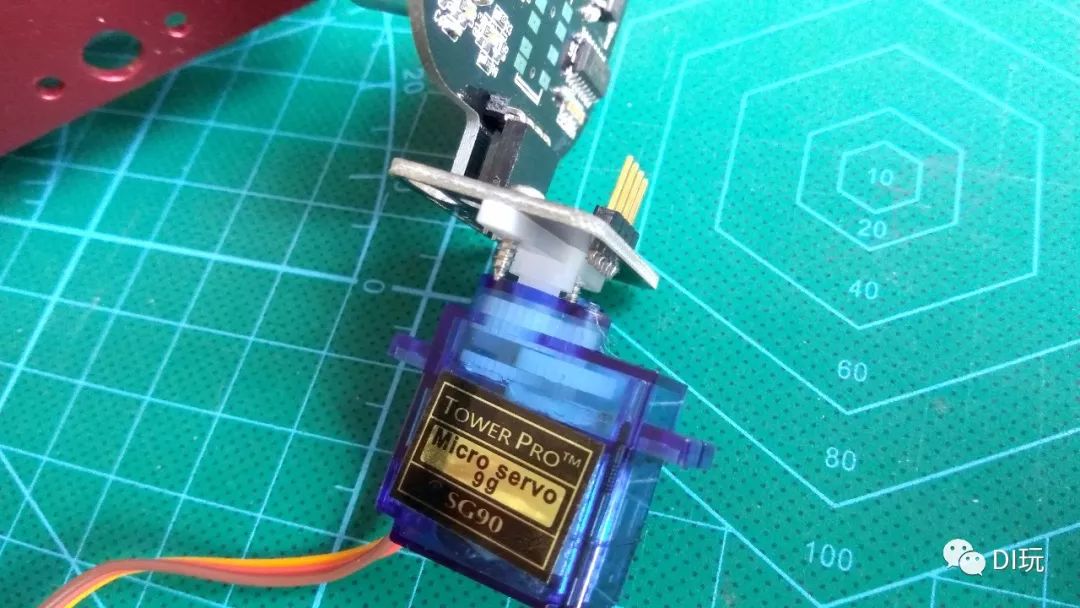
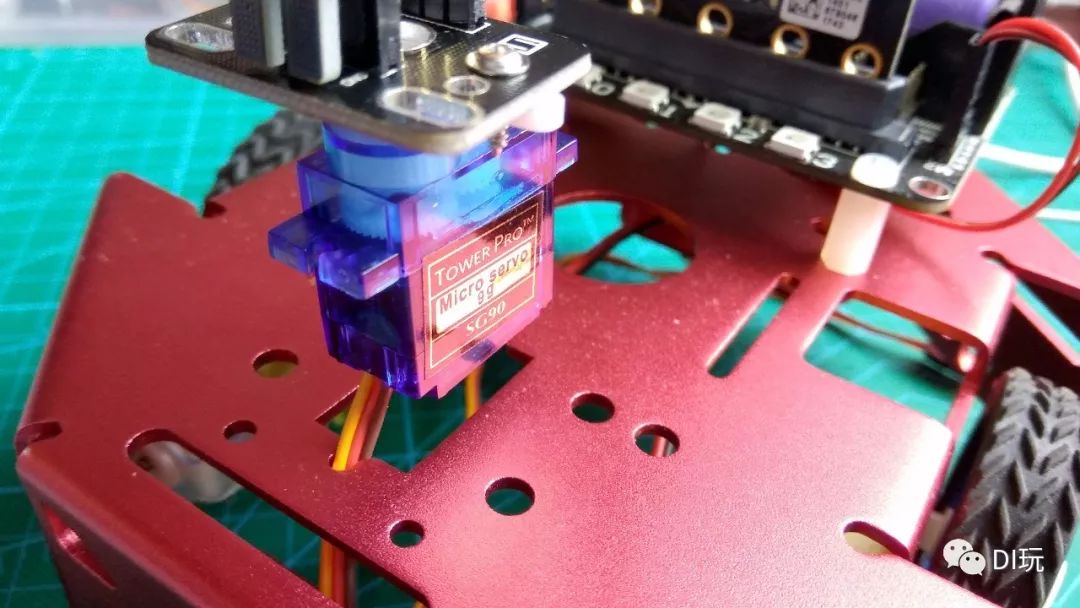
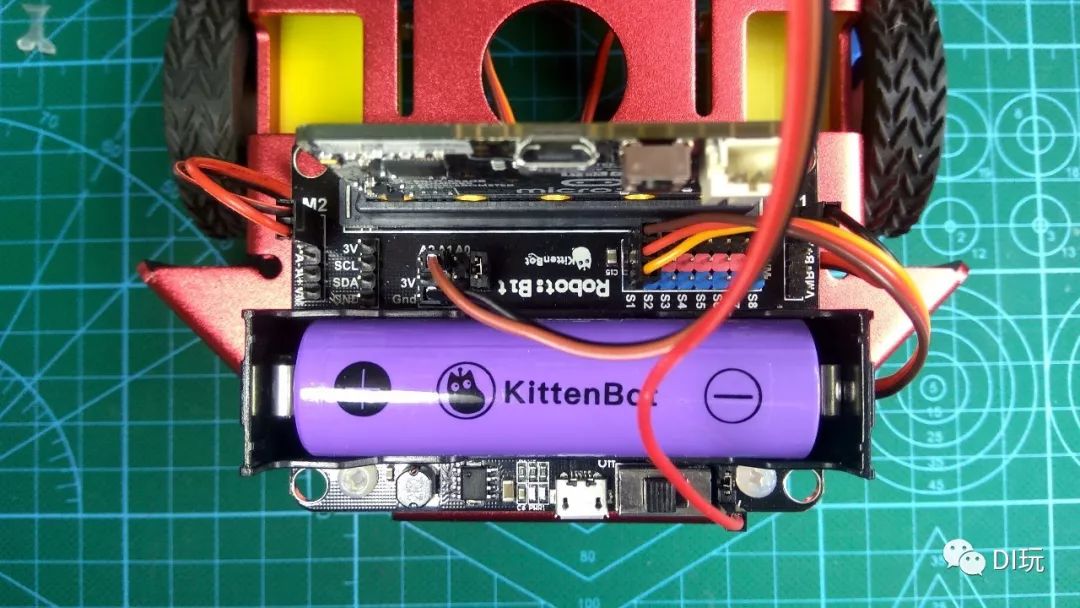
Fix the servo to the car body.
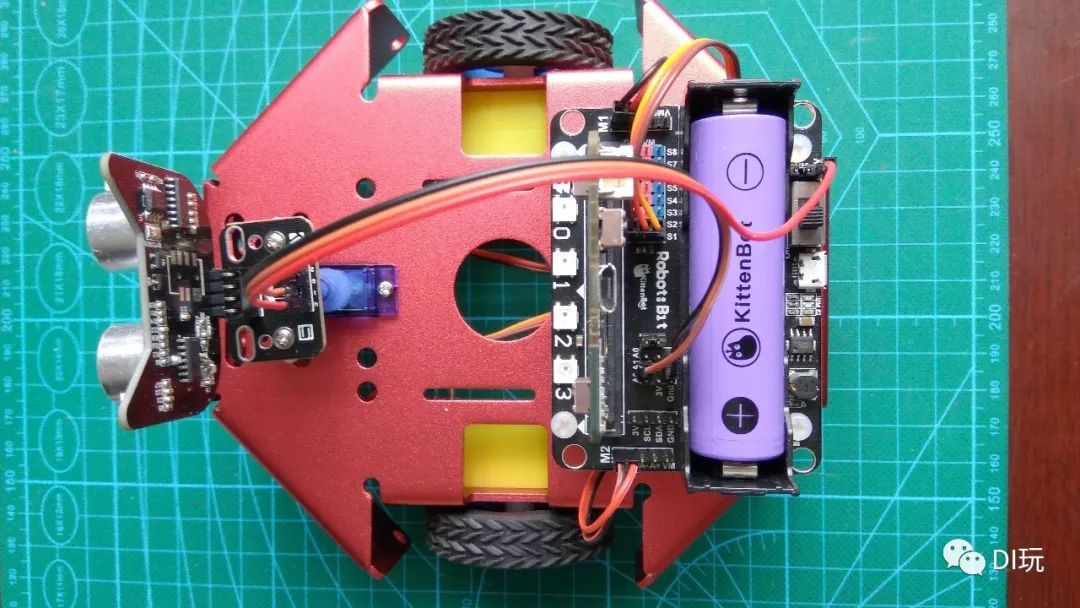
The wiring method is as follows:
|
Robot:bit |
Cat-head Ultrasonic |
|
5V |
V |
|
Gnd |
G |
|
A1 |
D |
Unlike the 4PIN connection method (VCC, Trig, Echo, GND) of common ultrasonic sensors, the cat-head ultrasonic uses a 3PIN connection. I consulted CC Meow, and the cat-head ultrasonic uses an alternating single-line method. It’s like changing from a two-way dual-lane to a single lane due to road repairs, allowing cars from both directions to alternate. This saves precious IO ports on the micro:bit and reserves control IO for the two LEDs on the cat head.
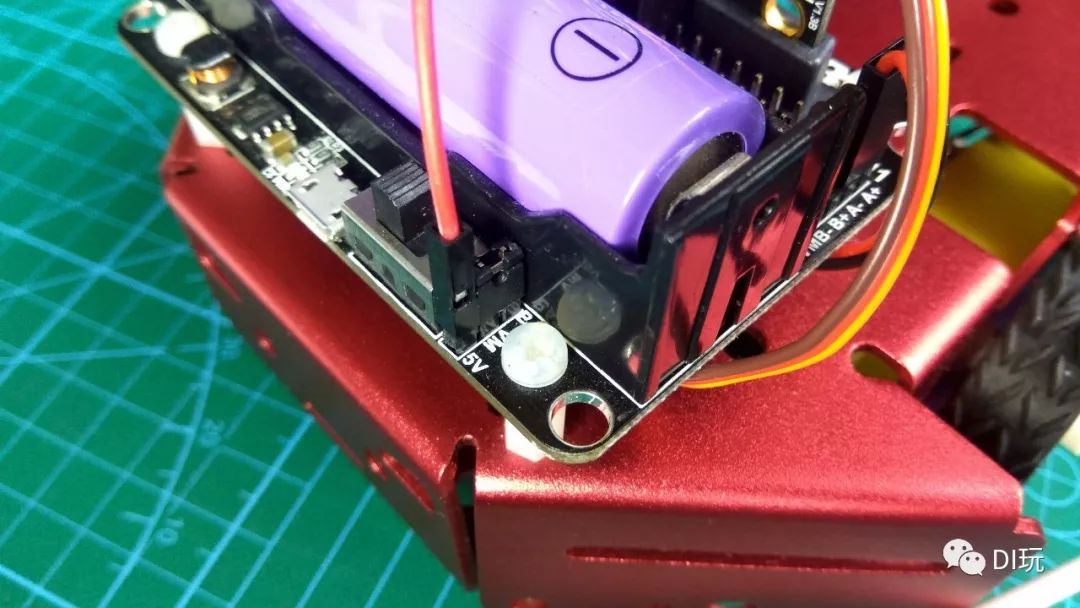
The ultrasonic power supply should connect to the 5V next to the expansion board switch.
As for the servo, it can be connected directly to S1.
Regarding the program,
we referred to KittenBot’s official tutorial,
which can be accessed by clicking “Read the Original“.
However, there was a small issue with the original program:
as soon as power was turned on, the car started running.
If you want to stop it
or make it start from a designated position,
you have to catch up with it first 
So we modified the program
to add remote control.
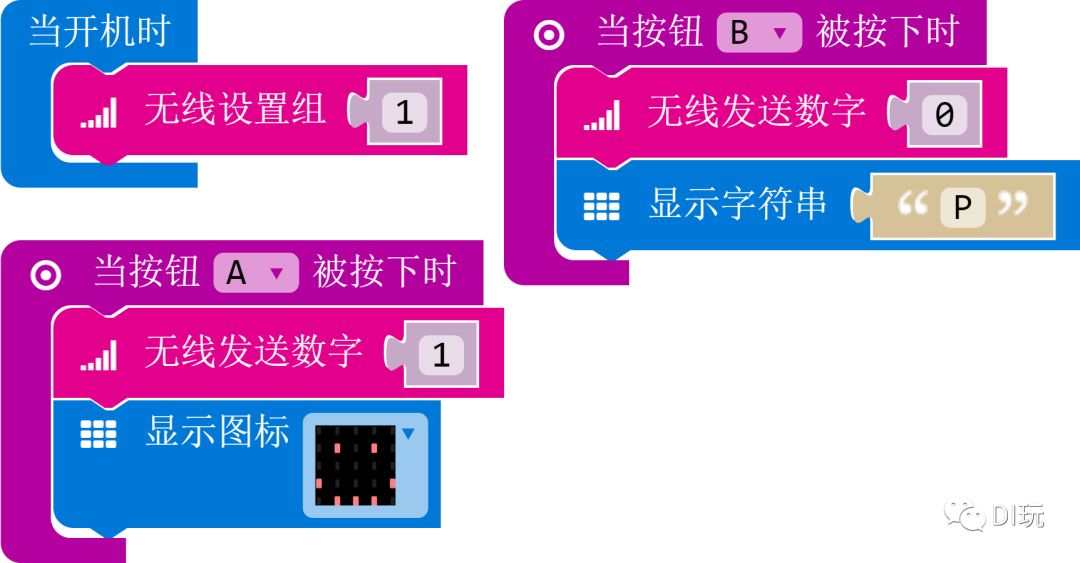
Transmitter program
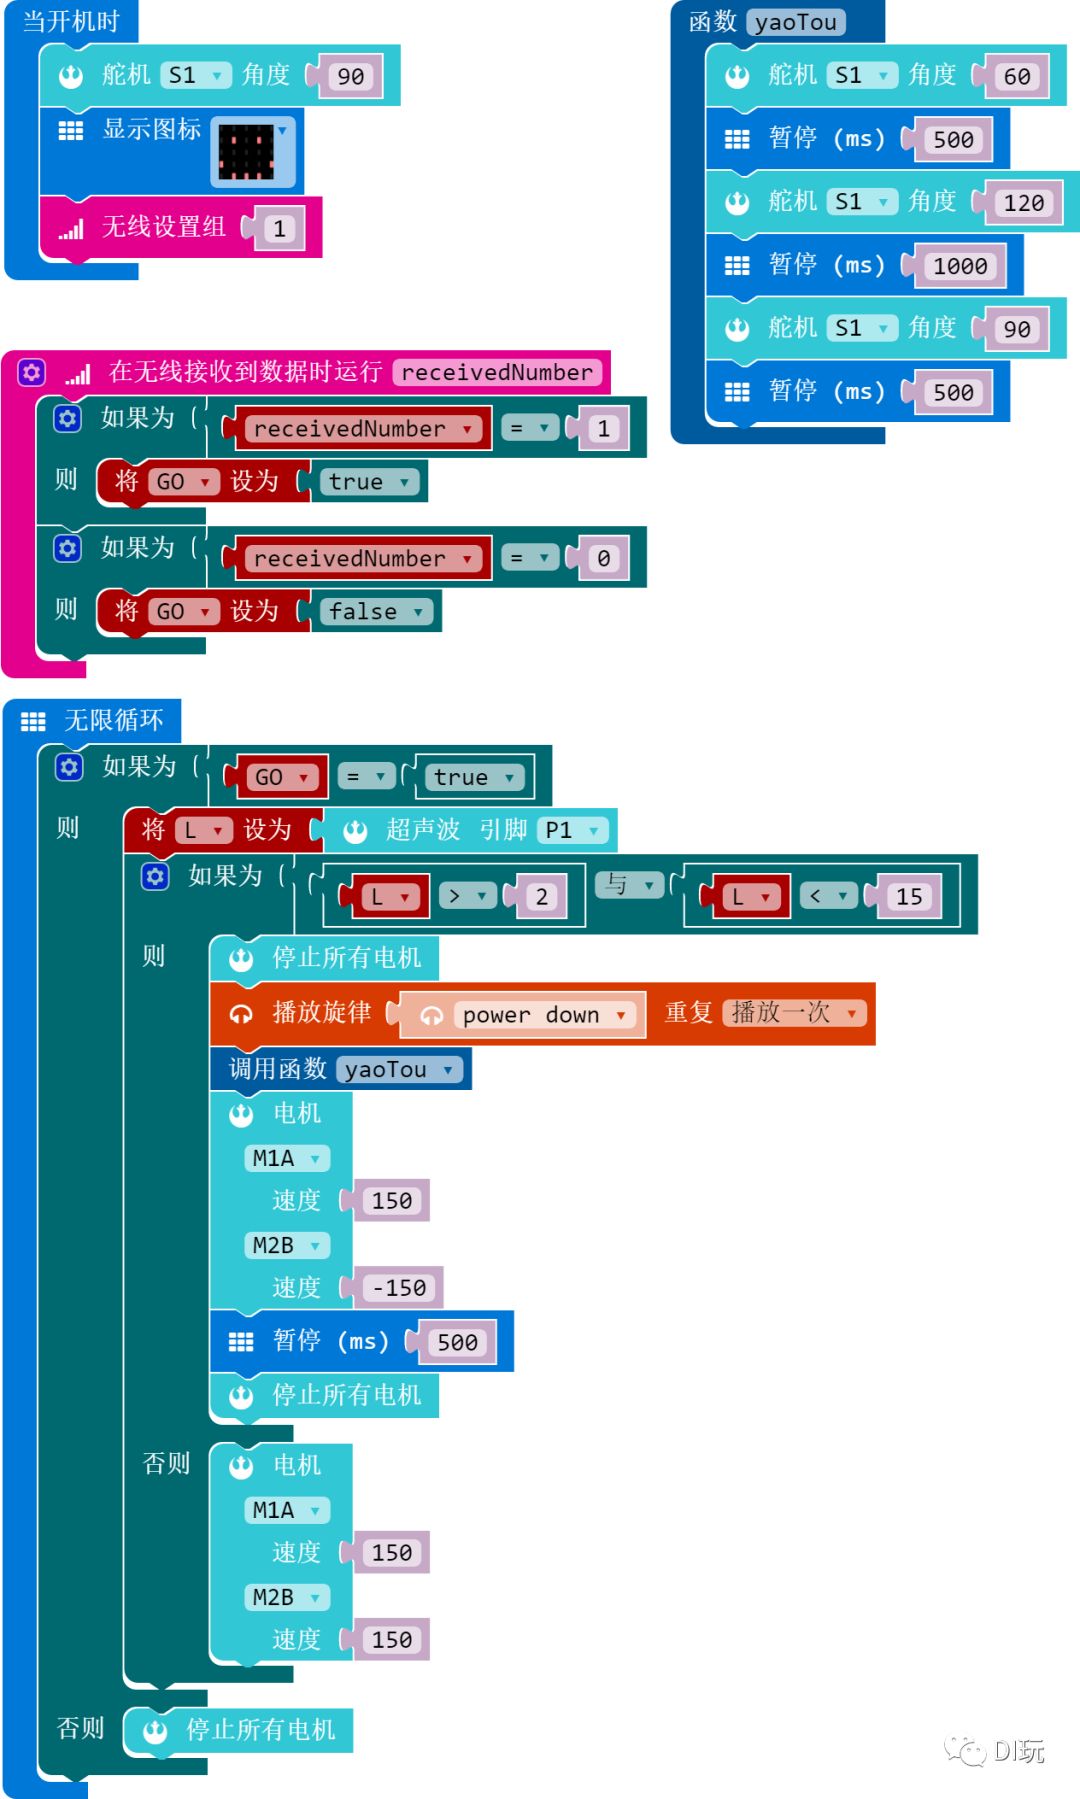
Receiver program
Use boxes to form a maze.
As long as the gaps are slightly large,
the red car will always find a loophole to escape.
Why not give it a try?
Red CarAdventure
[Red Car Adventure] 01 The Red Car Starts Running
[Red Car Adventure] 02 Moving Forward
[Red Car Adventure] 03 The Car Moves with Heart
Previous Fun Courses
[Micro Lesson] Fun with Xiaomi micro:bit 01 HELLO, DIMI!
[Micro Lesson] Fun with Xiaomi micro:bit 02 “Thump”
[Micro Lesson] Fun with BBC micro:bit 03 Bomber (1)
[Micro Lesson] Fun with BBC micro:bit 04 Bomber (2)
[Micro Lesson] Fun with BBC micro:bit 05 Play a Tune “Twinkle, Twinkle, Little Star”
[Micro Lesson] Fun with BBC micro:bit 06 Digital Dice
[Micro Lesson] Fun with BBC micro:bit 07 Plant Monitor
[Micro Lesson] Fun with BBC micro:bit 08 Halloween Trickster
[Micro Lesson] Fun with BBC micro:bit 09 Steve’s Magnetic Ore Detector
[Micro Lesson] Fun with BBC micro:bit 10 Bear Grylls’ New Compass
[Micro Lesson] Fun with BBC micro:bit 11 Autumn Pants Summoning Artifact
[Micro Lesson] Fun with BBC micro:bit 12 A Cup of Temperature (Part 1)
[Micro Lesson] Fun with BBC micro:bit 13 A Cup of Temperature (Part 2)
[Micro Lesson] Fun with BBC micro:bit 14 Boolean’s Heart-Shaped Night Light
[Micro Lesson] Fun with BBC micro:bit 15 Hogwarts Magic School’s New Apprentice
[Micro Lesson] Fun with BBC micro:bit 16 Turkey Hunter
[Micro Lesson] Fun with BBC micro:bit 17 Stuart Little
[Micro Lesson] Fun with BBC micro:bit 18 Step Counter
[Micro Lesson] Fun with BBC micro:bit 19 Thunderbolt Ranger
[Micro Lesson] Fun with BBC micro:bit 20 Writing “Chuan” with a Program
Mi Dad’s Digital Laboratory
-
Fun with DF Boson Micro:bit Heart Rate Sensor
-
Mi Dad’s Digital Lab: Fun with micro:bit Racing
-
When Little Makers Dive into the Herb Garden—An Integrated Practice Course Attempt Based on micro:bit
-
Micro:bit Becomes a Bug Agent
-
KITTENBOT MP3 Module Initial Testing
-
Remote Monitoring, Real-Time Recording, Animation Tips, Spend 1 Yuan to Make WU-LINK a Plant Nurse for IoT
-
Micro:bit Becomes an Electromagnetic Radiation Tester
-
Assessing from a “God’s Eye View”, Maker Dad’s Examination of German Milk
-
Soft and Hard, Dual Approach—Initial Testing of DF Micro:Mate Expansion Board and BXY Editor
-
Thunderbolt Baby Becomes You, I Think About Winter
-
Angry Little Particles—Lily Particle Expansion Board Review
-
Archive: Being SpaceX’s Transporter (Including Heavy Falcon Launch, Recovery, Starman Space Perspective, Merlin Engine Test Video)
-
Micro:bit Becomes a Wealthy Piggy Bank, Wishing Everyone Prosperity in the New Year!
-
OTTO Little Green Monster’s Life
-
New School Gear, Launching 20 micro:bit Clips!
-
Still struggling with whether furniture is environmentally friendly or if the new house’s formaldehyde has dissipated? It’s time to DIY an IoT formaldehyde monitoring device in 10 minutes!
-
Obsessive-Compulsive Patient’s Micro:bit Firmware Upgrade Notes
-
Little Ben is watching you, quietly eating! Smart Programming Play with Little Ben – IoT Initial Experience
-
Scratch 3.0 Editing Scratch 2.0 Files Using Kittenblock ID Loading Method
-
Let the Course Fly! Experiment on the Relationship Between Atmospheric Pressure and Altitude Based on micro:bit and BMP280
Knowledge and Reflection
-
Completing Professional Growth While Being a Dad
-
It Should Have Warmth—A Few Words on the Decoration and Layout of Maker Spaces
-
Small but Strong, BBC micro:bit is About to Make a Comeback in Maker Education
-
Discussing Craftsmanship Spirit from an 80 Yuan Tire Repair
-
Initial Experience of Classroom Teaching with BBC micro:bit and Suggestions for Teaching Environment Deployment
-
Using the Maker Way to Interpret the “Guidelines for Comprehensive Practice Activities in Primary and Secondary Schools”
-
Development and Practice of Application-Driven Maker Courses in Primary Schools