Hello everyone, I have now exited the LEGO teaching industry and am looking for alternatives. Fortunately, I found the microbit, which is the one below:
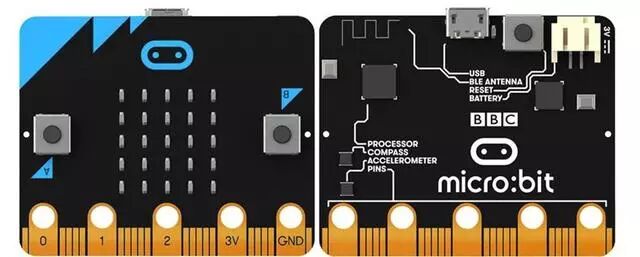
What is the purpose of this programmable board that resembles a microcontroller? Those who see my article should already have some understanding. If not, just search it on Baidu.
In short, this small board can be programmed and serves as a simple control core for robots, making it tailor-made for middle and primary school students who want to enter the world of robotics.
I plan to create a series of microbit courses based on my previous LEGO robot curriculum.
Without further ado, today is the first lesson.
1. First, let’s make a small car

The small police LEGO figure is behind the small car I made.
It is based on two TT motors (you can search for them on Taobao if you don’t know what they are) to enable turning, with a universal wheel at the back, using common items for maker kids.
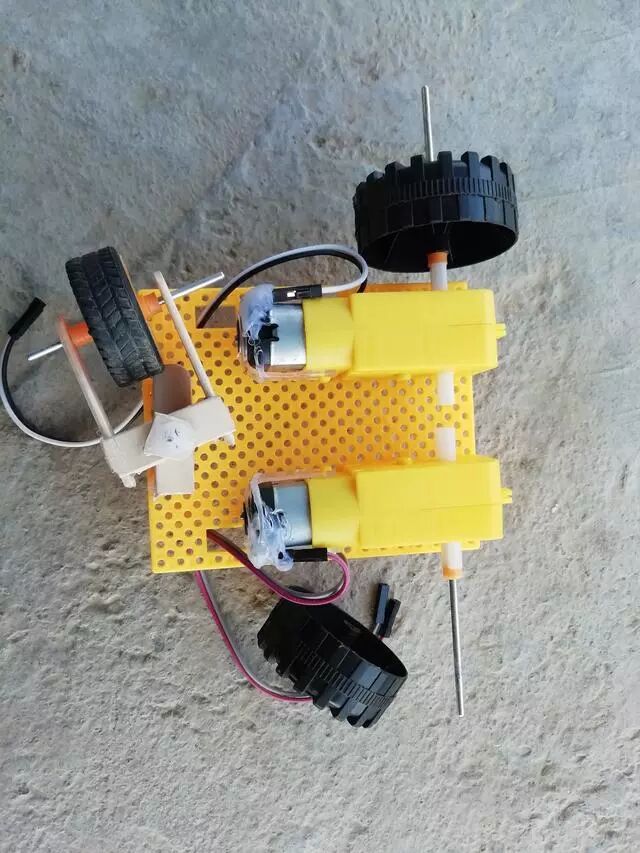
The tires are glued on with hot melt glue.
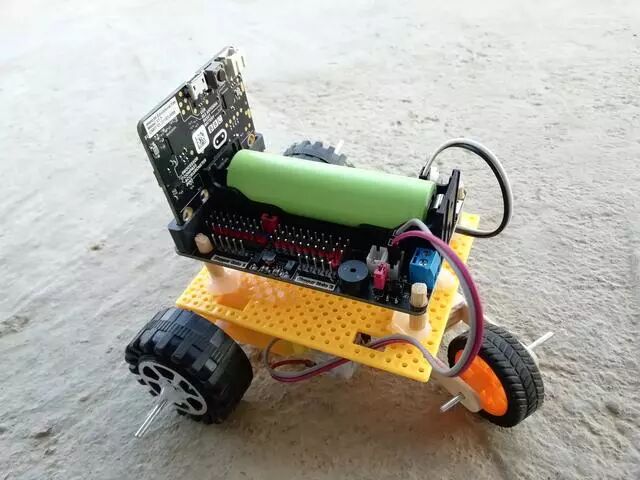
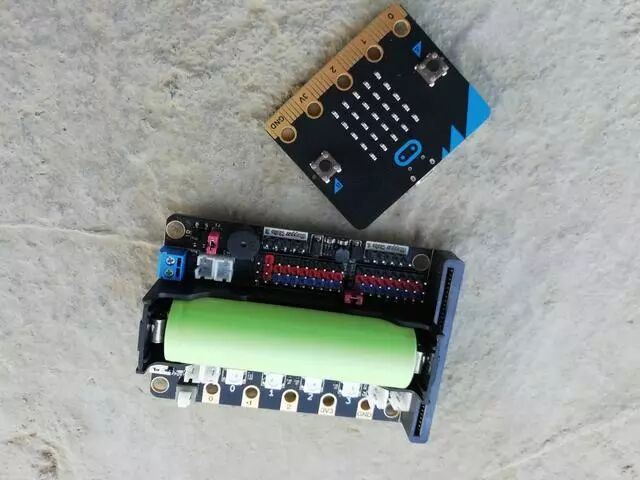
It uses a microbit board and an expansion board for driving. Since the microbit does not have a power connector and cannot directly drive motors, an expansion board is needed, which you can also find on Taobao. To avoid any advertising suspicion, I won’t mention the model of the board I used. However, you will also need the corresponding expansion program when programming, so please pay attention to that.
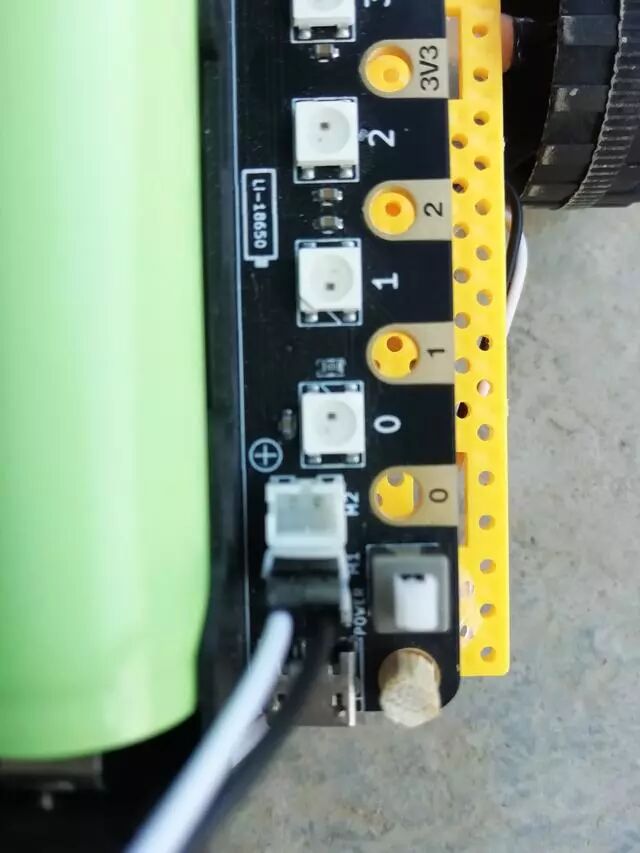
Be careful with the connection ports on the expansion board; otherwise, if the current direction is incorrect, the wheels will turn differently.
2. Programming to make it move.
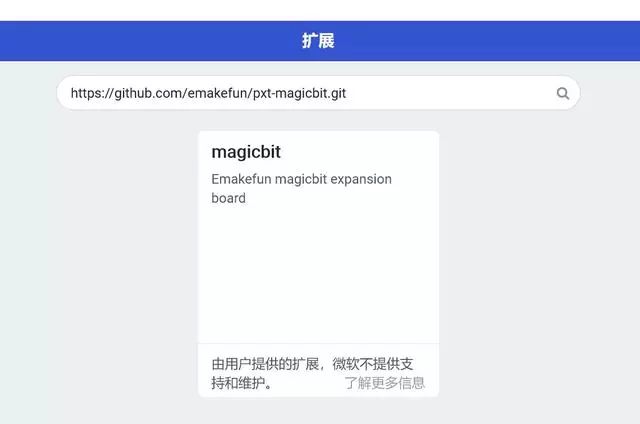
Remember this website; we need to go here to find the programming module for motor control.
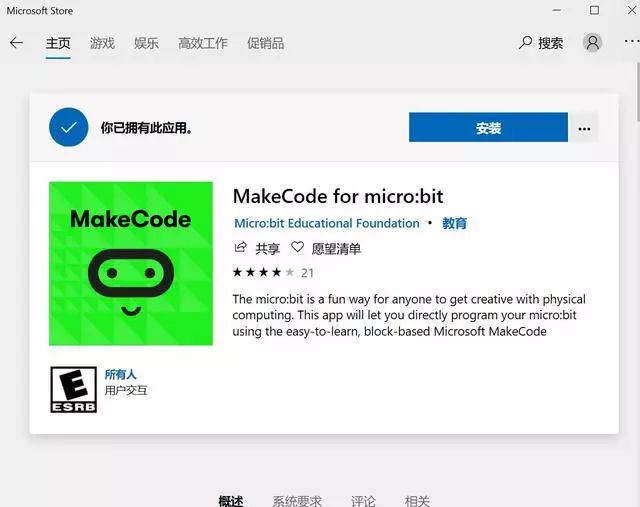
By the way, we can download the programming software here, or you can directly go to https://makecode.microbit.org to program.
Search for makecode in the Windows app store.
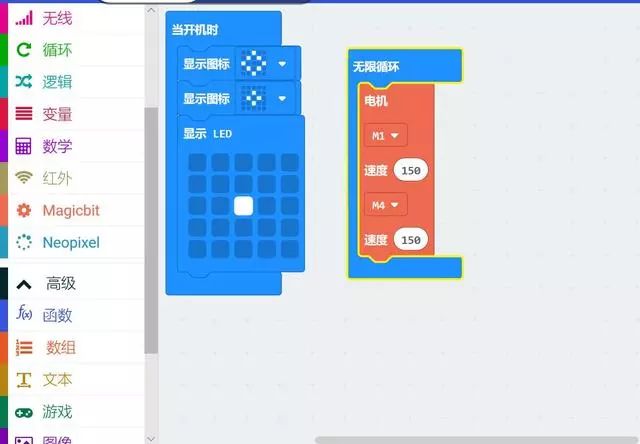
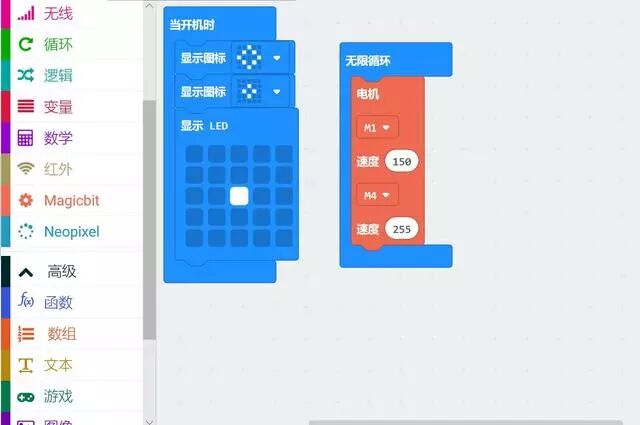
Now, our preparation work is complete. In addition to the normal programming modules, I have the motor driver module based on the expansion board:
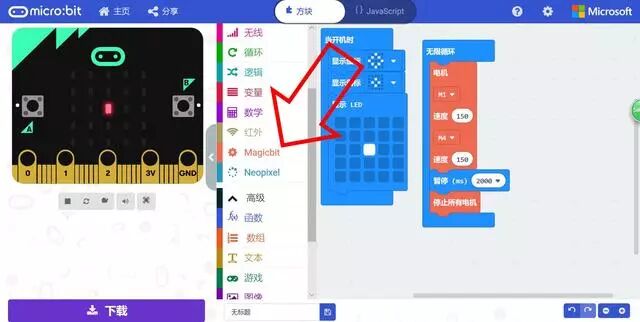
That is the Magicbit module.
Next, let’s control the car’s various movements.
1. Moving in a straight line
Set the speed of both motors to be the same in the program:
2. Turning left and right
Make the two motors run at different speeds:
There are two special cases:
1. One motor’s speed is zero. In this case, one wheel moves while the other does not, causing the car body to rotate around the stationary wheel.
2. Both motors have the same speed but in opposite directions, as shown in the image:
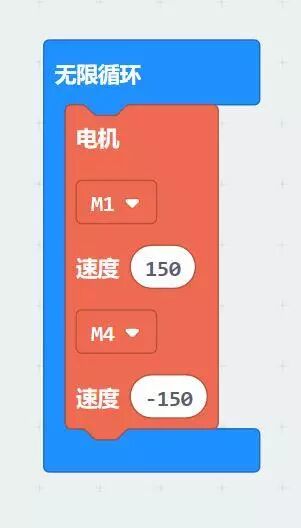
In this case, the car body will rotate around the midpoint between the two wheels (of course, the car body must be built correctly first).
3. Making the car travel a certain distance

By limiting the movement time of the car, we can control its travel distance.
Extension
Do you know how to make your car travel in a triangle or a square? Give it a try.

As for why I chose microbit.
Let’s do the math: a main board costs about 80 yuan, and an expansion board costs about 70 yuan. This is a reusable main component, totaling 150 yuan. The small car I made, with various small parts, costs only about 10 yuan. The slightly more expensive TT motors are 4.6 yuan each, bringing the total cost to 160 yuan. Even if I later add sensors to make it a sensing robot, the total cost will not exceed 200 yuan.
A robot costing less than 200 yuan is a smart toy that rural kids can afford. Now I am working on a maker project in the countryside, hoping my persistence can help fill the gap in innovative education in rural areas. I hope everyone can support this effort.