 MAKER:Dave Akerman/ Translated by:趣无尽
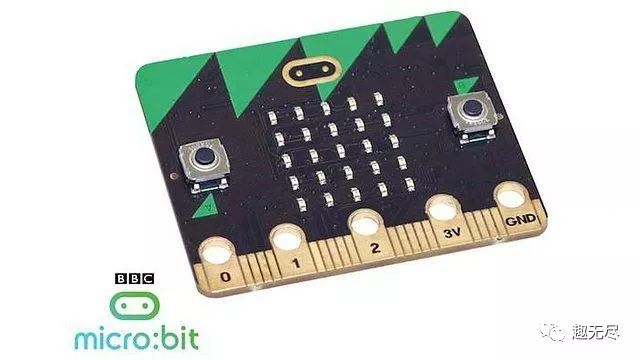
Although the basic functions of micro:bit are relatively limited compared to development boards like Raspberry Pi, its processor has enough flash memory and RAM to implement a basic tracking device.
Additionally, the micro:bit comes with an accelerometer and a compass chip, making tracking easier.Below, I will introduce the method and steps to create a balloon tracker.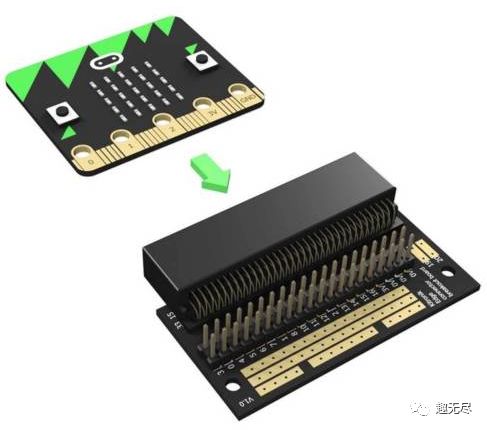 The micro:bit has built-in SPI, I2C, and serial ports, which can be accessed through an adapter board without the need to solder directly to the pads.Additionally, you can purchase a dedicated battery box.
Materials List
micro:bit×1Adapter Board×1UBlox Module×1LoRa Transceiver×1Battery Box×1
Introduction to Hardware
UBlox ModuleThe balloon tracker requires a suitable GPS to send location data at high altitudes, as well as an ISM band radio transmitter.In the end, I chose the UBlox module.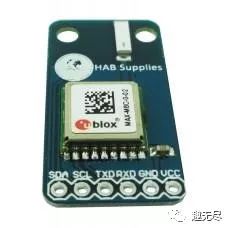
This module includes an I2C port and a common serial port.Since the micro:bit’s serial port is usually connected to a computer via USB, using serial GPS software would complicate development, while I2C makes development easier.
LoRa Transceiver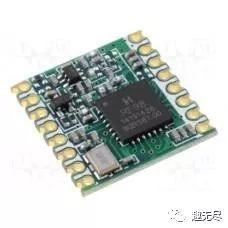 Next is the radio part.Currently, the most popular is the ntx2b radio transmitter, but it requires a serial port, which is why I didn’t choose it.I opted for the LoRa transceiver because it comes with an SPI interface, and the serial port can also be used for debugging.
Assembling Hardware
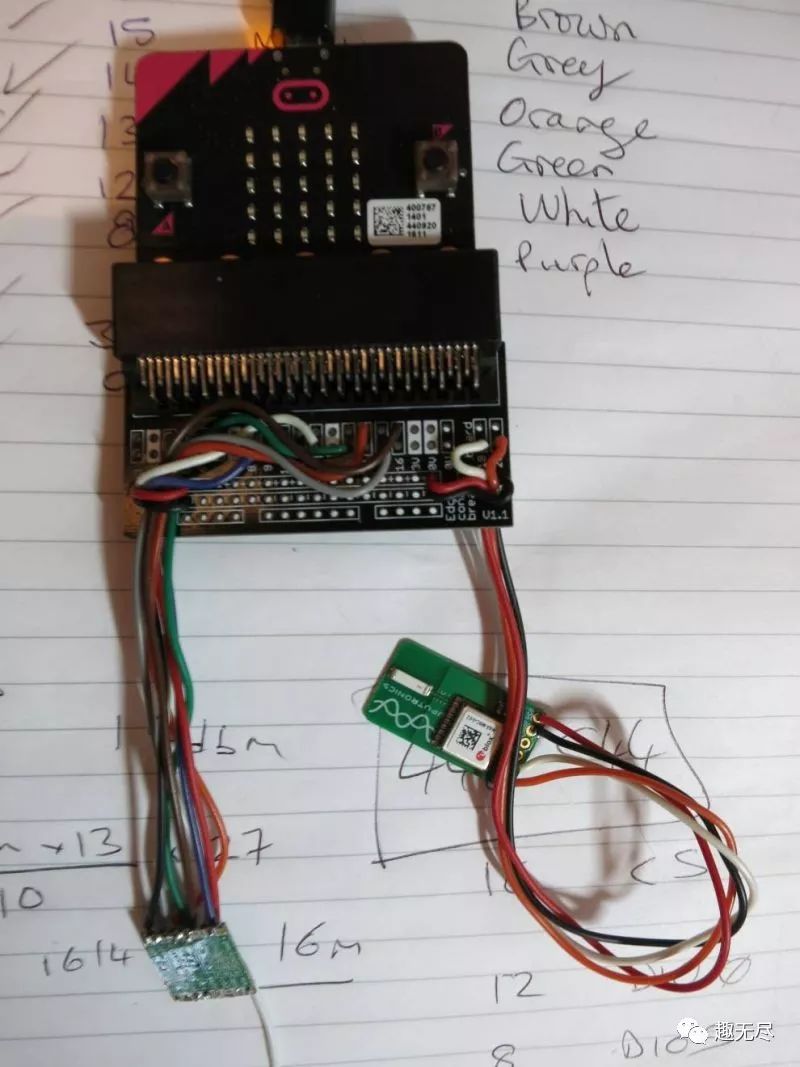
Now, all the hardware can be connected together.Due to limited space on the prototype board, to keep the GPS away from other devices (to reduce interference), I placed the GPS and radio at the end of the wires.
Software Section
GPS SoftwareThere are many programming methods that can be applied to the micro:bit, and I chose MicroPython.1. I started with some simple code to obtain the NMEA data stream from the GPS, which only took a few minutes.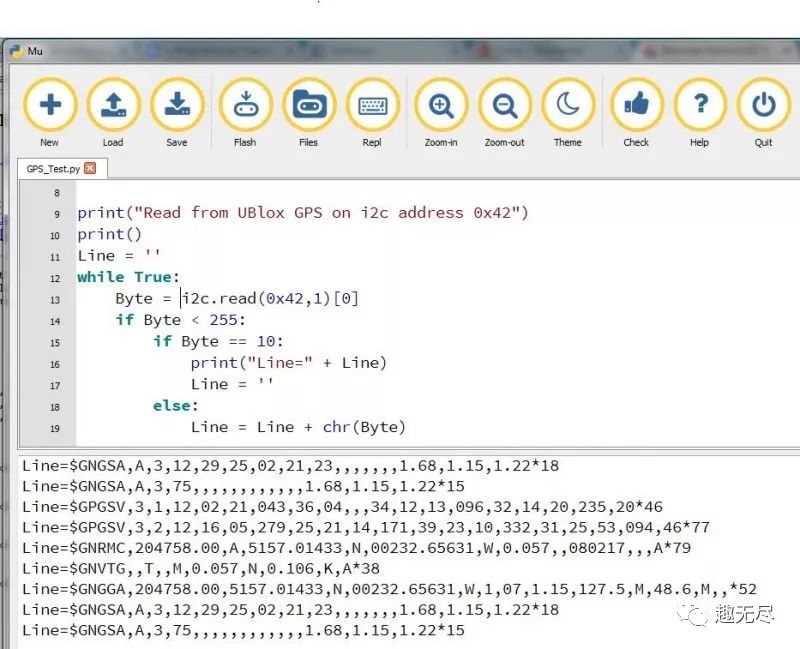
2. I ported the Raspberry Pi’s Python GPS NMEA parser (just needed to change the code to use the micro:bit’s I2C library instead of the Raspberry Pi’s serial port).Check out the test program from my other project (it was written for cars, so the GPS was not put into flight mode).https://microbit-micropython.readthedocs.io/en/latest/i2c.html
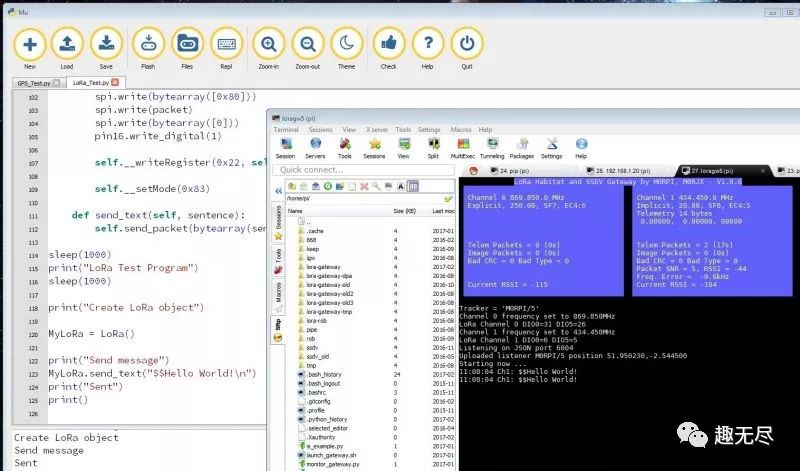
LoRa Wireless SoftwareOnce the device connections are good, it can be completed by entering a few commands in the micro:bit’s REPL.In the SPI library, all LoRa register definitions need to be removed as they take up too much program space.Check out the result test program:https://gist.github.com/daveake/86f7ba32fa8018acd5e5359674a737e5
To receive the transmitted data from LoRa, you need to install another Lora module as a receiver and use suitable software.I used my own C Lora gateway code for reception.C Lora gateway code:https://github.com/daveake/lora-gateway
Balloon Tracking Program
The project assembly is very simple, but the software still needs adjustments.Once the GPS and wireless modules start working, you only need a small amount of additional code to send the GPS data as a string, adding a prefix (“$$” and a valid ID) and a suffix (“*” and CRC), and then wirelessly send the result.However, when I combined the GPS and LoRa code, it could not compile.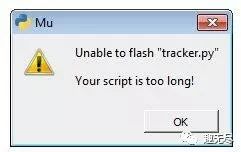
The code on the micro:bit cannot be too large, fortunately it wasn’t too big, then I removed some unnecessary code (mainly disabling unused NMEA sentences from the GPS in the code), and finally the compiler could work normally.
However, the results were not ideal.Once the compilation was completed, the generated bytecode would load into the micro:bit’s RAM, sharing any data (variables, stack, temporary workspace) used in the program.
The essence of Python is that memory is continually allocated and released when necessary, and when the program tries to allocate more space than available memory, my program would crash due to insufficient memory after running for a short time.This is the result of its work before crashing.
As a result, I had to reduce memory usage.I am used to using C language on microcontrollers, but MicroPython requires different techniques.For instance, in microcontrollers, C is usually in flash memory, with less restriction on data in RAM, so sometimes you can rewrite the code to use less RAM without worrying about new code using more code space.Unlike in MicroPython, everything shares RAM.I also tried some approaches, but the situation worsened (by calling gc.free_ram() in the main loop).
Then, I increased the remaining RAM by removing unnecessary code.After doing this, the program became stable.Each loop allocates memory, and the free memory continues to increase and decrease, then eventually releases.
An easy improvement is to display the number of GPS satellites using the LED, simply by importing the required module instead of the entire micro:bit library.The most relevant part of the code was originally to establish an NMEA.In C, you just allocate enough memory for the longest statement to be parsed, and then use pointers or arrays to put the incoming bytes into memory, checking for buffer overflow.In Python, strings are immutable, and you cannot use the same method.You can use “string = string + new_character”.
Of course, the Python interpreter will allocate new memory for the resulting string, marking the old string as “no longer in use” so it can be released later, leading to a lot of idle memory waiting to be released.Now, in my NMEA code, whenever a new byte is received, memory will be freed.
I changed the code to use bytearrays, which is the closest method to C, but the memory was still slightly lower (I assume it originally occupied more space), so I reverted to the original code.In the end, I rewrote the NMEA code using the binary UBX protocol instead.
The code has been running continuously for over 12 hours, and the free memory graph is solid (measured at the same point in the main loop each time).I still need to add flight mode code, but that should not be a problem.If all goes well, choosing a suitable weather condition will allow us to start flying.
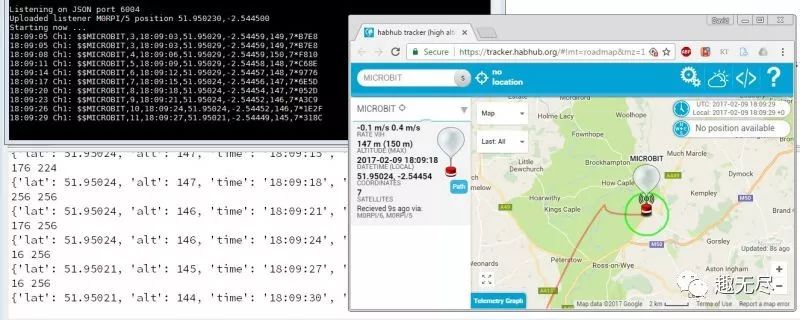
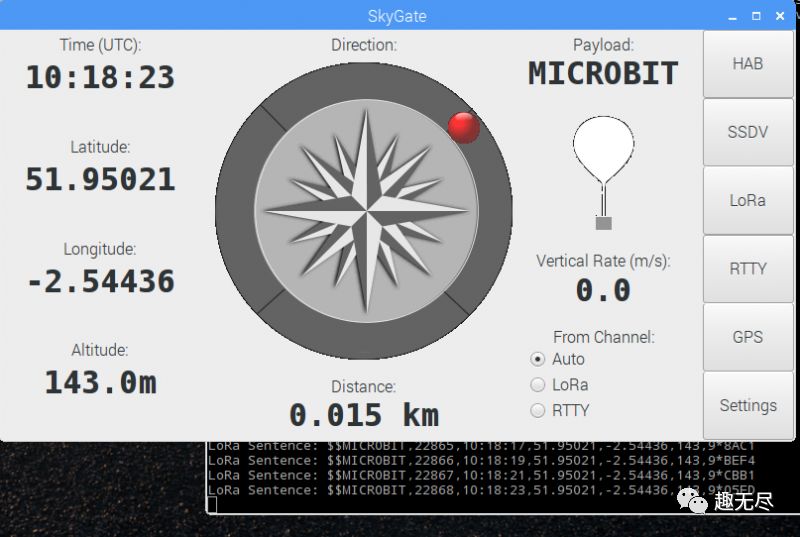
Finally, here are the test results I recently received through the Python Lora gateway program.

BrachioGraph:Raspberry Pi Drawing Machine