MP3 players were once all the rage on the streets, with nearly everyone holding an OPPO MP3 player. However, with the rise of smartphones, MP3 players have faded into memory. In this article, we will use the Arduino development board and the XY-V17B module to play a classic MP3 song of our choice.
Required Components
● Arduino Uno R3 Development Board
● XY-V17B MP3 Playback Module
● Jumper Wires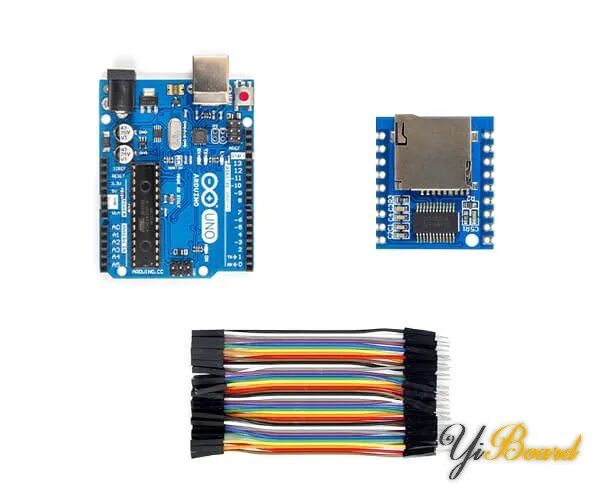
XY-V17B Card MP3 Playback Module
The XY-V17B SD/TF card MP3 playback module is a user-friendly and versatile audio playback solution. The module features a simple design with functionalities suitable for both beginners and enthusiasts. Its standout feature is compatibility with SD and TF cards, allowing users to easily play MP3 files directly from these storage devices. With a straightforward interface, users can easily browse tracks and control playback. The module also supports multiple audio formats, providing flexibility for various music libraries. Its compact design and easy integration make it suitable for a wide range of applications, from DIY projects to audio systems.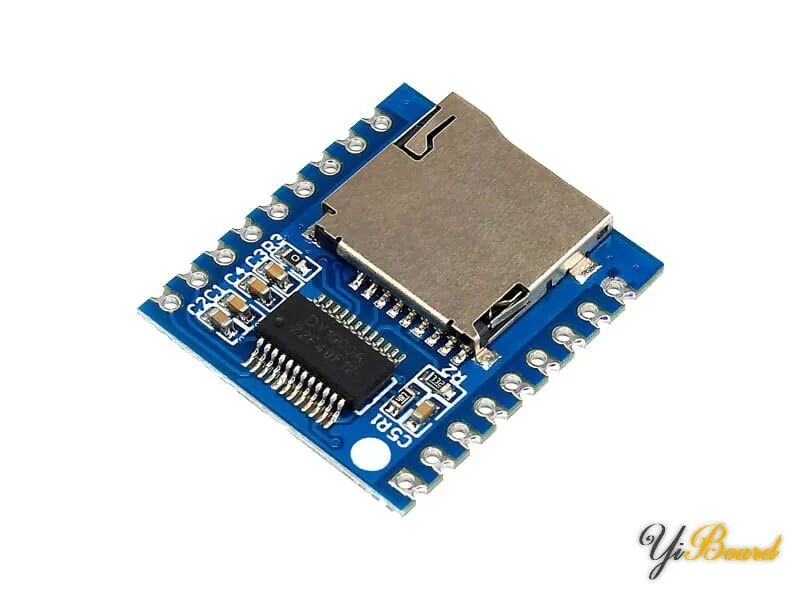
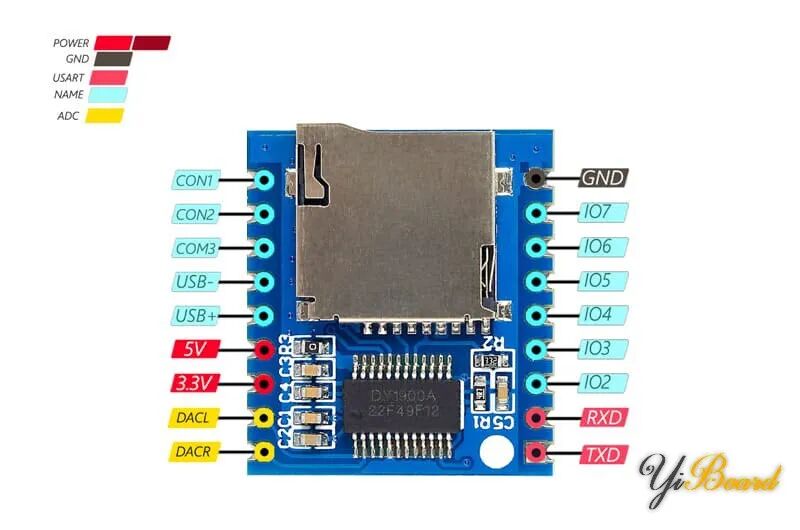
XY-V17B MP3 Playback Module Pin Configuration
This module has 8 IO pins for addressing, 3 CON pins for connecting to operating modes, and 2 USB pins for connecting to a PC.
Refer to the datasheet to set its operating mode. You can see the pin configuration of this module in the image below.
Hardware Connections
Before starting the connections, we need to upload the songs to the MicroSD card. Note: Ensure that the file names follow the format “00001.mp3” and increase the number of files as needed. Also, make sure the SD card is formatted to FAT16/32.
The XY-V17B model offers a variety of functions, providing seven different operating modes. In this article, we delve into two main modes, showcasing the module’s adaptability.
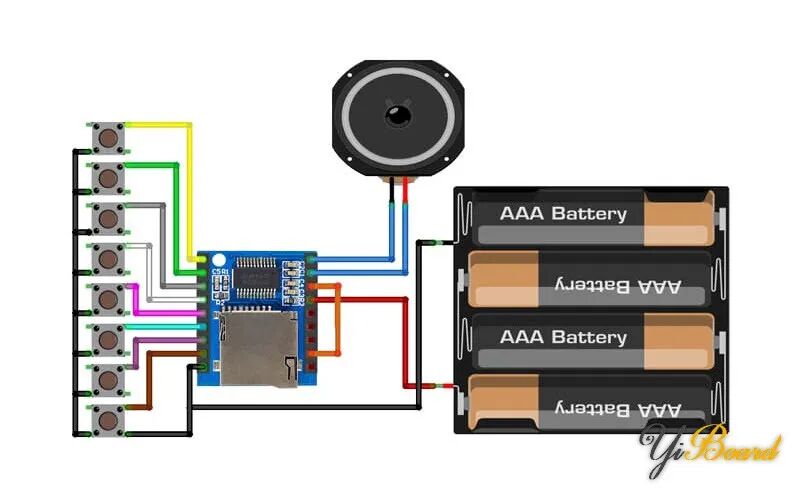
● IO Mode
The first mode emphasizes simplicity, allowing users to control sound playback using IO (buttons) specifically. This straightforward approach caters to users who prefer manual, button-based interaction with the module.
Pressing any button will cause the module to play the corresponding song based on the specified button number. (The sound stops when you release the button.)
● Serial Mode
The second mode demonstrates the model’s compatibility with serial communication, allowing seamless integration with various microcontrollers or microprocessors. As a practical example in this article, we demonstrate how to combine the XY-V17B model with Arduino.
The following circuit shows how to connect the Arduino to this module. Please refer to the image below for the connections.

Code
First, we need to install the necessary library files in the Arduino IDE: dyplayer. This library can be downloaded from GitHub: dyplayer.
Upload the following code to the Arduino development board.
/*Create on January 10, 2024*/
#include <Arduino.h>
#include "DYPlayerArduino.h"
// Initialise the player, it defaults to using Serial.
DY::Player player;
// Alternatively initialise on another serial port.
// DY::Player player(&Serial2);
void setup() {  player.begin();  player.setVolume(30); // 50% Volume  player.playSpecified(1);}
void loop() {
}
After uploading the code, the Arduino development board will send commands to the XY-V17B module to play the first “00001.mp3” file. After that, you can simply press the reset button on the Arduino to replay.
For more content, please click“Read Original” 》》