Getting Started with Arduino UNO: Control an LED in 10 Minutes (Includes Code and Wiring Diagram)
Introduction: Have you ever thought about using a small Arduino board to make an LED blink, breathe, or even dance to your code? Today, we will unlock the first magic of hardware development with Arduino UNO—controlling an LED! No complex knowledge is required; just follow the steps, and even beginners can become the “masters of light” in no time!
1. Preparation: Your “Light Toolkit”
1. Hardware List
- Arduino UNO Development Board ×1
- LED ×1 (any color, red or green recommended)
- 220Ω Resistor ×1 (to prevent LED burnout, must include!)
- Breadboard ×1
- Dupont Wires (male-to-male) ×2
2. Understanding Hardware
- LED Polarity: The longer leg is positive (connect to power), and the shorter leg is negative (connect to GND) → reverse connection will not light up!
- Function of Resistor: Current limiting protection, calculation formula: Resistance value = (5V – LED forward voltage drop) / current → Generally use 220Ω-1kΩ.
2. Hands-On Practice: Make the LED Blink!
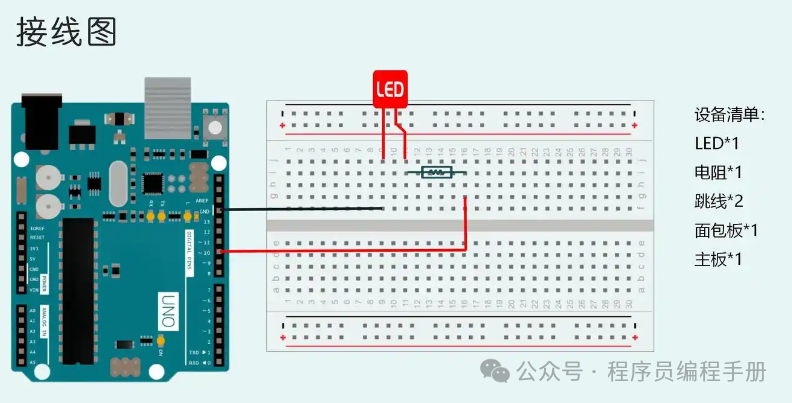
Step 1: Hardware Wiring (Complete in 5 Minutes)
Wiring Mnemonic: Positive connects to signal, negative connects to GND, don’t forget the resistor!
- Detailed Wiring Diagram (with images to ensure beginners can understand):
- LED long leg (positive) → through 220Ω resistor → UNO’s digital pin 13 (built-in LED for easy debugging).
- LED short leg (negative) → UNO’s GND pin.
Step 2: Code Writing (3 Lines of Core Code)
Open the Arduino IDE, copy the following code (detailed comments to help you understand):
void setup(){
pinMode(13,OUTPUT);// Set pin 13 as output mode
}

void loop(){
digitalWrite(13,HIGH);// Turn on LED
delay(1000);            // Wait for 1 second
digitalWrite(13,LOW);// Turn off LED
delay(1000);            // Wait for another second
}
Step 3: Upload Code (One-Click Completion)
- Connect UNO to the computer using a USB cable.
- Select board type: Tools → Board → Arduino AVR Boards → Arduino UNO.
- Select port: Tools → Port → Corresponding COM port (Windows) or **/dev/cu.usbmodemxxx** (Mac).
- Click the “Upload” button (right arrow icon) and wait for the “Upload Successful” prompt!
🎉 Congratulations! Your LED is now blinking rhythmically!
3. Upgrade Your Skills: Make the Light “Breathe”
🔥 Challenge PWM Dimming to achieve gradual brightness and dimming of the LED!
- Hardware Modification: Connect the LED positive to a PWM-supported pin (such as pins 9, 10, 11, marked with a “~” symbol).
- Code Replacement: Use
<span>analogWrite()</span>to control brightness (range 0-255):
void loop(){
// Gradually brighten
for(int i =0; i <=255; i++){
    analogWrite(9, i);
    delay(10);
}
// Gradually dim
for(int i =255; i >=0; i--){
    analogWrite(9, i);
    delay(10);
}
}
4. Pitfall Guide: Common Issues for Beginners
-
LED not lighting up?
- Check if the positive and negative are reversed!
- Ensure the resistor is in series with the positive circuit.
- Use a multimeter to measure pin voltage (should alternate between 5V and 0V).
Code upload failed?
- Ensure the board type and port selection are correct.
- Try unplugging and re-plugging the USB cable, or press the reset button on the UNO.
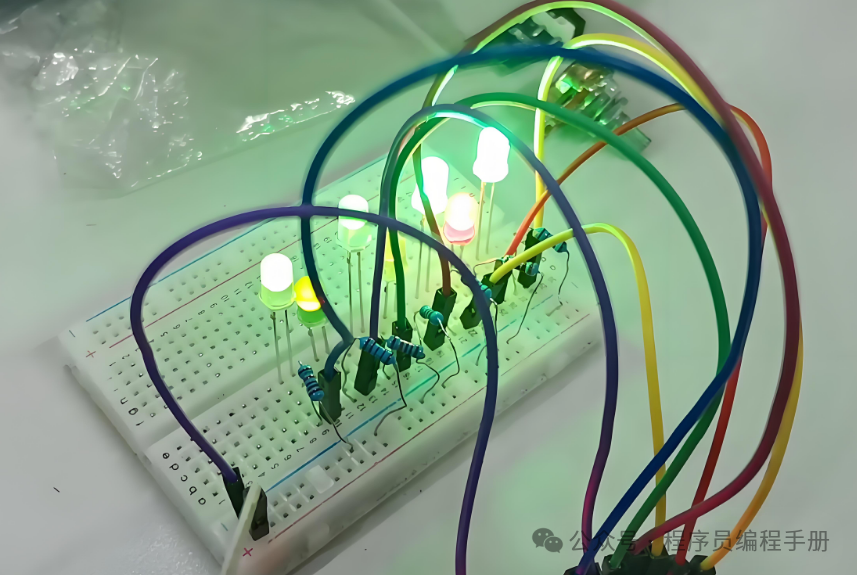
Want to control multiple LEDs?
- Expand wiring: connect multiple LEDs to different digital pins (like 12, 11, 10), and control them separately in the code!
5. Creative Extensions: You Control the Light Show!
🌟 Brainstorming Time:
- Button Interactive Light: Add a button, LED lights up when pressed, goes out when released.
- Sound-Controlled Light: Connect a sound sensor to control the LED switch with a clap.
- Rainbow LED Strip: Use WS2812B full-color LEDs to program a flowing light effect!
Conclusion: Starting with a small LED, the world of Arduino has opened its doors to you! Share this article with your friends to inspire more creative sparks!
Let the code shine in reality; we are all makers! 💡🚀