Distributed Communication
Intelligent robots have many functions. If all tasks are placed on one computer, it often encounters issues like insufficient computing power and lag. Wouldn’t it be better to break down these tasks and distribute them across multiple computers?
This is what a distributed system does, enabling task allocation across multiple computing platforms.
Distributed Communication
What does distributed mean?
As we discussed earlier, in the ROS system, a robot’s functionality is composed of various nodes, which may reside on different computers.
This structure can allocate resource-intensive tasks to different platforms, alleviating computational pressure, which is one of the typical applications of a distributed communication framework.
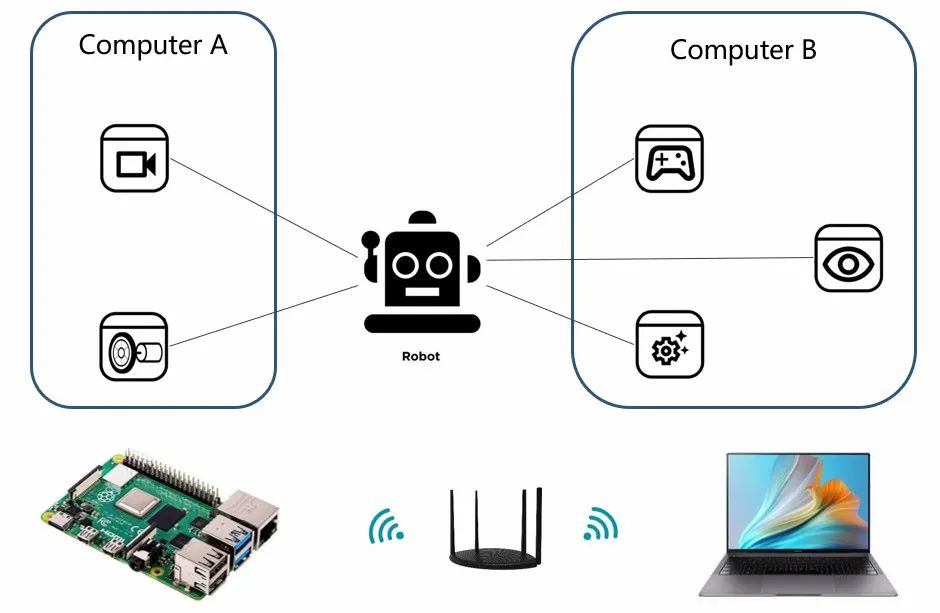
For example, in this robot system, there are two computing platforms.
The robot is relatively small and not suitable for carrying a laptop, so we use a Raspberry Pi as the controller, mainly to implement sensor driving and motor control functions.
However, visual processing and application functions are not suitable to run on the Raspberry Pi, so we place them on another, more powerful laptop.
Additionally, we need to monitor the robot’s sensor information on the computer and remotely control its movement.
The communication between the two computers may seem a bit complex, as there is quite a bit of data being transmitted.
However, the ROS system has already designed this for us; we just need to configure the ROS environment on each computer, and there is no need for any changes in functionality development, making it very convenient.
Next, let’s experience the charm of the ROS distributed system together.
Building a Distributed Network
Besides the laptop I used, we chose the Raspberry Pi as another computing platform to simulate a controller placed on the robot.
Raspberry Pi Configuration
Before development, we need to configure the environment for the Raspberry Pi. There are many resources online that everyone can refer to.
Installing the System
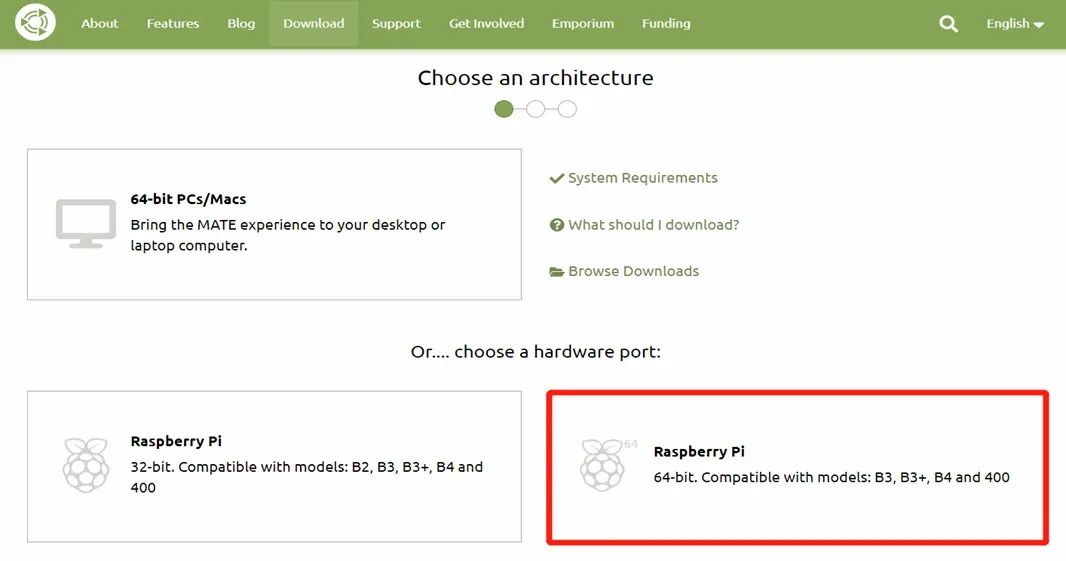
First, we need to install a system on the Raspberry Pi. Here we choose the Ubuntu Mate image for Raspberry Pi. After downloading the image, write it to the Raspberry Pi’s SD card to boot the system.
Ubuntu MATE image download link:
https://ubuntu-mate.org/download/
Installing ROS2
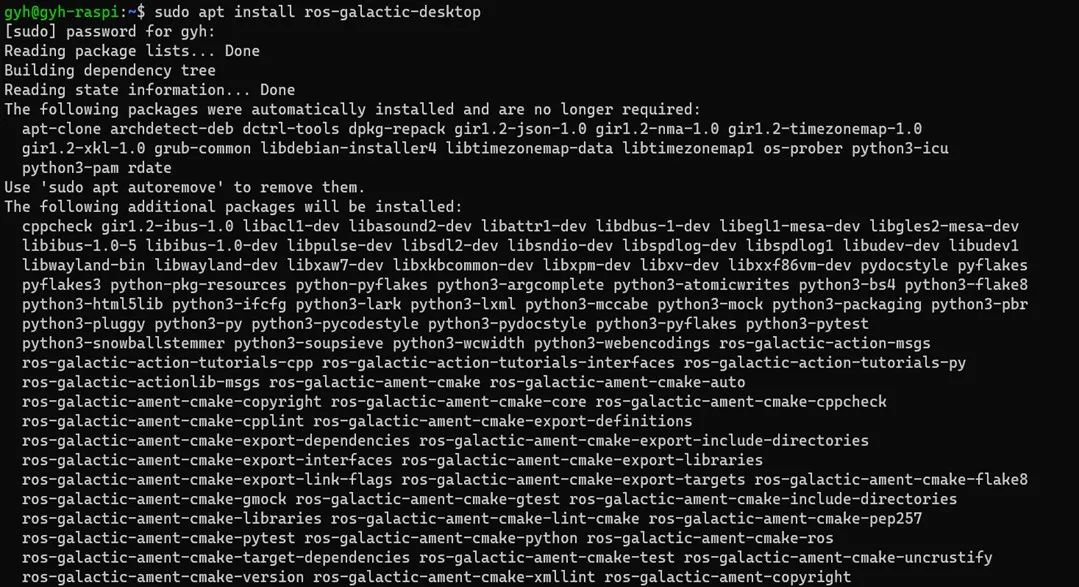
In the installed Ubuntu Mate system, install ROS2, following the same process as on the computer.
Compiling Code
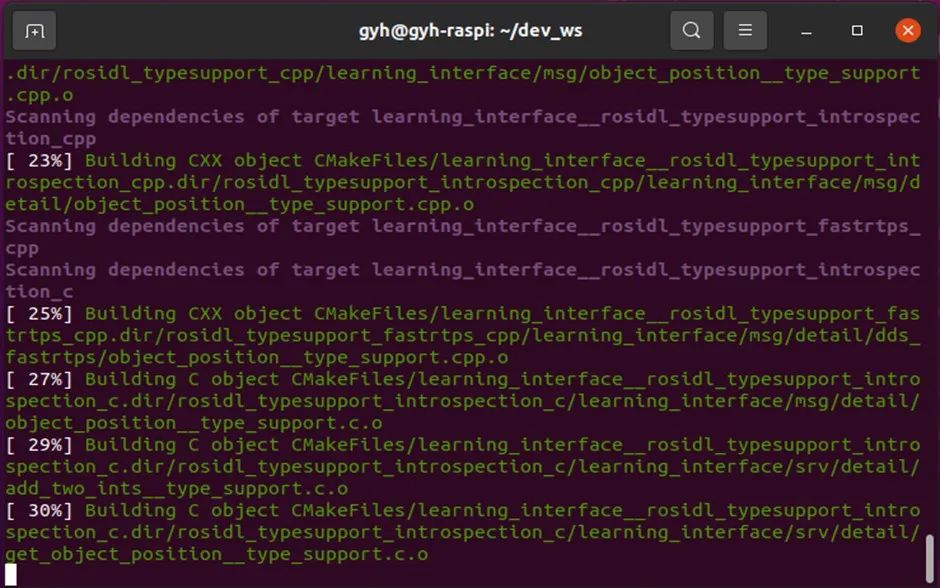
Download our course code to the Raspberry Pi and compile it.
Remote Desktop
If you have a monitor, you can directly connect a keyboard, mouse, and monitor to the Raspberry Pi. If this is inconvenient,
you can also configure a remote desktop on the Raspberry Pi, allowing you to access the Raspberry Pi’s desktop system over the network.
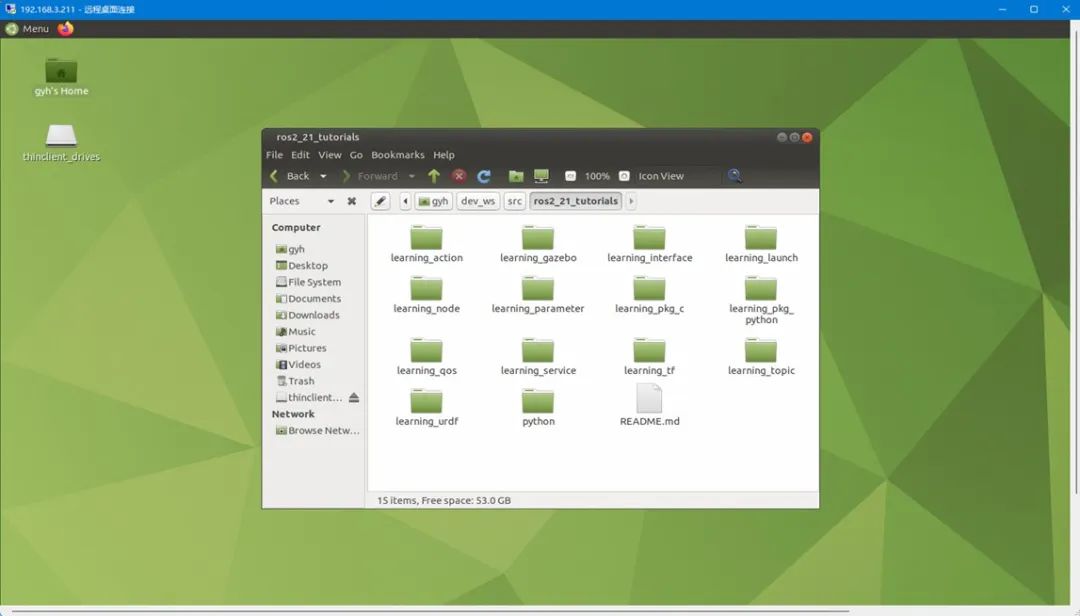
The overall process of the above steps is basically the same as the operations on the computer. You can also refer to the following link to configure the Raspberry Pi:
https://blog.csdn.net/qq_52785580/article/details/122599728
Distributed Data Transmission
After configuring the Raspberry Pi, ensure it is connected to the same local network as the computer you are using. Next, we will establish communication capabilities between the two computing platforms. What exactly needs to be done?
In short, nothing needs to be done. We will directly use the command line to test the topic communication effect.
Attention
If using a virtual machine, please change the virtual machine network to bridge mode.
On the Raspberry Pi, use the following command to start a publisher node:
$ ros2 run demo_nodes_cpp talker # Raspberry Pi side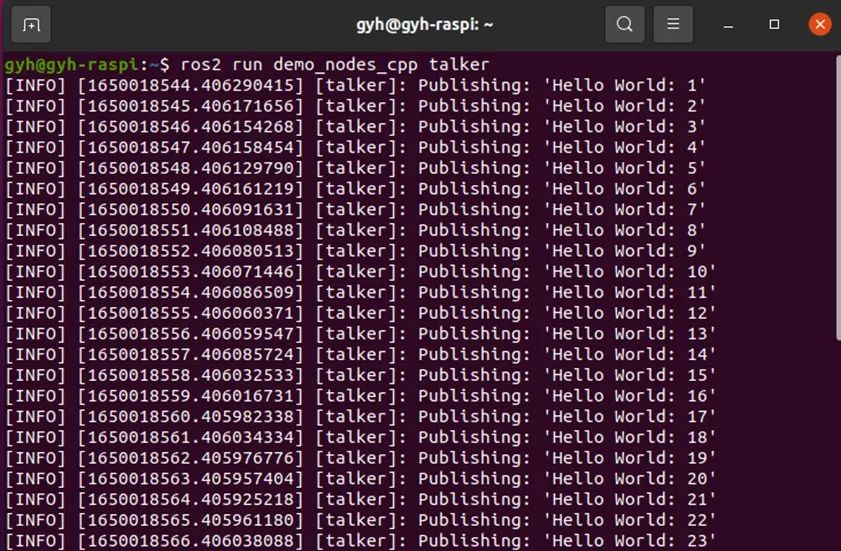
Next, on the computer side, use the following command to start a subscriber node:
$ ros2 run demo_nodes_py listener # PC side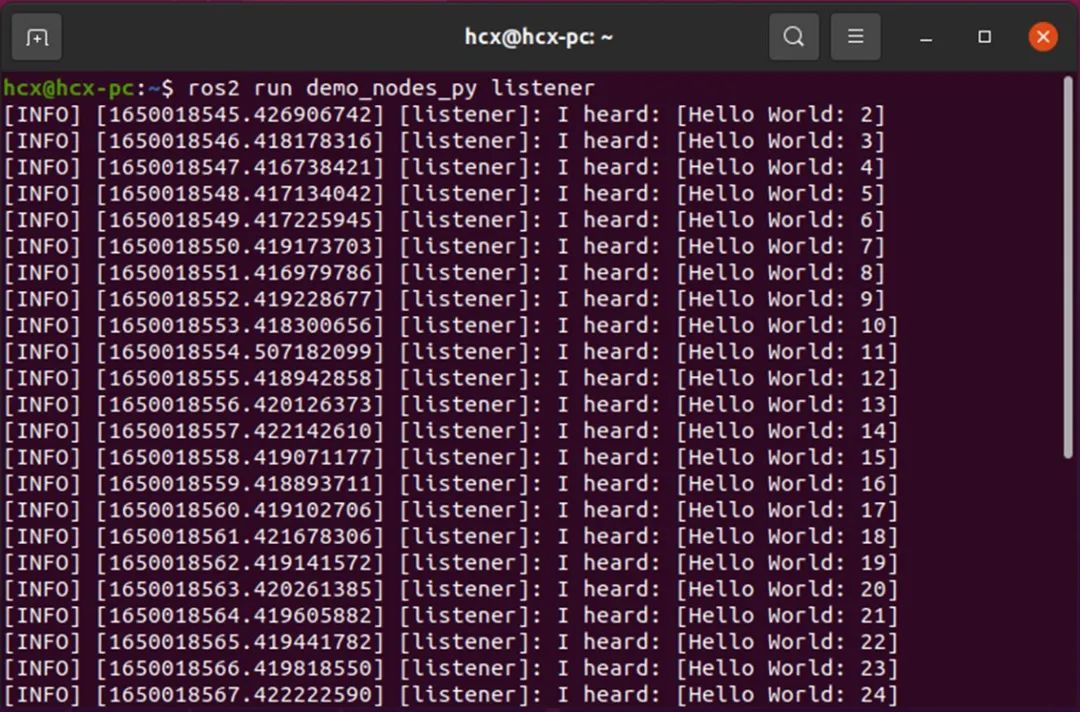
Magical things happen just like that; as long as both computers have ROS2 installed and are on the same network,
they can achieve the communication of topics, services, actions, etc., just like being on one computer.
However, this also raises a problem. If there are many computers in a network, we do not want them to all communicate with each other.
Instead, they can communicate in groups, and groups cannot communicate with each other.
Distributed Network Grouping
No problem, ROS2 provides a DOMAIN mechanism, similar to grouping.
Computers within the same DOMAIN can communicate. We can add this configuration line in the .bashrc of both the computer and the Raspberry Pi to assign them to the same group:
$ export ROS_DOMAIN_ID=<your_domain_id>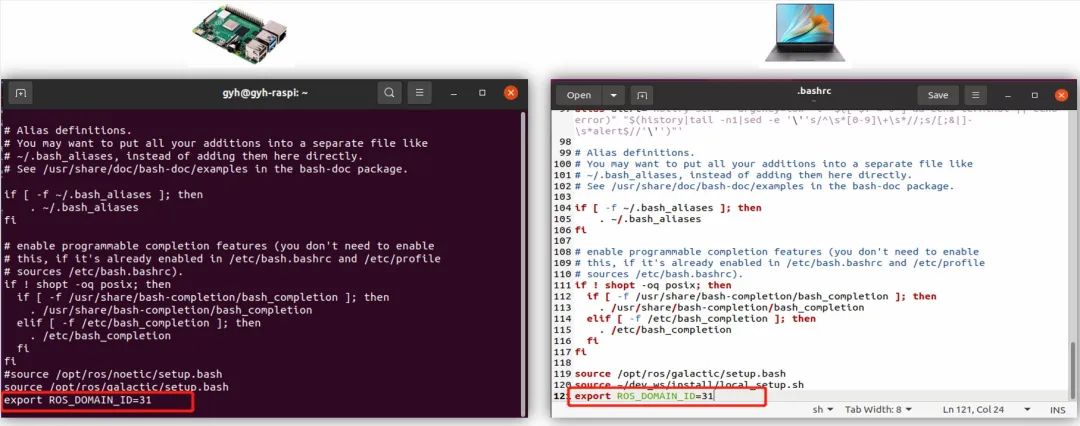
If the assigned IDs are different, then they cannot communicate.
Case 1: Turtlebot Distributed Control
The distributed communication network seems to have been successfully established. Is it really as magical as we think? Let’s continue testing some examples we learned earlier.
First, let’s try the classic example in ROS—the Turtlebot.
We can start the Turtlebot simulator on the computer side and start the keyboard control node on the Raspberry Pi, or vice versa, and still smoothly control the Turtlebot’s movement:
$ ros2 run turtlesim turtlesim_node # PC side$ ros2 run turtlesim turtle_teleop_key # Raspberry Pi side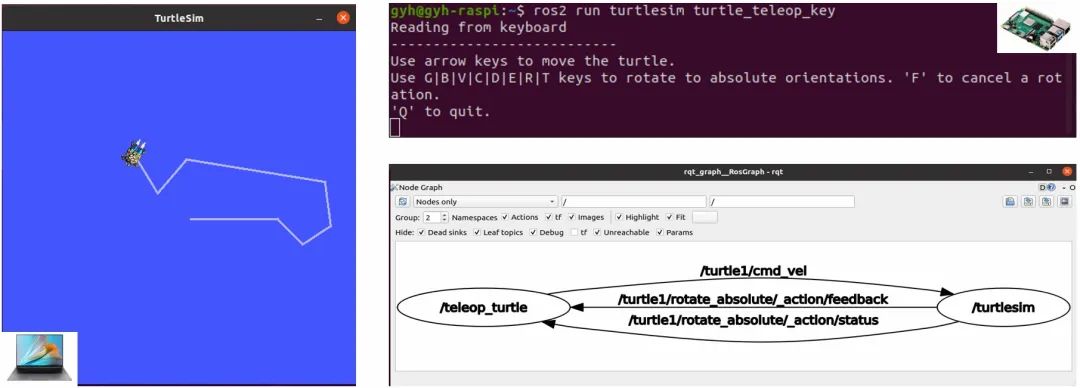
Case 2: Topic Distributed Communication
Can the examples we wrote earlier be used directly without modifying any code?

Let’s first test topic communication, with the Raspberry Pi as the publisher, publishing the Hello World string, and the computer as the subscriber, subscribing to the Hello World string:
$ ros2 run learning_topic topic_helloworld_pub # Raspberry Pi side$ ros2 run learning_topic topic_helloworld_sub # PC side

Case 3: Service Distributed Communication
Topic communication is fine, and service communication is no problem either.

We run the server program on the computer side and the client program on the Raspberry Pi side, and we can still smoothly achieve the addition functionality:
$ ros2 run learning_service service_adder_server # PC side$ ros2 run learning_service service_adder_client 2 3 # Raspberry Pi side

Case 4: Machine Vision Distributed Application
Isn’t that enough complexity? No problem, let’s arrange a visual recognition example.
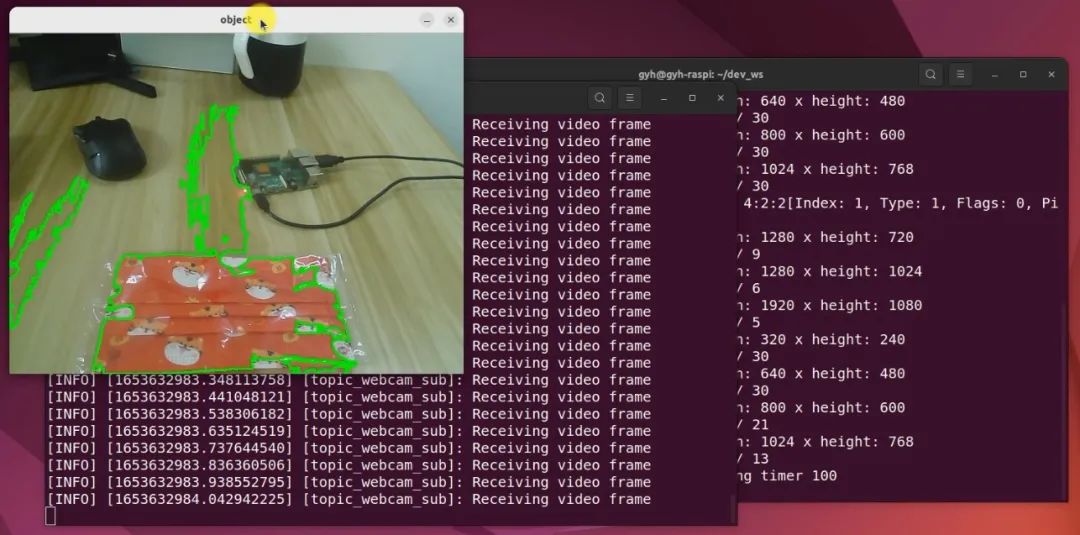
Next, we will connect a camera to the Raspberry Pi, simulating a small robot that can capture real-time images.
Then, through the distributed network, we will send the images to the processing node on the computer side to recognize the red objects in the images:
$ ros2 run usb_cam usb_cam_node_exe # Raspberry Pi side$ ros2 run learning_topic topic_webcam_sub # PC sideNo issues, the visual recognition results are as follows.
Alright, we have tested a series of examples within the distributed network of ROS without any issues. In actual robot development,
similar methods will be frequently used. ROS provides very friendly support for building distributed networks, requiring almost no configuration, and no code modifications.
As long as you use the ROS system, everything becomes so easy.
Reference link:
https://docs.ros.org/en/humble/Concepts/About-Domain-ID.html

Public Course “Introduction to ROS2: 21 Lectures by Guyue”
The brand new “Introduction to ROS2: 21 Lectures” is officially online, refined over more than 200 days, just to let more people get to know a brand new robot operating system.

(Scan to learn for free)

Scan or add WeChat ID: guyueju2020
Join the group chat to get more benefits!
 Click to read the original text to view the course