This article is an excellent contribution from the Kanxue forum.
Author ID on Kanxue Forum: Suifengxing
VMware Workstation 14 Pro
Windows 10 Pro x64 Virtual Machine
Installation in the virtual machine:
Windows Driver Sample /devcon (Source Code)
https://github.com/microsoft/Windows-driver-samples/tree/master/setup/devcon
After downloading, open it in VS. If you encounter a lot of errors, it’s because the msg.h file is missing; ignore this and directly compile release x64.
A msg.h file will be generated in the output directory. Copy it to the code directory and add it to the header files.
Open devcon.vcxproj in Notepad++, find <ClInclude Include=”msg.h” /> and delete it. Save, then reload the project to avoid the following error:
VS file msg.h is included in ClInclude and ClInclude project groups. Project items are not allowed to do this; it can only belong to one item group.
Once this is sorted out, you can read the code normally.
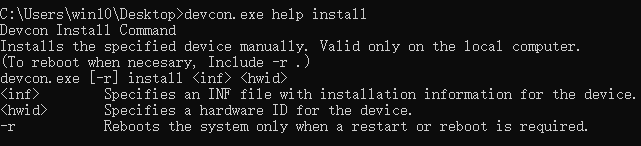
Here we analyze the installation of the PnP device driver. Copy the compiled devcon.exe to the virtual machine, start cmd with administrator privileges, and cd to the directory where devcon.exe is located.
cd C:\Users\win10\Desktop
devcon.exe install xxx.inf (specify the INF file containing device installation information) hwid (specify the device's hardware ID)
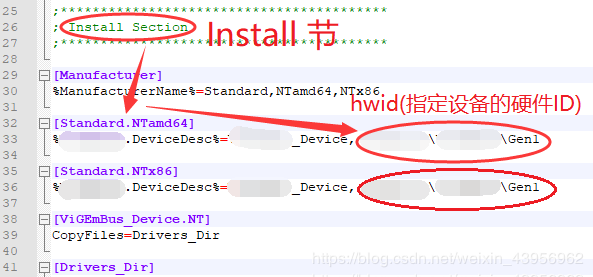
To find the device’s hardware ID, open the inf file, find the Install section, and select [Standard.NTamd64] or [Standard.NTx86] based on the system.
Installation successful return:Drivers installed successfully.
Check the device manager to find the driver you installed:
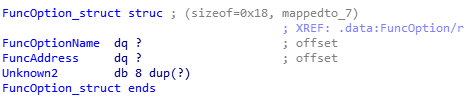
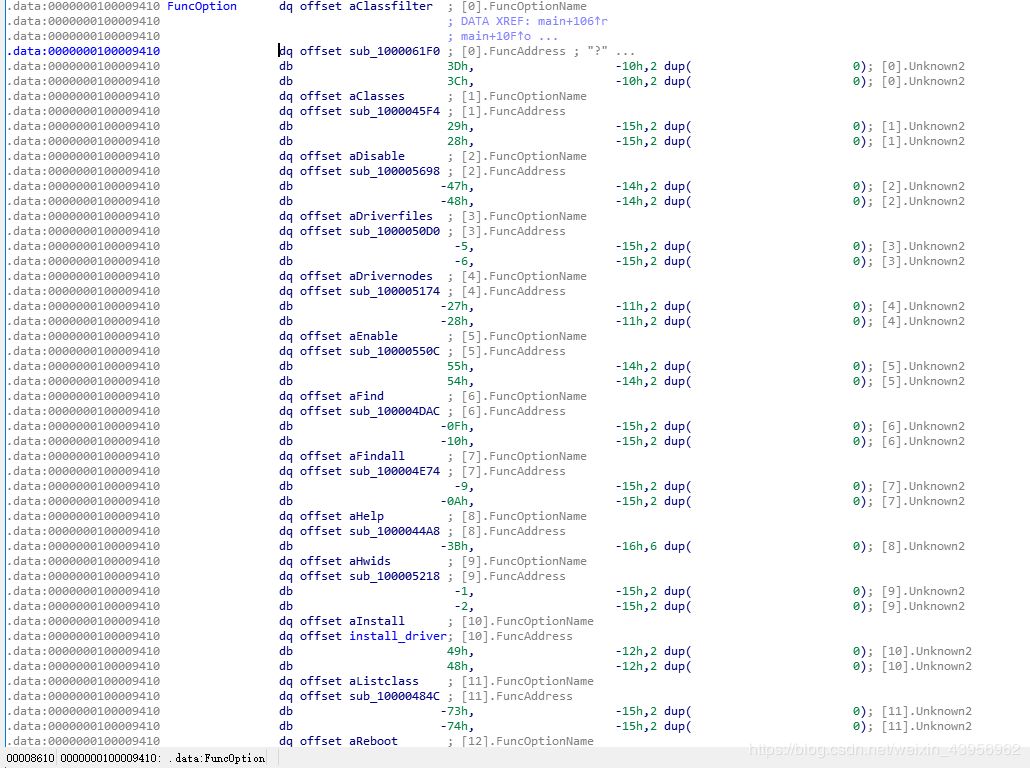
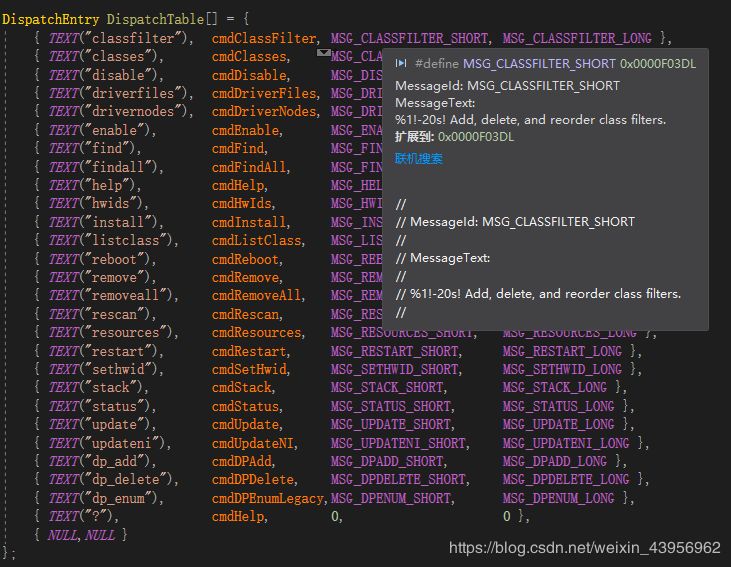
Initially, I couldn’t find the source code and reversed the overall logic; here’s a screenshot from IDA.Devcon has a clever structure.
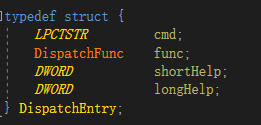
In devcon, it is defined as:
The last two DWORDs of the DispatchEntry structure are help messages,
where shortHelp is displayed when typing: `devcon.exe help`
and longHelp is displayed when typing: `devcon.exe help install (corresponding operation)`.
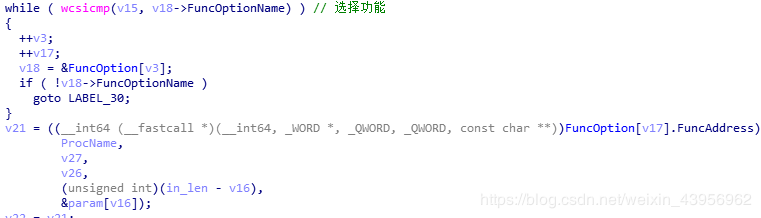
In the main function, v15 is the input command like:install v17 is the index of DispatchTable[]:
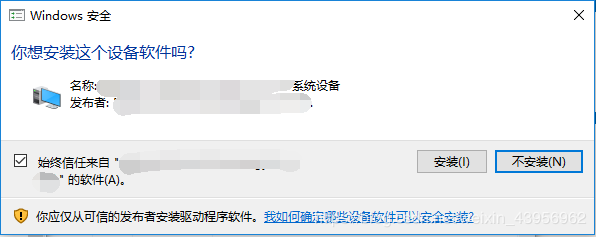
Automatic Installation and Windows Security
During installation, a Windows security prompt pops up; manual installation has no impact, but when deploying online at scale, it causes efficiency issues.
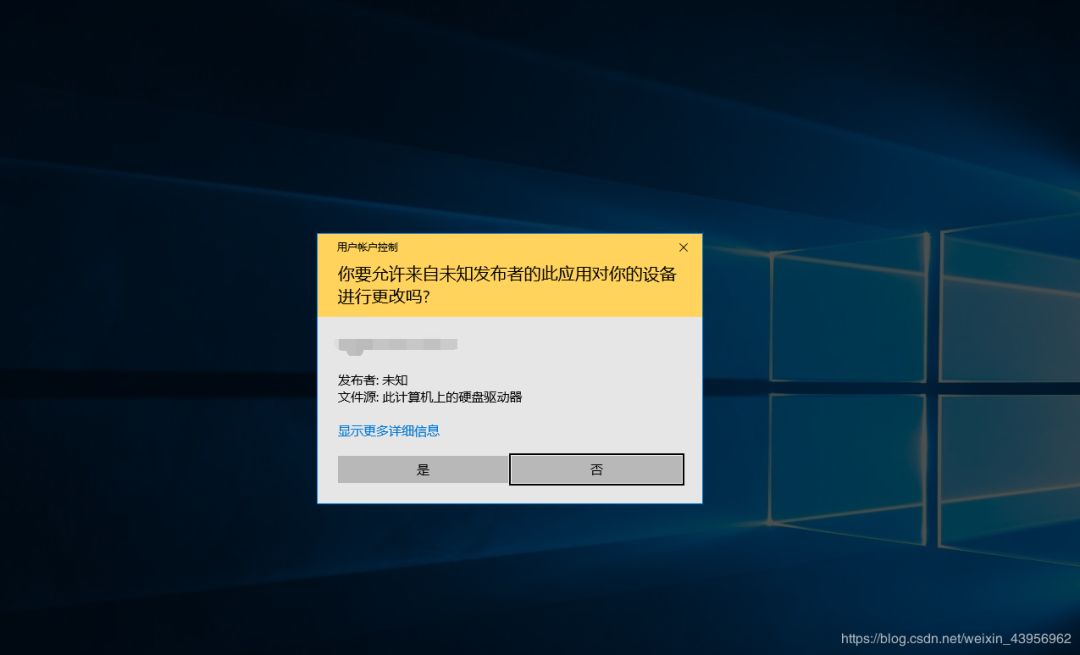
Initially, I speculated that this pop-up is similar to the User Account Control (UAC) pop-up running on the “secure desktop”; the entire desktop enters the SYSTEM account, and all programs under the original user account cannot know the status of this UAC pop-up, nor can they simulate user actions to bypass this UAC window.
After trying, I found that when the Windows security pop-up appears, Spy++, Task Manager, and x64dbg can all run normally and retrieve window information.
This pop-up belongs to the rundll32.exe process, located at C:\Windows\System32\rundll32.exe.
It is called in my installation of the Plug and Play device driver UpdateDriverForPlugAndPlayDevicesW API.
I want to eliminate this window during automatic deployment.
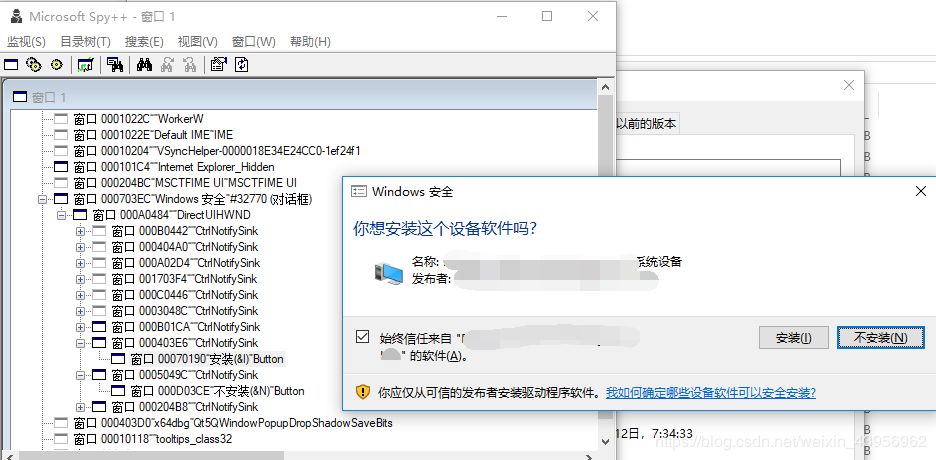
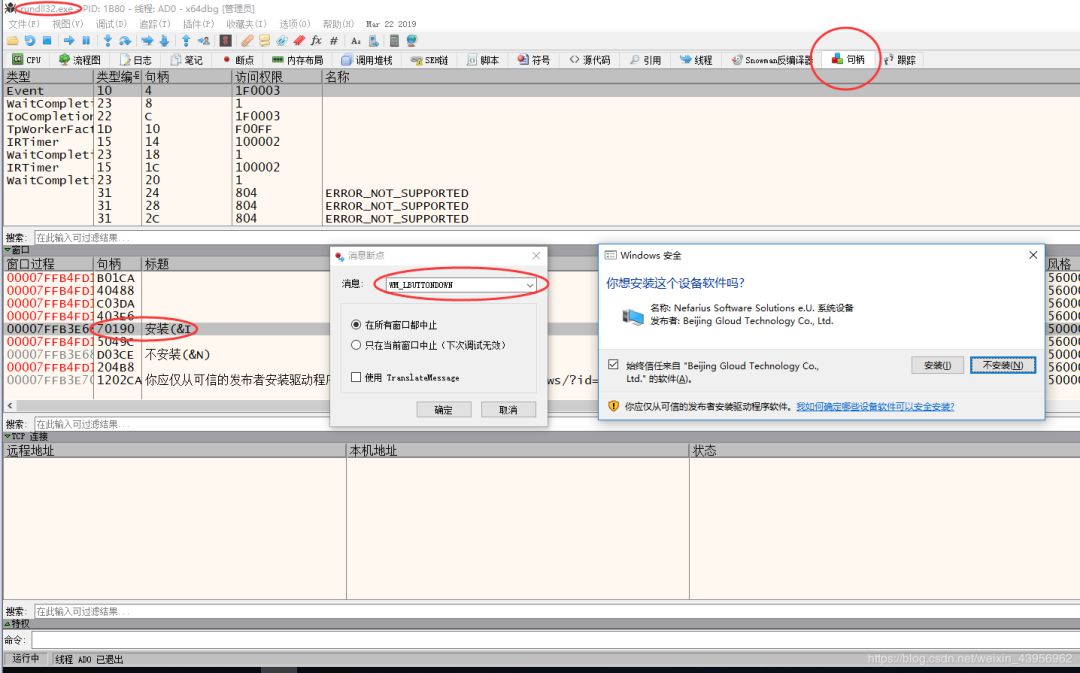
First, we use Spy++ to check the window properties to see if we can get the handle:
Both the title and handle can be obtained, so we can send a WM_LBUTTONDOWN message to the window.
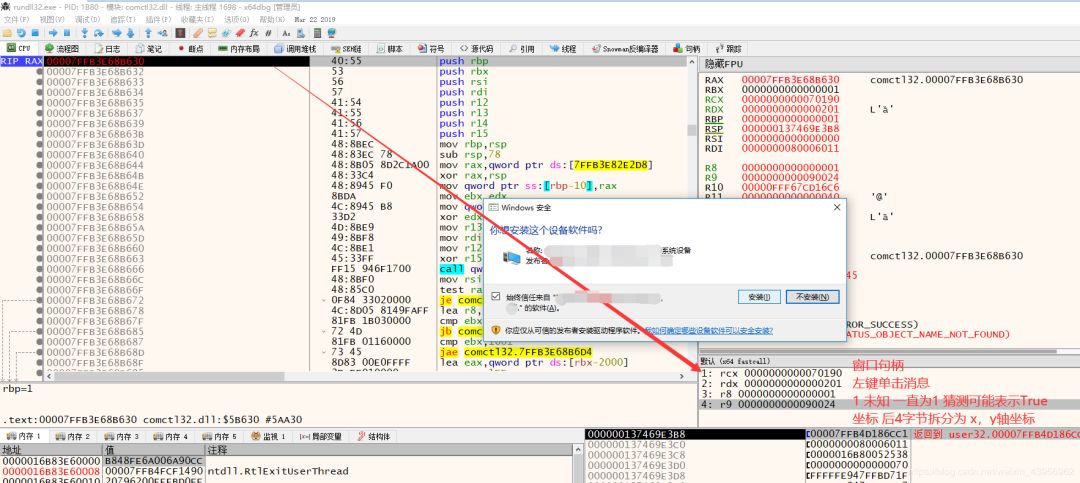
Set a message breakpoint in the x64dbg window, analyze the parameters after hitting the breakpoint.
DWORD64 dwLparam = 0x0000000000030003; // Coordinates
SendMessage(hwnd, WM_LBUTTONDOWN, 1, dwLparam);
SendMessage(hwnd, WM_LBUTTONUP, 1, dwLparam);
During the actual process of finding the window with code, I found that I couldn’t enumerate the installation button’s window, and its parent window has no title; there are four windows of the same class.
When the driver is successfully installed once, there is no security pop-up when uninstalling and reinstalling.
I initially speculated that the driver modified registry entries during installation; I tried to simulate manual registry modification—test—failed.
Transforming the thought process:
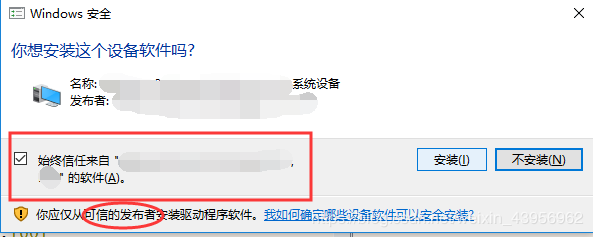
Further analysis of the pop-up shows a radio button that says “Always trust software from ‘XXXXXXXX'” and a trusted publisher.
I suspect it may be related to the CertificateStore:
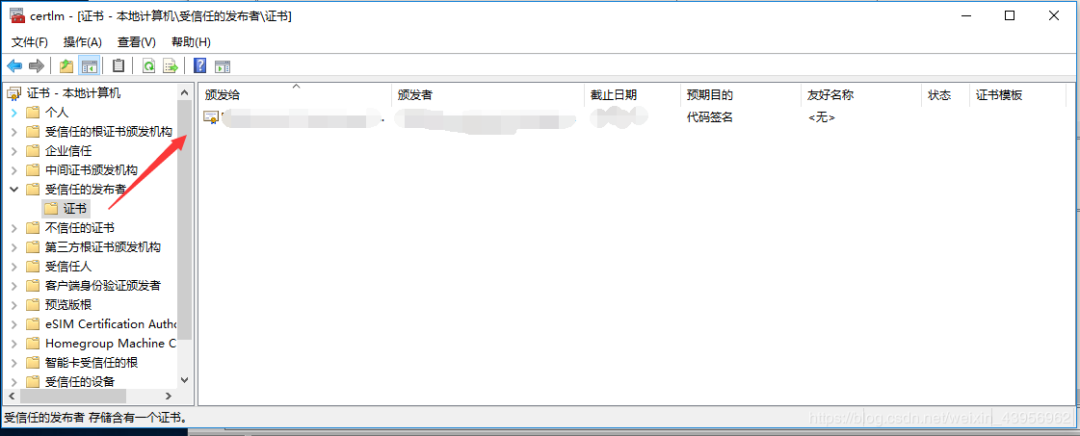
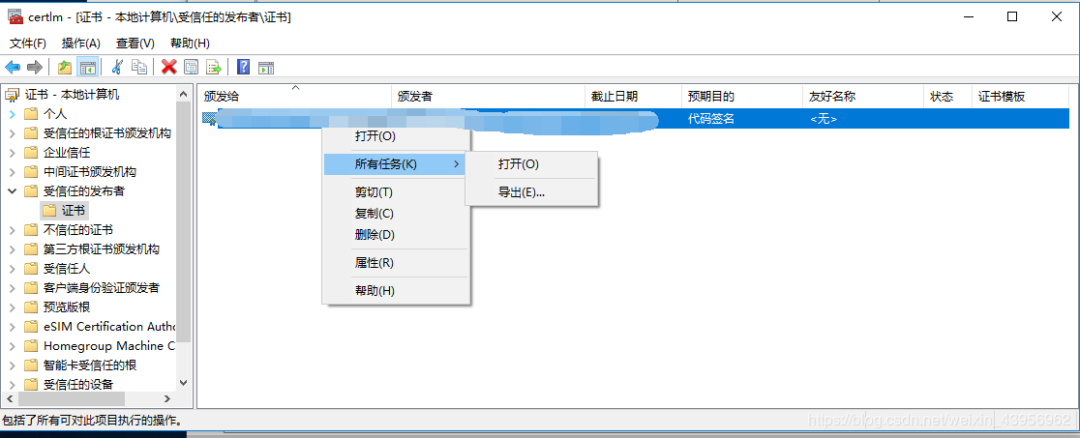
Run certmgr.msc with Win+R to open the certificate manager, check the trusted publishers, and right-click on the certificate to see the trusted publishers on this machine.
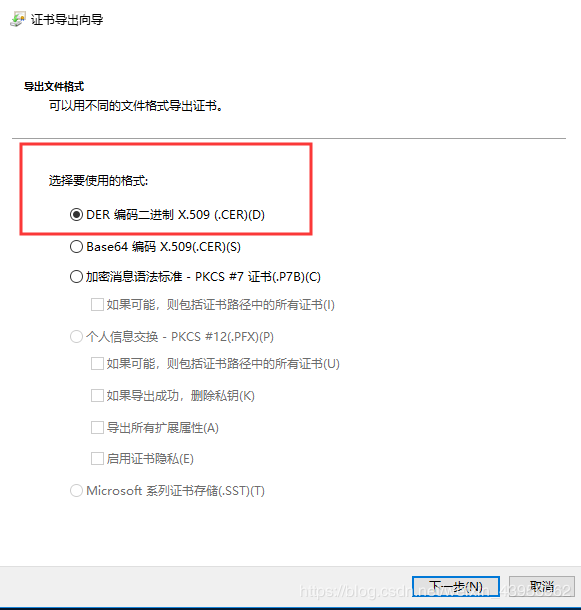
Find your driver signature, right-click to export:
Continue to the next step.
On a machine that hasn’t had the driver installed before, open certmgr.msc, right-click on trusted publishers to import the certificate, and when installing the driver, the security pop-up does not appear.
However, there is one last issue; manually importing the signature is not as convenient as just clicking away the security prompt.
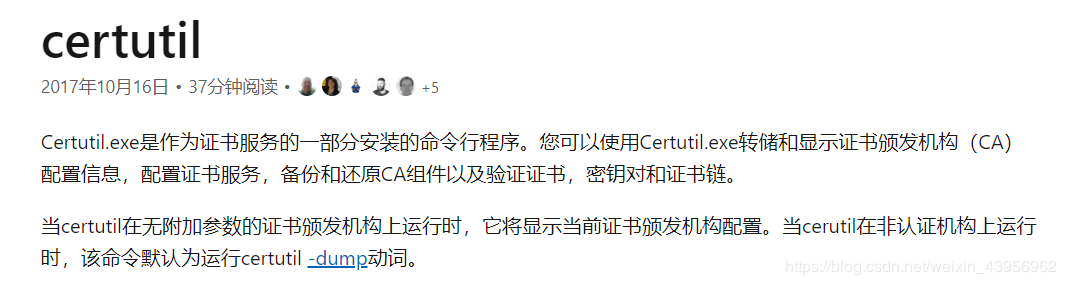
Refer to related materials.certutil:
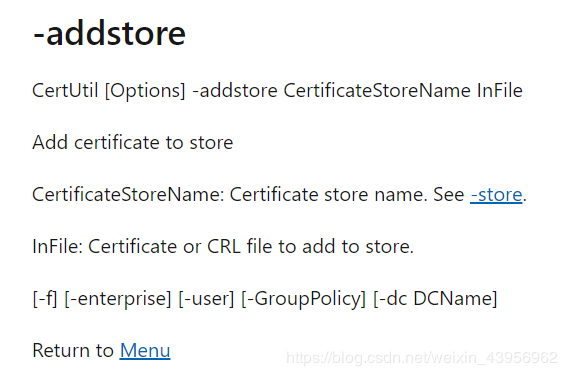
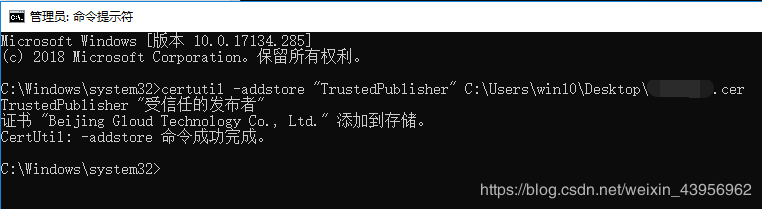
Run cmd and execute the following command:
certutil -addstore "TrustedPublisher" full path to the certificate file.cer
certutil -addstore “TrustedPublisher” full path to the certificate file.cer.
Here’s a useful debugging tip:
For dual-machine debugging:
-
For regular programs, at the entry point main, add MessageBox(0, 0, 0, 0);
-
For drivers, at the entry point DriverEntry, add DbgBreakPoint();
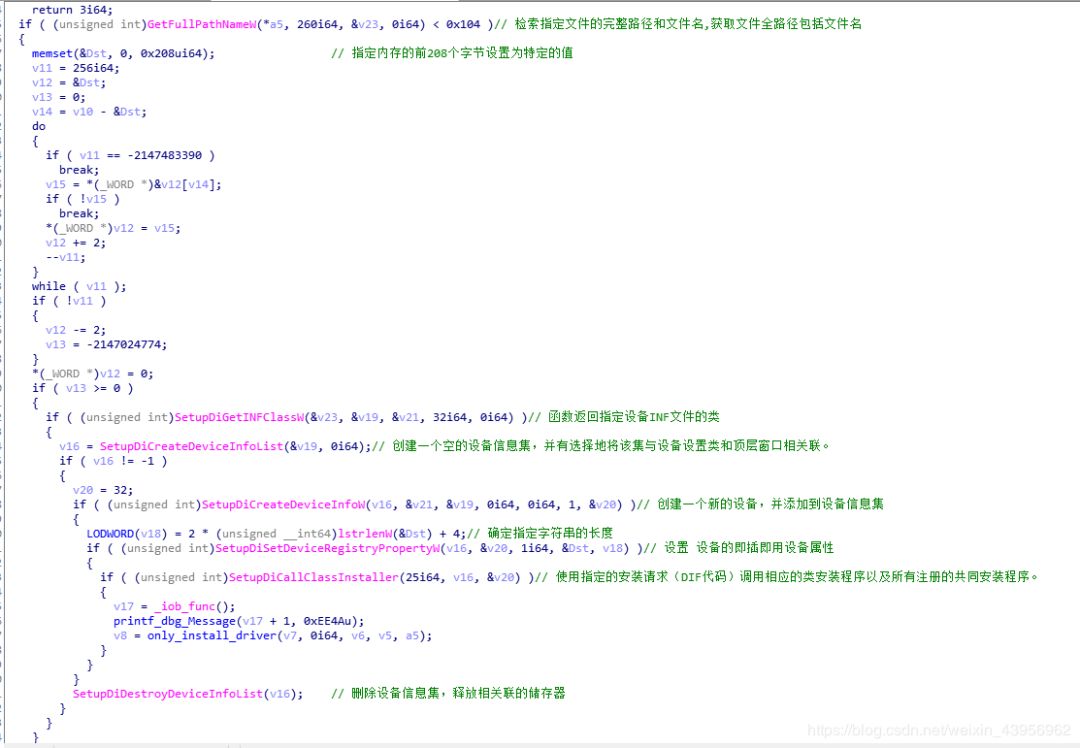
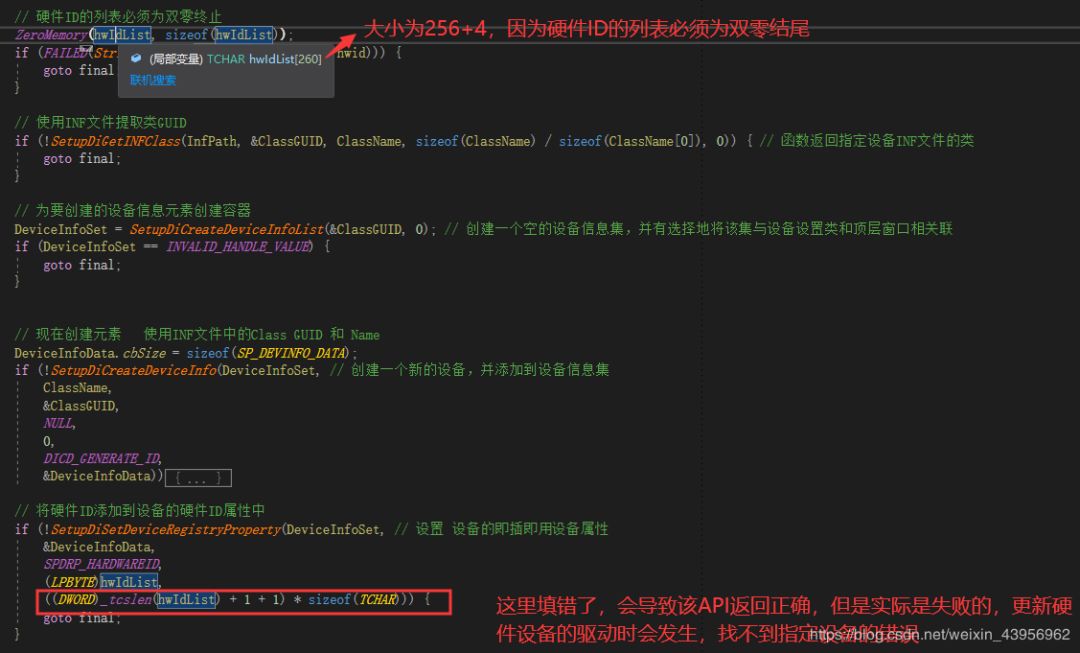
Installing a Plug and Play device driver requires:
1. First, create a virtual device
2. Modify the hardware ID properties
3. Call SetupDiCallClassInstaller to convert registry elements into actual device nodes in the PnP hardware tree
4. Obtain the UpdateDriverForPlugAndPlayDevicesW address
5. Call UpdateDriverForPlugAndPlayDevicesW to update the driver for the device we just created
Kanxue ID:Suifengxing
https://bbs.pediy.com/user-857955.htm
*This article is originally by Suifengxing from the Kanxue Forum, please indicate the source when reprinting from the Kanxue community.
* GandCrab v5.2 Analysis
* Common Non-PE Sample Analysis in Malware Analysis
* Custom Xposed Framework
* Detailed Analysis of retdlresolve Technology Through a Pwn Question
* Creating Your Own Penetration Tool—WiFi-Ducky
A Must-Read Book in Advanced Security Circles Public Account ID: ikanxue
Official Weibo: Kanxue Security
Public Account ID: ikanxue
Official Weibo: Kanxue Security