Cell Ranger is a suite of tools developed by 10x Genomics for analyzing single-cell and spatial transcriptomics sequencing data, primarily used for processing and analyzing single-cell RNA sequencing (scRNA-seq) and spatial transcriptomics data obtained from the 10x Genomics Chromium platform.
In a virtual machine running CentOS 7 on VMware Workstation (Linux system), download Cell Ranger and set up its system environment.
Step 1: Obtain the complete signed link from the official website.Find the Linux version of Cell Ranger (for example, cellranger-9.0.1.tar.gz).
Official link: https://www.10xgenomics.com/support/software/cell-ranger/downloads
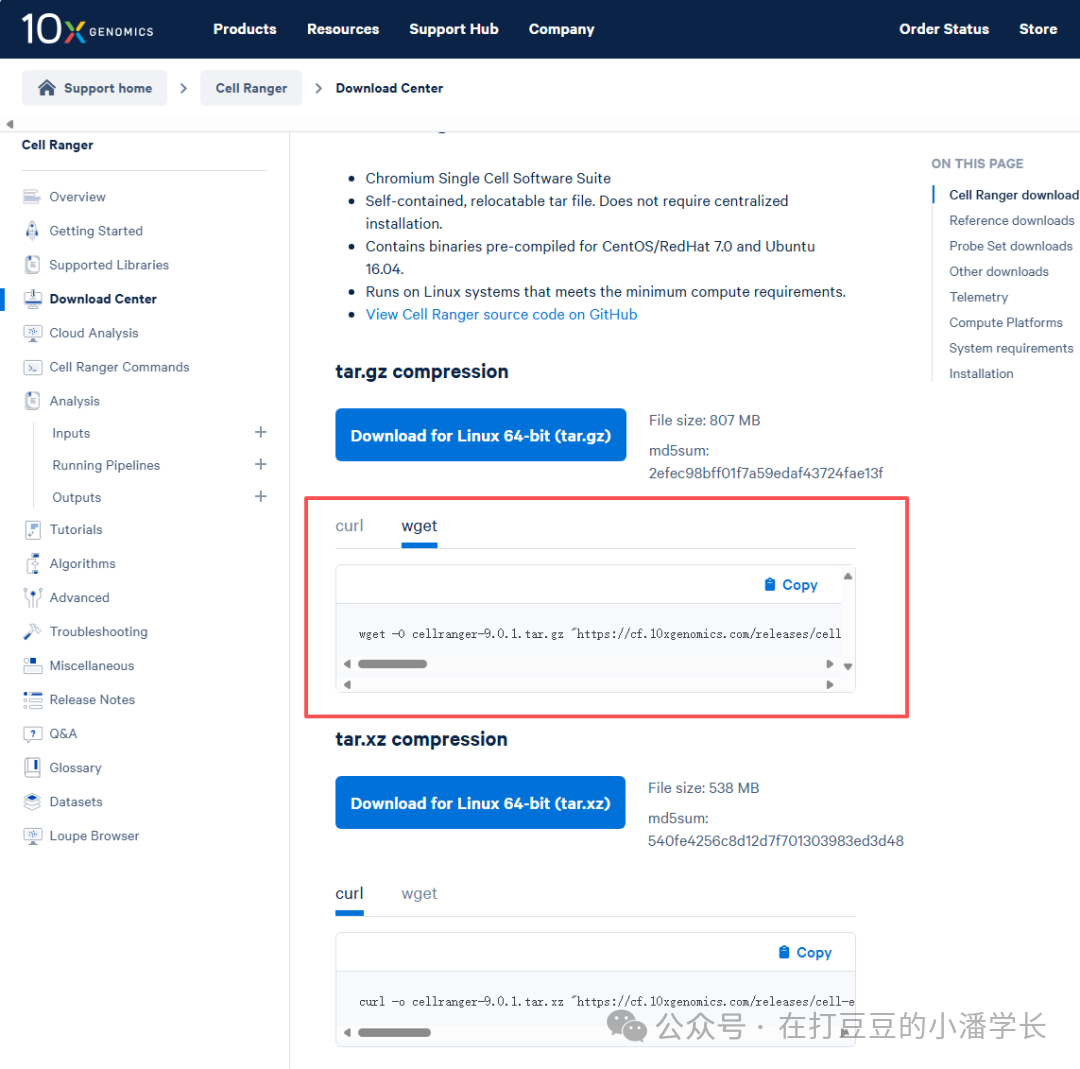
Step 2: Use wget to download in CentOS (make sure to wrap the URL in quotes):
wget -O cellranger-9.0.1.tar.gz "https://cf.10xgenomics.com/releases/cell-exp/cellranger-9.0.1.tar.gz?Expires=1758157846&Key-Pair-Id=APKAI7S6A5RYOXBWRPDA&Signature=a1FwJ7TdmO~xp9xpFJVFEWCsSotlCM5ynkgjYhMb3NNqpSiXHyhwPXlj55-CQpcPdTSwNSLhuNuGMekdqdXDgK-NbCrQh8d9Wk7~40VlxgH0YvuSRDEqK2yWDw6pK9Gt1YifdSbugbzToN9YnGKDylHY6u2x7bNwWOXASpeFxJxs1H8HmeeeYUBMwsQwMOlbiYN6hk05nRVjJW50chPcD5ZRD23KYTCYk8NnwTUNFf91aGXbP9V-Q0kpjRoPrFKIHinmHSrL3Twc1dJ01JCWCB0WH-VW2DApf8fU7EW658RjvQ-NhzX1ayT26yAMbbOWbVS0~EvHIGQscIQLZ9uqoA__"Note: This signed link is temporary; be sure to obtain the latest link from the official website.
Step 3: Installation steps after downloading
1. Extract
A directory named cellranger-9.0.1 will be created
tar -xzvf cellranger-9.0.1.tar.gz2. Move to the system directory
For system management convenience, software is usually moved to the system directory
sudo mv cellranger-9.0.1 /opt/# mv cellranger-9.0.1 ~/software/ # choose this if you lack permissions3. Set environment variables
To allow the system to recognize the Cell Ranger command from any location, its installation path needs to be added to the PATH environment variable.
Edit the user environment variable configuration file:Usually, modify the .bashrc file in the home directory.
nano ~/.bashrc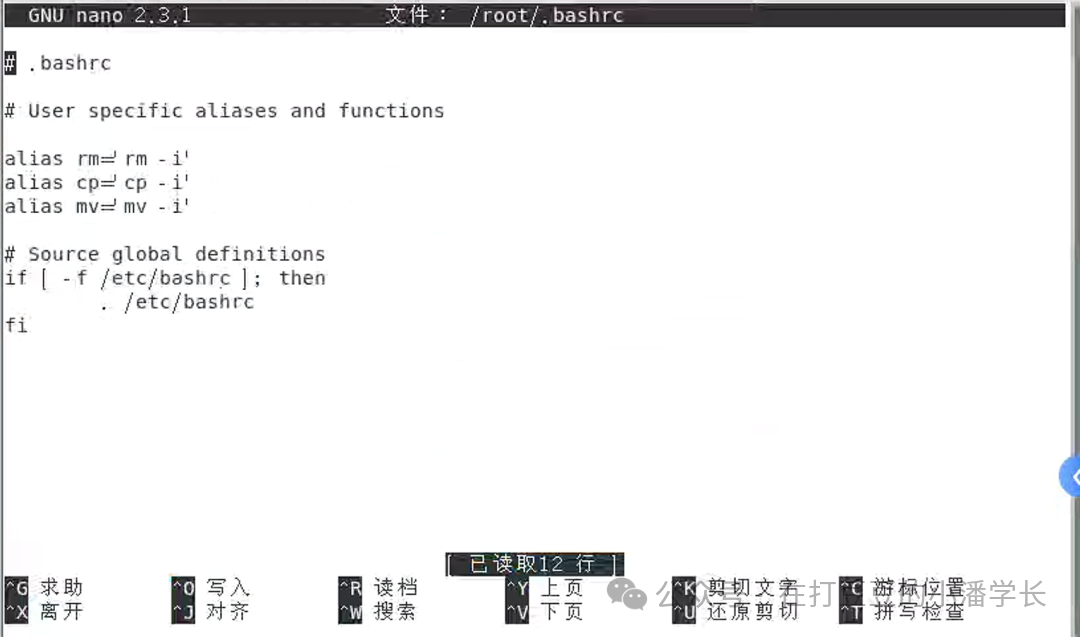
Add the Cell Ranger path:At the end of the .bashrc file, add the following line (modify according to your actual moved path)
echo 'export PATH=/opt/cellranger-9.0.1:$PATH' >> ~/.bashrc # use append mode (>>) to add the previous echo output to the end of ~/.bashrc file.#export PATH=~/software/cellranger-9.0.1:$PATH # if you moved it to the software folder in your home directory#export PATH=/path/to/your/current/directory/cellranger-9.0.1:$PATH # if you did not move the extracted folder (replace /path/to/your/current/directory/ with the actual full path)source ~/.bashrc # make the configuration effective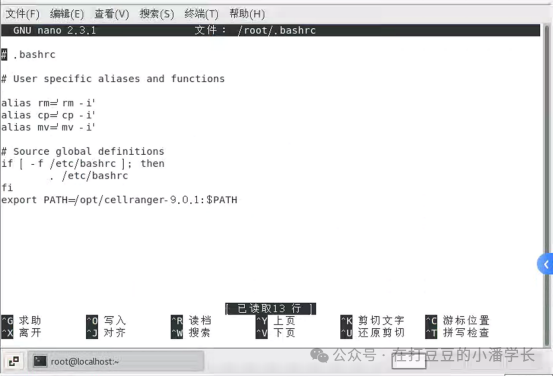
Verify
which cellranger # should return the added pathcellranger --version # should return the version
Test run:
cellranger testrun --id=test_install # --id=test_install: generates the name of the specified output folder (e.g., test_install/outs).If the run is successful, it will ultimately display: Pipestance completed successfully! This indicates that the Cell Ranger installation and environment configuration are correct!
That’s all for this sharing. The next issue will feature more exciting single-cell analysis content, so stay tuned.
Follow our public account for more exciting content.