In Linux systems, <span>Cron</span> is a powerful tool for automating repetitive tasks. By configuring <span>Cron</span> appropriately, users can easily schedule tasks to run every 5, 10, 15, or 30 minutes. This article will delve into how to use <span>Cron</span> to implement scheduled tasks at these intervals, covering everything from basic concepts to advanced configurations, aiming to provide readers with comprehensive and practical guidance.

1. Introduction to Cron and Its Working Principle
1. What is Cron?
<span>Cron</span> is a time-based job scheduler widely used in Linux and Unix-like systems. It allows users to automatically execute scripts, commands, or programs at specified time intervals or points. The core components of <span>Cron</span> include the <span>crond</span> daemon and the <span>crontab</span> configuration file.
- crond: The daemon for Cron, running in the background, responsible for reading and executing tasks defined in the
<span>crontab</span>file. - crontab: The task configuration file for users or the system, storing the scheduling rules and commands for scheduled tasks.
2. Cron Expression Format
<span>Cron</span> uses a specific time expression to define when tasks should run. A standard <span>Cron</span> expression consists of 6 fields, formatted as follows:
* * * * *  command_to_execute
- - - - -
| | | | |
| | | | +---- Day of the week (0-6, 0 is Sunday)
| | | +------ Month (1-12)
| | +-------- Day of the month (1-31)
| +---------- Hour (0-23)
+------------ Minute (0-59)
Each field can be defined in the following ways:
- Specific value: e.g.,
<span>5</span>means the 5th minute. - Range: e.g.,
<span>1-5</span>means from 1 to 5 minutes. - Interval: e.g.,
<span>*/5</span>means every 5 minutes. - List: e.g.,
<span>5,10,15</span>means the 5th, 10th, and 15th minutes.
3. Cron Expressions for Running Every 5, 10, 15, and 30 Minutes
To run tasks at fixed intervals, we mainly use the interval symbol <span>*/n</span>, where <span>n</span> is the time interval (in minutes). Here are the corresponding <span>Cron</span> expressions:
- Every 5 minutes:
<span>*/5 * * * *</span> - Every 10 minutes:
<span>*/10 * * * *</span> - Every 15 minutes:
<span>*/15 * * * *</span> - Every 30 minutes:
<span>*/30 * * * *</span>
These expressions indicate that tasks will be triggered at specified intervals in the minute field of each hour. For example, <span>*/5 * * * *</span><code><span> will run at 0, 5, 10, ..., 55 minutes.</span>
2. Steps to Configure Cron Tasks
1. Ensure the Cron Service is Running
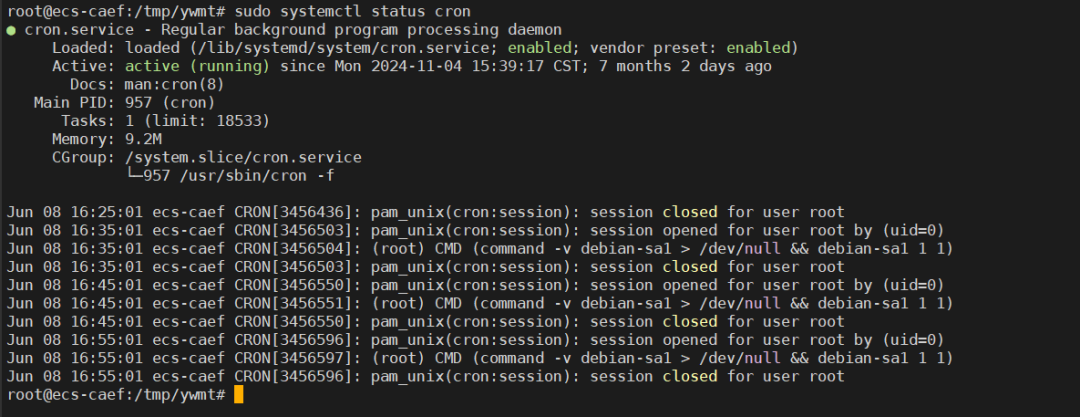
In most Linux distributions (like Ubuntu, CentOS), <span>Cron</span> is installed and running by default. You can check the status of the <span>crond</span> service with the following command:
sudo systemctl status cron
If the service is not running, you can start it and set it to start on boot:
sudo systemctl start cron
sudo systemctl enable cron
For SysVinit-based systems (like older CentOS 6), use:
sudo service crond status
sudo service crond start
sudo chkconfig crond on
2. Edit the Crontab File
Users can edit their scheduled tasks using the <span>crontab</span> command. Here are the specific steps:
(1) Open the Crontab Editor
Run the following command to open the user’s <span>crontab</span> file:
crontab -e
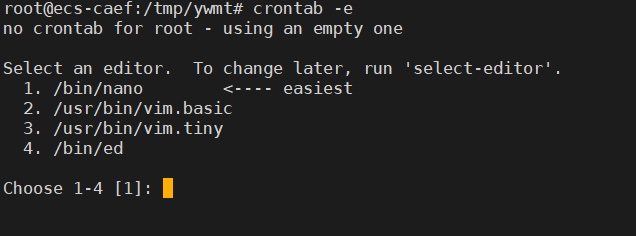
On the first run, the system may prompt you to select an editor (like <span>nano</span> or <span>vim</span>). After selecting your preferred editor, you will enter the <span>crontab</span> editing interface.
(2) Add Scheduled Tasks
In the <span>crontab</span> file, add the following example tasks to run every 5, 10, 15, or 30 minutes:
# Run script every 5 minutes
*/5 * * * * /path/to/script.sh

# Run command every 10 minutes
*/10 * * * * /usr/bin/python3 /path/to/script.py

# Run backup command every 15 minutes
*/15 * * * * /bin/bash /path/to/backup.sh

# Run cleanup task every 30 minutes
*/30 * * * * rm -f /tmp/*.log
Notes:
- Ensure the script path (e.g.,
<span>/path/to/script.sh</span>) is correct and that the script has executable permissions (use<span>chmod +x script.sh</span>). - Commands must use absolute paths (e.g.,
<span>/usr/bin/python3</span>), as<span>Cron</span>has limited environment variables. - Each line must end with a newline; otherwise, the last line may not be executed.
(3) Save and Verify
After saving the file, <span>Cron</span> will automatically load the new configuration. You can view the user’s <span>crontab</span> with the following command:
crontab -l
3. Example Script
Here is a simple Bash script example for testing <span>Cron</span> scheduled tasks:
#!/bin/bash
# File: /path/to/log_time.sh
echo "Task executed at $(date)" >> /var/log/cron_task.log
Create and grant executable permissions:
touch /path/to/log_time.sh
chmod +x /path/to/log_time.sh
Add the following content to <span>crontab</span> to log the time every 5 minutes:
*/5 * * * * /path/to/log_time.sh
After running, check if <span>/var/log/cron_task.log</span> has recorded the timestamps.
3. Advanced Configurations and Considerations
1. Setting Environment Variables
<span>Cron</span> runs with environment variables that differ from the user’s login shell environment, which may lack <span>PATH</span> or other variables, causing commands to be unrecognized. You can set environment variables in the following ways:
Add at the top of the <span>crontab</span> file:
PATH=/usr/local/sbin:/usr/local/bin:/usr/sbin:/usr/bin:/sbin:/bin
Or specify environment variables for specific tasks:
*/5 * * * * PATH=/custom/path:/usr/bin /path/to/script.sh
2. Logging and Error Troubleshooting
<span>Cron</span> does not send task output to the terminal by default; you can redirect output to a file for debugging:
*/5 * * * * /path/to/script.sh >> /var/log/cron_output.log 2>&1
<span>>></span>: Appends standard output to the file.<span>2>&1</span>: Redirects standard error to standard output.
If tasks do not execute, check the following:
- Cron Logs: On Ubuntu, check
<span>/var/log/syslog</span>or<span>/var/log/cron</span>; on CentOS, check<span>/var/log/cron</span>. - Permission Issues: Ensure scripts and target files have appropriate permissions.
- Path Issues: Use absolute paths to avoid relative paths.
3. System-Level Crontab
In addition to user-level <span>crontab</span>, system-level tasks can be implemented by editing <span>/etc/crontab</span> or the <span>/etc/cron.*</span> directories. For example:
# Edit /etc/crontab
sudo nano /etc/crontab
Add the following content (note that system-level <span>crontab</span> has an additional user field):
*/5 * * * * root /path/to/script.sh
Additionally, the <span>/etc/cron.d/</span> directory can be used to store custom task files, formatted the same as <span>/etc/crontab</span>.
4. Limiting the Runtime of Cron Tasks
If tasks may take a long time, you can use the <span>timeout</span> command to limit runtime:
*/5 * * * * /usr/bin/timeout 60 /path/to/script.sh
The above command limits the script’s runtime to 60 seconds.
5. Avoiding Task Overlap
If a task’s runtime may exceed the interval (e.g., running every 5 minutes but taking 6 minutes), it may lead to task overlap. You can use the <span>flock</span> command to lock:
*/5 * * * * /usr/bin/flock -n /tmp/script.lock /path/to/script.sh
<span>-n</span> means that if the lock is occupied, it will exit immediately to avoid running again.
4. Practical Application Scenarios
1. Check System Status Every 5 Minutes
The following task records system load every 5 minutes:
*/5 * * * * /bin/bash -c "uptime >> /var/log/system_load.log"
2. Synchronize Time Every 10 Minutes
Ensure the system time is accurate:
*/10 * * * * /usr/sbin/ntpdate pool.ntp.org
3. Backup Database Every 15 Minutes
Use <span>mysqldump</span> to back up a MySQL database:
*/15 * * * * /usr/bin/mysqldump -u root -pPASSWORD dbname > /backup/db_$(date +\%F_\%H\%M).sql
4. Clean Temporary Files Every 30 Minutes
Clean expired files in the <span>/tmp</span> directory:
*/30 * * * * /usr/bin/find /tmp -type f -mtime +1 -delete