Are you frustrated when your Raspberry Pi won’t start? Don’t worry, today I’m going to share a super practical solution. This article provides detailed solutions to help your Raspberry Pi come back to life.No matter if it’s a hardware problem or a software failure, you can find the corresponding solution here. Give it a try!

Summary
-
Raspberry Pi 5: Check the LED status during startup (red and green). If there is a fatal firmware error (4 slow blinks followed by 5 fast blinks) or a power failure (6 fast blinks), report it to the vendor.
-
Raspberry Pi 4: Use the correct power supply (PSU, 5.1V 3A) and a fresh installation of the latest operating system to avoid startup issues. Check if the HDMI cable is properly connected to the port.
-
Check the LEDs (PWR and ACT) on the Raspberry Pi to understand the startup status. No green light indicates a problem with the SD card. Irregular blinking and specific blinking patterns indicate startup errors.
You have connected everything for your Raspberry Pi, ready to run… but when you turn on the power, nothing happens. Something is wrong, but where is the problem? What should you do?
Here are the things to check for troubleshooting a Raspberry Pi that won’t start.
1. If your Raspberry Pi 5 won’t start
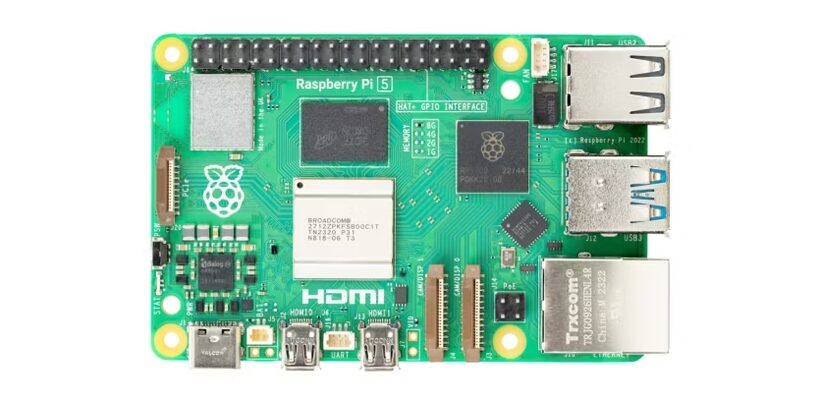
As the fifth generation of the Raspberry Pi board, the Pi 5 is more reliable than earlier models. However, it is still susceptible to some common problems.
You should be able to identify startup issues through the LED status. The Raspberry Pi 5 has an LED that can emit red and green light. Red indicates that the PSU is connected; green indicates that the device is running.
If the LED blinks slowly 4 times and then quickly 5 times, there is a fatal firmware error with the Raspberry Pi 5. 6 fast blinks indicate a power failure. Both cases should be reported to the vendor for a replacement device.
The Raspberry Pi 5 requires a 27W USB-C power supply. While some users report that the Pi 4’s power supply is sufficient, this often becomes inadequate once peripherals are connected.
We understand that purchasing a power supply for the Raspberry Pi 5 can be difficult in some regions. We recommend sticking to the official Raspberry Pi 27W PSU instead of risking a third-party device.
Is the boot device connected?
Like earlier versions, the Raspberry Pi 5 can boot from USB devices and microSD cards. It can also boot via Ethernet, and additionally from SSDs connected through PCIe.
However, if the Raspberry Pi 5 fails to boot correctly and the PSU is not the issue, make sure the boot device is not causing the problem. With an increasing number of boot options, this will take longer than earlier models.
Are you using a working HDMI cable?
Another issue Raspberry Pi 5 users face is startup failure caused by the HDMI cable. The best option here is to avoid using micro HDMI adapters and instead use specific micro HDMI to HDMI cables. This can help avoid the risks associated with poor-quality adapters.
2. Raspberry Pi 4 won’t start? Try these methods
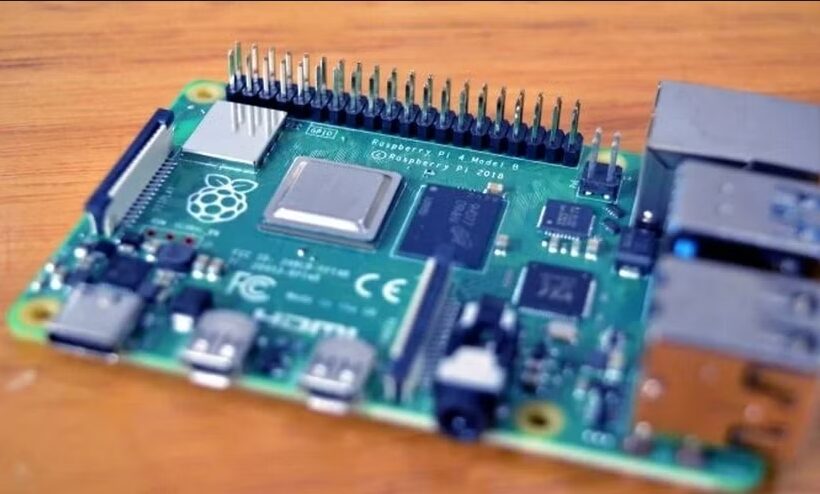
Three issues may cause the Raspberry Pi 4 to not start or appear to be powered off.
Raspberry Pi 4 power issues
Like the Pi 5, the Raspberry Pi 4 uses a different power supply unit (PSU) than older models. Power is provided through a USB Type C connector, and it is best to use the official 5.1V 3A PSU. Phone or tablet chargers are not sufficient, just like older Raspberry Pi models.
Raspberry Pi 4 won’t start and the red light is on?
The Raspberry Pi 4 requires a fresh installation of the latest version of the Raspberry Pi operating system. In fact, regardless of which version of the Raspberry Pi operating system you prefer, you need a version released after June 2019.
Operating systems compatible with older Raspberry Pi models will not run reliably on this device. Using an outdated or unsupported operating system will cause the Raspberry Pi 4 to light up the red light upon powering on. It simply cannot start an operating system not designed to run on this computer.
A fresh installation of the latest operating system will resolve many startup issues with the Raspberry Pi 4.
Can’t see the output from the Raspberry Pi 4 on the display? The Pi 4 has two HDMI outputs. Specifically, these are micro-HDMI ports labeled HDMI0 and HDMI1.
Most issues where the Raspberry Pi 4 appears not to start are caused by the HDMI cable being connected to the wrong port. Make sure to use the HDMI0 connector on the left.
3. Raspberry Pi won’t start? Check the red and green LEDs
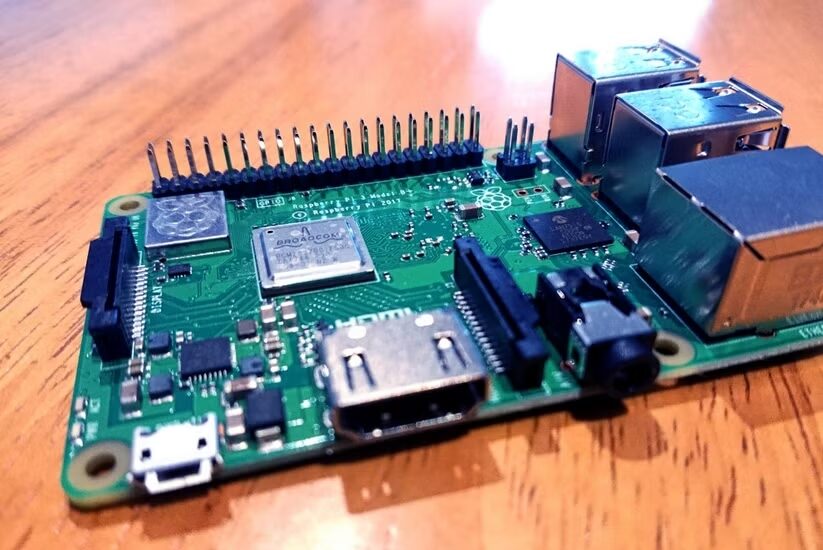
When the Raspberry Pi (models 1 to 4) starts, one or more LEDs will activate. One is red, indicating power (PWR); the other is green, indicating activity (ACT). (If connected, there are three additional green Raspberry Pi LEDs indicating Ethernet status.)
So, what do these LEDs indicate? Well, there is a normal state where both the PWR and ACT LEDs are activated. The ACT blinks during SD card activity. Therefore, if your Raspberry Pi has no green light, the SD card has an issue.
Meanwhile, the PWR blinks when the voltage drops below 4.65V. Therefore, if the red light on the Raspberry Pi is not lit, it indicates no power.
If only the red PWR LED is lit and not blinking, it indicates that the Pi is receiving power but there are no readable boot instructions on the SD card (if any). On the Raspberry Pi 2, the ACT and PWR LEDs lit indicate the same status.
When booting from the SD card, the green ACT light on the Raspberry Pi should blink irregularly. However, it can also blink in a more regular pattern to indicate issues:
-
3 blinks: start.elf not found
-
4 blinks: unable to start start.elf, which may be corrupted. Alternatively, the card may not be properly inserted or the slot may not be functioning properly.
-
7 blinks: kernel.img not found
-
8 blinks: SDRAM not detected. In this case, your SDRAM may be damaged, or bootcode.bin or start.elf may not be readable.
If any of the above indicators appear, try using a new SD card with a fresh installation of the Raspberry Pi operating system. No luck? Keep reading for more solutions.
4. Raspberry Pi won’t power on? Check the PSU
As mentioned above, power issues may cause the Raspberry Pi to fail. It may shut down or hang during operation, or it may not start at all. A stable power supply unit (PSU) is required for accurate reading from the SD card.
To ensure your PSU is good enough, check if it meets the specifications for your Raspberry Pi model. Also, confirm that the micro-USB connection from the PSU to the Pi is normal.
Many people use smartphone chargers to power their Raspberry Pi. This is usually not a good idea; it is recommended to use a dedicated, suitable PSU.
The Raspberry Pi has a resettable fuse, which is a polyfuse. While it can reset itself, it may take up to two days. If you accidentally burn out the polyfuse, you will only find out when you try to start it later.
In the meantime, go purchase a suitable PSU; the official Raspberry Pi power adapter is your best choice. Note that this is a 15W power supply suitable for the Raspberry Pi 4 but only meets the minimum power requirements for the new Raspberry Pi 5. For the Raspberry Pi 5, it is best to choose a 27W USB-C PSU.
5. Does the Raspberry Pi have an operating system installed?
If there is no operating system, your Raspberry Pi will not start. You can install the Raspberry Pi operating system on the microSD card or run a boot script to install the operating system.
Therefore, if the operating system is not installed on the SD card, your Raspberry Pi will not function properly.
If you have installed the Raspberry Pi operating system on an SSD or other device, make sure it is properly connected.
6. If the Raspberry Pi won’t start, check the microSD card
A working Raspberry Pi relies on a high-quality SD card to boot and run the operating system. If the SD card is not functioning properly, your Raspberry Pi will fail or not start.
You can check the SD card by powering off the Raspberry Pi, then inserting the card into your computer. Use a reliable flash drive formatting tool and try to reformat it (use the SD Association’s SDFormatter tool on Windows and Mac). If formatting fails, the card is damaged (SanDisk SD cards can be returned under warranty).
When setting up a new Raspberry Pi operating system, always format the SD card before writing the image using a reliable card reader/writer. Look for media with high write speeds and excellent error-checking capabilities to ensure the Raspberry Pi runs quickly and efficiently.
Only purchase SD cards from reputable vendors, such as SanDisk 64GB microSD cards. Other well-known brands include Samsung and PNY.
7. Your Raspberry Pi has no video output?
Without a bootable SD card and a working HDMI cable, your Raspberry Pi cannot display any video.
The display device must be able to detect a signal from the Raspberry Pi. If the Raspberry Pi appears not to start because there is no display on the screen, you need to force HDMI detection.
Since the Raspberry Pi does not have a BIOS, it relies on the configuration files on the SD card. You can force HDMI detection by inserting the SD card into your desktop or laptop and browsing to the /boot/ partition. Open the config.txt file and add the following content at the end:
Save and exit the file, safely remove the SD card, put it back into the Raspberry Pi, and restart.
You can also use other video options. However, until the Raspberry Pi 4, the motherboard used TRRS, meaning you need the correct cable. This cable should be able to convert RCA (red and white connectors) and composite (yellow connector) signals.
You can find the appropriate TRRS A/V cable in stores. If HDMI is not an option, this cable will also meet your needs.
8. Raspberry Pi won’t start? How to determine if it’s faulty or defective?
If you’ve gotten this far and the Raspberry Pi still won’t start, it may be defective. It seems you’re not very lucky—every Raspberry Pi is tested after production.
Do you have an early Raspberry Pi (B, B+, 2B, or 3B—what’s the difference between Raspberry Pi motherboards?)? One way to check if it is damaged is to compare it with a working model of the same type.
Remove the SD card, Ethernet cable, power cable, and HDMI cable from the suspect device. Remove all other connected devices and replace them with the working device’s cables, peripherals, and SD card.
If the device starts, it indicates that your other Raspberry Pi is faulty; if not, then your cables, power supply, or SD card are the cause of the problem. Refer to the above.
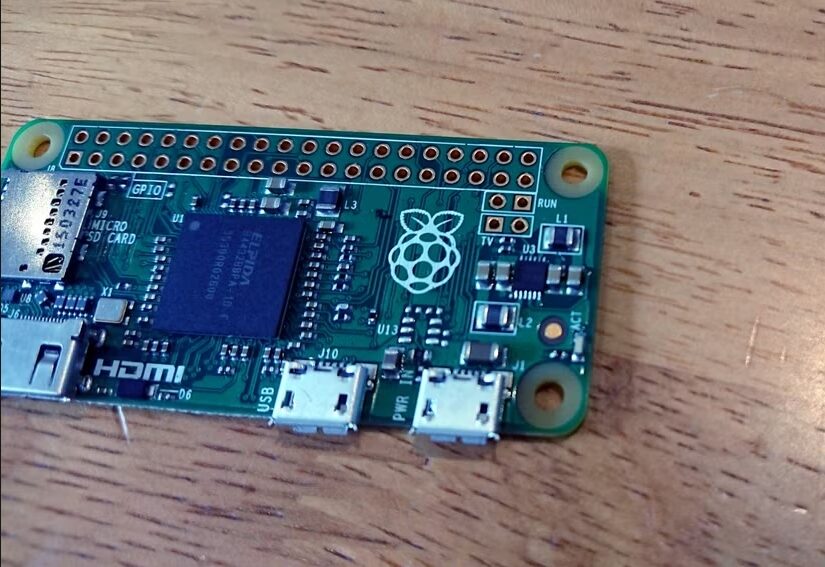
At the same time, for Raspberry Pi A, A+, and Zero devices, there is a different method to check the suspect device. Remove all cables and SD cards and connect the device to your Windows computer via USB cable (Raspberry Pi A and A+ use USB-A to USB-A, Pi Zero models use micro-USB to USB-A).
If normal, the device will be detected and emit a beep. You will find the Raspberry Pi listed as “BCM2708 Boot” in the “Device Manager.” On Linux and Mac, the running Raspberry Pi A or Zero will be listed in the dmesg command.
The Raspberry Pi has a 12-month warranty, but check the terms and conditions before returning [PDF].
Raspberry Pi startup issue solutions!
So, here are the things you need to check to resolve the Raspberry Pi startup issues. Here’s a recap:
1. Using Raspberry Pi 5? Ensure the power supply unit (PSU) is suitable, the boot device is correctly inserted/connected, and a working HDMI cable is connected.
2. Using Raspberry Pi 4? Check the power cable, operating system, and HDMI cable.
3. Check the LED indicators.
4. Is the power adapter suitable?
5. Have you installed the operating system?
6. Is the microSD card reliable?
7. Is HDMI output disabled?
8. Is your Raspberry Pi defective?
Is everything running smoothly? It’s time to consider a Raspberry Pi project.
Raspberry Pi products can be purchased directly from Raspberry Pi agents, purchase methods:
1. Scan the code to add Engineer Yang for consultation and purchase.

2. Send us your contact information via private message to place an order directly.
3. Consult and order on the official website of the Raspberry Pi dealer:https://www.edatec.cn/cn
We will update regularly~
Follow Raspberry Pi developers~
Learn more about Raspberry Pi related content~