Home Assistant: Mastering HTTP Network Services with Ease
In the previous article, we explored the advanced features and best practices of user authentication in Home Assistant. Today, let’s understand the network capabilities of Home Assistant in a simple and easy-to-understand way.
💡 What is the Network Service of Home Assistant?
Imagine Home Assistant as the “brain” of your smart home, and its network service is like the “mouth” and “ears” of this brain—allowing you to communicate with it and enabling it to communicate with the outside world.
Basic Knowledge:
- • The default address of Home Assistant on your home network is:
<span>http://your_device_IP:8123</span> - • The “8123” is like a specific house number (port number), through which you can access Home Assistant.
📁 The Magical Folder for Storing Your Files: WWW Directory
Home Assistant has a special folder, just like “My Documents” on your computer, where you can store your own files:
What is the WWW Directory?
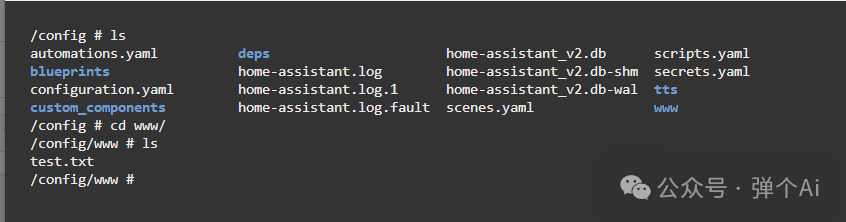
- • Location:
<span>/config/www/</span>folder (you need to create it yourself the first time) Note: After creating it, you need to restart for it to take effect! - • The magic: Files (images, music, web files, etc.) placed here will automatically become accessible resources over the network.
- • Access method:
<span>http://your_device_IP:8123/local/your_filename</span>
Practical Example: If you have a family photo <span>family.jpg</span> stored in this folder, you can view it anywhere through <span>http://your_device_IP:8123/local/family.jpg</span>!
Daily Uses:
- • Add custom background images
- • Store alert sounds (“Door Opened.mp3”)
- • Place custom icons or interface components
⚠️Note: The contents of this folder can be accessed without a password, so do not place sensitive information here!
🔌 Talking to Home Assistant: API Interface
The API is like the “remote control button” provided by Home Assistant, allowing other programs to control your smart home.
What is an API? In simple terms, an API is a way for programs to communicate with each other, just like people communicate with language. Regardless of which API is used, you need to obtain an access token (Long-Lived Access Token) to verify your identity. This is like the “key” to enter Home Assistant.
Using the API requires a “key”:
- 1. Create a “Long-Lived Access Token” in Home Assistant.
- 2. This token is like your personal password, and you need to include it when using the API.
Two Common Types of APIs:
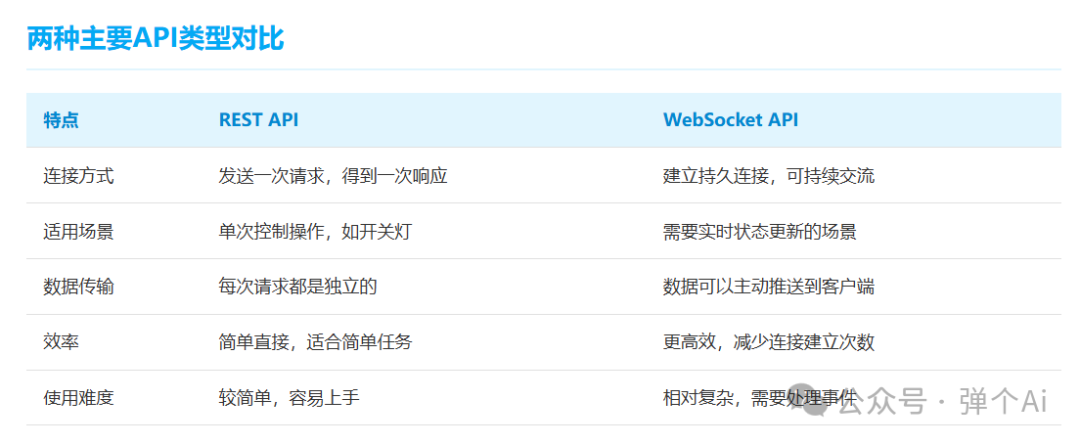
- 1. REST API – A simple and direct command method.
- • Features: Send a request and receive a response, like sending a text message.
- • Suitable for: Single control (turning lights on/off, querying temperature, etc.).
- • Features: Establishes a long connection, allowing continuous message reception, like a video call.
- • Suitable for: Scenarios requiring real-time updates (real-time monitoring, dynamic displays).
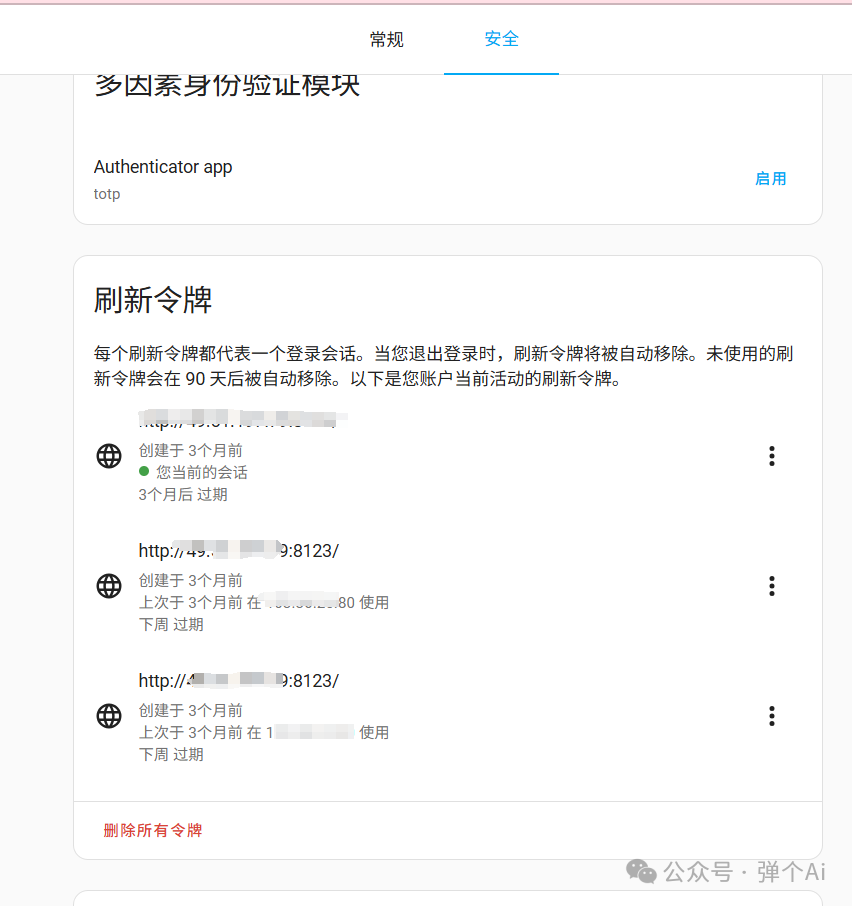
How to Obtain an Access Token
Steps to Create a Long-Lived Access Token
Log in to the Home Assistant web interface Click the profile icon in the lower right corner Select the security card Scroll to the bottom of the page to the “Long-Lived Access Tokens” section Click the “Create Token” button Enter a meaningful name (e.g., “Mobile App Access”) Click “Confirm” and the system will display a long string Important: Copy and save this token immediately, as it will only be displayed once!

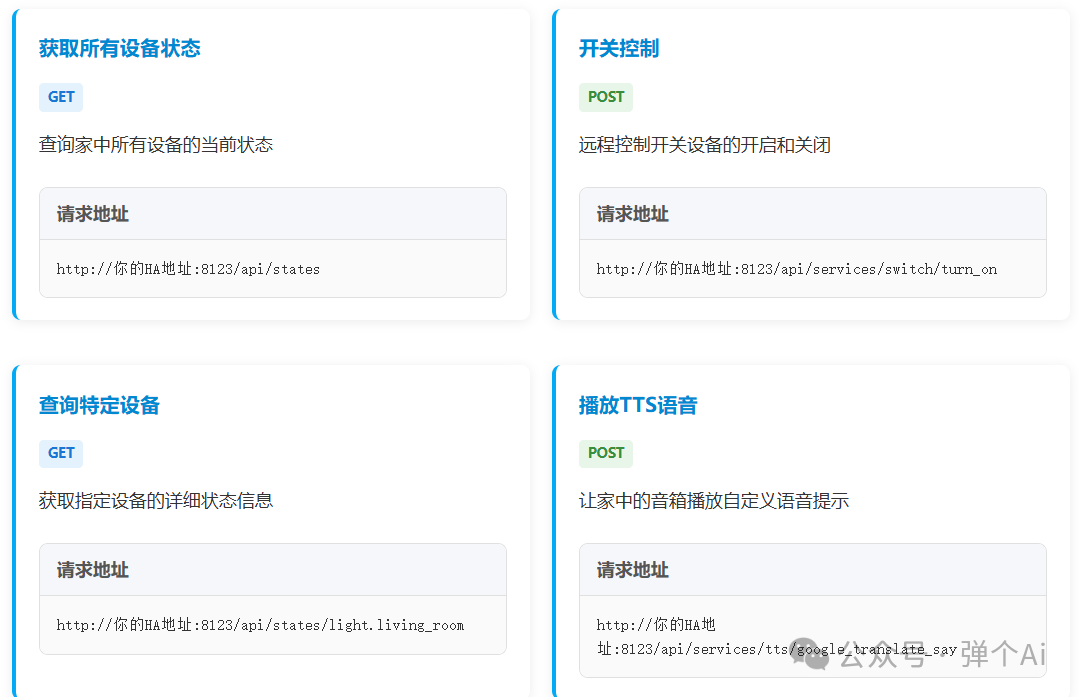
REST API Usage Examples
REST API is the most commonly used interface type, suitable for simple control operations. Here are some common examples:
Complete API Call Example
# Python code example: Control living room lights

import requests

url = "http://your_HA_address:8123/api/services/light/turn_on"
headers = {
  "Authorization": "Bearer your_long_lived_access_token",
  "Content-Type": "application/json"
}
data = {
  "entity_id": "light.living_room",
  "brightness": 255,
  "color_name": "blue"
}

response = requests.post(url, headers=headers, json=data)
print(response.text)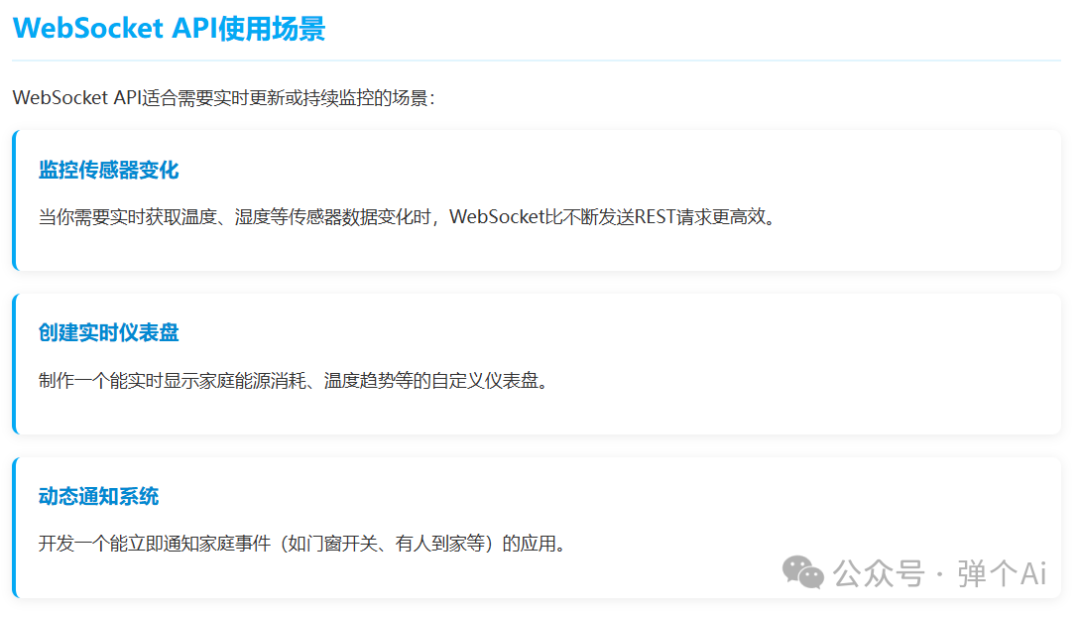
🌐 Difference Between Internal and External Access
There is a difference between your home network and the external internet, just like the intercom at home and the mobile phone when you are out:
Two Access Addresses:
- •
<span>internal_url</span>: The address used at home (e.g.,<span>http://192.168.1.100:8123</span>) - •
<span>external_url</span>: The address used outside (e.g.,<span>https://my_home.duckdns.org</span>)
These two addresses are like Home Assistant’s “home phone” and “mobile phone,” used in different scenarios.
Important Security Advice: Regularly change access tokens, especially after potential leaks. Create different tokens for different applications for easier management. If only internal access is needed, do not open external ports. Consider using HTTPS for encrypted communication, especially for external access. Regularly check the list of authorized tokens and delete those that are no longer in use.
🎵 Example: Playing Music Stored in Home Assistant
Imagine you have placed a “Wake-Up Alarm.mp3” in the WWW folder of Home Assistant:
- 1. Actual file location:
<span>/config/www/Wake-Up Alarm.mp3</span> - 2. Network access address:
<span>http://your_device_IP:8123/local/Wake-Up Alarm.mp3</span> - 3. Playback method: You can set the “Play Media” action in automation, filling in this address.
💡 Why Do Some Applications Connect Without a Token?
Some applications (like ESPHome, HomeKit, etc.) are already “familiar” with Home Assistant, establishing trust in a special way, just like family members do not need to verify their identity every time.
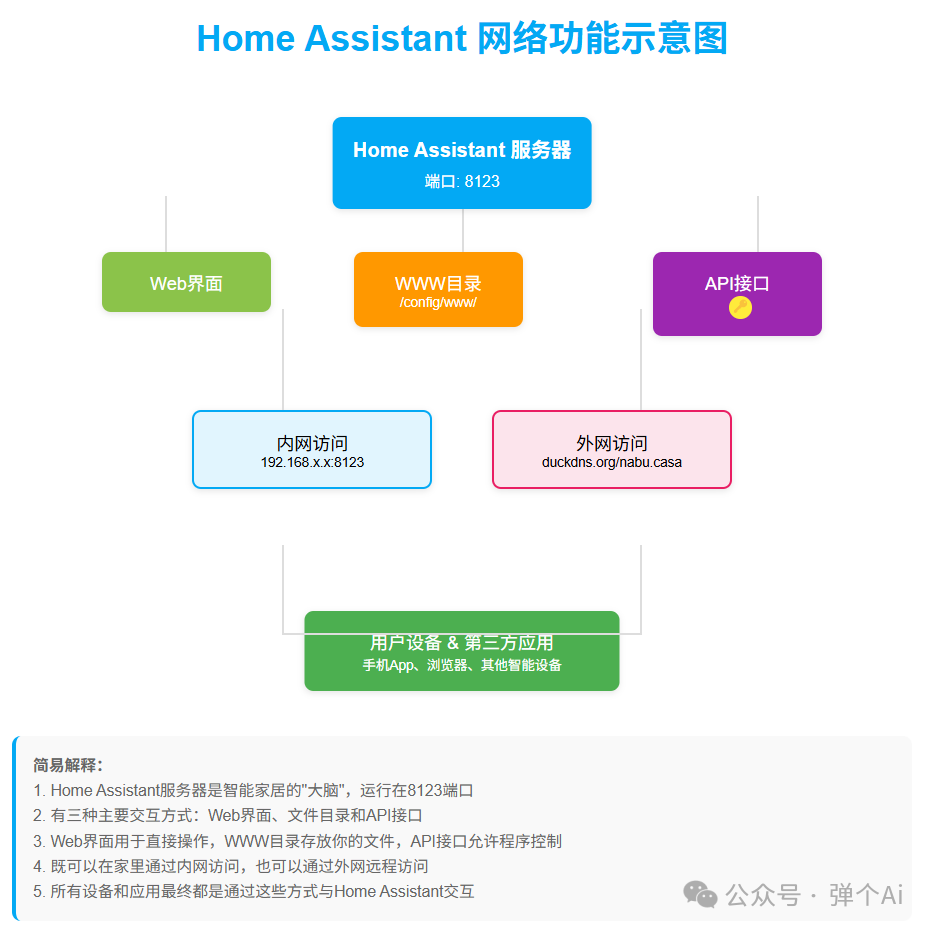
🔄 Overview of Home Assistant Network Functionality
Here is a simplified flow of understanding Home Assistant’s network functionality from the user’s perspective:
- 1. Browser Access → Home Assistant Interface (via port 8123)
- 2. WWW Directory → Store your files → Access via
<span>/local/</span>path - 3. API Control → Requires token verification → Can remotely control devices
- 4. Internal and External Access → Use internal network address at home, external network address outside
If you found this helpful, give it a thumbs up!