Introduction
“MQTT (Message Queuing Telemetry Transport)” is a lightweight messaging protocol commonly used for communication in the Internet of Things (IoT) and sensor networks. It is designed to transmit data in low-bandwidth, unstable, or high-latency network environments, making it particularly suitable for communication between connected devices, especially in resource-constrained environments.
This article will briefly introduce the protocol, then use an MQTT client tool and an open-source library to write a client and try it out.
1. Overview of MQTT
“MQTT (Message Queuing Telemetry Transport)” is a lightweight messaging protocol commonly used for communication in the Internet of Things (IoT) and sensor networks. It is designed to transmit data in low-bandwidth, unstable, or high-latency network environments, making it particularly suitable for communication between connected devices, especially in resource-constrained environments.
The main features of MQTT include the following:
-
Lightweight: The MQTT protocol itself is very simple, with a small message header that occupies less bandwidth, making it efficient in low-bandwidth networks.
-
Publish/Subscribe Model: MQTT uses a publish/subscribe model where clients can subscribe to specific topics and receive messages related to those topics. Publishers send messages to specific topics, and all clients subscribed to that topic will receive the message.
-
Reliability: MQTT supports three different levels of message delivery quality, including at most once, at least once, and exactly once delivery, allowing users to choose the appropriate level based on application needs.
-
Persistent Sessions: MQTT allows clients to establish persistent sessions so that they can restore previous subscriptions and message delivery states when reconnecting after a connection loss.
-
QoS (Quality of Service): MQTT provides different QoS levels to ensure reliable message delivery. This includes QoS 0 (at most once delivery), QoS 1 (at least once delivery), and QoS 2 (exactly once delivery).
-
Adaptability: MQTT can run over various network protocols, including TCP/IP, WebSocket, and others.
In summary, MQTT is a communication protocol that is very suitable for IoT and sensor networks, widely used due to its lightweight and efficient characteristics. It allows real-time information exchange between devices, supporting various applications, including smart homes, industrial automation, and agricultural monitoring.
2. MQTT’s QoS Mechanism
What is the QoS mechanism? (https://www.emqx.com/zh/blog/introduction-to-mqtt-qos)
Often, devices using the MQTT protocol operate in network-constrained environments, and relying solely on the underlying TCP transport protocol cannot fully guarantee the reliable arrival of messages. Therefore, MQTT provides a QoS mechanism, which is designed with multiple message interaction mechanisms to provide different service qualities to meet user requirements for message reliability in various scenarios.
MQTT defines three QoS levels:
- QoS 0, at most once delivery.
- QoS 1, at least once delivery.
- QoS 2, exactly once delivery.
Using QoS 0 may result in message loss, using QoS 1 guarantees message receipt but may result in duplicates, and using QoS 2 guarantees that messages are neither lost nor duplicated. The QoS levels from low to high not only indicate an increase in message reliability but also an increase in transmission complexity.
MQTT’s .Net Library – MQTTnet
MQTTnet is an open-source, high-performance .NET library for MQTT-based communication. It provides an MQTT client and an MQTT server (broker) and supports the MQTT protocol up to version 5. It is compatible with most supported .NET framework versions and CPU architectures.
GitHub address: https://github.com/dotnet/MQTTnet
MQTTnet is delivered via the NuGet package manager. The package can be found here: https://www.nuget.org/packages/MQTTnet/
In Visual Studio, use the following command in the Package Manager console to manually install MQTTnet:
Install-Package MQTTnet
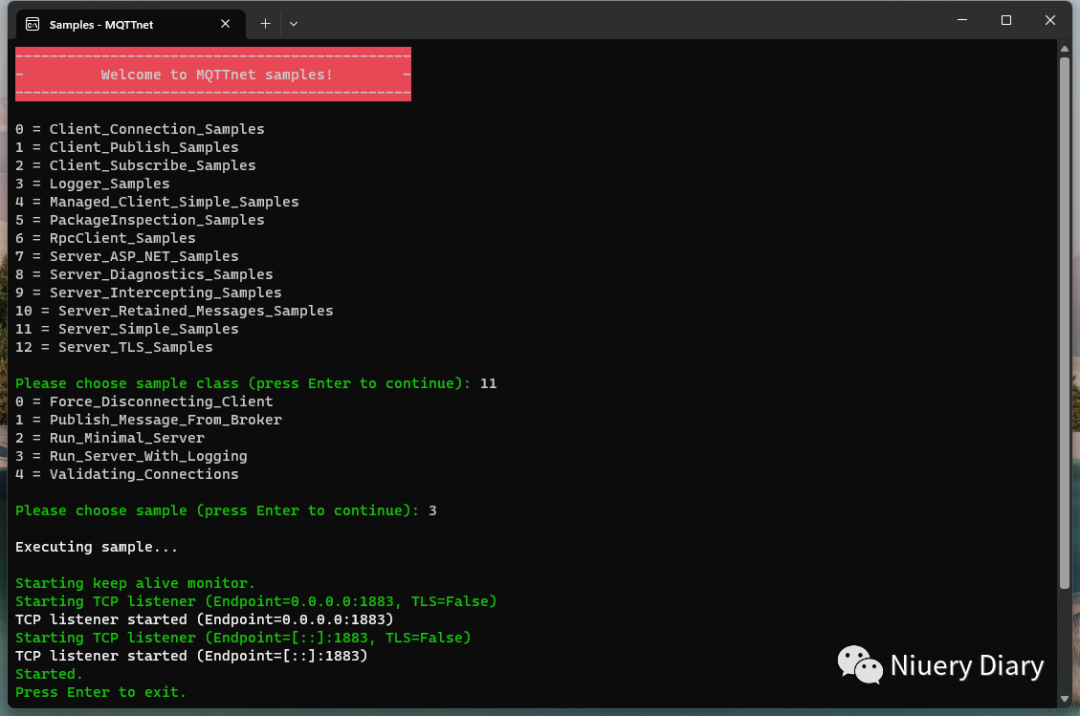
You can view the demo source code directly on GitHub or download the source code and open it in Visual Studio. It provides several Samples, each containing different related methods, including the following categories:
- Client_Connection_Samples —
- Client_Publish_Samples
- Client_Subscribe_Samples
- Logger_Samples
- Managed_Client_Simple_Samples
- PackageInspection_Samples
- RpcClient_Samples
- Server_ASP_NET_Samples
- Server_Diagnostics_Samples
- Server_Intercepting_Samples
- Server_Retained_Messages_Samples
- Server_Simple_Samples
- Server_TLS_Samples
You can download the source code, compile it, and run it as follows:
Installing and Using MQTT Message Server on Windows
Common MQTT server software includes:
-
“Mosquitto” – A popular open-source MQTT server, but it lacks a visual interface and requires other tools for visualization.
-
“EMQX” – A powerful open-source MQTT server with a visual interface.
-
“HiveMQ” – HiveMQ is a commercial MQTT server that offers a free developer edition.
Here, we recommend using EMQX, as it provides a visual interface for easier configuration, management, and monitoring of the MQTT server.
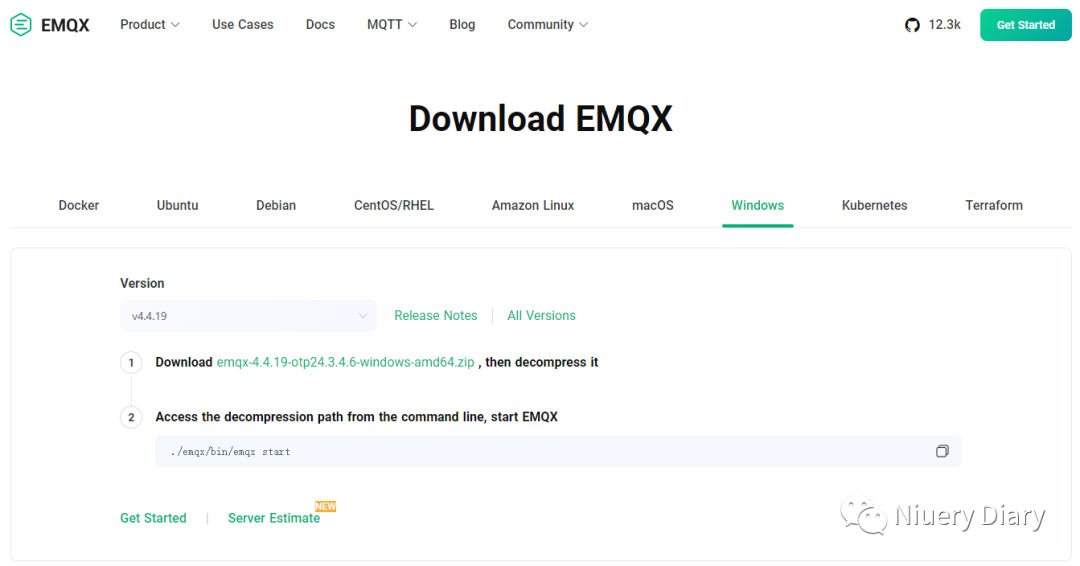
1. Download EMQX
The EMQX official website provides extensive documentation, with the Quick Start address: https://www.emqx.io/docs/zh/v5.2/
It is not recommended to install the latest version; it is advisable to use an earlier version. If you install the latest version emqx-5.3.0-windows-amdx64, it may start abnormally, as shown below:
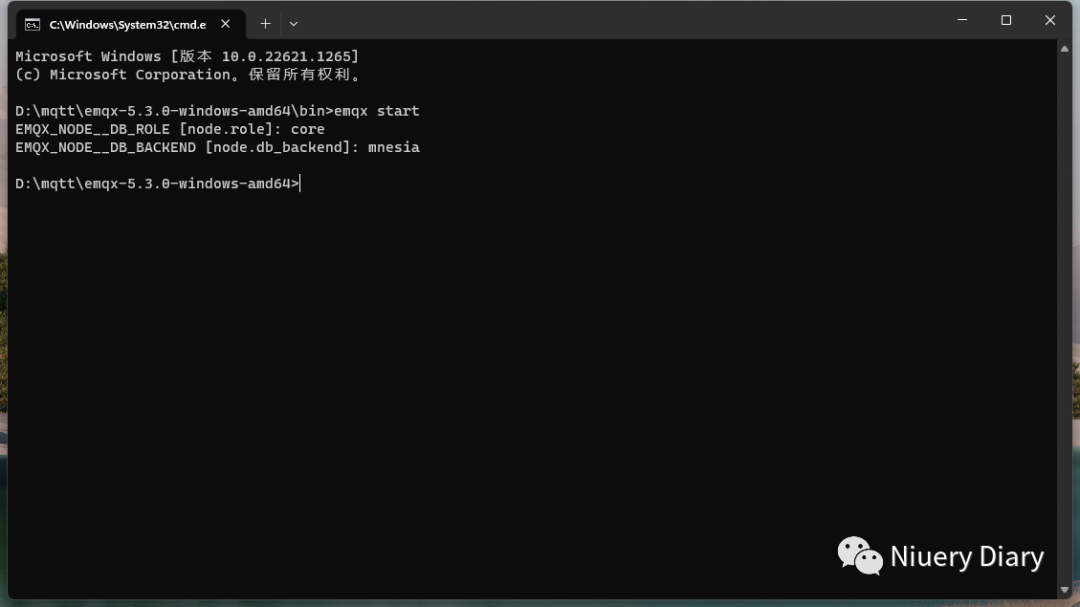 This test uses version emqx-4.4.19-otp24.3.4.6-windows-amd64, as shown below:
According to the official tutorial, navigate to the installation directory/emqx/bin and use the following command to start EMQX:
emqx start
2. Starting the EMQX Service
Common EMQX startup commands:
| “Command” | “Description” |
|---|---|
| start | Starts EMQX in daemon mode, running without an interactive shell. |
| console | Starts EMQX in an Erlang or Elixir interactive shell. Used for debugging EMQX in a development environment, requiring interaction with EMQX. |
| foreground | Starts EMQX in foreground mode without using an interactive shell. Used for starting EMQX in a development environment without needing to run in the background. |
| stop | Stops the running EMQX node. |
| ctl | Manages and monitors EMQX; executing emqx ctl help provides more detailed information. |
Common EMQX ctl commands:
| “Command” | “Description” |
|---|---|
| status | Quickly checks whether the current running node is operational. |
| broker | Views the current node’s running version status and uptime. |
| observer | Can be used to view runtime status, displaying an interface similar to the Linux top command. |
| admins | Used to create, modify, or delete administrator accounts. |
| clients | Views and manages clients. |
| topics | Views all subscribed topics in the current system. |
| subscriptions | Views, adds, or deletes subscriptions for a specific client. |
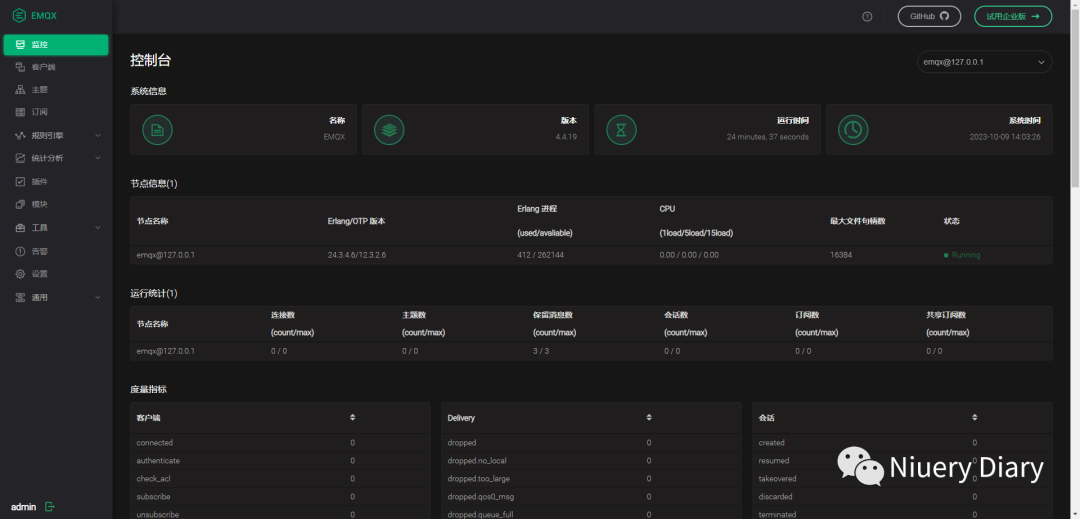
3. EMQX Dashboard
The EMQX Dashboard is a built-in web application that supports viewing the overall connection count, number of subscribed topics, message send/receive counts, and inflow/outflow rates of the running EMQX cluster. It also includes a list of nodes, node information, and some system metrics, and allows viewing and managing some client connection and subscription data.
If EMQ is installed on the local machine, open the address http://127.0.0.1:18083 in a browser, and enter the default username admin and default password public to log into the Dashboard, as shown in the image below:
If you forget the Dashboard login password, you can reset it using the admins command in the CLI; for details, refer to the command line – admins:
./bin/emqx ctl admins passwd <Username> <Password>
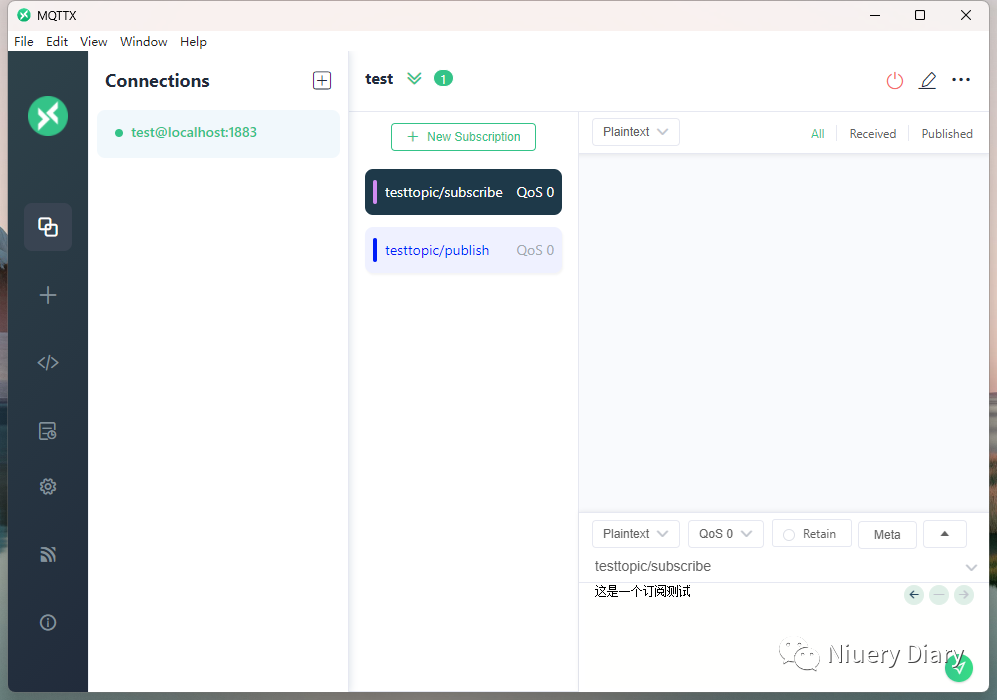
4. MQTTX Desktop
The MQTTX client is a cross-platform MQTT desktop client tool. It provides a user-friendly graphical interface that allows users to quickly create and test MQTT connections and publish and subscribe to MQTT messages. Download address: https://mqttx.app/zh/downloads. The interface is shown in the image below:
Client Code Development
1. Preparation
Next, we will use MQTTnet to write server and client code for testing:
-
Create a new console project and add the MQTTnet library.
-
Start the EMQX service using the command mentioned above.
-
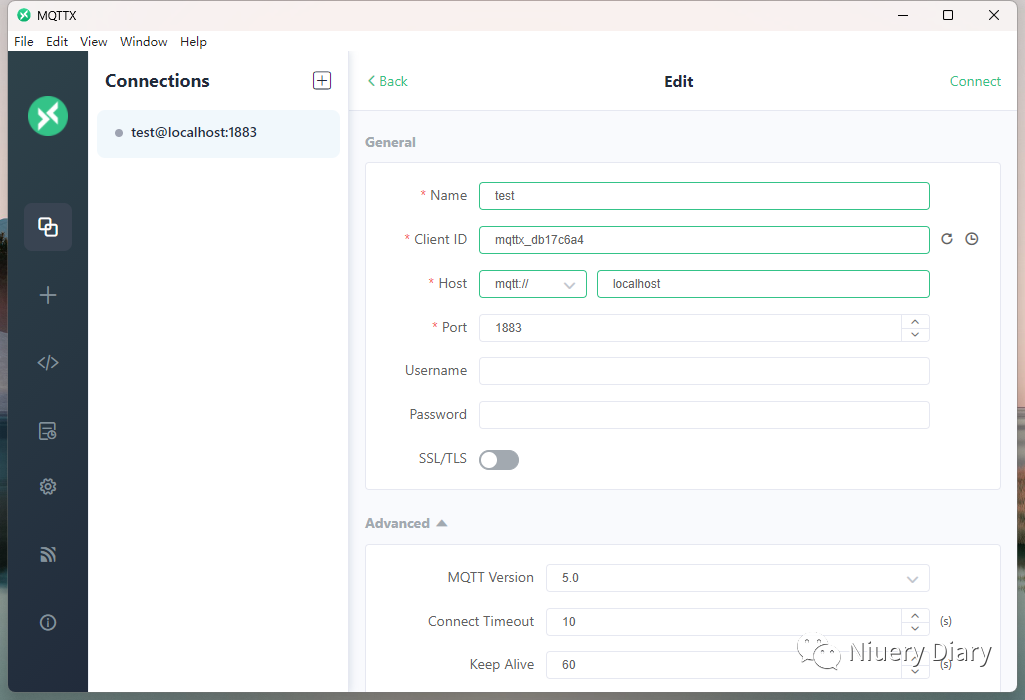
Using MQTTX Desktop, set the “host” to
localhostand “port” to1883to connect to the service, as shown in the image below:
2. Code Development
Now that the preparation work is done, let’s write the code to create a publish client as follows:
public static async Task CreatePublishMQTTClient()
{
    try
    {
        MqttFactory mqttFactory = new MqttFactory();

        var mqttClient = mqttFactory.CreateMqttClient();

        var mqttClientOptions = new MqttClientOptionsBuilder()
            .WithTcpServer("localhost", 1883)
            .WithClientId("Client1")
            .Build();
        var connectResult = await mqttClient.ConnectAsync(mqttClientOptions, CancellationToken.None);

        Console.WriteLine("mqttClient connectResult: " + connectResult.ResultCode.ToString());

        while (true)
        {
            var msg = Console.ReadLine();

            string topic = "testtopic/publish";
            string payload = $"{msg} {DateTime.Now:yyyy-MM-dd HH:mm:ss:fff}"; // Message content

            var message = new MqttApplicationMessageBuilder()
                .WithTopic(topic)
                .WithPayload(payload)
                .WithQualityOfServiceLevel(MqttQualityOfServiceLevel.AtLeastOnce) // Set message quality
                .WithRetainFlag(false) // Whether to retain the message
                .Build();

            await mqttClient.PublishAsync(message, CancellationToken.None);
        }

    }
    catch (Exception ex)
    {
        Console.WriteLine(ex.ToString());
    }
}
Next, let’s write the code for a subscription client:
public static async Task CreateSubscribeMQTTClient()
{
    try
    {
        MqttFactory mqttFactory = new MqttFactory();

        var mqttClient = mqttFactory.CreateMqttClient();

        var mqttClientOptions = new MqttClientOptionsBuilder()
            .WithTcpServer("localhost", 1883)
            .WithClientId("Client1")
            .Build();


        mqttClient.ApplicationMessageReceivedAsync += (e) =>
        {
            Task task = Task.Factory.StartNew(() =>
            {
                var msgArray = e.ApplicationMessage.Payload;
                string result = Encoding.UTF8.GetString(msgArray);
                Console.WriteLine("Received: " + result);
            });

            return task;
        };

        var connectResult = await mqttClient.ConnectAsync(mqttClientOptions, CancellationToken.None);

        Console.WriteLine("mqttClient connectResult: " + connectResult.ResultCode.ToString());

        string topic = "testtopic/subscribe";

        var subscribeOptions = new MqttClientSubscribeOptionsBuilder()
            .WithTopicFilter(topic)
            .Build();

        await mqttClient.SubscribeAsync(subscribeOptions);

    }
    catch (Exception ex)
    {
        Console.WriteLine(ex.ToString());
    }
}
Next, write the console Main method. Since the MQTT Client methods are asynchronous, to prevent the console from exiting, a While infinite loop is added to keep the console program active, as shown below:
static void Main(string[] args)
{
    Console.WriteLine("Choose a creation type: \r\n 1: PublishClient\r\n 2: SubscribeClient");
    var type = Console.ReadLine();
    switch (type)
    {
        case "1":
            _ = CreatePublishMQTTClient();
            break;
        case "2":
            _ = CreateSubscribeMQTTClient();
            break;

    }
    while (true) Thread.Sleep(1000);
}
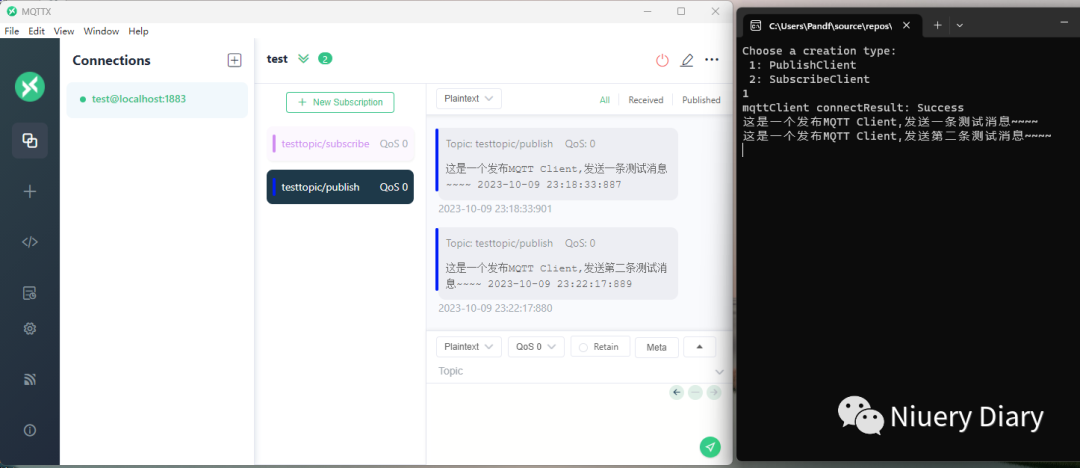
3. Testing
First, test the publish client by selecting PublishClient in the console and waiting for the connection. You should see the connection result as Success, and after sending two test messages, you can see that MQTTX Desktop received them both.
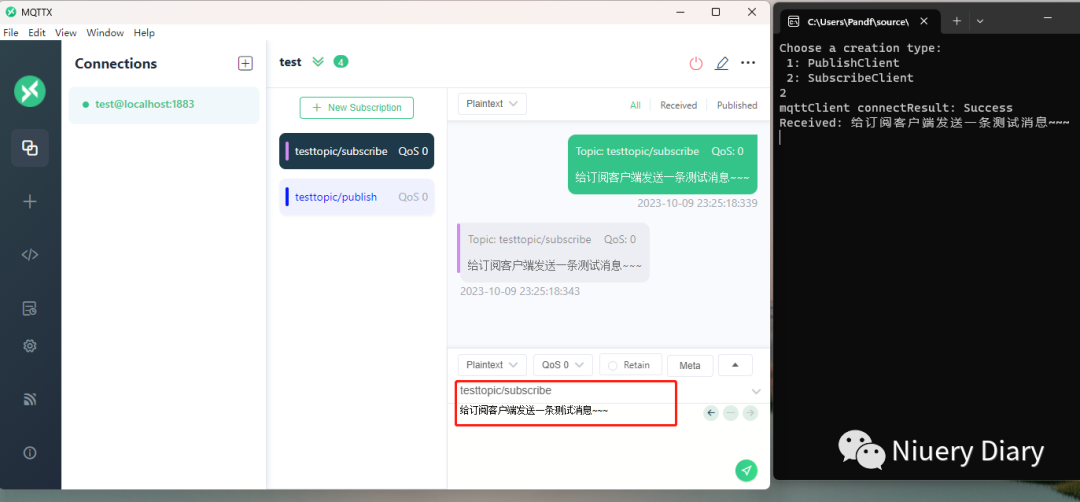
Next, test the subscription client by selecting SubscribeClient in the console and waiting for the connection. You should see the connection result as Success. When a message is published to the subscription client from MQTTX Desktop, you can see that the console program received the test message.
Conclusion
In summary, there is relatively little information available for writing MQTT-related code in C#, but fortunately, the official documentation is detailed enough. It took quite a bit of effort to try it out today. This article serves as a starting point to gain a basic understanding of the lightweight communication protocol MQTT, supplemented by demos to deepen understanding and familiarize oneself with its usage. At the end of the article, several reference articles are provided for everyone to learn from.
❝
Reference Links
MQTTnet GitHub address: https://github.com/dotnet/MQTTnet
MQTT Beginner’s Guide: https://www.emqx.com/zh/mqtt-guide
EMQX Official Documentation: https://www.emqx.io/docs/zh/v5.2/
EMQX Command Line Documentation: https://www.emqx.io/docs/zh/v5.2/admin/cli.html
EMQX Configuration Manual: https://www.emqx.io/docs/zh/v5.2/configuration/configuration-manual.html
EMQX Basic Functions: https://juejin.cn/post/7081629128650129416
MQTTX Client Download: https://mqttx.app/zh/downloads
❞