Abstract:
This article takes the NT100-RE-DP gateway as an example to implement communication between Modbus/TCP Client and PROFIBUS DP devices, thereby integrating PROFIBUS DP slave devices into the Modbus/TCP network. The following will gradually demonstrate the configuration steps of this gateway, which are similar for other models in the same series.
01
Gateway Introduction
1)The NT100-RE-DP gateway can support conversion between PROFIBUS DP and PROFINET IO, EtherNet/IP, Open Modbus/TCP, Sercos. It supports various conversion methods:
1、 Conversion between PROFIBUS DP and PROFINET IO: DP master to PN slave, DP slave to PN master, DP slave to PN slave
2、 Conversion between PROFIBUS DP and EtherNet/IP: DP master to EIP slave, DP slave to EIP master, DP slave to EIP slave
3、 Conversion between PROFIBUS DP and EtherCAT: DP master to ECAT slave, DP slave to ECAT master, DP slave to ECAT slave
4、 Conversion between PROFIBUS DP and Sercos: DP master to Sercos slave, DP slave to Sercos master, DP slave to Sercos slave
5、 Conversion between PROFIBUS DP and Open Modbus/TCP: DP master to Open Modbus/TCP, DP slave to Open Modbus/TCP
2)、Features of NT100-RE-DP gateway:
· I/O data conversion time is the shortest, less than 10 milliseconds
· Device replacement completed in seconds via memory card loading
· Upgradable firmware for flexible use of other conversions
· Comes with USB diagnostic and configuration port
3)、Typical application diagram of NT 100 gateway:

02
Gateway Configuration Software
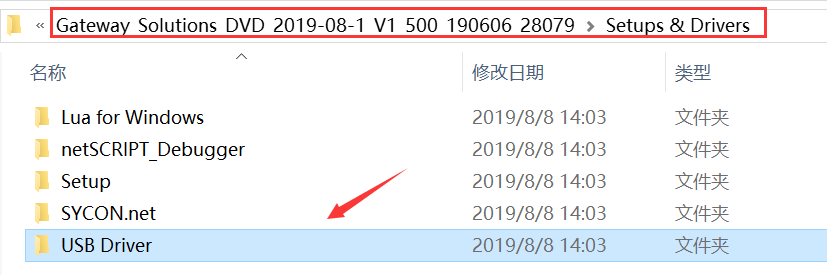
(1)USB Serial Driver: When the NT 100 is first connected to the computer via USB cable and powered on, the computer will automatically detect the hardware. The corresponding driver can be found in the DVD folder under the following directory, after installing the driver, it can be confirmed in the computer device manager:
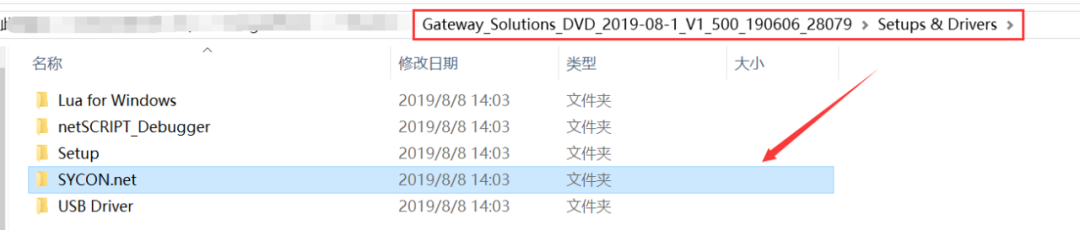
(2)SYCON Configuration Software: Find SYCON.net configuration software in the DVD folder, double-click to install this software:
After the software installation is complete, if SYCON.net is opened for the first time, it will ask for a password. If not needed, just click “0K“. In the future, when opening “SYCON.net”, it will always ask for a password. If there is no password, just click “0K”.
This completes the software installation required for configuring the NT100 gateway:
·SYCON.net:Used for gateway parameter configuration and diagnostics.
03
Gateway Parameter Settings
(1)After the gateway USB device driver and configuration tool SYCON.net have been successfully installed, connect NT 100 to the computer using a USB cable, and open SYCON.net, select “File”“New” to create a new configuration project, the interface shown in the picture appears:
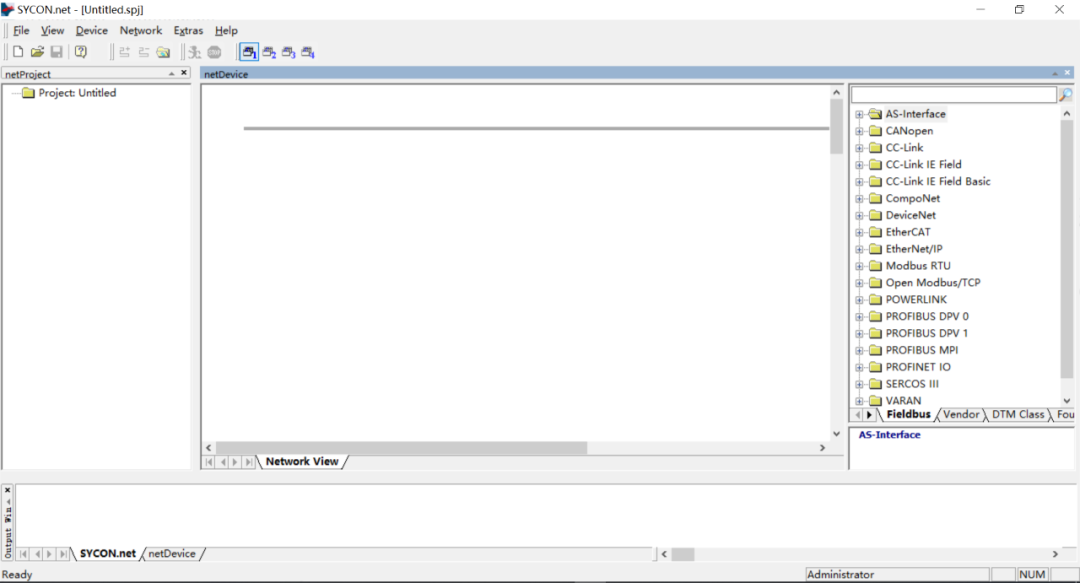
(2)In the software interface, select the “Fieldbus” section on the right, drag the PROFIBUS DPV 0, Gateway / Stand-Alone Slave folder’s NT 100-XX-XX icon (representing the gateway) and drop it below the gray line in the middle area, as shown in the picture:

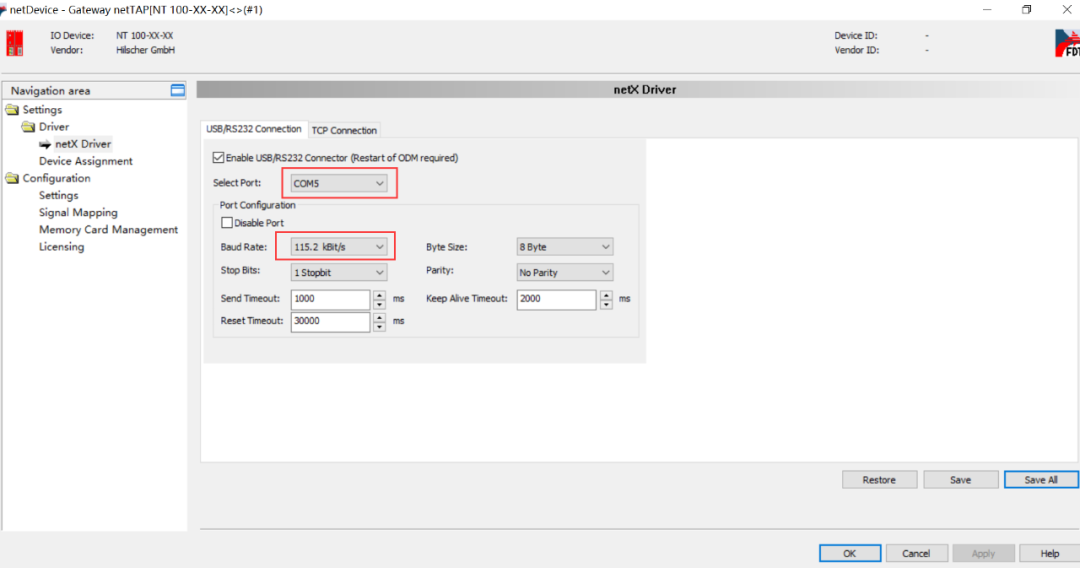
(3)Double-click the icon to pop up the configuration dialog box, select the “netX Driver” section in the “USB/RS232Connection” tab, ensure that “Enable USB/RS232 Connector” is checked. Confirm the USB corresponding COM port in the computer device manager, then set the COM port number, baud rate, etc. on this page, and click “Save” to save. As shown:
(4)Select the “Device Assignment” section, click the Scan button to scan for the gateway hardware, check the gateway and click the Apply button to save. Only after clicking Apply can further operations on the gateway be performed; otherwise, it may report an error indicating that the device cannot be found.
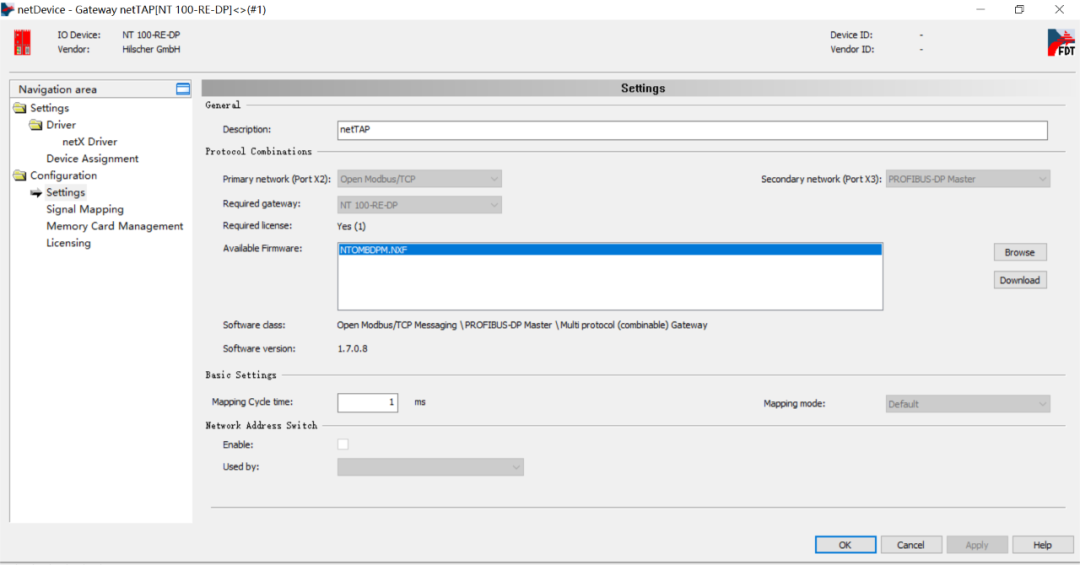
(5)Select the “Settings” section, Port X2 select OpenModbus/TCP protocol, Port X3 select PROFIBUS DPMaster protocol, as shown. Select the corresponding Available Firmware, and click the right-side Download button to download the corresponding firmware. After the firmware download is complete, click the OK button to exit the dialog box.
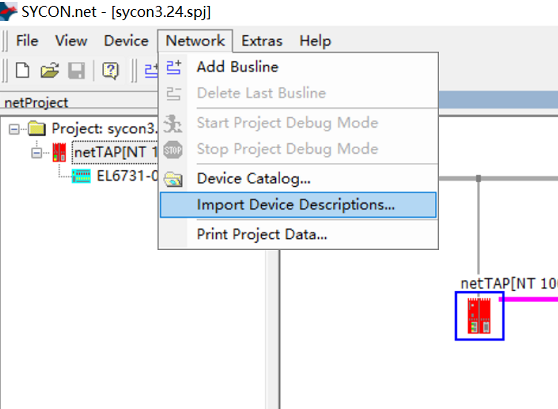
(6)Select the menu “Network” under “Import Device Descriptions” to import the third-party PROFIBUS DP slave eds file into the SYCON configuration software for PROFIBUS DP network configuration and setup. As shown:
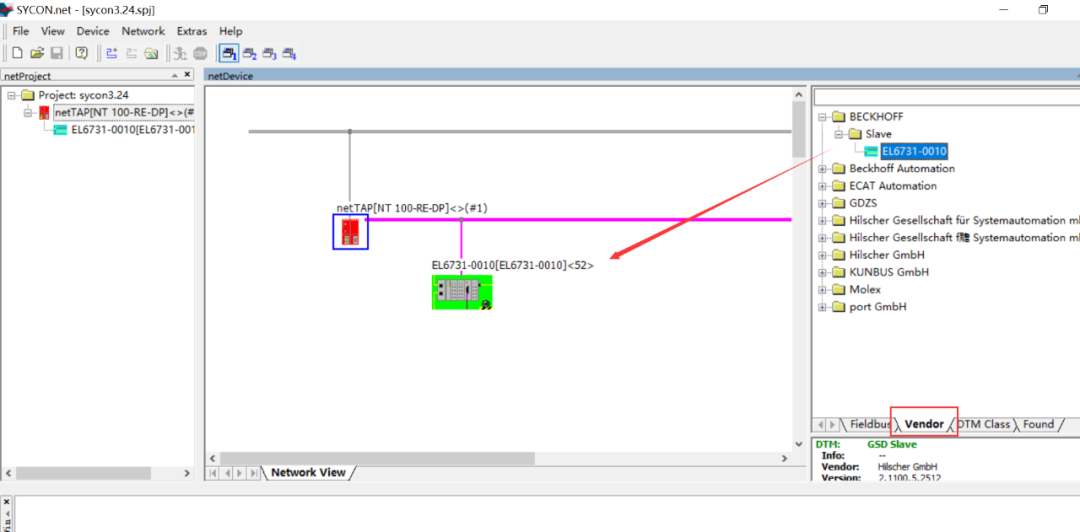
(7)From the right-side Fieldbus options under “Vendor”, find the imported eds file and drag it to the middle window under the purple line connected to the gateway, as shown:
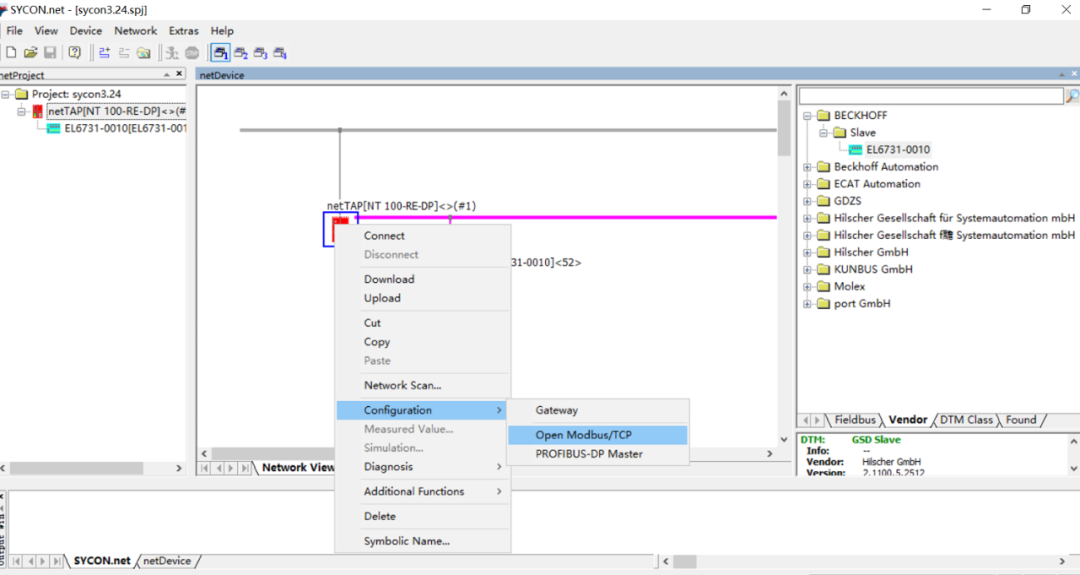
(8)Right-click the gateway icon, select “Configuration” to configure the gateway, PROFIBUS DP end and Open Modbus/TCP end respectively.
(9)First set the PROFIBUS DP end, divided into two steps:
a. Select “Configuration”“PROFIBUS DP Master“, a dialog box pops up, set the PROFIBUS DP Master parameters and the corresponding slave device parameters in the PROFIBUS DP network, such as baud rate, station number, etc. After setting, be sure to save, as shown:

b. Double-click the slave device connected under the purple line of PROFIBUS DP, in the dialog box that pops up, set the input and output data amount of the slave device. From “Avalible Modbules” select the required data module, click “Insert” and it can be seen in “Configured Modules” with the configuration parameters, here with 17 WORD of input and 7 WORD of output, as shown:
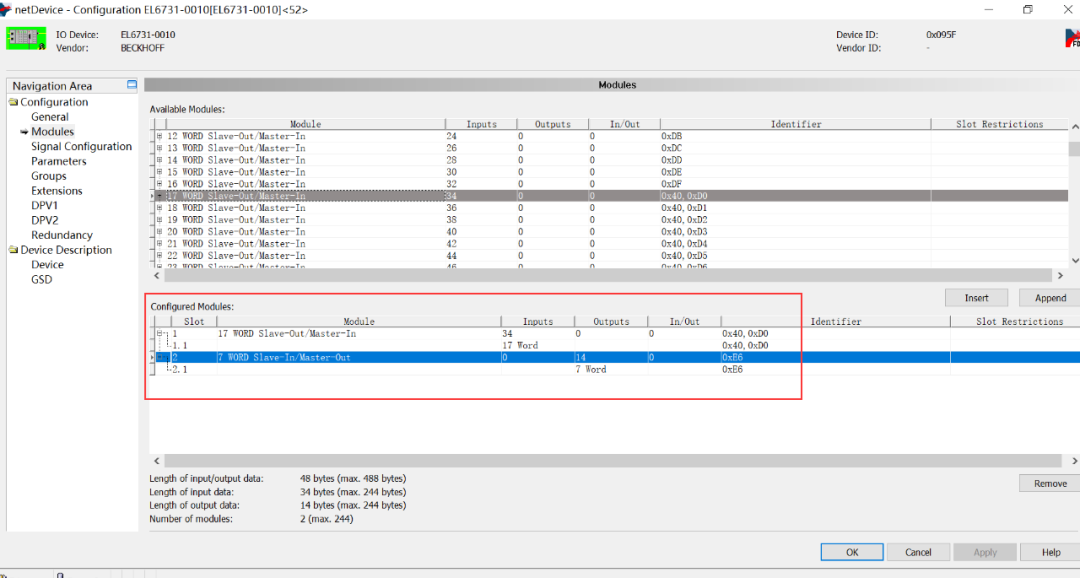
Can confirm in the “Configuration” “PROFIBUS DP Master”“Process Data” section.
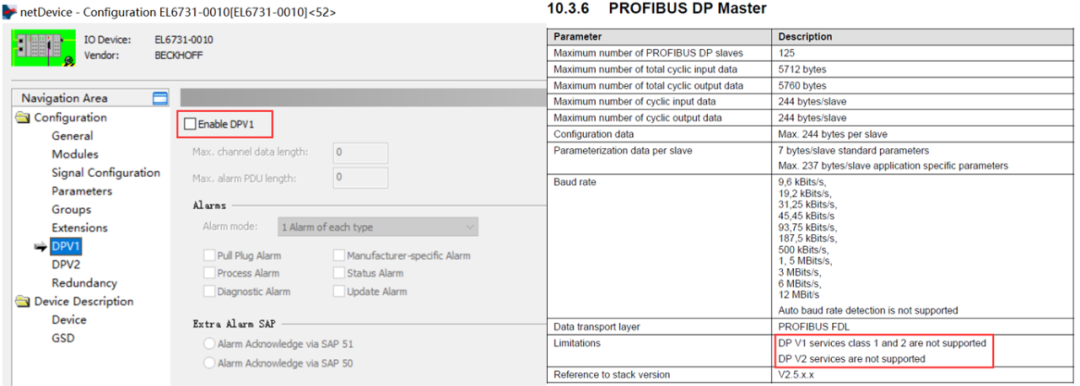
Additionally, since the gateway function does not support DPV1 and DP V2 services, it is necessary to ensure that both Enable options are unchecked:
(10)Set the Open Modbus/TCP end:
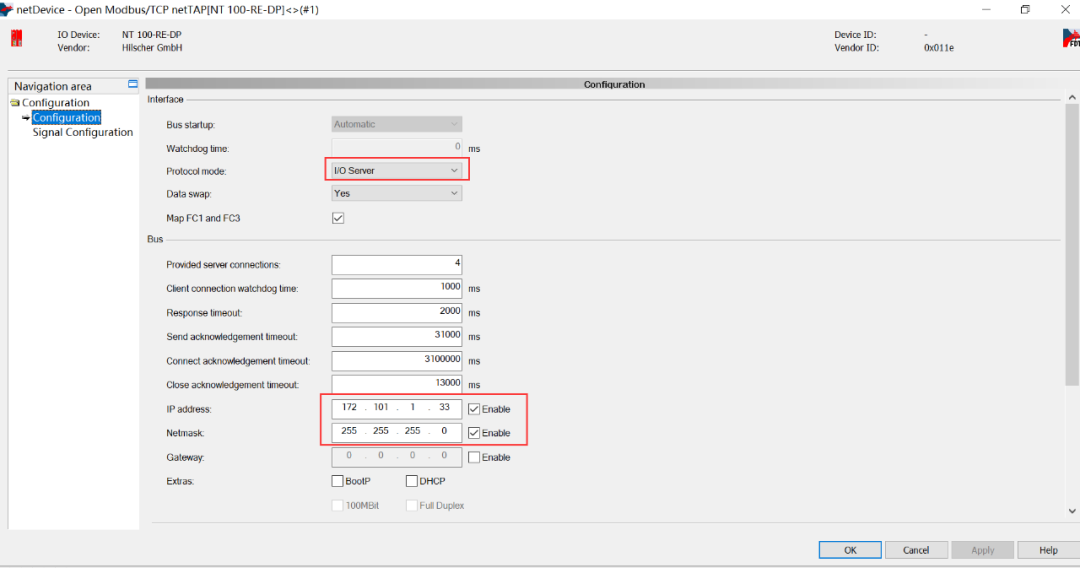
a. In SYCON software, select “Configuration”“Open Modbus/TCP”, a dialog box pops up, set the Open Modbus/TCP Protocol mode and IP address and other parameters, here set to IOServer, as shown:
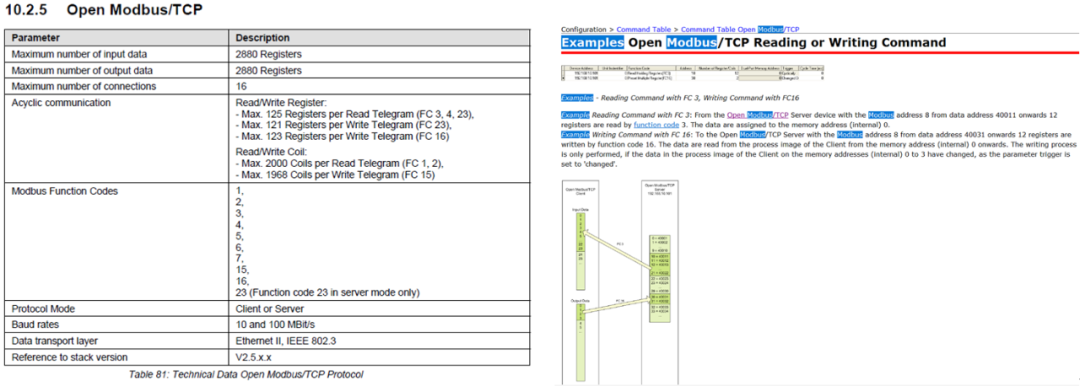
b. In the Modbus/TCP upper computer software or program, use the corresponding function code to read and write data, here taking function code FC 3 “Read Holding Registers” as an example, its read and write starting address is 40001。
(11)Again double-click the gateway (or right-click the gateway, select “Configuration”“Gateway”), a dialog box pops up, select the “SignalMapping” item to perform data mapping, click the “Map Signal” below, after completing all data mapping click the Apply button, as shown.
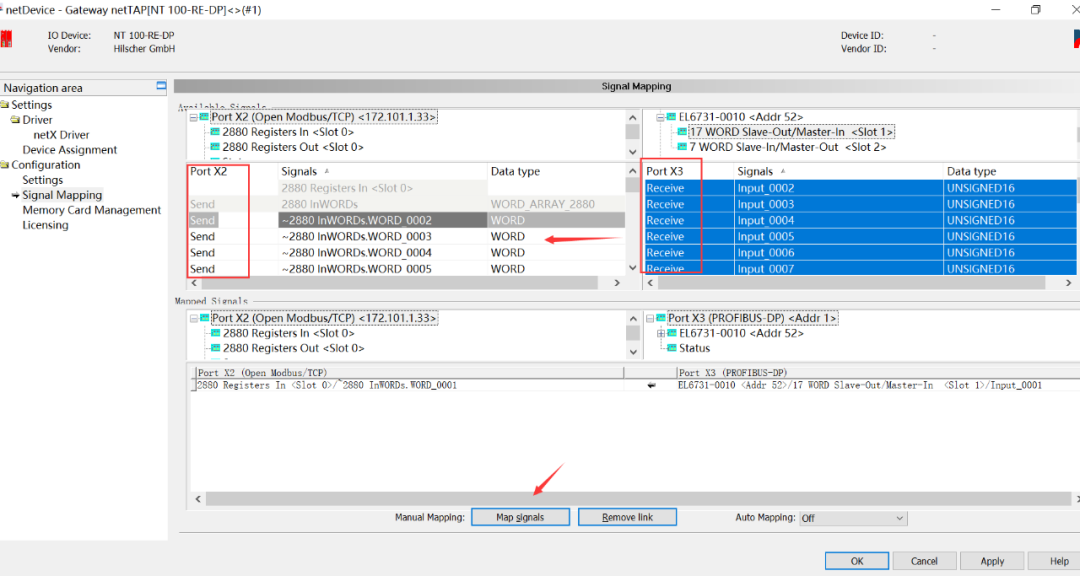
The general rule for data mapping is to always map Receive data to Send data, Receive direction is the data received by one interface of the gateway, Send direction is the data sent by another interface of the gateway.
Multiple Receive data can be selected using the Ctrl or Shift key. Data auto-mapping can also be performed in AutoMapping by selecting “From Port3 to Port2”, and clicking the Apply button for automatic data mapping.
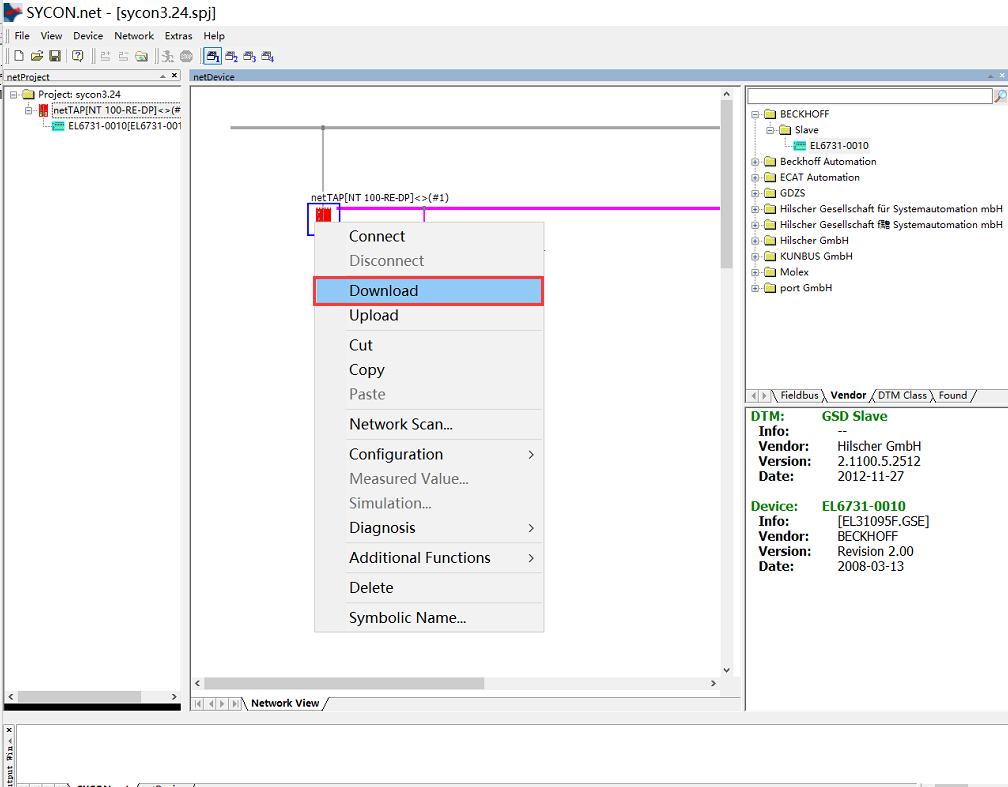
(12)At this point, all configurations of the gateway are complete. Right-click the gateway, select Download to download the configuration file to the gateway. Based on the downloaded firmware and configuration file, the gateway can start working according to these parameters.
(13)Remember to save the configuration project for future applications, so that minor modifications can be made quickly based on this foundation.
04
Gateway Diagnostics
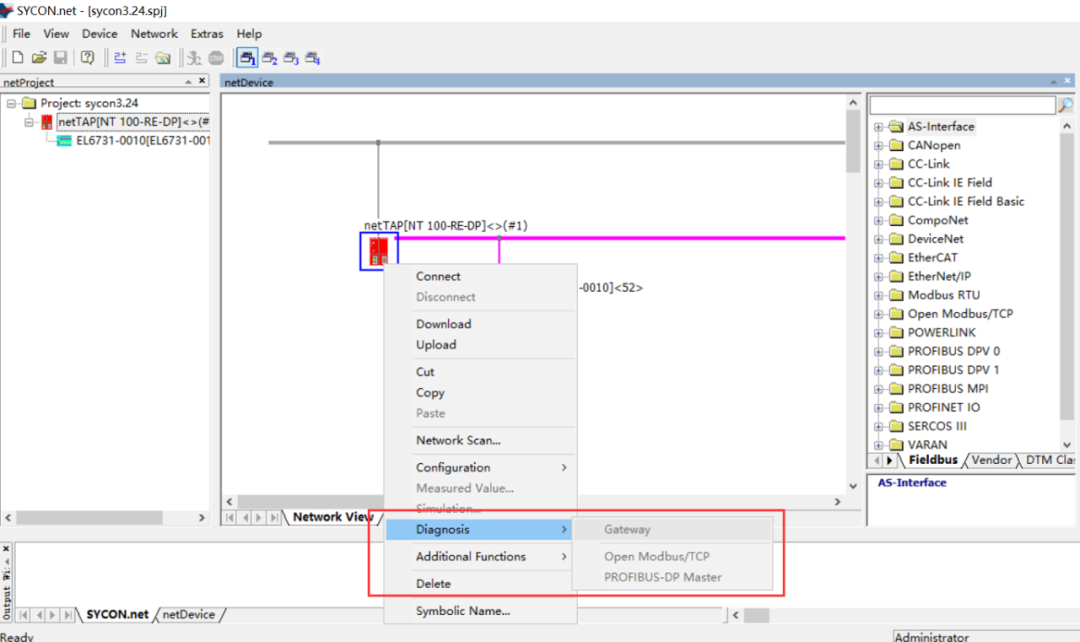
(1)The gateway supports online diagnostics, select the gateway, keep the USB cable connected to the computer, right-click first “Connect”, then select “Diagnosis” to view the communication status of the gateway, PROFIBUS DP end and Open Modbus/TCP end respectively. As shown:
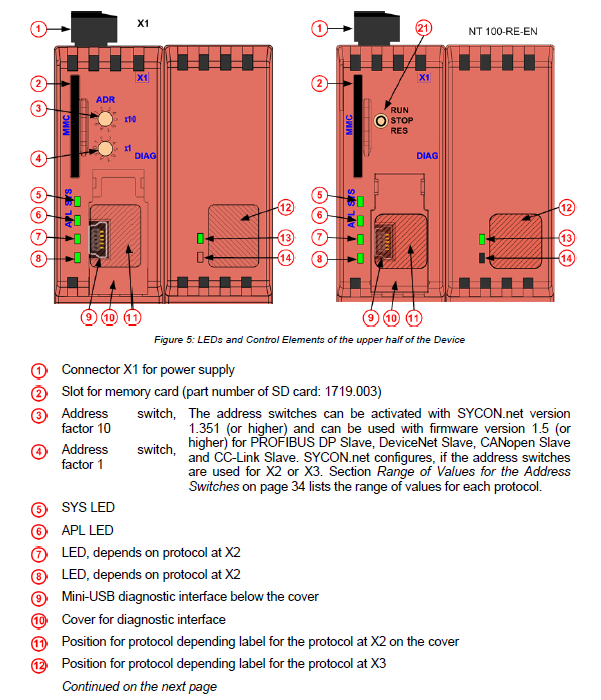
(2)Quickly judge the communication status through the Led indicator lights on the gateway, as shown:
Hongke is a high-tech company with over 10 years of experience in the field of industrial automation, especially in the industrial bus communication industry. The Hongke Industrial Communication Division collaborates deeply with world-renowned industrial communication experts【PEAK-System, Hilscher, Kunbus, SYS TEC, Koenig-Pa, Port, Copa-data, TenAsys, SoC-e, RELYUM】 to provide top-level industrial bus protocol software and hardware solutions, including protocol types such as【CAN, CANopen, EtherCAT, Profibus, Profinet, Ethernet/IP, TSN】, and product types including codes, software, chips, boards, modules, etc. Hongke Industrial Communication is customer-oriented and technology-driven, providing the most suitable products and the most satisfactory services for domestic enterprises. Especially under the big environment of Industry 4.0, Hongke Industrial Communication keeps pace with the times and has launched TSN (Time-Sensitive Networking) solutions, which will play a role like a highway in promoting the trend of IoT.