Keywords: Development Board, Development Tools, Embedded
Question: Arduino Nano RP2040 Connect Development Board User Experience
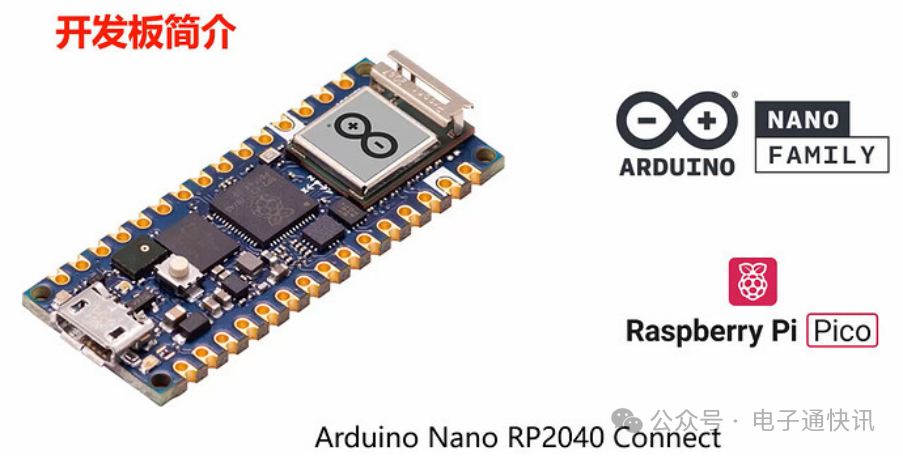
Arduino Nano RP2040 Connect is part of the Arduino Nano family, which consists of compact boards that are rich in features, powerful, and easy to learn development boards, each designed with great precision.
The design of the Arduino platform is aimed at making it cheaper and easier for people to control robots, and the Arduino library, sensor libraries have high consistency and versatility, making them very suitable for beginners to learn.
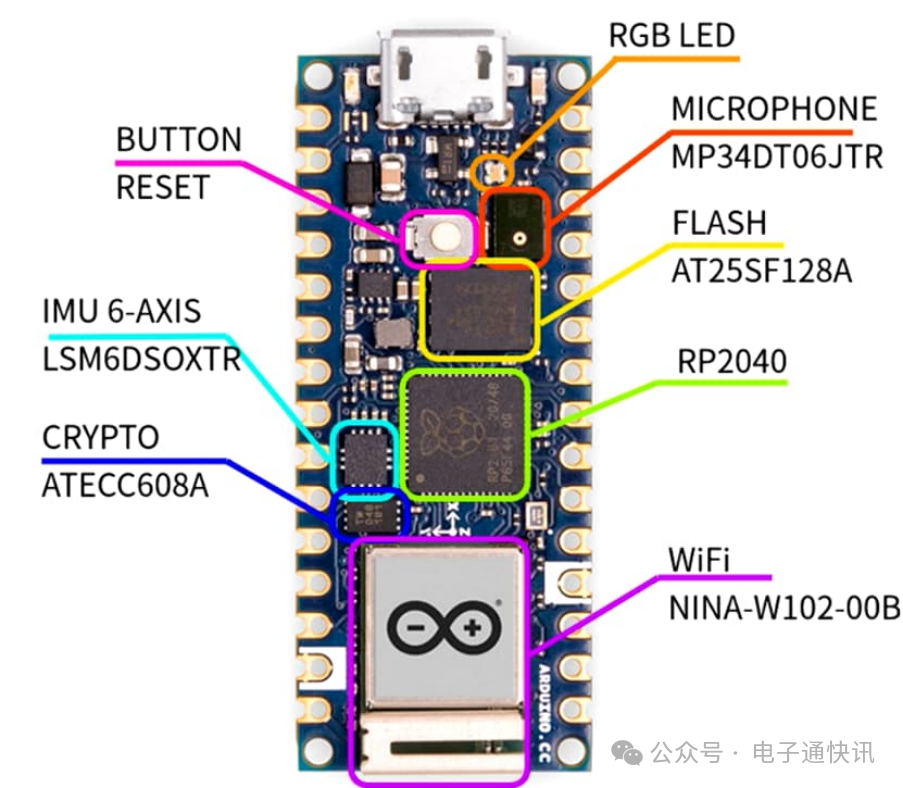
Additionally, the development board is equipped with a very popular MCU, the Raspberry Pi RP2040. The 2040 is the first attempt of this MCU, featuring two ARM Cortex-M0+ cores, a clock frequency of 133MHz, and 264KB of built-in RAM. It also has multiple commonly used peripheral interfaces such as UART, SPI, I2C, USB, ADC, etc., making it an excellent choice for beginners.
RP2040 supports various development environments. The official Raspberry Pi Pico-sdk is developed based on C/C++, which is considered the native development environment for RP2040. However, to use this SDK directly, you need to set up the cmake compilation and download the debugging environment yourself. Fortunately, there are now official extensions based on VSCODE or PlatformIO environments, which integrate writing, compiling, and downloading debugging services.
Moreover, RP2040 also supports microPython, allowing you to write code using Python scripts and burn them into the chip. Since Python is a scripting language, it does not require compilation and has better readability. This development environment is much simpler compared to the Pico-sdk. The development tool for microPython can be Thonny, which is also very easy to use and friendly for beginners.
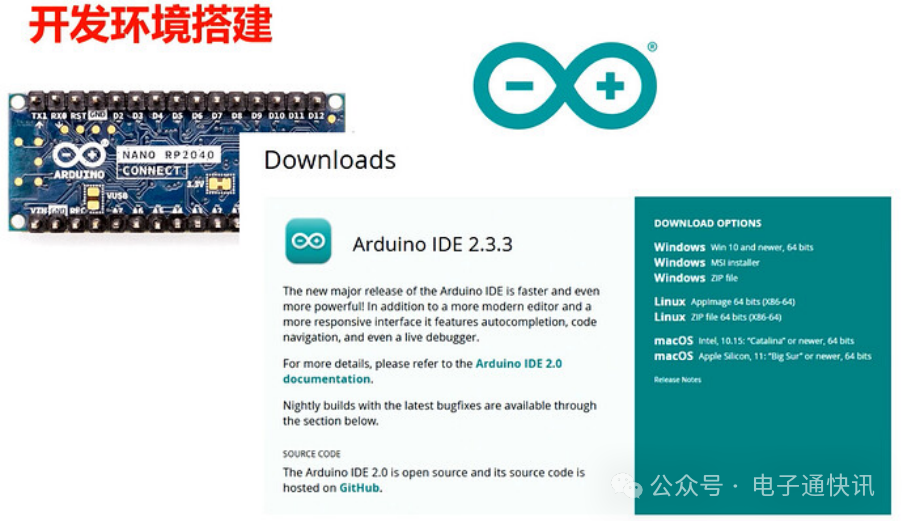
The Arduino Nano development board naturally supports the Arduino development environment. The Arduino development tools include its IDE, which has been updated to version 2.0, supporting serial oscilloscopes, and the overall interface is more user-friendly.
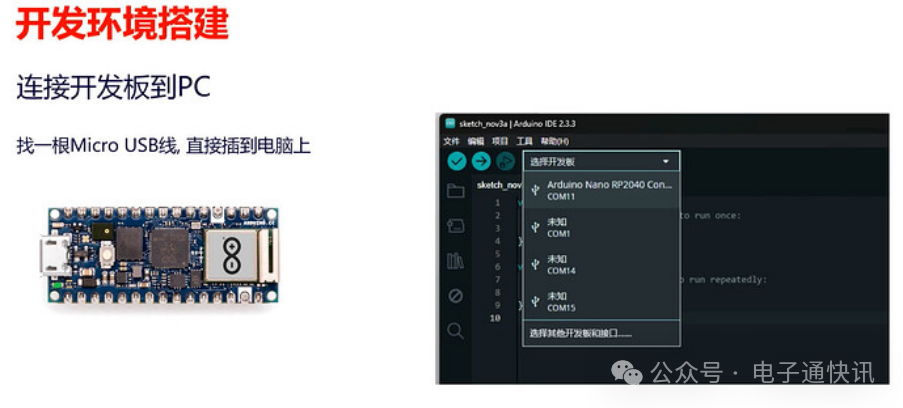
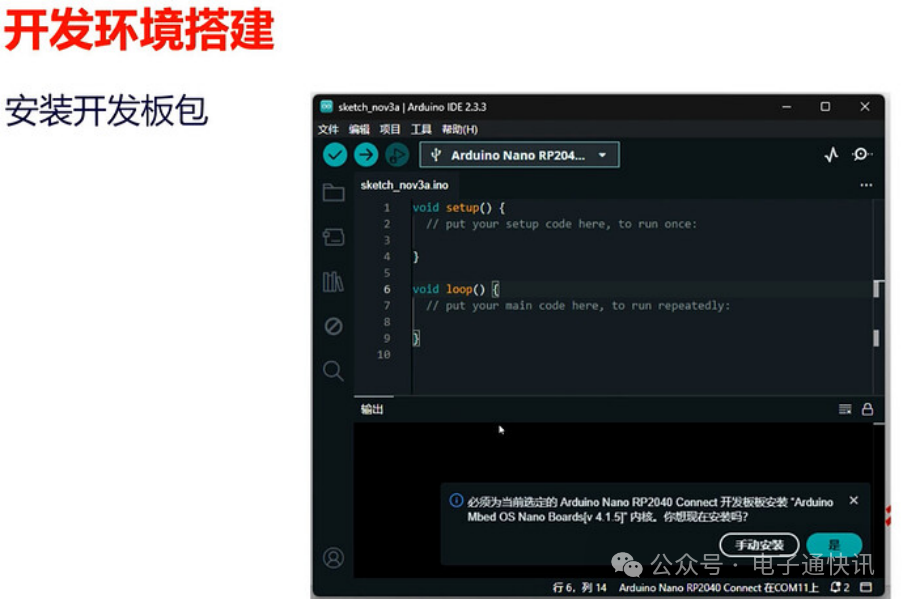
For the development board, find a Micro USB data cable and connect it to your computer. Normally, the development board you receive has the bootloader and Arduino firmware already burned in. In the IDE, you can directly see the port of the development board, select the port for the 2040.
Then, the IDE will automatically prompt you to download an RP2040 board support package. Click yes, and the IDE will automatically configure all the necessary packages. When you see the following content in the log, it means the installation is complete. We will restart the software to avoid some components not loading successfully. After restarting, you can write code normally.
During the development process, you may encounter unexpected issues that could cause the board’s bootloader to be lost or the IDE to fail to recognize the development board. What should you do in this situation? When encountering this situation, the RP2040’s bootloader is embedded in the chip. You just need to enter the RP2040 bootloader mode. First, connect the board to your computer, then near the wifi module, there is a REC pin next to GND. Use tweezers to short these two pins and click the reset button on the front, then release it. In the computer’s file explorer, you will see the RPI-PR2 disk appear. Then, download the Arduino compiled blink firmware and drag it into the disk, the development board will automatically restart, and the RGB light will start flashing, indicating that the board has returned to normal. At this point, you can connect to the board again in the software.
More Arduino Nano RP2040 Connect User Experiences:
·Arduino Nano RP2040 Connect User Experience – Part 1
·Arduino Nano RP2040 Connect User Experience – Part 2
For more related technical content, please refer to the posts below:
·Episode 4: Building Simple Control Circuits with Arduino
·Episode 5: Basic Input/Output of Arduino
·Arduino Modulino Pixels Tutorial
·Arduino Expansion Board
·In Arduino Opta PLC Ladder Logic (Ladder Logic) UDFB