1. What is Arduino IDE?

In today’s wave of digitalization, the Internet of Things (IoT) is like a magical force that connects various devices in our lives, making homes smarter and cities more intelligent. In the vast realm of IoT development, Arduino IDE serves as a magical key, opening the door to an exciting world for countless creative developers.
Arduino IDE, short for Arduino Integrated Development Environment, is a development environment specifically designed for the Arduino platform. It acts as a bridge, connecting the creative ideas of developers to Arduino hardware devices that can sense the environment and execute commands. Whether you are a novice with dreams of technology or a seasoned professional deeply engaged in IoT, Arduino IDE can help everyone quickly turn ideas into functioning projects with its simplicity and ease of use.
2. First Step for Beginners: Installing Arduino IDE

(1) Obtaining the Installation Package
The first step to starting your Arduino journey is to obtain the Arduino IDE installation package. Open your browser and type the official Arduino website address “https://www.arduino.cc” in the address bar. After entering the official site, hover over the “Software” option in the top navigation bar and click to enter the download page. Here, you will see multiple versions for different operating systems, such as the .exe installation package for Windows, .dmg for macOS, and Linux users can choose the corresponding format based on their distribution. Be sure to carefully check your computer’s operating system version and select the appropriate Arduino IDE installation package, as this is key to a smooth installation. If you are using Windows 10 or later, usually choosing the latest version is sufficient; if your system is older, like Windows 7, you may need to scroll down to find a slightly older compatible version, generally the 1.8.X series is more stable. Once selected, click the “DOWNLOAD” button and patiently wait for the download to complete. If the official site prompts for a donation to download, don’t worry, just select “JUST DOWNLOAD” to skip this step.
(2) Foolproof Installation
The installation process is as easy as unwrapping a surprise gift. For Windows systems, locate the downloaded .exe installation package, double-click to open it, and the installation wizard will start. Click “Next” to proceed, and the first thing you will see is the license agreement. Quickly review and confirm it, then check “I accept the agreement.” Next, choose whether to install for all users or just the current user; beginners are advised to keep the default settings. Then specify the installation path; choosing a non-system drive (like D or E) is a good option to avoid taking up precious space on the system drive, allowing the computer to run more smoothly. During installation, if a driver installation prompt appears, don’t hesitate, click “Install” as this is an important step for the Arduino board to communicate smoothly with the computer. Once the installation progress bar completes, click “Finish,” and you’re done; Arduino IDE is now installed on your computer, ready to follow your commands at any time.
(3) First Impressions of the Interface
When you first open Arduino IDE, a simple yet professional interface greets you. At the top is the menu bar, encompassing file operations, editing, tools, and various functional options, like a toolbox that meets all your development needs. Next to it is the toolbar, displaying a row of prominent icon buttons, from left to right: Verify (check for errors and compile code), Upload (send the written code to the Arduino board), New Project, Open Existing Project, and Save Current Project; these common operations can be triggered with a single click, isn’t that super convenient? The large area in the center is the editing area, like a blank canvas waiting for you to paint your smart ideas with code. Below the editing area is the status area, which provides real-time feedback on code compilation, upload progress, and development board connection status; if any issues arise, you’ll be notified immediately, helping you quickly troubleshoot.
3. Lighting Up the First LED: Initial Experience

(1) Preparing the Development Board
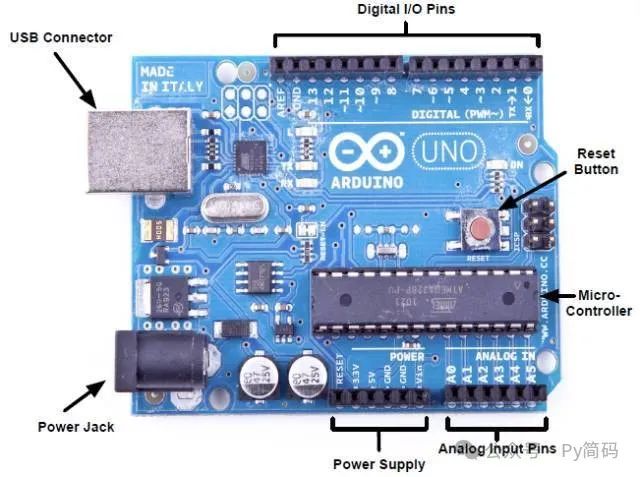
Once Arduino IDE is ready, it’s time for the star of the show—the Arduino development board. Taking the common Arduino Uno as an example, remove the board from the kit and connect one end of the included USB data cable to the board’s USB port and the other end to the computer’s USB port. Upon the first connection, Windows may prompt that a new device has been detected. If you see an unknown device with a yellow exclamation mark in the device manager, don’t panic; this is because the CH340 driver has not yet been installed. Open your browser, search for “CH340 driver download,” go to the official site, find the corresponding version, and install it. Once installed, right-click on the “This PC” icon on your desktop, select “Manage,” and in the pop-up window, click “Device Manager.” Expand the “Ports (COM & LPT)” option; if you see a device like “Arduino Uno (COMX)” (where X is a specific number, which may vary by computer), then the development board has successfully “shaken hands” with the computer, ready to embark on a wonderful journey.
(2) Configuring the Development Environment
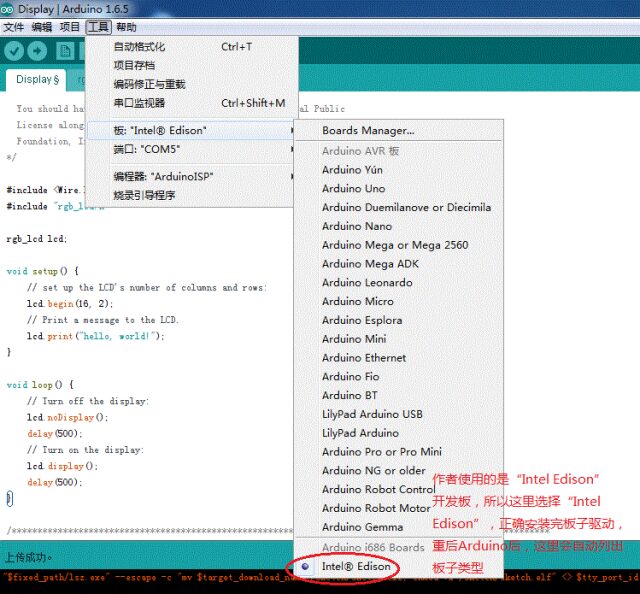
With the development board ready, you also need to “arrange” its parameters in Arduino IDE. Open Arduino IDE, click on the “Tools” option in the menu bar, hover over “Board” in the dropdown menu, and a list of various board models will unfold. Precisely find and select “Arduino Uno”; this step is like filling in the correct address for a package to ensure the code is accurately delivered to the board. Next, click on “Tools” again, select “Port,” and from the string of COM port numbers listed below, find the corresponding port for Arduino Uno that you confirmed in the device manager (usually COM3, COM4, etc., depending on the computer) and click to select it. This way, the communication “bridge” between the board and the computer is securely established.
(3) Loading the Example and Uploading
With everything ready, let’s light up the first “digital lamp” in Arduino IDE. Click on the “File” menu, select “Examples,” and find the “01.Basics” folder among the many example folders, then select the “Blink” example. The editing area will instantly be filled with a simple yet magical piece of code. This code acts like a well-trained conductor, precisely controlling the LED on the board to blink in rhythm. Don’t rush to upload; click the “Verify” button on the toolbar (the icon is a checkmark), and Arduino IDE will carefully check the syntax of the code like a meticulous teacher. If the code is correct, the status area at the bottom will cheerfully indicate “Compilation Complete”; if there are errors, don’t be discouraged; the red error messages will point out the issues, and you can modify them as prompted. Once confirmed correct, click the “Upload” button (the right arrow icon), and the IDE will quickly package the code and transmit it to the development board via the USB “channel.” After a moment, you will witness the LED marked “L” on the board joyfully blinking on and off once per second, as if declaring: Congratulations, you have successfully stepped into the exciting world of Arduino IoT development!