Main Component Introduction
Similar to the previous article on buttons, this time the components and circuit diagram are the same, Arduino version, button, LED light
Circuit Connection Method
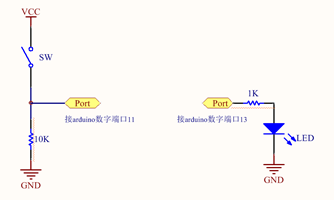
One end of the button switch connects to 5V interface, and the other end connects to digital port 11, then connect to the pull-down resistor. The long pin of the LED is connected in series with a 1k resistor to digital port 13, and the short pin connects to GND.

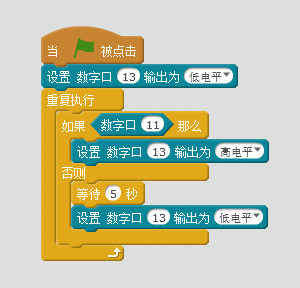
Scratch Code is as follows
When the button is pressed, it lights up the LED, and when the button is released, it waits for 5 seconds before turning off