0. Introduction
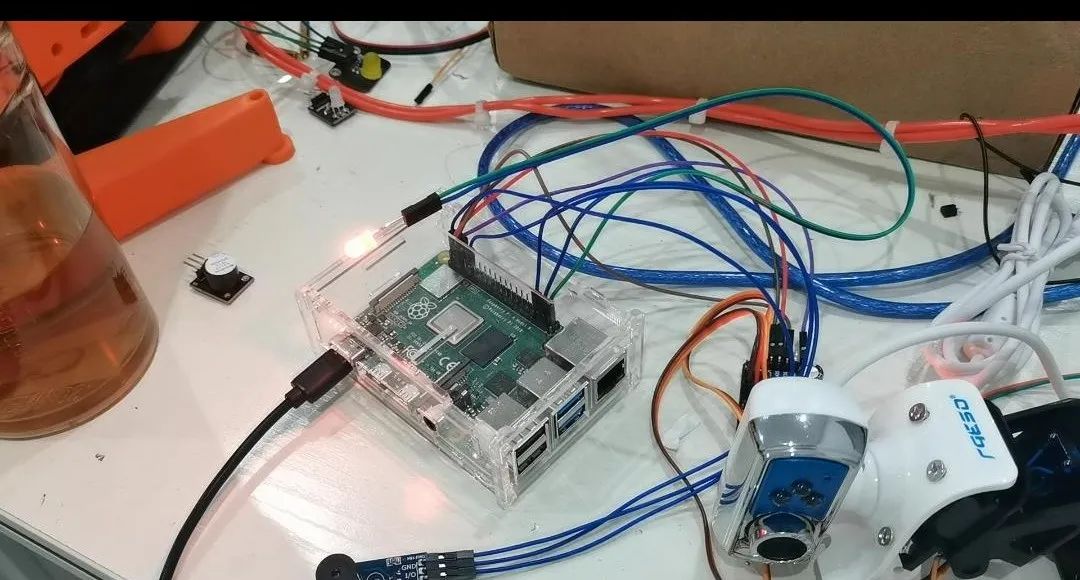
Materials: Raspberry Pi, Camera, Two SG90 Servos, PCA9685 Expansion Board, LED Light, Buzzer Module
1. Introduction to Raspberry Pi Pins
Raspberry Pi Pinout Table
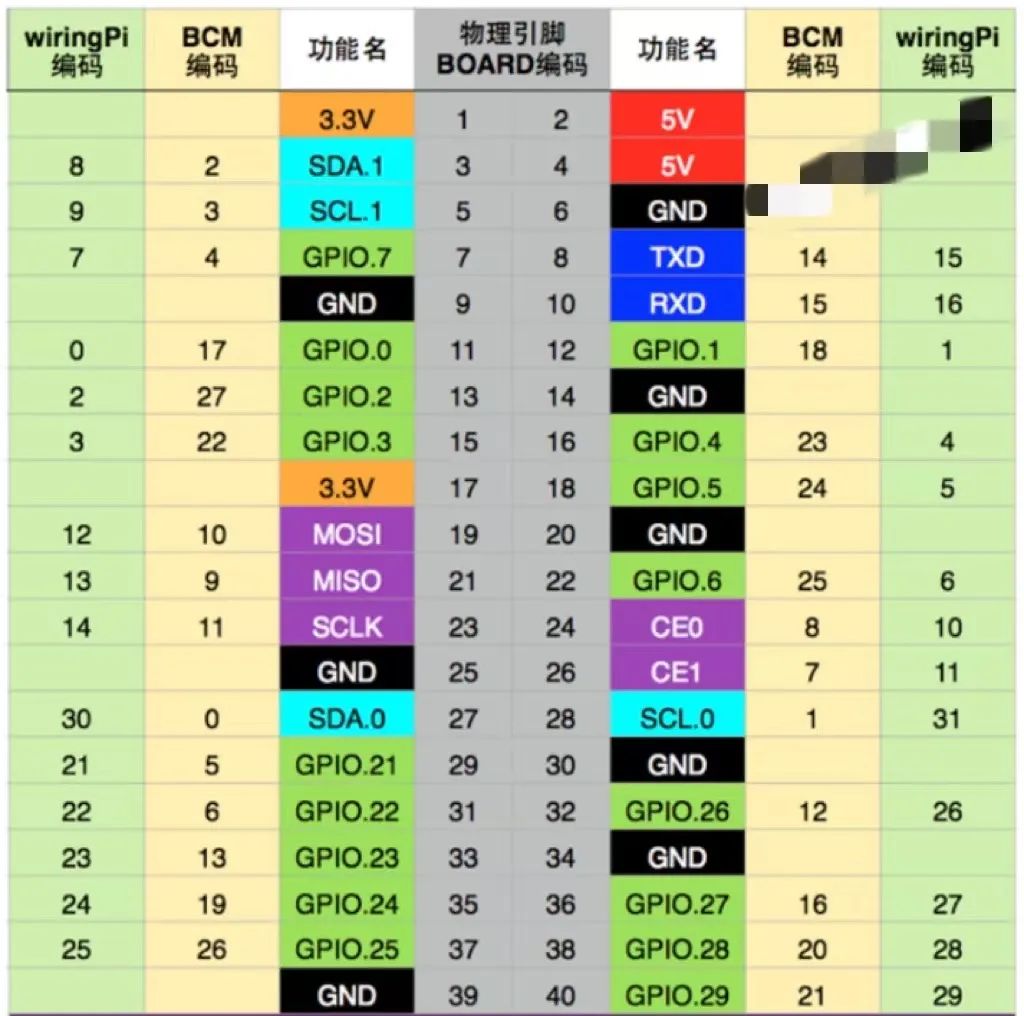
There are three definitions: Wiring Pi encoding, BCM encoding, and BOARD physical pin encoding.
1.1 Pin Setup
First, enter the following command in the terminal:
sudo raspi-configGo to the settings and find
Interfacing OptionsThen find
Remote GPIOEnable GPIO
2. Writing the Code
2.1 Import Libraries
First, import the libraries
import RPi.GPIO as GPIO # 1 Import pin library
GPIO.setmode(GPIO.BOARD) # 2 Define pin mode as BOARD
GPIO.setup(channel, GPIO.OUT) # 3 Create channel, needs two parameters: pin number and mode
GPIO.output(7, True) # 4 Drive channel
GPIO.cleanup() # 5 Clear and release resources
2.2 Example Code to Light LED and Sound Buzzer
# Import GPIO module and call pin
import RPi.GPIO as GPIO
# Initialize pin mode as BOARD, suppress warnings
GPIO.setmode(GPIO.BOARD)
GPIO.setwarnings(False)
# Pin definitions: Buzzer on pin 35, LED on pin 37
beep = 35
led = 37
GPIO.setup(beep, GPIO.OUT) # Set GPIO mode as output
GPIO.setup(led, GPIO.OUT)

GPIO.output(led, GPIO.HIGH) # Turn on LED
GPIO.output(led, GPIO.LOW) # Turn off LED
GPIO.output(beep, GPIO.HIGH) # Buzzer sounds
GPIO.output(beep, GPIO.LOW) # Buzzer off
3. Complete Code and Images
#!/usr/bin/env python2
# -*- coding: utf-8 -*-
"""
* @par Copyright (C): 2010-2020, hunan CLB Tech
* @file         50_Hand_gestures.py
* @version      V2.0
* @details
* @par History
@author: zhulin
"""
import cv2
import numpy as np
import math
import time
import sys
import Adafruit_PCA9685 # Import PCA9685 module
# Set encoding to utf-8
import importlib
importlib.reload(sys) # sys.setdefaultencoding('utf8')
# Import GPIO module and call pin
import RPi.GPIO as GPIO
# Initialize pin mode as BOARD, suppress warnings
GPIO.setmode(GPIO.BOARD)
GPIO.setwarnings(False)
# Pin definitions: Buzzer on pin 35, LED on pin 37
beep = 35
led = 37
GPIO.setup(beep, GPIO.OUT) # Set GPIO mode as output
GPIO.setup(led, GPIO.OUT)

# Initialize PCA9685 and servo
servo_pwm = Adafruit_PCA9685.PCA9685()  # Instantiate servo
# Set initial values for servo, adjust as needed
servo_pwm.set_pwm_freq(60)  # Set frequency to 60HZ
servo_pwm.set_pwm(5, 0, 325)  # Base servo
servo_pwm.set_pwm(4, 0, 325)  # Tilt servo
time.sleep(1)
# Initialize camera and set thresholds
cap = cv2.VideoCapture(0)
cap.set(3, 120)
cap.set(4, 160)
while(1):
    try:  # Handle errors if no contour found
        ret, frame = cap.read()
        frame = cv2.flip(frame, 1)
        kernel = np.ones((3, 3), np.uint8)
        # Define region of interest
        roi = frame[0:300, 0:300]
        cv2.rectangle(frame, (0, 0), (300, 300), (0, 255, 0), 0)
        hsv = cv2.cvtColor(roi, cv2.COLOR_BGR2HSV)

        # Define range of skin color in HSV
        lower_skin = np.array([0, 20, 70], dtype=np.uint8)
        upper_skin = np.array([20, 255, 255], dtype=np.uint8)
        # Extract skin color image
        mask = cv2.inRange(hsv, lower_skin, upper_skin)

        # Extrapolate the hand to fill dark spots within
        mask = cv2.dilate(mask, kernel, iterations=4)
        # Blur the image
        mask = cv2.GaussianBlur(mask, (5, 5), 100)

        # Find contours
        _, contours, hierarchy = cv2.findContours(mask, cv2.RETR_TREE, cv2.CHAIN_APPROX_SIMPLE)
        # Find contour of max area (hand)
        cnt = max(contours, key=lambda x: cv2.contourArea(x))
        # Approx the contour a little
        epsilon = 0.0005 * cv2.arcLength(cnt, True)
        approx = cv2.approxPolyDP(cnt, epsilon, True)

        # Make convex hull around hand
        hull = cv2.convexHull(cnt)
        # Define area of hull and area of hand
        areahull = cv2.contourArea(hull)
        areacnt = cv2.contourArea(cnt)
        # Find the percentage of area not covered by hand in convex hull
        arearatio = ((areahull - areacnt) / areacnt) * 100
        # Find the defects in convex hull with respect to hand
        hull = cv2.convexHull(approx, returnPoints=False)
        defects = cv2.convexityDefects(approx, hull)
        # l = no. of defects
        l = 0
        # Code for finding no. of defects due to fingers
        for i in range(defects.shape[0]):
            s, e, f, d = defects[i, 0]
            start = tuple(approx[s][0])
            end = tuple(approx[e][0])
            far = tuple(approx[f][0])
            pt = (100, 180)

            # Find length of all sides of triangle
            a = math.sqrt((end[0] - start[0]) ** 2 + (end[1] - start[1]) ** 2)
            b = math.sqrt((far[0] - start[0]) ** 2 + (far[1] - start[1]) ** 2)
            c = math.sqrt((end[0] - far[0]) ** 2 + (end[1] - far[1]) ** 2)
            s = (a + b + c) / 2
            ar = math.sqrt(s * (s - a) * (s - b) * (s - c))
            # Distance between point and convex hull
            d = (2 * ar) / a
            # Apply cosine rule here
            angle = math.acos((b ** 2 + c ** 2 - a ** 2) / (2 * b * c)) * 57

            # Ignore angles > 90 and ignore points very close to convex hull (they generally come due to noise)
            if angle <= 90 and d > 30:
                l += 1
                cv2.circle(roi, far, 3, [255, 0, 0], -1)
            # Draw lines around hand
            cv2.line(roi, start, end, [0, 255, 0], 2)

        l += 1
        # Print corresponding gestures which are in their ranges
        font = cv2.FONT_HERSHEY_SIMPLEX
        if l == 1:
            if areacnt < 2000:
                cv2.putText(frame, 'Put hand in the box', (0, 50), font, 2, (0, 0, 255), 3, cv2.LINE_AA)
            else:
                if arearatio < 12:
                    cv2.putText(frame, '0', (0, 50), font, 2, (0, 0, 255), 3, cv2.LINE_AA)
                elif arearatio < 17.5:
                    cv2.putText(frame, 'Best of luck', (0, 50), font, 2, (0, 0, 255), 3, cv2.LINE_AA)
                else:
                    cv2.putText(frame, '1', (0, 50), font, 2, (0, 0, 255), 3, cv2.LINE_AA)
                    GPIO.output(led, GPIO.HIGH)  # Turn on LED
        elif l == 2:
            cv2.putText(frame, '2', (0, 50), font, 2, (0, 0, 255), 3, cv2.LINE_AA)
            GPIO.output(led, GPIO.LOW)  # Turn off LED
        elif l == 3:
            if arearatio < 27:
                cv2.putText(frame, '3', (0, 50), font, 2, (0, 0, 255), 3, cv2.LINE_AA)
                GPIO.output(beep, GPIO.HIGH)  # Buzzer sounds
            else:
                pass  # Suppress OK gesture
                # cv2.putText(frame, 'ok', (0, 50), font, 2, (0, 0, 255), 3, cv2.LINE_AA)
        elif l == 4:
            cv2.putText(frame, '4', (0, 50), font, 2, (0, 0, 255), 3, cv2.LINE_AA)
            GPIO.output(beep, GPIO.LOW)  # Buzzer off
        elif l == 5:
            cv2.putText(frame, '5', (0, 50), font, 2, (0, 0, 255), 3, cv2.LINE_AA)
            GPIO.output(led, GPIO.HIGH)  # Turn on LED
            time.sleep(0.5)
            GPIO.output(beep, GPIO.HIGH)  # Buzzer sounds
            time.sleep(0.5)
            GPIO.output(beep, GPIO.LOW)  # Buzzer off
            time.sleep(0.5)
            GPIO.output(led, GPIO.LOW)  # Turn off LED
            time.sleep(0.5)
        elif l == 6:
            cv2.putText(frame, 'reposition', (0, 50), font, 2, (0, 0, 255), 3, cv2.LINE_AA)
        else:
            cv2.putText(frame, 'reposition', (10, 50), font, 2, (0, 0, 255), 3, cv2.LINE_AA)
        # Show the windows
        cv2.imshow('mask', mask)
        cv2.imshow('frame', frame)
    except:
        pass

    k = cv2.waitKey(5) & 0xFF
    if k == 27:
        break
cv2.destroyAllWindows()
cap.release()
Functionality:
-
Gesture 1: One finger extended, lights up the LED.
-
Gesture 2: Two fingers extended, turns off the LED.
-
Gesture 3: Three fingers extended, buzzer sounds.
-
Gesture 4: Four fingers extended, buzzer off.
-
Gesture 5: Five fingers extended, sound and light alarm.

“Matlab-Based Simulink Robotic Arm Visualization Tutorial“
This tutorial is based on Matlab R2019B version, starting from basic component introduction to teach how to create a Matlab-based robotic arm visualization simulation system.

(Scan the QR code to view course details)