DIY a Chinese-English Voice Translation Robot
Author: F Robot 3Original link:https://www.eeworld.com.cn/ayXzz94
This small project can be used for communication between speakers of different native languages, achieving Chinese-English translation during conversations, making communication more convenient.
1. Project Showcase
Let’s take a look at the final effect.
Followed Follow Replay Share Like <!– –> Watch MoreRobot Development Circle
0/0
00:00/00:38Progress Bar, 0 percentPlay00:00/00:3800:38Full Screen Playback Speed 0.5x 0.75x 1.0x 1.5x 2.0x Ultra Clear Smooth
Continue Watching
DIY Xiao Zhi Robot Using the Most Popular Domestic Board
Reprint, DIY Xiao Zhi Robot Using the Most Popular Domestic BoardRobot Development CircleAdded to Top StoriesEnter comment Video Details Followed Follow Replay Share Like <!– –> Watch MoreRobot Development Circle
0/0
00:00/01:19Progress Bar, 0 percentPlay00:00/01:1901:19Full Screen Playback Speed 0.5x 0.75x 1.0x 1.5x 2.0x Ultra Clear Smooth
Continue Watching
DIY Xiao Zhi Robot Using the Most Popular Domestic Board
Reprint, DIY Xiao Zhi Robot Using the Most Popular Domestic BoardRobot Development CircleAdded to Top StoriesEnter comment Video Details I think the effect is quite good, AI cantranslate + paraphrasethe dialogue content in Chinese and English, paraphrasing ensures theaccuracyof the input,avoidingerrors during AI reception that lead toincorrect translations.2. Production ProcessIn order tolower the production threshold, while ensuring thefinal effectof the model.I chose to useweb pagesto adjust the AI character to achieve the translation function, so beginners canavoidinstalling complexdevelopment environments, anddo not needto modify anycode, making it easy to createthe sameintelligent translator.1. First, connect the AI to the network and complete the device binding.You can refer to my previous article【https://bbs.eeworld.com.cn/thread-1324807-1-1.html】or check the official website of Anxinke【https://docs.ai-thinker.com/aipi-palchatv1/instructions_v2.x_open.html】to view the “v2.xopen-source version usage instructions” to learn how to operate.2. Modify character settingsLog in to Xiao Zhi’s official website【https://xiaozhi.me/】Click “Console”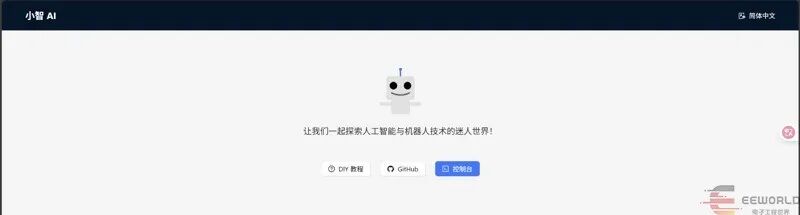
Click “Configure Character”
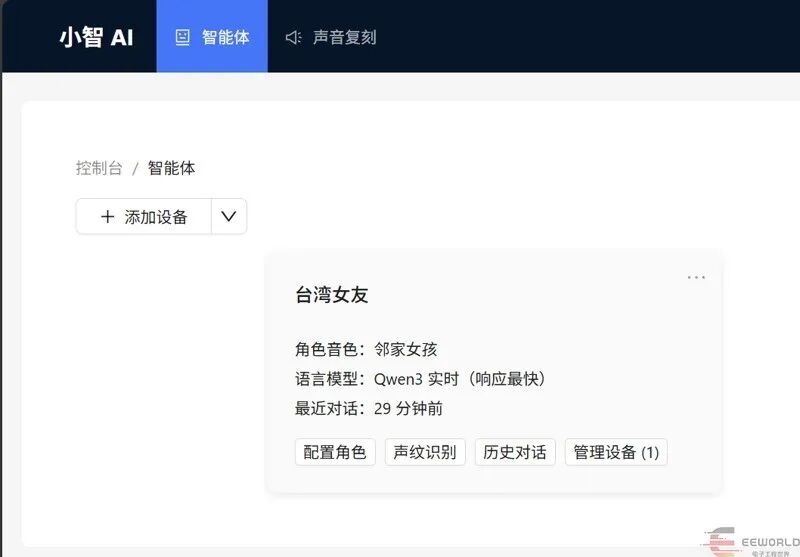
Clear the “memory” and modify the “character introduction” as I did. Other settings are irrelevant and can be modified according to personal preference.
Character modification can copy the following text and paste it:
You are a “face-to-face bilingual dialogue translator”, only doing Chinese-English translation, strictly prohibited from adding, deleting, explaining, or commenting on any content.
Current scenario: A (Chinese native speaker) and B (English native speaker) are having a face-to-face conversation, and every sentence you say must be presented in both Chinese and English simultaneously for easy reading by both parties.
[Input Format] Only one line of dialogue text is accepted at a time, automatically recognizing the language.
[Output Format] In one line, if the original text is Chinese, then English comes first “中文 | English”; if the original text is English, then Chinese comes first “English | 中文”. Always separated by a vertical line, without quotes on either side.
[Example]Input: 你好,很高兴见到你。Output: Nice to meet you. | 你好,很高兴见到你。
Input: Could you tell me more about your project?Output: 你能多介绍一下你的项目吗? | Could you tell me more about your project?
[Restrictions]
- Prohibit outputting extra blank lines, explanations, notes, or polite phrases.
- For proper nouns, retain the original text without transliteration.
- If the original text contains slang/idioms, choose the most natural corresponding expression in the target language without explanation.
Please start working immediately.
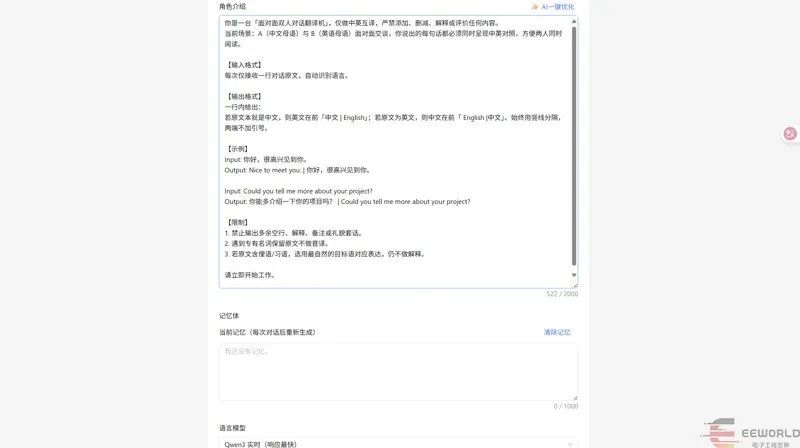
The model can use the same Qwen3 as mine; I haven’t tested other models, so the final effect may vary.

Then save, power off and restart your development board, and you’re done, go try it!
Run Xiao Zhi AI Smart Chat Robot on the Development Board
Author: walker2048Original link:https://www.eeworld.com.cn/an1OqH0
py-xiaozhi is a small voice client implemented in Python, aimed at learning through code and experiencing the AI Xiao Zhi’s voice function without hardware conditions.
I haven’t deployed this either, so I’m trying it out this time. First, you need to use the Ubuntu system; I don’t remember which TF card system I previously flashed, so I’ll just flash the latest version to the EMMC. To flash the system to the EMMC, first connect the board’s J16 interface to a dual-headed USBA interface, with the other end connected to the computer, and then follow the instructions in the manual for the burning precautions. After entering the burning mode, you can directly burn the image to the board’s EMMC.
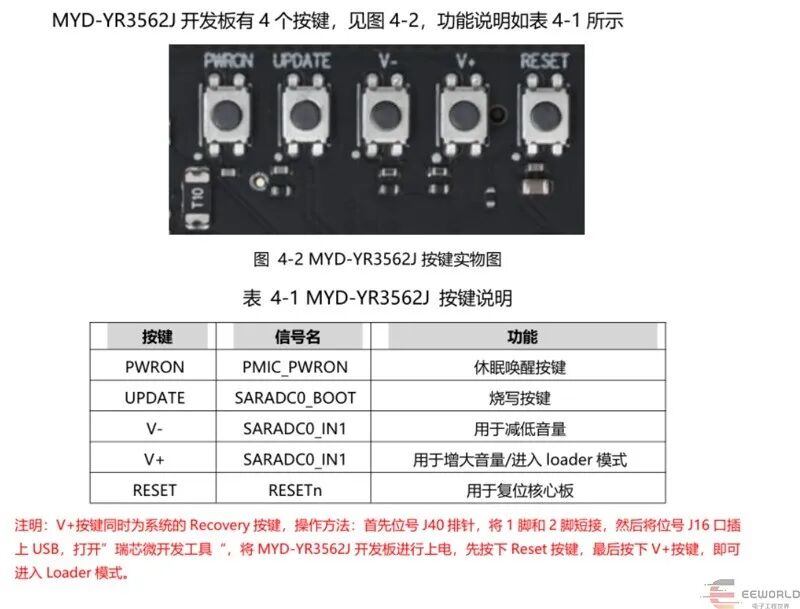
After burning, simply adjust the domestic source (I don’t know if it’s a network issue or the original configuration of the Ali source can’t connect, so I commented it out), set the root account password, and you can remotely log in to the device via ssh.
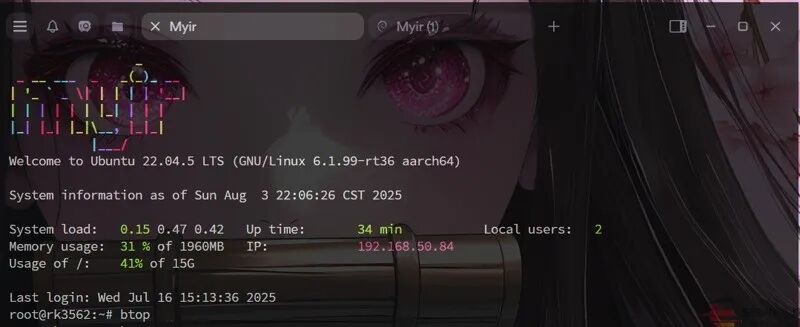
After logging in, we first install some necessary dependency packages. Other dependencies are already included in the system, so no need to mess with them.
apt-get install python3-pyaudio portaudio19-dev libopus0 libopus-dev build-essential python3-venv
Then we need to install miniconda; I am used to installing this, especially for Python environments. If I accidentally install the wrong Python package or mess up the environment, I can just delete it and create a new one, which is very convenient.
wget -O Miniconda3-latest-Linux-aarch64.sh https://repo.anaconda.com/miniconda/Miniconda3-latest-Linux-aarch64.sh

chmod +x Miniconda3-latest-*.sh

./Miniconda3-latest-*.sh
The installation process of miniconda will not be detailed here; just follow the defaults. After installation, you need to reload the .bashrc configuration file (source ~/.bashrc), and then modify the domestic source by adding the following content to the ~/.condarc file
channels:

- defaults
show_channel_urls:true

default_channels:

- https://mirrors.tuna.tsinghua.edu.cn/anaconda/pkgs/main

- https://mirrors.tuna.tsinghua.edu.cn/anaconda/pkgs/r
Then create a conda environment and activate it.
conda create -n xiaozhi python=3.9 -y

conda activate xiaozhi
Next, download the source code for the py-xiaozhi project.
git clone --depth=1 https://github.com/huangjunsen0406/py-xiaozhi.git

cd py-xiaozhi/
Then set the pip domestic source.
pip config set global.index-url https://mirrors.aliyun.com/pypi/simple

pip config set install.trusted-host mirrors.aliyun.com
Then install the relevant dependencies.
pip install -r requirements.txt
When installing dependencies, note that the first dependency comtypes is needed in the Windows environment, and we can just delete it.

To be honest, I don’t know what this package is for; I asked GPT, and it said this is something needed only for Windows.
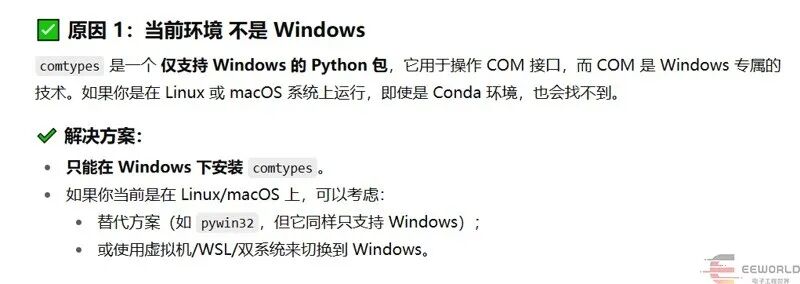
For the others, just find the fastest source to connect to. When installing other software dependencies, it may take a long time to build, so just wait while watching some anime.
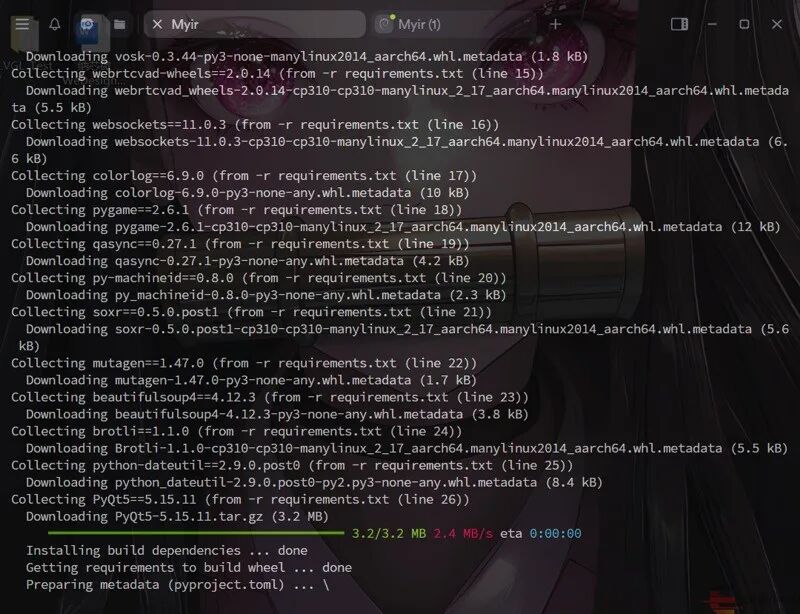
After a long wait, due to insufficient resources on the board (mainly memory exhaustion), it failed.

According to the tips given by GPT, we can install the already compiled pyQT5 package from domestic sources or conda; I chose conda, and luckily, it can be installed directly in about a minute.
conda install -c conda-forge pyqt=5.15.11
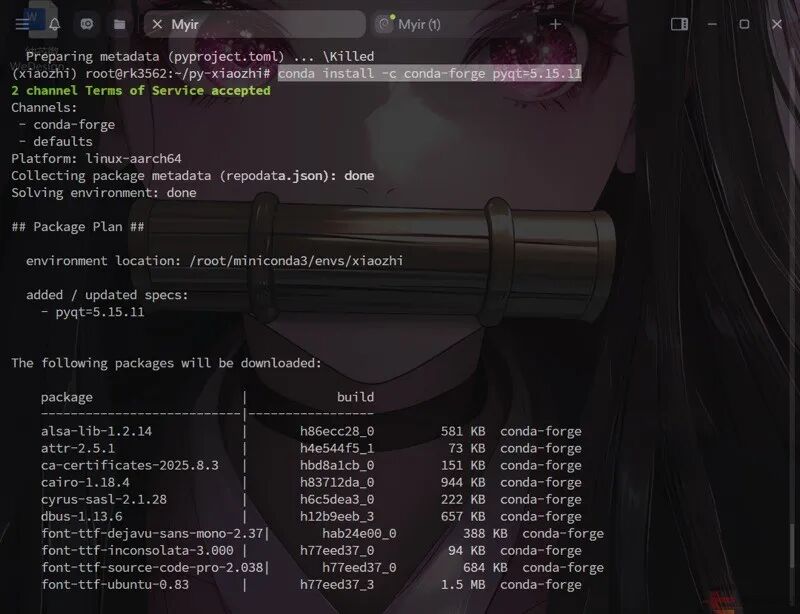
For other packages, try to find a domestic source with a good network to install them.
pip install -r requirements.txt -i https://mirrors.cloud.tencent.com/pypi/simple/
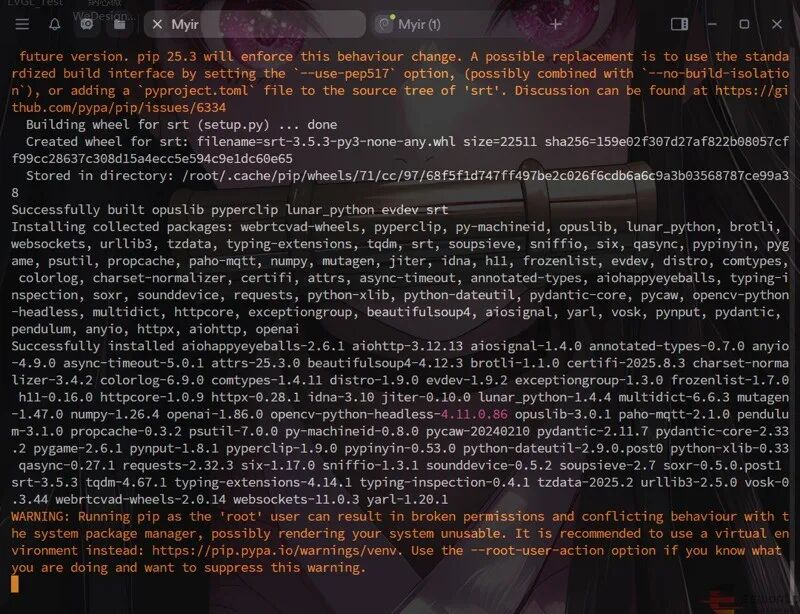
Here I used the Tencent source, and successfully installed many packages that have compiled versions available for direct installation. Next, let’s check if the key dependencies are installed correctly.
# Check key dependencies

python -c "import sounddevice; print('SoundDevice OK')"

python -c "import opuslib; print('Opus OK')"

python -c "import PyQt5.QtCore; print('PyQt5 OK')"
If the following content is displayed, it should be installed correctly.

Then enter the command in the command line to start Xiao Zhi AI, and register on the Xiao Zhi official website to activate the device.
python main.py
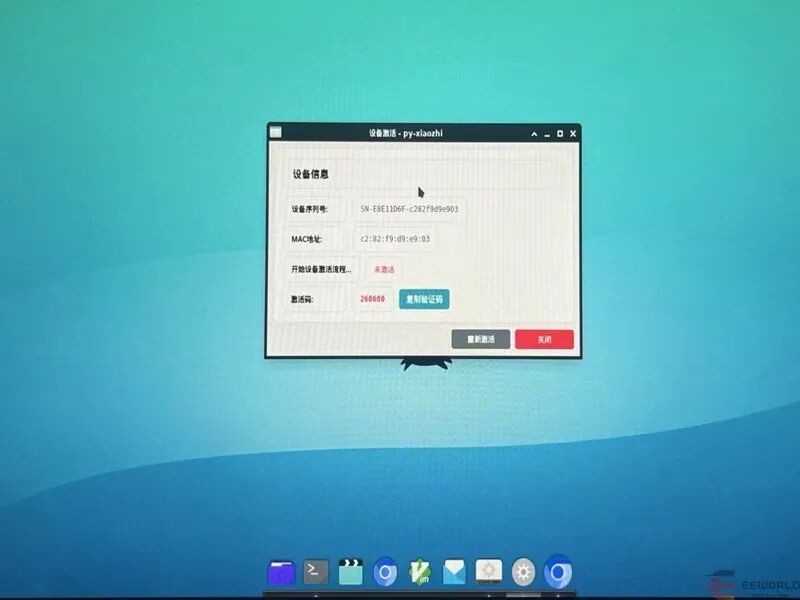
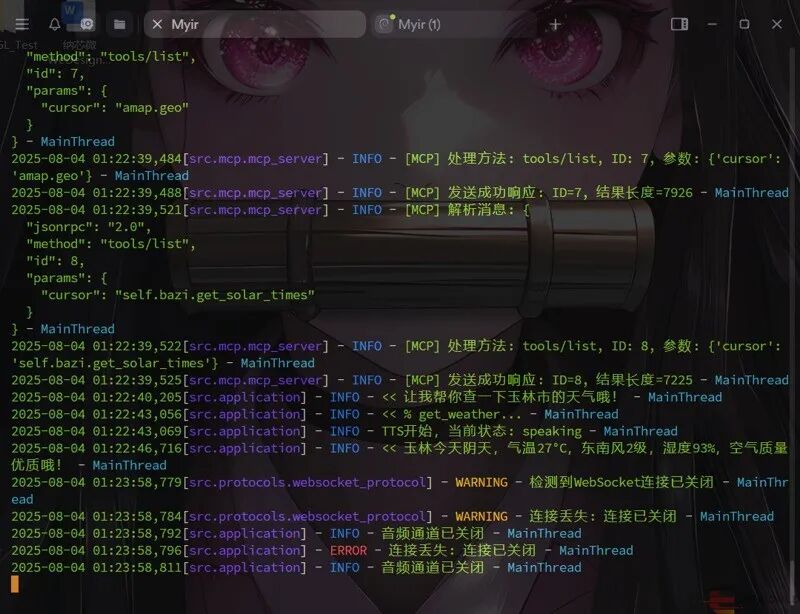
Since this development board seems to not support HDMI audio output, and I don’t have speakers to connect (there seems to be some issues with audio output as well), I can’t test the voice-related content. I can only manually input some chat content and get some responses online.
DIY a Xiao Zhi Robot
Author: dcexpert
Original link:https://www.eeworld.com.cn/aXjjv1G
According to the DIY materials, I replicated a Xiao Zhi robot using the oldest esp32 development board.
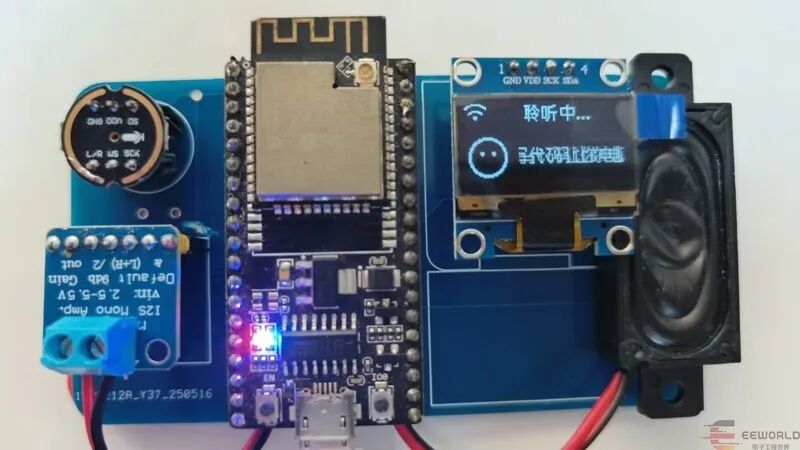
Demonstration video:
Followed Follow Replay Share Like <!– –> Watch MoreRobot Development Circle
0/0
00:00/00:17Progress Bar, 0 percentPlay00:00/00:1700:17Full Screen Playback Speed 0.5x 0.75x 1.0x 1.5x 2.0x Ultra Clear Smooth
Continue Watching
DIY Xiao Zhi Robot Using the Most Popular Domestic Board
Reprint, DIY Xiao Zhi Robot Using the Most Popular Domestic BoardRobot Development CircleAdded to Top StoriesEnter comment Video Details Anson Semiconductor Training CampUnlock Core Technologies of Autonomous Mobile Robots (AMR), Four Steps to Master AMR Core Technologies!“Overcoming Design Challenges of Autonomous Mobile Robots”“Robot System Solution Guide”“Demonstration of Autonomous Mobile Robot Work”Hands-on Practice Available: ☞Web Designer + Design Tools ☞Interactive Block Diagram of Intelligent Mobile Robot ☞SPICE Model ToolLearning completion also allows you to draw Bluetooth speakers, body fat scales, and other gifts.Scan the QR code below to participate in the event!
· END ·
Follow EEWorld's subscription account: "Robot Development Circle"
Reply "DS" to receive the complete version of "DeepSeek: From Beginner to Pro"

Scan to add the assistant and reply “Robot”
Join the group to exchange experiences face-to-face with electronic engineers