DIY Boston Dynamics-Inspired Robot with Raspberry Pi: A Comprehensive Guide

DIY Boston Dynamics-Inspired Robot with Raspberry Pi: A Comprehensive Guide
What to do if you can’t afford the $530,000 Boston Dynamics robot dog?
How about using an open-source project to DIY one with Raspberry Pi, costing less than 4000 yuan?
Doesn’t it feel like you have a Boston Dynamics dog?
DIY Boston Dynamics-Inspired Robot with Raspberry Pi: A Comprehensive Guide
Let’s start with a warm-up exercise to demonstrate the flexible joints:
DIY Boston Dynamics-Inspired Robot with Raspberry Pi: A Comprehensive Guide
Through three-axis body posture control, this Raspberry Pi version of the Boston Dynamics dog can achieve two modes of movement.
One is a jogging posture. In this four-phase gait, the two legs diagonally opposite move simultaneously, achieving a faster speed.
DIY Boston Dynamics-Inspired Robot with Raspberry Pi: A Comprehensive Guide
The other is a walking posture. This eight-phase gait, combined with body movement, helps maintain the balance and stability of the robot dog.
DIY Boston Dynamics-Inspired Robot with Raspberry Pi: A Comprehensive Guide
This robot dog was built by a foreign guy named Michael Romanko.
Are you feeling a bit excited?
Then keep reading, grab this detailed open-source tutorial, and having your own mini Boston Dynamics dog is not a dream. (Dog head)
DIY Boston Dynamics-Inspired Robot with Raspberry Pi: A Comprehensive Guide

Hardware costs less than 4000 yuan

This Raspberry Pi robot dog is based on the open-source ThingVerse Spot Micro framework. The shell parts are made using a 3D printer with a 0.6 nozzle.
DIY Boston Dynamics-Inspired Robot with Raspberry Pi: A Comprehensive Guide
The software part is implemented on a Raspberry Pi 3B computer running Ubuntu 16.04.
So first, you need to prepare a Raspberry Pi 3B development board worth about 230 yuan.
DIY Boston Dynamics-Inspired Robot with Raspberry Pi: A Comprehensive Guide
The control components include a servo driver PCA9685 priced at less than 30 yuan with an I2C interface.
And 12 servo motors PDI-HV5523MG, priced at about 70+ yuan each.
Additionally, a 16×2 I2C interface LCD display is required.
For the battery, a 2s 4000mAh lithium battery is used, directly connected to the power servo, costing about 160 yuan.
The voltage regulator used is HKU5 5V/5A UBEC, powering the Raspberry Pi, LCD panel, and PCA9695 control board, costing about 45 yuan.
The total cost, including the 3D printer, is less than 4000 yuan, even lower than the cost of Stanford’s low-cost open-source quadruped robot Pupper (600-1000 USD).
DIY Boston Dynamics-Inspired Robot with Raspberry Pi: A Comprehensive Guide
Stanford Pupper
DIY Boston Dynamics-Inspired Robot with Raspberry Pi: A Comprehensive Guide

Detailed tutorial down to every detail

Mike’s assembly tutorial is quite brief, but he provided a reference to a “mini robot dog AI” (SpotMicroAI) community.
The SpotMicroAI tutorial is truly “hand-holding”, with the engineer who wrote the tutorial providing every detailed step for assembling the robot dog, even including how to SSH into the Raspberry Pi, striving for everyone to understand.
DIY Boston Dynamics-Inspired Robot with Raspberry Pi: A Comprehensive Guide
First, install the operating system on the Raspberry Pi, it is recommended to install PINN, which is an enhanced version of the NOOBS operating system installer.
After installation, the system comes with SSH and VNC, no need to connect a keyboard and mouse to the Raspberry Pi, and you can debug it remotely.
DIY Boston Dynamics-Inspired Robot with Raspberry Pi: A Comprehensive Guide
Successfully connected to Raspberry Pi via VNC
Select to install Raspbian Lite from the many operating system options in PINN. After that, disconnect the VNC connection and connect to the Raspberry Pi entirely via SSH.
DIY Boston Dynamics-Inspired Robot with Raspberry Pi: A Comprehensive Guide
The Raspberry Pi system comes with FTP. To facilitate beginners in transferring files between the computer and Raspberry Pi, it is recommended to install the FileZilla software.
Enter the Raspberry Pi’s IP address, username, password, port 22, and click Quickconnect to connect to the Raspberry Pi’s file system. Now, you can drag and drop files from SpotMicroAI as needed.
DIY Boston Dynamics-Inspired Robot with Raspberry Pi: A Comprehensive Guide
Next comes the most critical step, installing the robot dog control software. To simplify the installation, the author has written a script that automates the installation process:
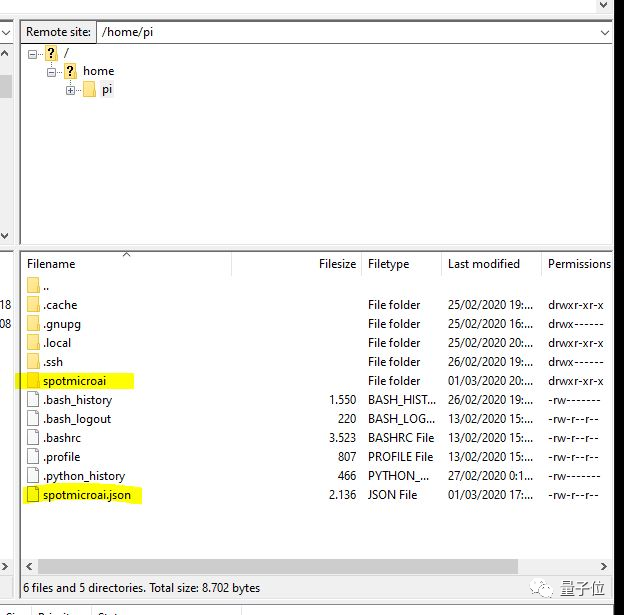
ssh [email protected] https://gitlab.com/custom_robots/spotmicroai/basic-runtime/-/raw/master/utilities/self_install.sh | bash
Then start the I2C communication bus. Open the terminal and run the following command:
sudo raspi-config
Then make the following changes from the display options: Interfacing options → Enable I2C
DIY Boston Dynamics-Inspired Robot with Raspberry Pi: A Comprehensive Guide
Next, connect all the hardware to the Raspberry Pi as shown in the image below:
DIY Boston Dynamics-Inspired Robot with Raspberry Pi: A Comprehensive Guide
The 3D printing files for the robot dog’s shell are also included. The author recommends using a 0.6mm nozzle with a layer height set to 0.3mm to maximize printing speed.
DIY Boston Dynamics-Inspired Robot with Raspberry Pi: A Comprehensive Guide
After completing the hardware assembly, it’s time for software debugging.
First, download the default configuration file in JSON format:
https//gitlab.com/custom_robots/spotmicroai/basicruntime/-//blob/master/spotmicroai.default, and place that file in the user’s home directory.
Open the calibration tool and click to calibrate the 12 servos, finding the initial position of the motors when the robot dog is at rest.
cd ~/spotmicroai/calibration./calibration.sh
DIY Boston Dynamics-Inspired Robot with Raspberry Pi: A Comprehensive Guide
After calibration, the robot dog can perform various actions.
DIY Boston Dynamics-Inspired Robot with Raspberry Pi: A Comprehensive Guide
By the way, what is the display screen installed on the tail of the robot dog for? It helps us quickly see the current status of the robot dog.
DIY Boston Dynamics-Inspired Robot with Raspberry Pi: A Comprehensive Guide
For example, on the panel above, we can see the current temperature of the Raspberry Pi CPU, the connection status with the external controller, the status of the servo control board, and more.
Thus, the mini robot dog is complete. If you not only want to assemble it but also want to learn more advanced development tutorials, you can check the content in Extra.
DIY Boston Dynamics-Inspired Robot with Raspberry Pi: A Comprehensive Guide

Next steps

Currently, Mike’s mini robot dog can only perform simple actions, and his next plan is to make it as intelligent as Boston Dynamics’ robot dog. Mike’s future goals are:
1. Add laser radar to achieve simple 2D mapping of the room through SLAM, just like the original Boston Dynamics robot dog.
Now someone has already realized Mike’s first goal:
DIY Boston Dynamics-Inspired Robot with Raspberry Pi: A Comprehensive Guide
2. Develop an automatic movement module to guide the robot to perform simple tasks around the sensed 2D environment. For example, navigating in a room and avoiding obstacles.
3. Create software modules that combine a camera or web camera for basic image classification. For example, perceiving the closing and opening of a fist, allowing the robot to respond to certain actions, achieving gesture control.
DIY Boston Dynamics-Inspired Robot with Raspberry Pi: A Comprehensive Guide

Netizens: Let’s do it

DIY “Boston Dynamics dog” by yourself, such practice has even been praised by the Raspberry Pi official.
DIY Boston Dynamics-Inspired Robot with Raspberry Pi: A Comprehensive Guide
Netizens expressed: “This is really cool.”
Some are eager to start making it themselves.
DIY Boston Dynamics-Inspired Robot with Raspberry Pi: A Comprehensive Guide
So, let’s do it?
Reference links:
https://www.raspberrypi.org/blog/mini-raspberry-pi-boston-dynamics-inspired-robot/
https://github.com/mike4192/spotMicro#Overview
https://gitlab.com/custom_robots/spotmicroai

DIY Boston Dynamics-Inspired Robot with Raspberry Pi: A Comprehensive GuideDIY Boston Dynamics-Inspired Robot with Raspberry Pi: A Comprehensive GuideDIY Boston Dynamics-Inspired Robot with Raspberry Pi: A Comprehensive Guide

Recently, the WeChat public account’s push mechanism has changed again. Everyone canlight up“Looking”, or set the poisonous tongueasStar Mark” to prevent disconnection.DIY Boston Dynamics-Inspired Robot with Raspberry Pi: A Comprehensive Guide

DIY Boston Dynamics-Inspired Robot with Raspberry Pi: A Comprehensive Guide

Poisonous tongue technology l ID: dushekeji

Long press the QR code to follow

DIY Boston Dynamics-Inspired Robot with Raspberry Pi: A Comprehensive Guide

MORE | More exciting articles

Are today’s sweeping robots still “artificially intelligent idiots”?

Not to brag, but seeing luxury homes is just too cool!

Post-00s college students launch rockets at home, making everything from engines to software themselves, “inspired by Musk in middle school”

Infidelity is wilder than you think for Chinese people

Good article! Must like + look

Leave a Comment

×