WireMock is a widely used and open-source HTTP service mocking tool, suitable for various scenarios such as interface automation, unit testing, and integration testing. WireMock can run as a standalone server or be embedded in test code, supporting multi-language SDKs and multiple protocols such as REST and SOAP. The core advantages of WireMock lie in its flexible request matching, dynamic responses, fault injection, and recording playback, which can enhance testing efficiency and reliability.
1. Setting Up and Using WireMock
1. Download the WireMock JAR file
You can also download the latest JAR file from:
http://repo1.maven.org/maven2/com/github/tomakehurst/wiremock/1.57/wiremock-1.57-standalone.jar
2. Run the command
After downloading the JAR file, run the following command: java –jar wiremock-1.57-standalone.jar –port 9999. For Windows systems, navigate to the JAR file location and run the command. You should see the following:
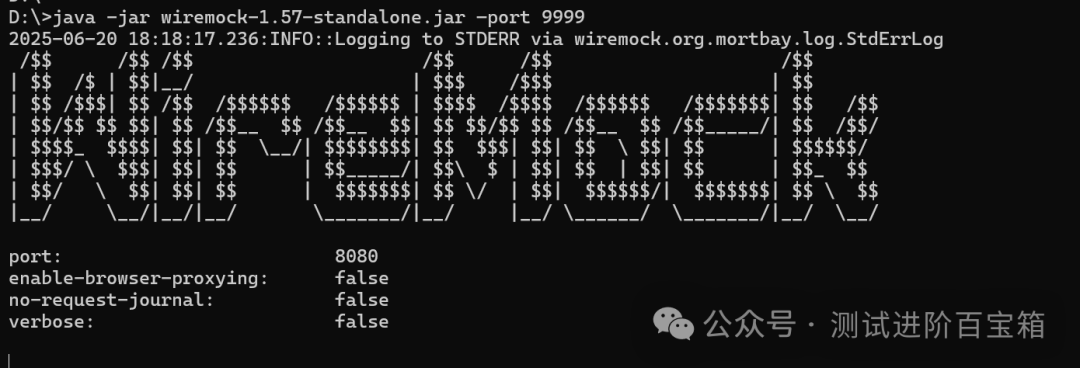
If the output indicates that WireMock has executed successfully, the port shown in the image is 8080, which does not match the set port of 9999. The port should be based on the successful execution command.
After a successful startup, WireMock will generate two folders, mappings and __files, in the current directory, which store the stub configurations and response files, respectively.
3. Creating a Mock Service
The mock service is implemented by creating a stubMapping. This section mainly discusses defining request responses through Java code, adding request-response rules in the code.
3.1 Create a Maven project and add the dependency in pom.xml:
<dependency>
<groupId>com.github.tomakehurst</groupId>
<artifactId>wiremock</artifactId>
<version>1.57</version>
<scope>test</scope>
</dependency>
3.2 Create a mock service using Java code
Write the request and response rules in the Maven project in IDEA, as shown in the code below:
package com.jd.exercise;import static com.github.tomakehurst.wiremock.client.WireMock.*;public class Test1 {public static void main(String[] args){// Connect to port configureFor(8080);// Remove old rules //removeAllMappings // Request-response stubFor(get(urlPathEqualTo("/user/1")) .willReturn(aResponse() .withStatus(200) .withBody("{\"id\":1,\"name\":\"jack6201830\"}"))); }}3.3 After successfully running the main function in the code, enter the following in the browser::http://127.0.0.1:8080/user/1, and the response will be as follows:
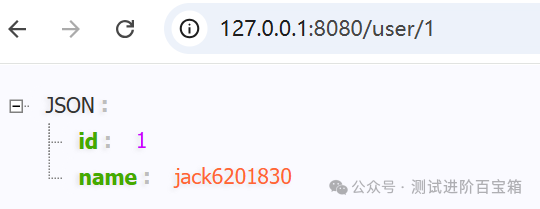
After completing the above steps, the mock service will be effective,/user/1 is the HTTP interface path mocked in the code, and the response is also defined in the codewithBody(“{\”id\”:1,\”name\”:\”jack6201830\”}”} as the body value.
2. Practical Cases of WireMock
1. Simulating RESTful API Interfaces
WireMock can simulate various API requests such as GET, POST, PUT, DELETE, supporting paths, parameters, request bodies, and headers. The main code can refer to section 3.2, as shown below:
stubFor(get(urlPathEqualTo(url))
.willReturn(aResponse()
.withStatus(200)
.withHeader(“Content-Type”, “application/json”)
.withBody(data)));
Using the above method, a complete API simulation environment can be quickly set up locally, supporting parallel front-end and back-end development and automated mock testing.
Further Optimization:1.1 Generally, data is maintained in files located in the src/main/resource directory, such as creating a user.txt file, as follows:
{ "id": 1, "name": "jack", "age":18 }1.2 Add the following dependencies:
<dependency> <groupId>org.springframework</groupId> <artifactId>spring-core</artifactId> <version>4.3.10.RELEASE</version> </dependency> <dependency> <groupId>commons-io</groupId> <artifactId>commons-io</artifactId> <version>2.6</version> </dependency>1.3 Modify the code as follows:
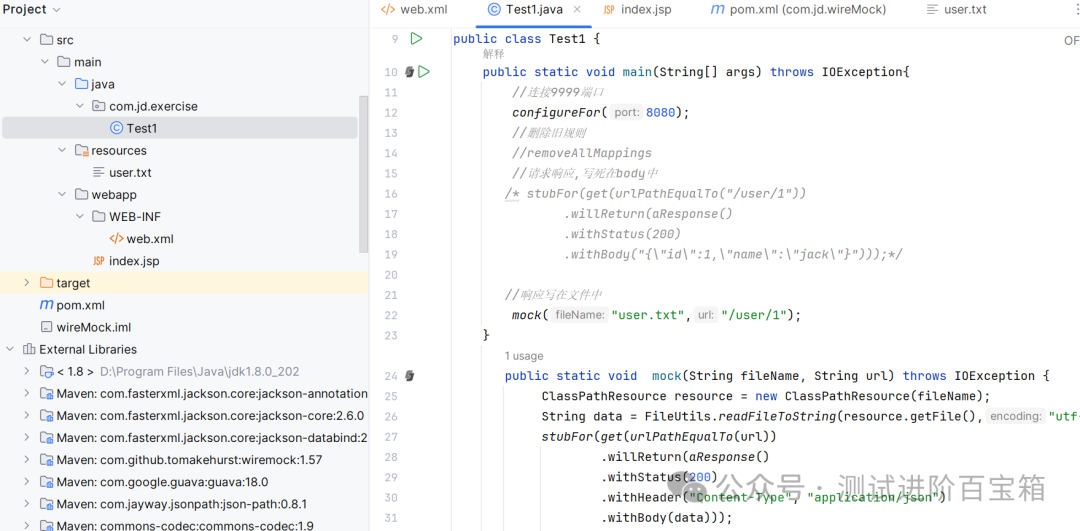
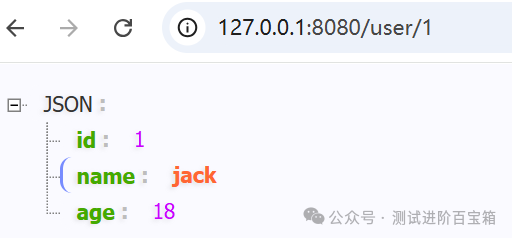
package com.jd.exercise; import org.apache.commons.io.FileUtils; import org.springframework.core.io.ClassPathResource; import java.io.IOException; import static com.github.tomakehurst.wiremock.client.WireMock.*; public class Test1 { public static void main(String[] args) throws IOException{ // Connect to port 8080 configureFor(9999); mock("user.txt","/user/1"); } public static void mock(String fileName, String url) throws IOException { ClassPathResource resource = new ClassPathResource(fileName); String data = FileUtils.readFileToString(resource.getFile(),"utf-8"); stubFor(get(urlPathEqualTo(url)) .willReturn(aResponse() .withStatus(200) .withBody(data))); }}1.4 After successfully running the main function, accesshttp://127.0.0.1:8080/user/1, and the following will appear:
2. Simulating Failures and Delays
In microservices, distributed systems, and external dependencies, failures and delays are common risks. WireMock can be used to simulate these scenarios, validate the system’s fault tolerance and degradation strategies, and conduct exception testing. Add the following code at the position of step 1.3:
withFixedDelay(5000)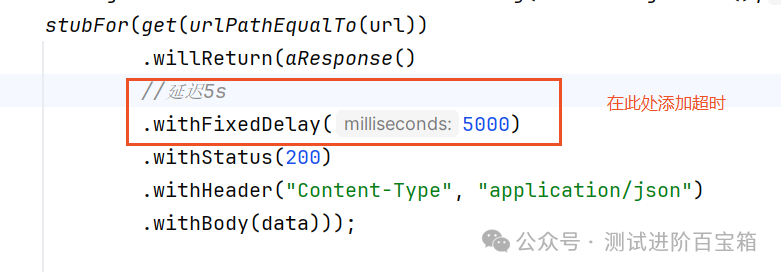
3. Traffic Recording
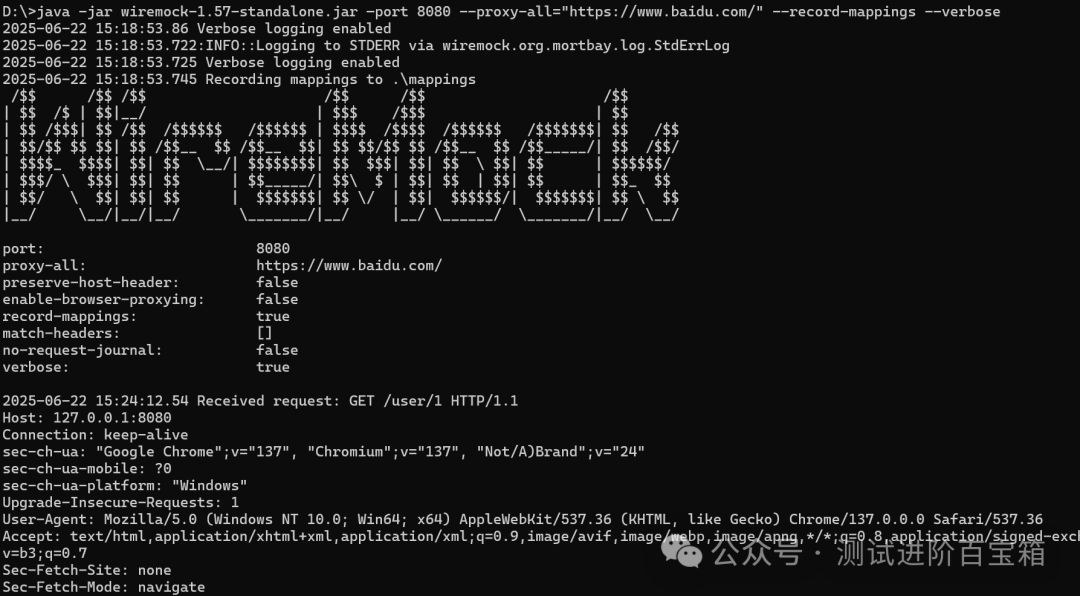
3.1 Start WireMock in recording mode
java -jar wiremock-standalone-3.3.1.jar \
–port 8080 \ # WireMock server port
–proxy-all=”https://www.baidu.com” \ # Proxy to the real API address
–record-mappings \ # Enable recording
–verbose # Optional: View detailed logs After successful execution, the following will appear:
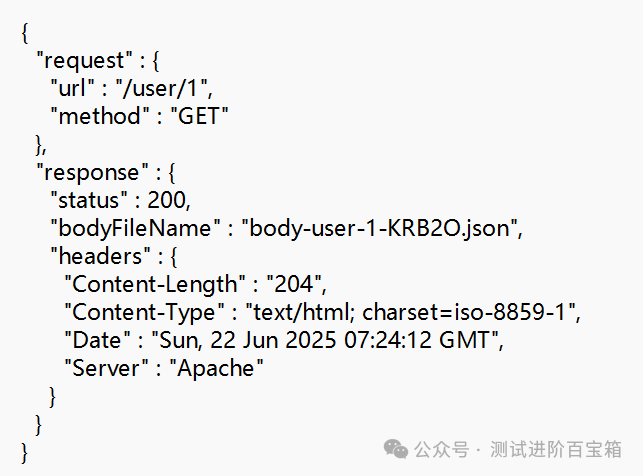
3.2 Enter the address in the browser, such as: http://127.0.0.1:8080/user/1, at this time, the traffic will be forwarded to the real API and recorded. After recording, stub rules and response files will be generated in the WireMock service directory under the mappings and __files directories. The structure is as follows:
wiremock/
|–mappings/
|——–mapping-user-1-KRB2O.json # Generated stub rule
|–__files/
|——–body-user-1-KRB2O.json # Recorded response body, can be modified
The content of the mapping-user-1-KRB2O.json file is as follows:
The content of the body-user-1-KRB2O.json file is as follows:
3.3 Restart the WireMock service, enter the command java -jar wiremock-1.57-standalone.jar –port 9999
3.4 Revisit http://127.0.0.1:8080/user/1, and the following will be generated, with the response content matching the body-user-1-KRB2O.json file content

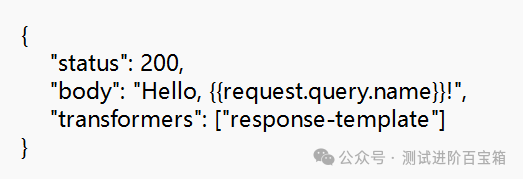
3.5 Traffic recording has many advanced features, such as filtering requests, custom storage paths, and response file templating. Those interested can explore further.
In conclusion, WireMock is an efficient HTTP simulation tool with core functionalities including request matching, dynamic responses, fault simulation, and traffic recording. In practice, it is recommended to use HTTPS to ensure security, integrate with CI/CD automation, and manually check recorded stubs to avoid sensitive data leakage.
Everyone is encouraged to study and explore more. Continuous learning, continuous output, and continuous sharing.