Everyone knows that when a mobile hard drive, flash drive, or SD card has files deleted or lost due to accidental operations or other reasons, software methods may be able to recover all or part of the files. However, not just any software will necessarily recover the files. Many times, one software may not work, but another may. Therefore, we need to master several software options and solutions, trying different methods to resolve the issue when it arises.
Tip: Precautions Before Recovering Files
When a disk or storage medium has issues, you often encounter situations where the system prompts that it is RAW or another file system is unformatted, asking whether to format it. This is because the file system error prevents it from being recognized by the current operating system. At this point, do not follow the system’s prompt to format the drive. Do not hold onto the idea that recovery software can restore formatted media; formatting indiscriminately will only cause further data damage. Furthermore, file recovery must be based on the disk being recognized by the system or recovery tools. If the hardware of the mobile device is physically damaged, the drive letter cannot be recognized, and software recovery methods will be ineffective.
1. Simple Operation: Six Steps to Recover Data
When data is lost, everyone feels anxious and hopes to recover it as quickly as possible. The PhotoRescue Pro software caters to this need. After running the software, first go to “Menu→Setting” to access the settings window, click the Recover option to set the target path for storing recovered files (make sure this folder is not selected as the problematic drive).
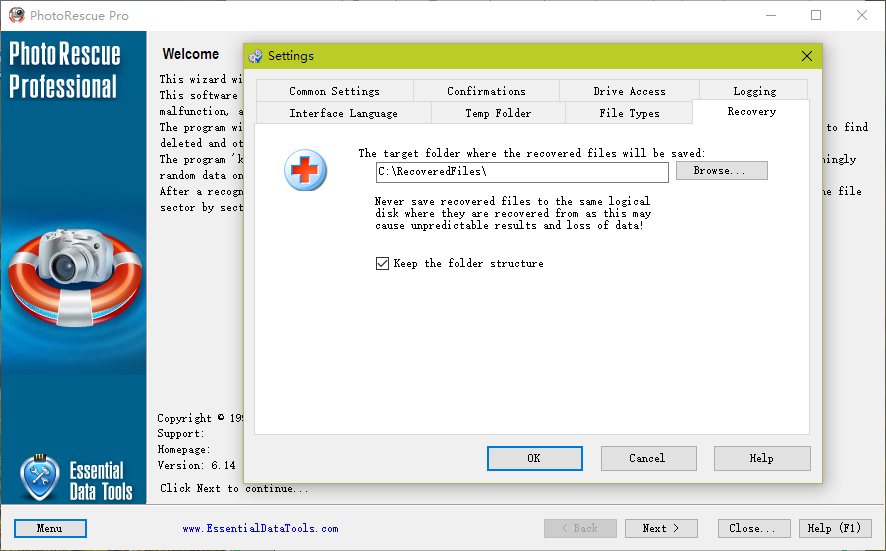
(Figure 1)
Next, follow the six-step wizard to select the drive letter to recover, perform an automatic file system scan, select the content to recover from the listed scanned file structure, and click the Recover button to restore.
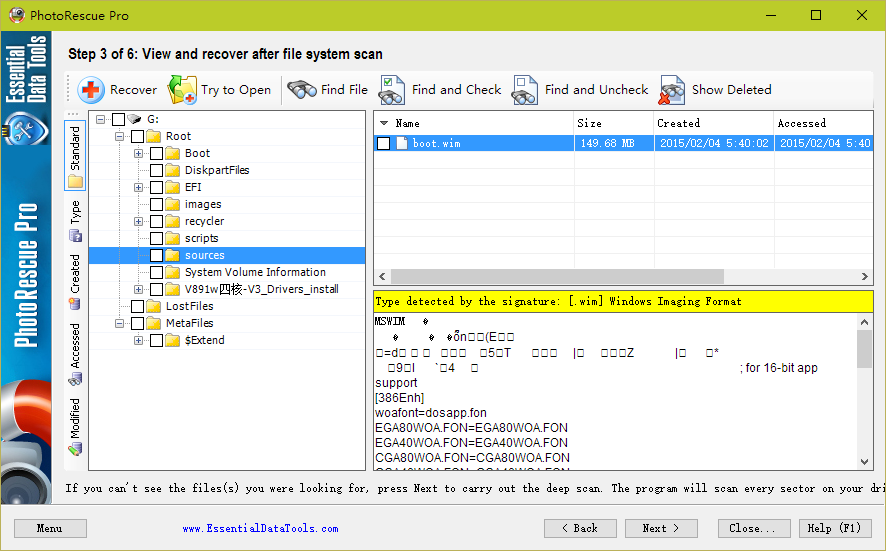
(Figure 2)
Then, select the file types and scan the drive sectors, finally providing the scan recovery results. Click the Explore recovered files button to view the recovered files.
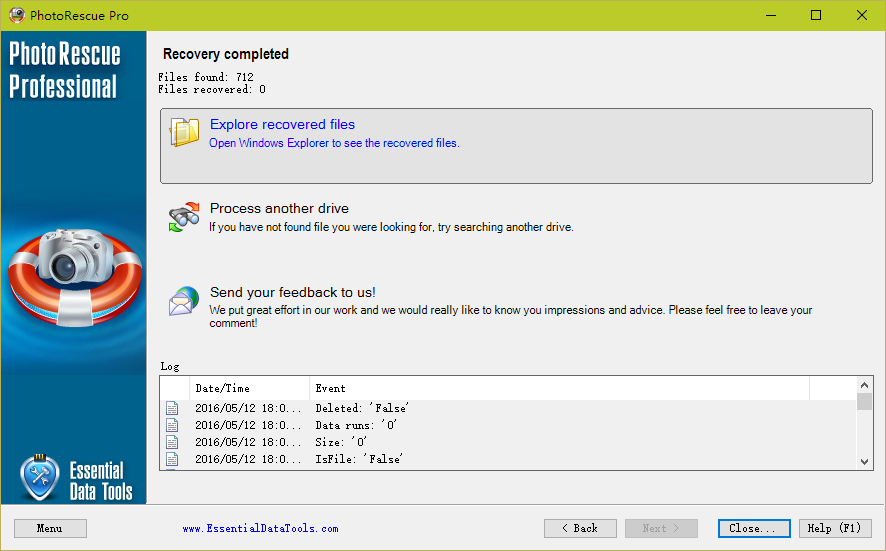
(Figure 3)
Tip:
When using the PhotoRescue Pro version, if you do not enter a registration code and use it in Demo mode, you can only recover files under 64KB. To enhance usability, please choose an appropriate channel to register and remove file size limitations.
2. Easier to Use: Six Steps in Three Moves
If you find the above software requires registration and has slightly more steps, you can also choose FinalData software for recovery.
Run FinalData as an administrator and open it, click the first button on the toolbar, and select the drive to recover in the dialog box that opens.
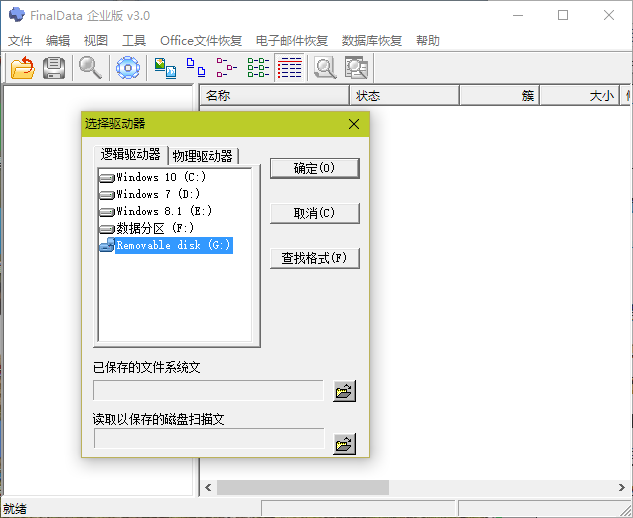
(Figure 4)
Next, select the location to save the recovered files, ensuring it is not the drive where the lost files were located.
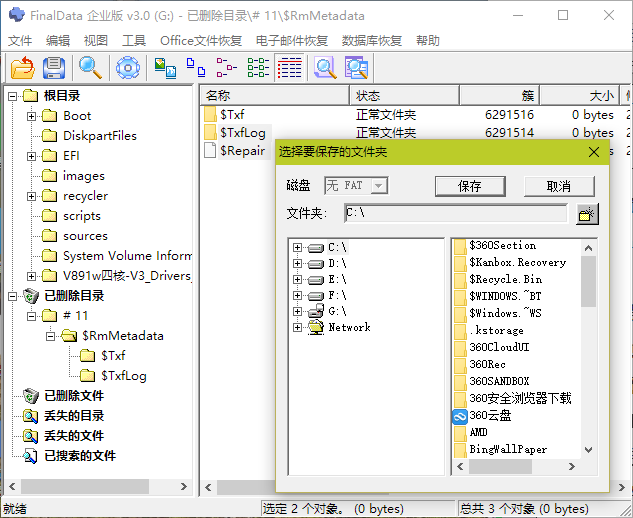
(Figure 5)
Select the cluster range to search, and after scanning, choose the content to recover from the deleted directories or files, then click the second button on the toolbar to recover.
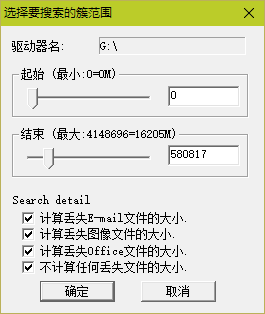
(Figure 6)
FinalData is suitable for file recovery in cases where the media’s file allocation table or root directory has been damaged by viruses, physical faults have made the file allocation table or media root directory unreadable, and when all files are lost after the media has been formatted. Even if data files have been partially overwritten, FinalData can recover the remaining parts of the files, which may be particularly useful for plain text code, articles, etc.
Tip:
The advantage of FinalData software is its high recovery rate. However, the downside is that the recovered files are not in a specific directory structure and need to be organized manually. Additionally, a full disk scan takes a lot of time, but you can shorten the time by specifying a range.
3. All Advantages: Effective and Fast
If you want both flexible operation and fast recovery speed, you can choose Recuva, which allows for both wizard-style operation and window-based data recovery. If you do not need the wizard window, you can click “Cancel” after the first run and choose “Do not show this wizard at startup.”
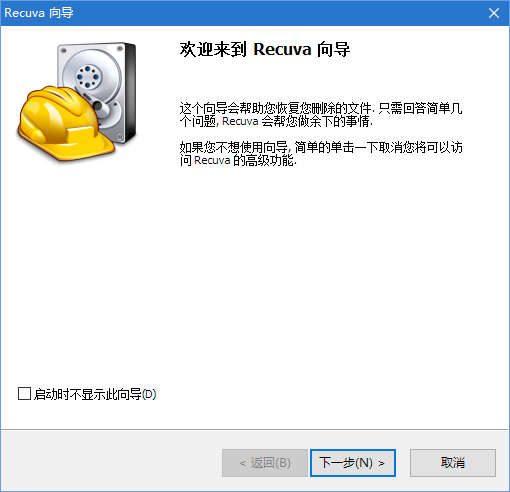
(Figure 7)
After switching to window operation, select the partition to scan, choose the file scanning method (you can also select the file types to scan). Under the file scanning method, you can also choose to scan by file content and input keywords.
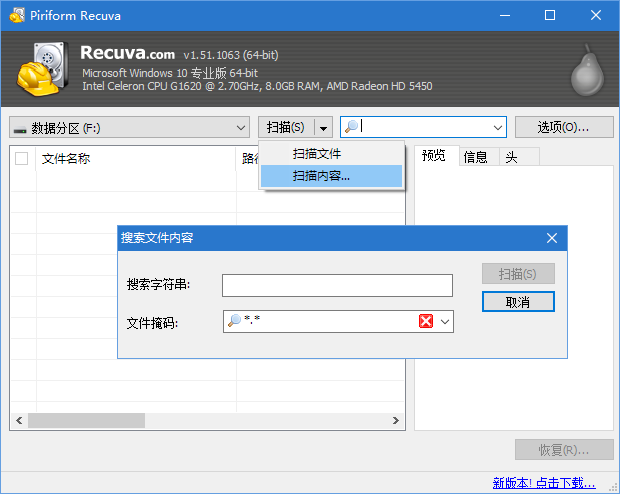
(Figure 8)
If you want to support more media, you can select options including CDs, mobile devices, SSD drives, etc., from the “Options→Drive” list. Additionally, by using the “Add→Context Menu” option, you can add right-click recovery menu commands to the Explorer and Recycle Bin, making it very convenient to restore deleted files by right-clicking in folders or the Recycle Bin. Furthermore, under the “Actions” tab, you can choose to recover files from hidden system directories, recover files from reformatted disks, and perform deep scans for special cases. After setting the conditions and executing the scan, click the “Recover” button to proceed.