1. Introduction
I have been working with Freescale/NXP’s I.MX6 processor for over two years. As someone who initially played with MCUs, I faced many challenges. The most frustrating aspect was the official Yocto-based development environment, which required an enormous amount of space, specific versions of Ubuntu, and even the ability to bypass internet restrictions. Additionally, understanding the Yocto architecture was quite complex. After two attempts, I was ready to give up on it entirely. However, due to work requirements, I had to face the task of compiling the filesystem once again. I happened to find online that someone had successfully used Buildroot, so I tried it and succeeded with minimal effort. Buildroot is significantly simpler than Yocto. I wrote this article to document the process, hoping it will help others.
2. Environment Overview
Here is a unified explanation of the hardware and software environment involved in this article.
2.1. Hardware
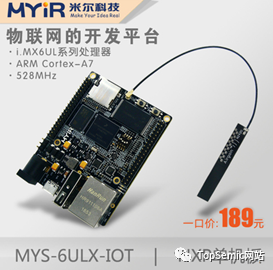
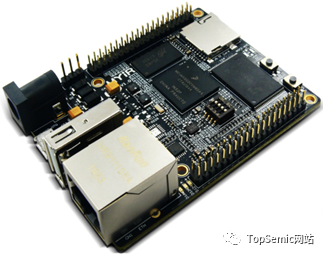
1) I used a small board from Meil Technology, the I.MX6ULL. It was given to me for free during an online event. The board is compact and well-designed, very similar to the previous Freescale Freedom development board, making it convenient for carrying and use. The content of this article is also applicable if you are using other I.MX series.
2) A Micro USB cable is used to power the small board and also for downloading programs, which is a great design as it eliminates the need for a separate power supply.
3) A USB to TTL serial cable is used to connect to the debug serial port for system login.
4) An Ethernet cable is used to connect the PC and the board to verify ssh and scp functionality.
2.2. Software
1) http://down.myir-tech.com/MYS-6ULX/, this is the official link provided by Meil for the board documentation, which includes Uboot, Kernel, Yocto-related files, download tools, documents, etc.
Since this article focuses on creating the root filesystem with Buildroot, I won’t be introducing other related content. The provided Mfgtool package already includes the Uboot, Kernel, device tree files, and root filesystem that match the board. I will just be replacing the original root filesystem generated by Yocto.
2) Buildroot, the official download address is: https://buildroot.org/downloads/
I used buildroot-2019.02.tar.gz, which is a relatively new version. I extracted it to the ~ (current user’s home directory) in Ubuntu.
3) Toolchain, I used Linaro’s gcc-linaro-7.3.1-2018.05-x86_64_arm-linux-gnueabihf.tar.xz version, which I extracted to the /opt directory in Ubuntu.
The official download link for the toolchain:
Regarding the toolchain, I want to mention a few points. The first point to note is that Buildroot can use an already installed toolchain, such as Linaro, but it does not support toolchains generated by Yocto. For the specific reason, please refer to the following English description.
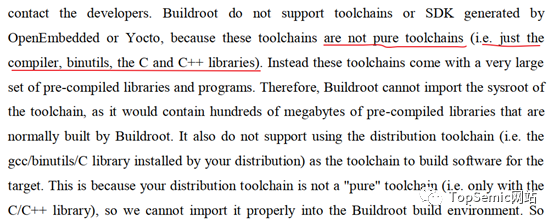
I initially used the toolchain produced by Yocto to compile, but I encountered a sysroot error, so please pay attention to this.
As for why I chose this version of the toolchain, it is because a module manufacturer specified a required gcc version for the SDK of their communication module, so I had to choose this version accordingly.
3. Creating the Buildroot Root Filesystem
The detailed steps are as follows:
1) Enter the corresponding directory after extracting Buildroot
cd buildroot-2019.02
2) Generate the .config file using the default configuration file,
sudo make imx6ulevk_defconfig
Note 1: The imx6ulevk_defconfig file is located in the /buildroot-2019.02/configs directory, and you need to choose it based on your specific chip model. Since I am using the 6ULL, I used this one. If you are using I.MX7, you should choose the one starting with imx7.
Note 2: I encountered a compilation error without sudo, so I added sudo. You can try without sudo first.
3) Customize the configuration using make menuconfig
sudo make menuconfig
The following interface pops up:
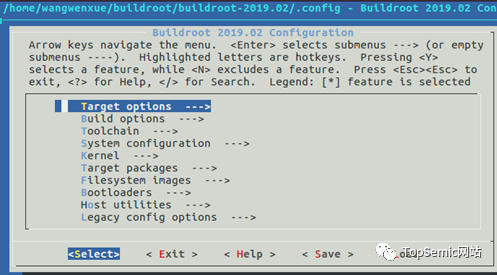
Here is a brief introduction to the configuration options in Buildroot:
-
Target options
Target options include processor architecture, binary file format, architecture series, ABI, floating-point operations, and instruction sets.
For the I.MX6ULL I am using, its CPU architecture is cortex-A7 architecture.
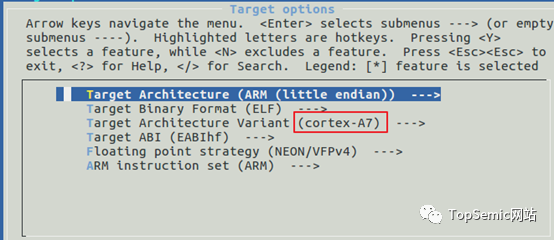
If you are using I.MX6D, then it corresponds to the cortex-A9 architecture.
-
Build options
Build options related to compilation settings.
I did not make any modifications and used the default settings.
-
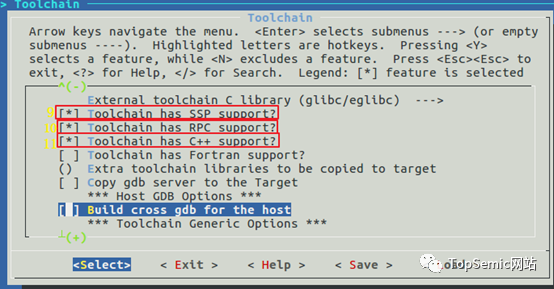
Toolchain
Cross-compilation toolchain. Choose which compilation chain to use, including those provided by Buildroot and external ones. For my situation, I need to modify the following items:

Note 1: The method to check the External toolchain gcc version marked 6 above is: first export PATH=$PATH:/opt/gcc-linaro-7.3.1-2018.05-x86_64_arm-linux-gnueabihf/bin
Set the environment variable, then use arm-linux-gnueabihf-gcc -v to check.
arm-linux-gnueabihf-gcc -v
The result is as follows:

Of course, the version number in the name of the cross-compilation chain we downloaded is 7.3.1, which is this gcc version, but checking this way gives more assurance.
Note 2: The External toolchain kernel header series can be found in the version.h file in the toolchain directory, my toolchain is specifically located at: ./arm-linux-gnueabihf/libc/usr/include/linux/version.h. If you don’t know where it is, it’s easy to find; just enter your cross-toolchain directory and use the find command to locate it quickly.
find -name version.h
After finding the file, open it to check; it contains:
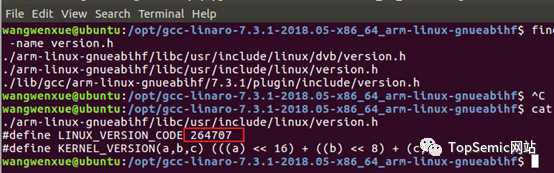
You also need to use a calculator to convert this decimal to hexadecimal, 40A03, then convert the corresponding decimal version to 4.10.3 version.

-
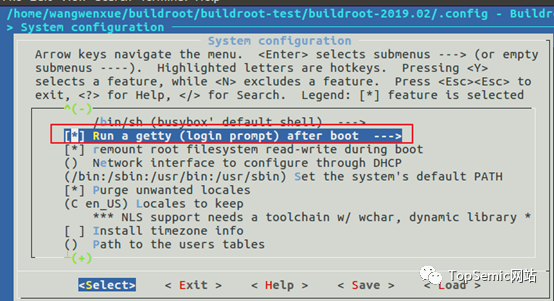
System configuration options. For example, hostname, banner, busybox, password, console, and other configurations
For example, the default hostname here is buildroot.
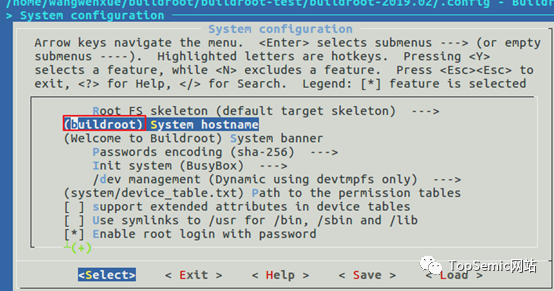
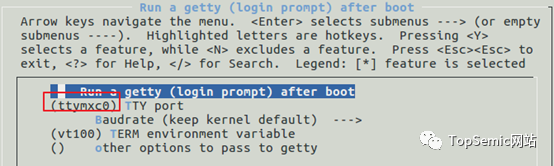
Here, you need to check whether the login serial port number is configured correctly.
-
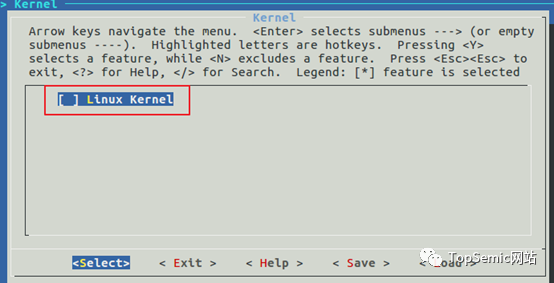
Kernel
Configure the kernel of the embedded system. Since we are not compiling the kernel in Buildroot, we do not need to select kernel-related configurations. The default is selected, and we need to deselect it.
-
Target packages
Filesystem applications and library installation packages. There are over 1800 buildroot packages available for selective installation.
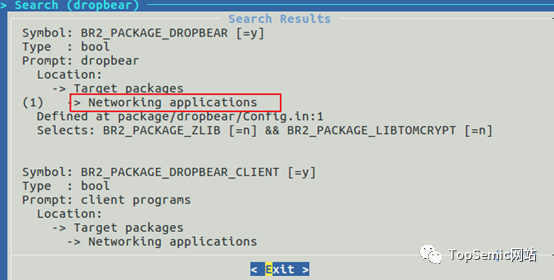
I want to use dropbear to implement ssh and scp functionality, just select it in Networking application.
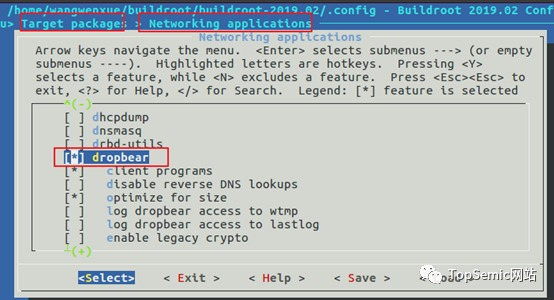
You might be curious about how I knew where this path was; let me tell you a method, use / to search for dropbear.
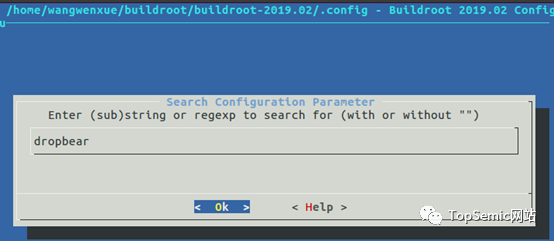
The prompt information obtained below tells you the exact location.
-
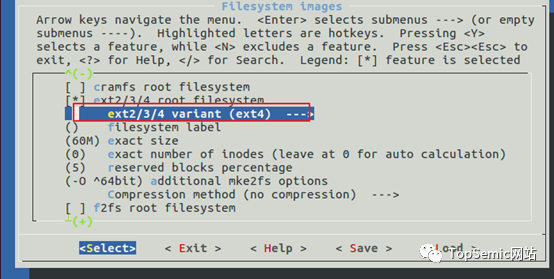
Filesystem images
Filesystem image files. Generate various types of root filesystems, such as BUIFS, EXT2/3/4, jffs2, etc.
Here, the following default configuration is used:
-
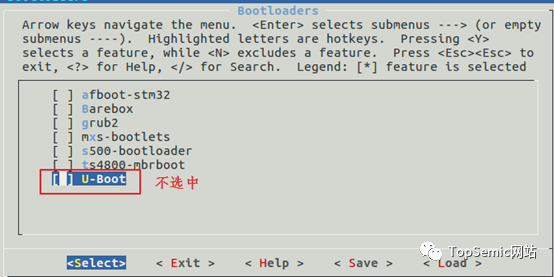
Bootloaders
System bootloaders. Include Barebox, mxs-bootlets, U-boot, etc. Since I am not compiling Uboot in Buildroot, I will not configure it. The default is selected for Uboot, so I will deselect it here.
-
Host utilities
Host tools for embedded systems. Select some required tools.
-
Legacy config options
Legacy configurations. The content that has been deleted or is no longer supported in this version of buildroot.
4) Compile using make all
sudo make all
This will compile for a while, not too long. After compiling, the output results are located in output/images, and a rootfs.tar format file will be generated.
5) Convert rootfs.tar to bz2 format file
cd output/images/ sudo mkdir rootfs sudo tar xvf rootfs.tar -C ./rootfs/cd rootfs/ sudo tar -cjf core-image-base-myd-y6ull14x14.rootfs.tar.bz2 *
Since the rootfs file format in Mfgtool is bz2 format, I first decompress it, then compress it into bz2 format file, and finally place it in the corresponding directory of Mfgtool, and then write it to the board via USB.
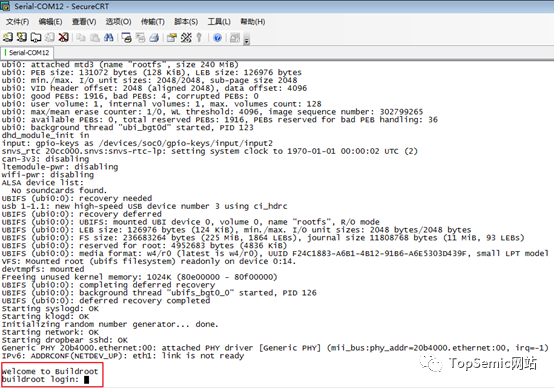
4. Result Verification
After flashing to the board and starting normally, use the USB to TTL serial cable to connect the PC and the board, and you can see that the system starts normally, with the hostname as buildroot, consistent with our configuration above.
Commands like ls/cd can also be used normally,

Now let’s take a look at the dropbear we added earlier, by executing the following steps:
1) First check the version of dropbear
dropbear –V
The following information is prompted:
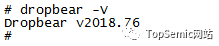
This indicates that our dropbear has been successfully installed.
2) After the Linux kernel starts, dropbear will start automatically. Verify if dropbear is listening on port 22 by typing the following command
netstat -tln

3) Use the cd command to enter the /etc/dropbear directory and generate the dropbear key with the following command
dropbearkey -t ecdsa -f dropbear_ecdsa_host_key
The prompt is as follows:

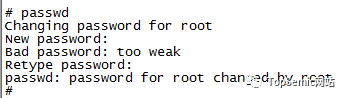
4) Use passwd to set a password for the root user on the board
passwd
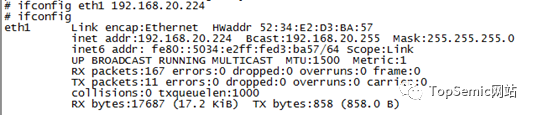
5) Connect the PC and the board with an Ethernet cable, configure the network card with ifconfig, ensuring the computer’s IP segment matches that of the board.
ifconfig eth1 192.168.20.224
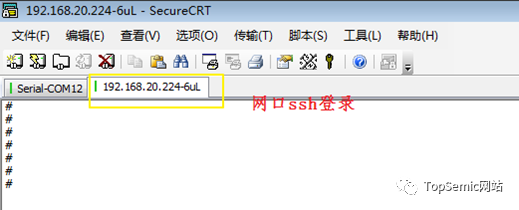
5) After this, you can use ssh and scp normally
The ssh login is successful as shown below:
SCP can also be used to conveniently upload and download files with the Windows host.
5. Conclusion
Using Buildroot is much simpler than setting up and using the Yocto environment. Its overall usage and compiling uboot, kernel are quite similar, and the generated root filesystem is also relatively lightweight. I recommend everyone to give it a try. Additionally, through this Buildroot experience, I deeply understand the convenience of using third-party tools to build systems. Previously, I didn’t understand why such tools existed. In comparison to manually building root filesystems with busybox and compiling and porting dropbear into the filesystem, using Buildroot is much more convenient. Practice makes perfect.
Related materials for this issue are available on Baidu Cloud, link:
https://pan.baidu.com/s/1LDaszSo-XPp9V_xSXQPauQ
Extraction code: 6666
It contains the cross-toolchain I used in this article, Buildroot, and the final config file I used (the source file is .config, I renamed it; if you want to use it directly, place it in your Buildroot directory and rename it to .config).

If you are interested in purchasing the development board I used here, please click the following official Taobao link:
https://s.click.taobao.com/JPXYVAw