On November 15, 2019, the Android x86 project released the first stable version of pie-x86, r1. On March 25, 2020, the second stable version was released. This article describes how to install Android pie-x86 second stable version r2 on VMware virtual machine, which is similar to the installation of the first stable version.
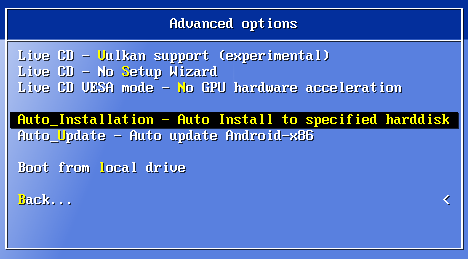
1. Open the virtual machine, create a new virtual machine, select [Typical], and then [Next].

2. Set the CD image file to install, which can be downloaded here:
https://www.fosshub.com/Android-x86.html
If the network is poor and downloads often fail, you can join QQ group 139340026 (freely enter and exit), and download from the shared files in the group. Android x86 provides three Windows versions, the first is the 32-bit version (android-x86-9.0-r2.iso), the second is the 64-bit version (android-x86_64-9.0-r2.iso), and the third is the 64-bit version recommended for VMware users (android-x86_64-9.0-r2-k49.iso). This article uses the third one as an example.


12. Restart the client (E).


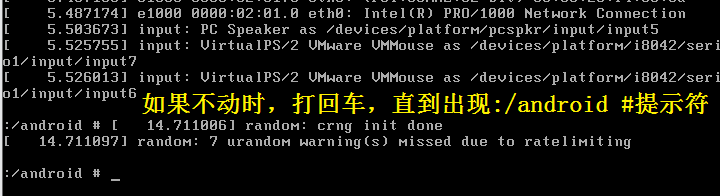
2. Enter the Android x86 interface


2. If unable to find, [Skip], then [Next]….. [Accept], select the main screen application [Taskbar] or [Quickstep], I chose [Taskbar].


3. Install software packages
Android-x86 is a version compiled from the Android source code that can run on x86 series processors. For applications, if they are all written in Java, there will be no problem. Even if JNI functions are used, if an x86 dynamic library is compiled and included in the APK file, it will also work. However, many internal applications only have dynamic libraries for the ARM instruction set, which cannot run on the Android-x86 platform, and there are many such applications. To solve this compatibility issue, Intel provides a library called Houdini, which can dynamically convert instruction sets at runtime, translating ARM instruction sets into x86 instruction sets to run. It is dynamically translated during program execution, completely transparent to the application. Moreover, Google itself has also added a NativeBridge intermediate layer in its AOSP code since version 5.0 to help applications like Houdini integrate better into the Android system, with very little code change. Below we will learn step by step how to set up the compatibility package.
1. Set the compatibility mode, as shown in the figure below, set it to be compatible with applications using ARM libraries.


After setting, exit and then re-enter the settings to check if the above settings are effective. If the compatibility mode does not change as shown in the figure above, it means it is set. If the compatibility mode reverts to the original state, no matter how you set it, it will revert to the original state again when you check it, you need to handle it as follows.
(2) Run the terminal emulator and execute the command su to switch from a normal user to a superuser.


3. Run the enable_nativebridge script program. If successful, it will return to reset the compatibility mode. If the following situation occurs, it indicates that the houdini.sfs file is missing, press Ctrl+C to terminate the program.

Check the enable_nativebridge script program, you can see 6 short links, translate the short address into a long address similar to the following URL:
http://dl.android-x86.org/houdini.php?v=9_y
Visit this address to download the file houdini.sfs. However, due to special reasons, the download speed is particularly slow. Therefore, it is recommended to use some special methods to save it somewhere.
I placed the downloaded houdini.sfs file on the host’s hard drive, started an HTTP server, and downloaded it in the virtual machine’s browser. The downloaded file houdini.sys is in the /sdcard/Download directory.

4. Return to the terminal emulator, execute the following commands, and then run enable_nativebridge successfully. Reset the compatibility mode and check again, ok.

3. Try installing Google Pinyin


It works now.