1. Origin
A long time ago, I saw a post on social media that mentioned hanging an e-ink display on the door of a company meeting room to show the schedule in real-time.
After seeing it, I found it very interesting. At that time, I had no development experience, so I only left a small impression. Later, as I gradually became familiar with Python and understood the development documentation of WeChat Work, I had a faint idea that I could simulate this product myself.
After doing some preparation work intermittently, I started spending more time on this in June and July, and recently managed to solve all the problems quite perfectly.
2. Effects
Without further ado, let’s take a look at the actual effects:
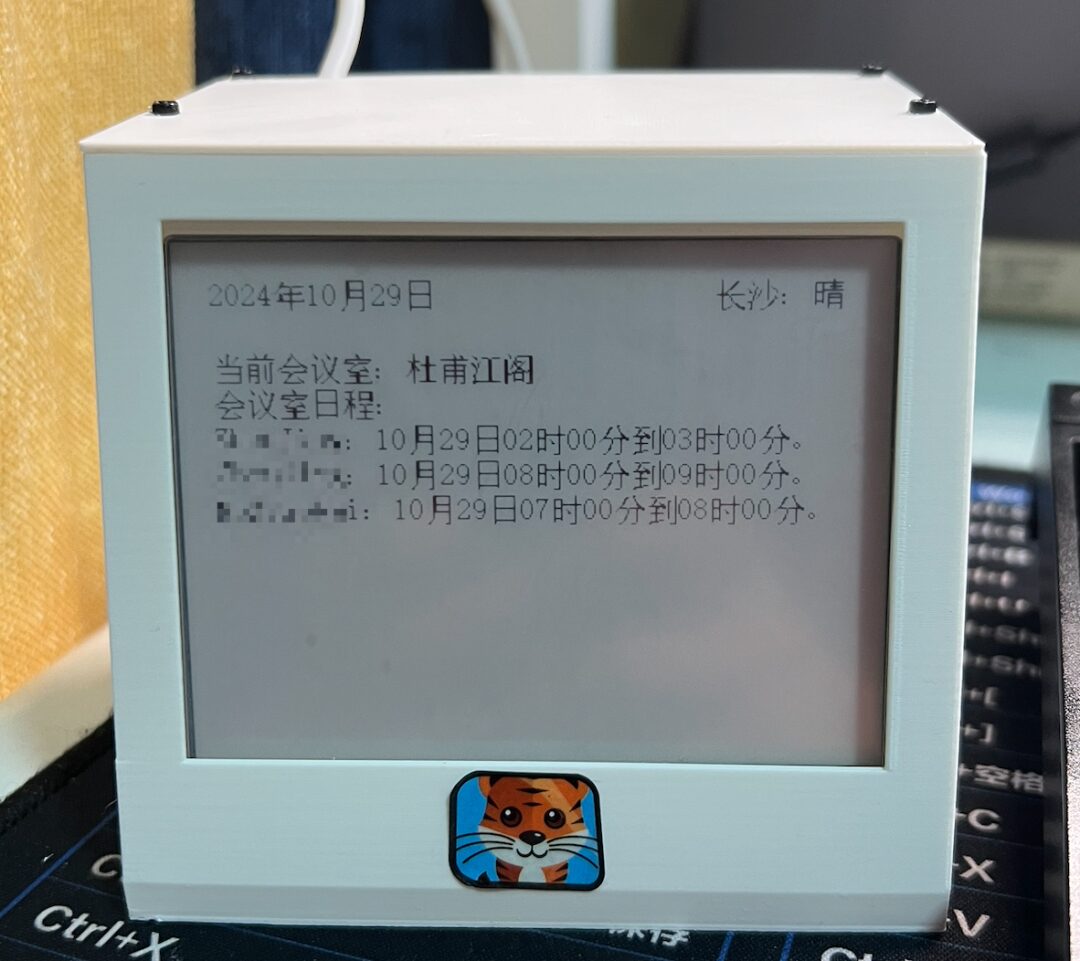
• Simulating the effect of that post, displaying the schedule of a certain meeting room in real-time.

• Displaying a black-and-white image.

• Displaying a piece of text.

3. Hardware Materials and Architecture
1. Main Control ESP32
The main control unit uses the ESP32. I initially wanted to use the cheaper ESP8266, but the memory of the 8266 is too small to drive a 4.2-inch e-ink display. So I was forced to use the ESP32, which costs about 30 yuan each.
If using devices like Raspberry Pi or Orange Pi, it should reduce some business complexity, but the price will be higher.
2. 4.2-inch E-Ink Display
The price of the e-ink display is quite high; the price of a 4.2-inch e-ink display from MicroXue is around 130 yuan. Through various online stores, I found some generic e-ink displays for about 15 yuan each. Why so cheap? Because these displays are second-hand, and they may have been quietly serving in some supermarket for many years. I bought two at first, but both broke while disassembling, so I simply used a cutting machine to cut the ribbon cable position to ensure I could pull the cable out.
3. E-Ink Display Driver Board
The e-ink display has a 24PIN cable interface, and the ESP32 does not have such an interface, so a “driver board” is needed for bridging, which costs about 5 yuan each.
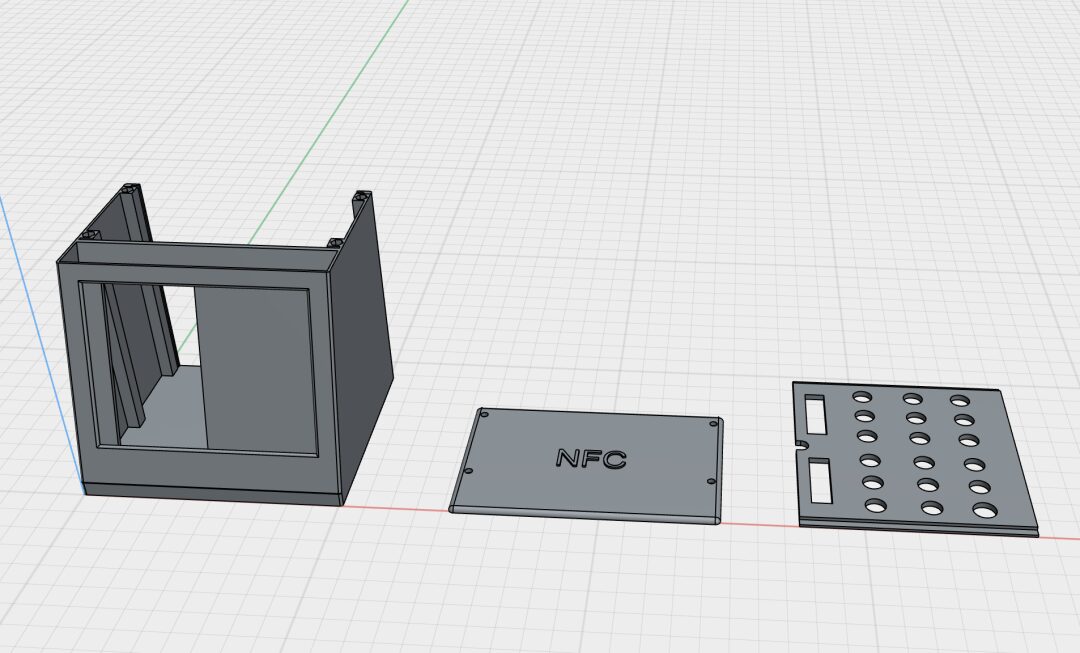
4. 3D Printed Shell
All of the above are loose parts, and connecting them together does not look like a product, so I 3D printed a shell to house the components, making it look much more perfect.
4. Familiarizing with ESP32 and MicroPython
The ESP8266 is a common and cheap microcontroller, while the ESP32 is its upgraded version with more memory space. Microcontroller development generally uses the Arduino development environment, but since I have no relevant knowledge, I used the MicroPython development environment.
MicroPython is a simplified version of Python that can run on microcontrollers. When running on a microcontroller, MicroPython serves as both a development language and the OS for the microcontroller.
During this process:
-
• I learned how to use Thonny software and how to flash the MicroPython firmware system onto the microcontroller using the Mac command line.
-
• How to connect the microcontroller to a WIFI network and synchronize time.
-
• How to enable hotspot mode on the microcontroller, allowing other devices to connect for network configuration and file management.
-
• How to make HTTP requests from the microcontroller to obtain resources from the network, during which I resolved issues with Chinese encoding.
5. SPI Protocol Driving E-Ink Displays
Display devices suitable for microcontrollers include not only e-ink displays but also more commonly OLED and LCD screens. The protocols used by microcontrollers to drive these screens are commonly SPI and I2C. Since I learned that this e-ink display supports SPI protocol, I first familiarized myself with the SPI protocol.
The SPI protocol generally requires three interfaces: SCK, MOSI, and MISO.
-
• SCK, also known as SCL, is the SPI clock pin.
-
• MOSI, also known as SDA or DIN, is the SPI data sending pin.
-
• MISO is the SPI data input pin; since the display is generally an output device, this interface can be left unconnected.
SPI can be hardware SPI or software SPI. Hardware SPI refers to using fixed PINs on the microcontroller, while software SPI only requires ordinary PINs.
According to the official documentation, the hardware SPI pins for ESP32 are: SCK uses PIN 14, MOSI uses PIN 13, and MISO does not need to be connected. At the same time, the baudrate parameter is adjusted from 80000000 to 10000000. The code is as follows:
hspi = SPI(1, baudrate=10000000,sck=Pin(14), mosi=Pin(13), miso=Pin(12))SPI is just a driving protocol; to actually drive it, you also need to use the corresponding driver program for the display. The e-ink display I found online had no documentation, but based on the comments, I learned that it is compatible with the MicroXue screen driver. After some searching, I finally found the Python version of the driver. This process encountered some pitfalls, such as:
-
• In the driver program, BUSY = const(0) needs to be changed to BUSY = const(1); otherwise, the system will think BUSY is always busy and will not perform any driving work.
-
• Familiarizing with the framebuf library that comes with MicroPython. This library allocates a memory cache area on the microcontroller, allowing you to write content to this area through the program and then synchronize it to the screen all at once.
-
• The framebuf can draw points, lines, rectangles, circles, and English characters, but it cannot display Chinese characters and cannot change the font size of English characters.
6. Displaying Chinese/Images
“Displaying Chinese content” is the part that took the longest time in the entire project. After a long period of trial and error, I finally understood the general principles and achieved the effect.
The 4.2-inch e-ink display is essentially a pixel matrix with a width of 400 and a height of 300 pixels, totaling 120,000 pixels. By controlling each pixel to be either 0 or 1, representing black and white colors respectively, since framebuf can only draw points, lines, rectangles, circles, and English, and cannot adjust English font sizes, other solutions require converting text into other forms of pixel bitmap.
1. Using Software to Generate the Pixel Matrix for Each Character
By using the “PCtoLCD” software, I generated pixel bitmaps for over 3000 commonly used Chinese characters and symbols, creating a configuration file. Whenever I need a character, I retrieve it from this configuration file.
This method requires generating a set of configuration files for each Chinese character, font, and font size, which results in an exceptionally large configuration file that the ESP32 cannot handle.
Thus, the final solution is to place this configuration file on the cloud. The device sends an HTTP request to fetch any needed text from the cloud and then displays it on the e-ink screen.

2. Generating a Complete Image Bitmap of All Display Content
To display the content, I used PIL image processing tools to generate an image and converted the entire image into a pixel bitmap. This method produces a significantly better effect than the previous one (the font display is much smoother), but the MicroPython installed on the ESP32 does not support the PIL library.
The solution is to place the PIL image processing program on the cloud. The ESP32 only needs to send the text, position, and size it wants to display to the cloud. After processing, the cloud sends the data back to the ESP32. To reduce the size of the returned data, further compression is needed. The process is as follows:
First, generate a nested list of 400 by 300 for each pixel of the black-and-white image, where each element’s value is either 0 (black) or 1 (white).
Next, merge every 8 values into one bit, generating a binary data nested list, reducing the returned data size to 50 by 300.
Third, perform hexadecimal encoding on this binary nested list to further reduce its length.
Finally, after the ESP32 retrieves the data through an HTTP request, it calculates the data in reverse to restore and display the image.
7. Other Issues
1. Function Calculation
Both methods above utilize cloud computing capabilities, but setting up a server for this can be cumbersome. At this point, we can use the “Function Calculation” capability provided by cloud service providers.
“Function Calculation” allows Python, NodeJS, and other language scripts to be online and provides an HTTP trigger. The client only needs to initiate an HTTP request to trigger the execution of this script to achieve the desired effect.
2. 3D Printed Shell
During the testing phase, the development board, driver board, and e-ink display were simply connected using Dupont wires. After the prototype was completed, I considered the appearance of the final product. At this stage, I took the opportunity to purchase a 3D printer and learned some basic 3D design to create a shell for the product. The final product is shown below:


8. Conclusion
The entire process from generating the idea to final implementation has taken a long time. Sometimes when faced with problems that seem unsolvable, I would set them aside for a while, such as the driving issue of the e-ink display and the problem of displaying Chinese characters. However, there has always been a lingering thought in my mind, and fortunately, after reorganizing my thoughts, I ultimately managed to resolve everything.
The last question many might ask is: what is the use of this? I can only say, it’s fun!