↓Recommended Follow↓
Abstract
This article mainly documents the technologies involved in my project, including: .NET IoT, .NET Web, .NET MAUI, and the framework used is the latest .NET 7.
I developed and tested it using Raspberry Pi Zero 2 W (ubuntu-22.04), but the .NET IoT library also has a community submission by Zhang Gaoxing for Orange Pi GPIO pin mapping, with corresponding drivers for Orange Pi models available at https://github.com/dotnet/iot/tree/main/src/devices/Gpio/Drivers.
Those who are on a budget can try modifying the code for Orange Pi and see how it runs; I will test it on actual hardware later.
Project open-source address – Verdure.Kame.DotNet
https://github.com/maker-community/Verdure.Kame.DotNet
Using .NET IoT to Operate SPI for Screen Driver
Pictures speak louder than words
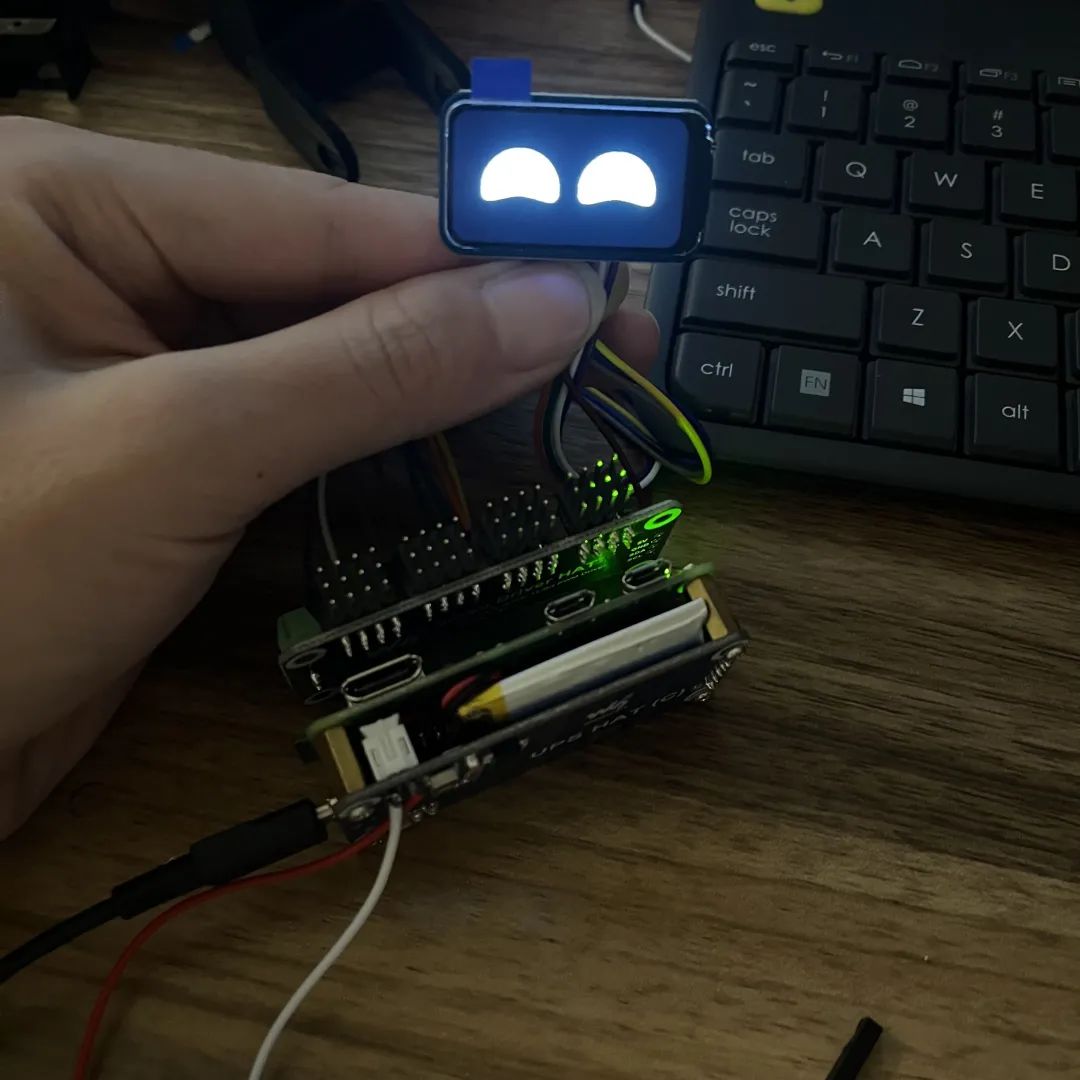
To understand what SPI is, you can first review an article by Zhang Gaoxing:
Zhang Gaoxing’s .NET IoT Introduction Guide: (4) Using SPI for Communication https://www.cnblogs.com/zhanggaoxing/p/10943822.html
Once you understand what SPI is, you should have an idea of what we need to do. The screen we purchased has many communication protocols, and I just happened to choose this SPI protocol screen; the manufacturer’s documentation center provides detailed introductions.
SPI initialization => Transfer image data => Screen displays normally
Screen usage documentation https://www.waveshare.net/wiki/1.47inch_LCD_Module
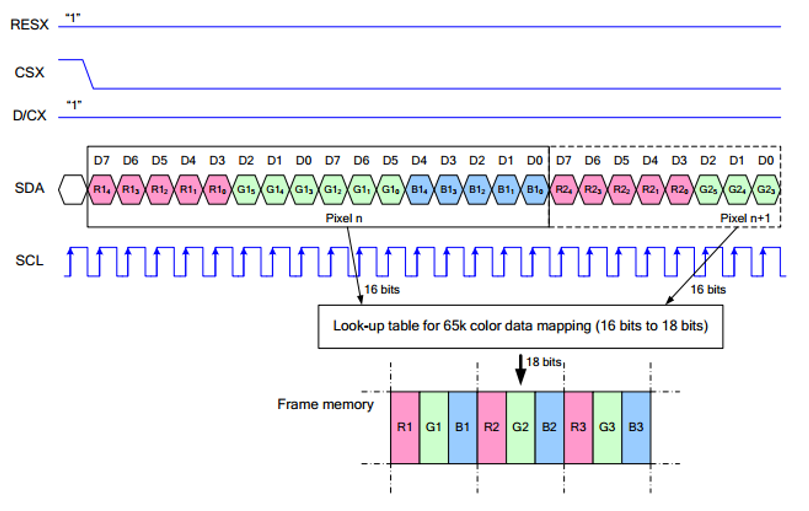
The above image shows how we need to transfer image data for it to work correctly; below, I quote the introduction from the documentation.
This LCD uses the built-in controller ST7789V3, which is a 240 x RGB x 320 pixel LCD controller, while this LCD itself has a resolution of 172(H)RGB x 320(V). Due to initialization control, it can be set for both landscape and portrait modes, so the internal RAM of the LCD is not fully utilized. This LCD supports 12-bit, 16-bit, and 18-bit color formats per pixel, namely RGB444, RGB565, and RGB666. This example uses the RGB565 color format, which is also a commonly used RGB format. The LCD uses a four-wire SPI communication interface, which greatly saves GPIO ports while also allowing faster communication.
The screen I purchased has a resolution of 172 * 320 and supports 16-bit color. The total data for transferring one image is 172 * 320 * 2 bytes.
You can refer to the Python code in the documentation and my implementation to learn how to write a simple screen driver. Since I am not a professional embedded developer, I won’t elaborate further.
Constructor of the screen chip driver
public ST7789V3(int dataCommandPin,
    SpiDevice sensor,
    int resetPin = -1,
    PwmChannel? pwmBacklight = null,
    PinNumberingScheme pinNumberingScheme = PinNumberingScheme.Logical,
    GpioController? gpioController = null,
    bool shouldDispose = true)
{
    if (dataCommandPin < 0)
    {
        throw new ArgumentOutOfRangeException();
    }
    _dataCommandPin = dataCommandPin;
    _pwmBacklight = pwmBacklight;
    _pwmBacklight?.Start();

    _sensor = sensor ?? throw new ArgumentNullException(nameof(sensor));

    _gpio = gpioController ?? new GpioController(pinNumberingScheme);
    _resetPin = resetPin;
    _shouldDispose = shouldDispose || gpioController is null;
    Initialize();
}
The data transmission code is as follows:
public void SpiWrite(bool isData, ReadOnlySpan<byte> writeData)
{
    Console.WriteLine($"writeData length: {writeData.Length}");

    _gpio.Write(_dataCommandPin, isData ? PinValue.High : PinValue.Low);

    if (writeData.Length > 4096)
    {
        for (int i = 0; i < 26; i++)
        {
            var query = writeData[(i * 4096)..((i * 4096) + 4096)];
            _sensor.Write(query);
        }

        var dataLcdList1 = writeData[(26 * 4096)..110080];

        _sensor.Write(dataLcdList1);
    }
    else
    {
        _sensor.Write(writeData);
    }
}
SPI has a limit on the length of data that can be transmitted at once, which is 4096 bytes, so be careful to manually segment the transmission.
1.47-inch display C# driver https://github.com/GreenShadeZhang/dotnet-iot-tutorial-code/tree/main/src/ST7789V3
Currently, the driver part has been tested successfully, but there are issues with converting image data to RGB565, causing some colors to appear abnormal; however, black and white are fine, so I will use it for now.
Using .NET IoT to Control 16-channel Servo Driver
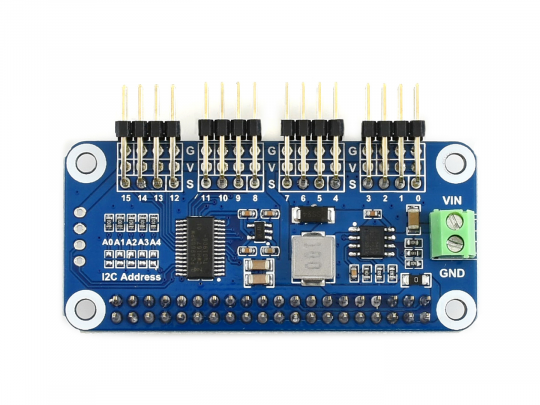
This servo driver part has already been contributed by the community, so I can directly wrap it using .NET IoT to control the 16-channel servo driver. If you’re interested, you can check the source code and copy the official test program.
Pca9685 16-channel servo driver test program https://github.com/GreenShadeZhang/dotnet-iot-tutorial-code/tree/main/src/Pca9685/Pca9685.Sample
Pca9685 – I2C PWM Driver
https://github.com/dotnet/iot/tree/main/src/devices/Pca9685
 Server Setup
First, here’s an architecture diagram:

The Raspberry Pi is mainly used to run web services written in .NET, and then call the aforementioned drivers to operate the screen and servo driver board for related hardware operations.
The protocol files mainly define the playback of images on the screen, playback of videos on the screen, and servo control for the quadruped robot.
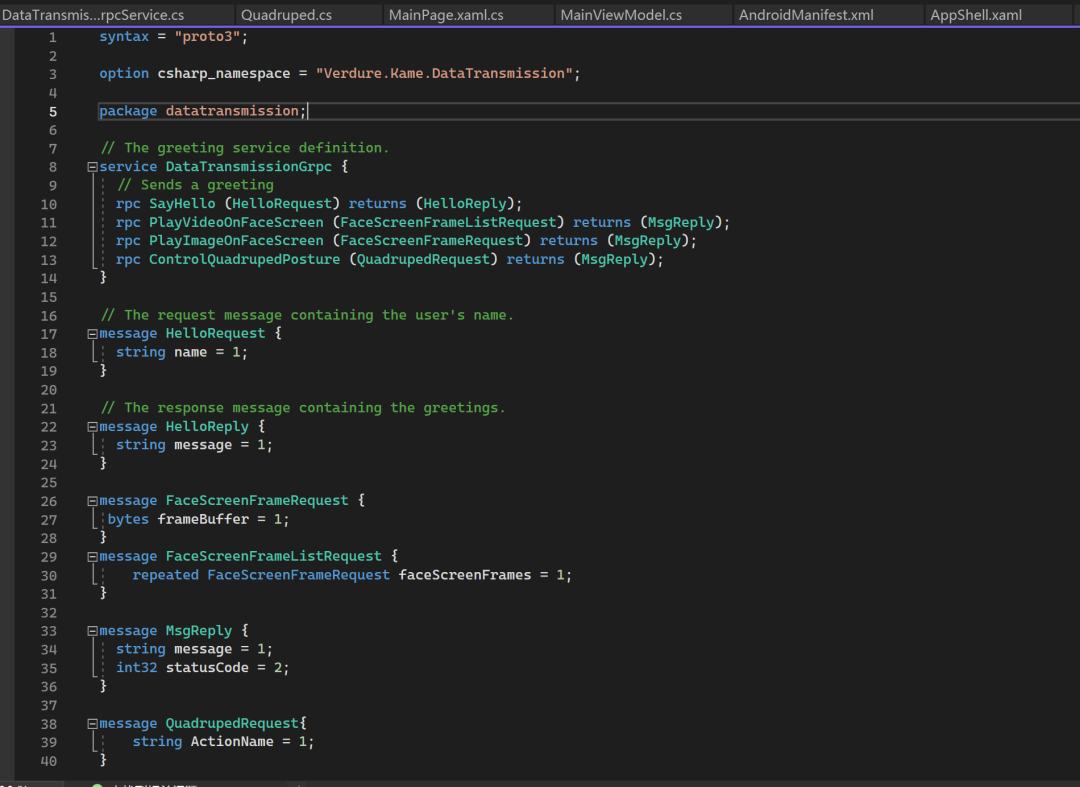
The server is very simple; it only does basic data forwarding without processing data, leaving data processing to the client, which is the MAUI program.
Client Setup
The client uses the MAUI framework, utilizing specific libraries for Windows in MAUI, such as opencvsharp. The functionality of the MAUI client is currently quite limited, so I will wait until I finish testing before adding new features.

Conclusion
Through practical experience in developing with .NET for all scenarios, I found that there is indeed a lot of potential, allowing for quick implementation of features without spending too much time learning other tech stacks.
However, due to platform differences, some functionalities in MAUI still need to be handled separately for specific platforms, which increases the complexity of development.
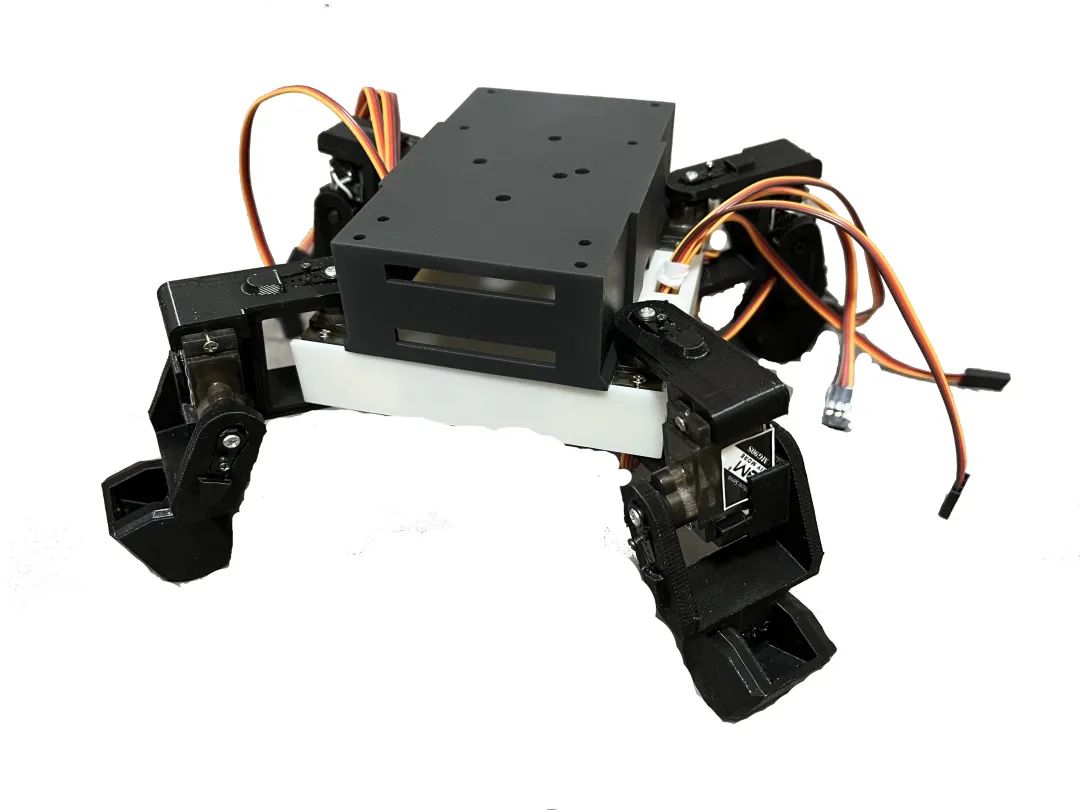
Here’s a full picture of the quadruped robot; the code is implemented, but due to the pandemic, I can’t receive some parts via delivery. For now, here’s a physical picture; later, I will also put the screen on it. If you are interested, you can follow my Bilibili account, where I will upload videos later: https://space.bilibili.com/25228512
Recommended Projects
-
.NET IoT Libraries
https://github.com/dotnet/iot
-
nanoFramework IoT.Device Library repository
https://github.com/nanoframework/nanoFramework.IoT.Device
-
RaspberryPi-Minikame
https://github.com/LakshBhambhani/RaspberryPi-Minikame
-
Verdure.Kame.DotNet
https://github.com/maker-community/Verdure.Kame.DotNet
Source: Green Shade A Guang
Link: cnblogs.com/GreenShade/p/16909134.html
– EOF –
Did you gain anything from this article? Please share it with more people
Recommended follow “DotNet” to enhance your .Net skills
Likes and views are the biggest support ❤️