4.1 LAN Debugging
Hardware Preparation: ESP8266-01S module and ESP debugger
- Use your phone to create a 2.4G Wi-Fi hotspot (5G is not allowed);
- Connect your computer to the phone’s Wi-Fi hotspot, and also connect the ESP8266 to the Wi-Fi hotspot;
- Send the command AT+CIFSR to the ESP8266 to query its IP address, which should return +CIFSR:STAIP,”192.168.43.8″;
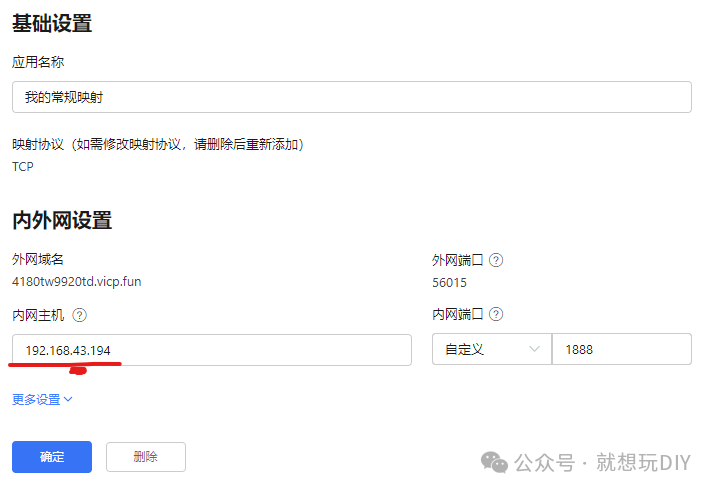
- When setting up internal network penetration with Peanut Shell, the IP address must be in the same subnet as the ESP8266, for example: “192.168.43.194″ (this IP address must be obtained from the network debugging assistant, do not fill it in randomly), everyone is in the “43” subnet, with port 1888;
- Open the network assistant, select TCP Server for protocol type, choose the local address as “192.168.43.194″; port 1888; click connect, thus starting the local server;
- Connect the ESP8266-01S module and ESP debugger, and plug the debugger into the computer’s USB port;
- Open the serial debugging assistant and send the following commands to the ESP8266:
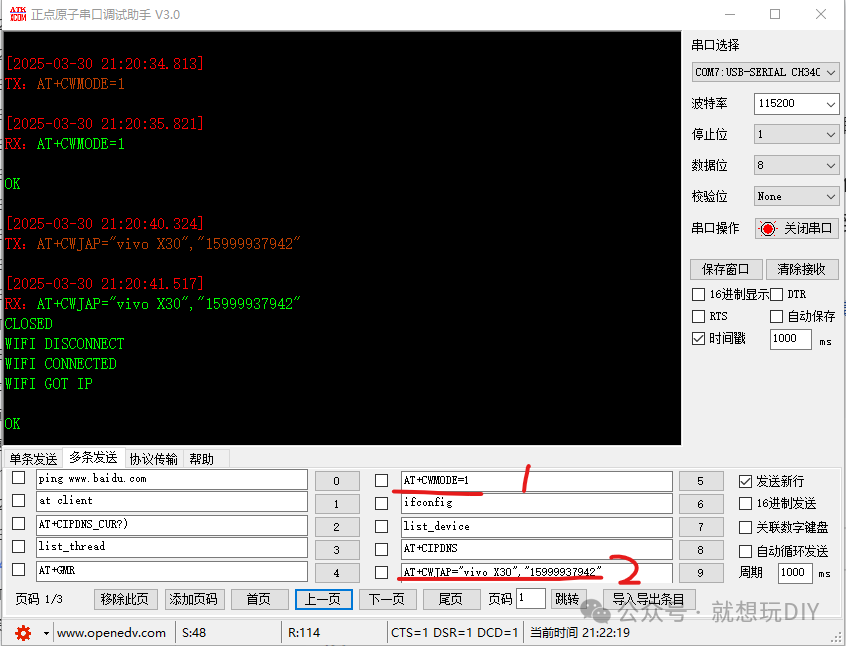
- AT+CWMODE=1 // Set ESP to work in STA mode
- AT+CWJAP=”vivo X30″,”15999937942″ // Connect to Wi-Fi hotspot
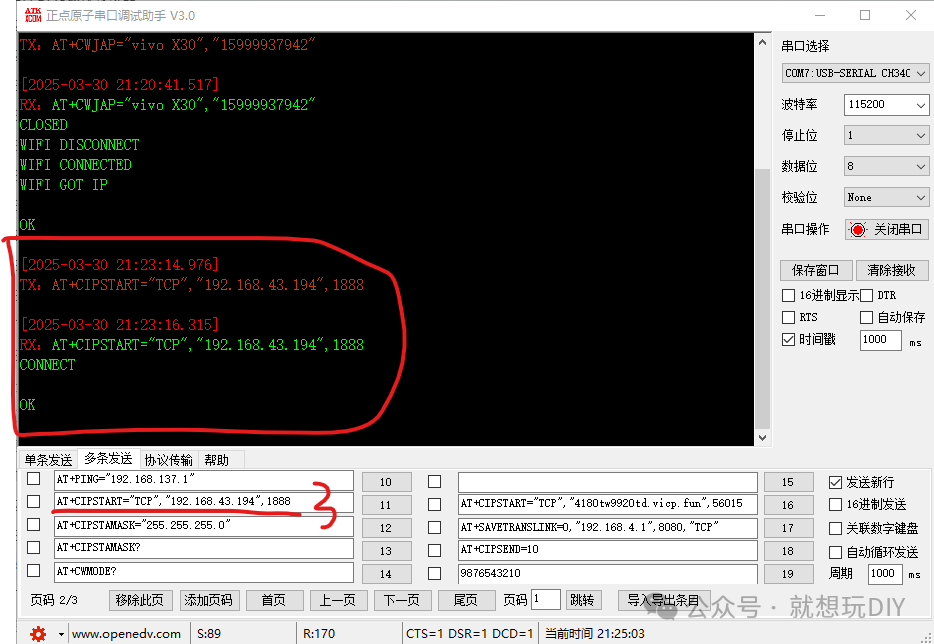
- AT+CIPSTART=”TCP”,”192.168.43.194″,1888 // Connect to the local server using internal network penetration mapping, seeing the return CONNECT OK indicates successful connection to the server;
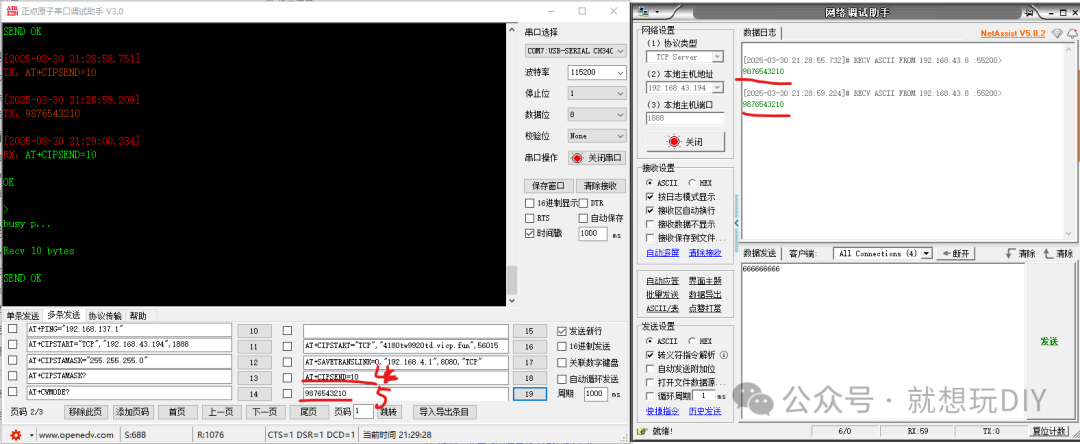
- First send the command AT+CIPSEND=10, then send data “9876543210” // Test sending data from ESP8266 to the server, then see the server receiving the same data
- If the ESP8266 successfully logs into a server using AT commands and needs to log into another server, the ESP8266 firmware needs to be re-flashed, which is a situation I encountered during debugging

4.2 Connecting to Aliyun MQTT over the Internet
Hardware Preparation: ESP8266-01S module and ESP debugger
- Use your phone to create a 2.4G Wi-Fi hotspot (5G is not allowed);
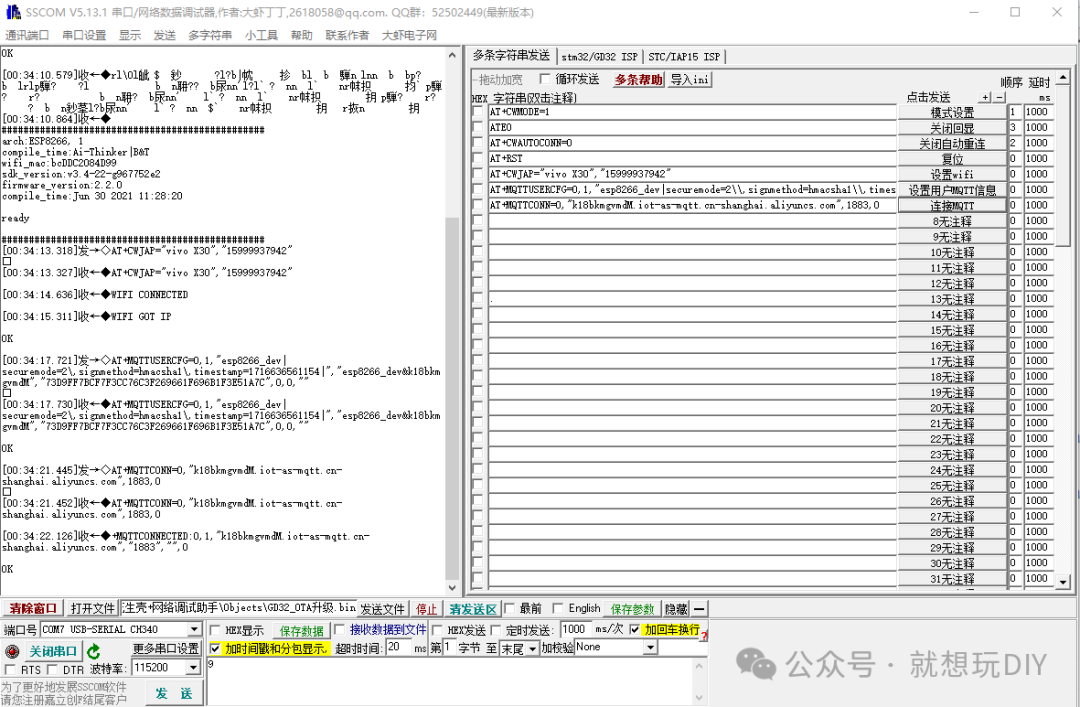
- Use the serial assistant to send the following AT commands in order:
- AT+CWMODE=1 // Set ESP8266 to STA (client) mode,
- ATE0 // Disable echo
- AT+CWAUTOCONN=0 // Disable auto connection
- AT+RST // Reset
- AT+CWJAP=”vivo X30″,”15999937942″ // Connect to Wi-Fi
- AT+MQTTUSERCFG=0,1,”esp8266_dev|securemode=2\,signmethod=hmacsha1\,timestamp=1716636561154|”,”esp8266_dev&k18bkmgvmdM”,”73D9FF7BCF7F3CC76C3F269661F696B1F3E51A7C”,0,0,”” // Configure user MQTT information
- AT+MQTTUSERCFG=0,1,”esp8266_dev|securemode=2\,signmethod=hmacsha1\,timestamp=1716636561154|”,”esp8266_dev&k18bkmgvmdM”,”73D9FF7BCF7F3CC76C3F269661F696B1F3E51A7C”,0,0,”” // Connect to the MQTT server
Before successfully logging into MQTT, the device is in an offline state:

Successfully logged into MQTT, the device is in an online state:
